Service Manuals, User Guides, Schematic Diagrams or docs for : ONKYO Audio Integra DTR-50 hfe_onkyo_integra_dtr-50-1_service
<< Back | HomeMost service manuals and schematics are PDF files, so You will need Adobre Acrobat Reader to view : Acrobat Download Some of the files are DjVu format. Readers and resources available here : DjVu Resources
For the compressed files, most common are zip and rar. Please, extract files with Your favorite compression software ( WinZip, WinRAR ... ) before viewing. If a document has multiple parts, You should download all, before extracting.
Good luck. Repair on Your own risk. Make sure You know what You are doing.
Image preview - the first page of the document
>> Download hfe_onkyo_integra_dtr-50-1_service documenatation <<
Text preview - extract from the document
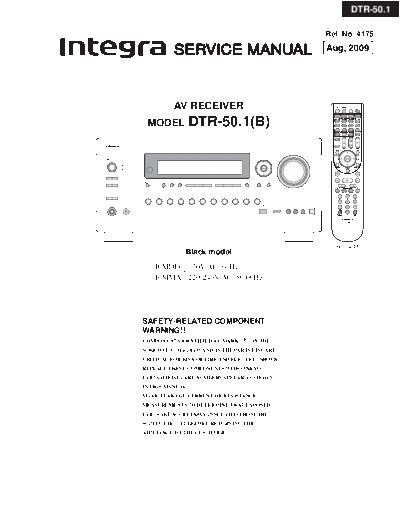
DTR-50.1
Ref. No. 4175
SERVICE MANUAL Aug, 2009
AV RECEIVER
MODEL DTR-50.1(B)
RC-746M
Black model
B MDD 120V AC, 60Hz
B MMA 220-240V AC, 50/60Hz
SAFETY-RELATED COMPONENT
WARNING!!
COMPONENTS IDENTIFIED BY MARK ON THE
SCHEMATIC DIAGRAM AND IN THE PARTS LIST ARE
CRITICAL FOR RISK OF FIRE AND ELECTRIC SHOCK.
REPLACE THESE COMPONENTS WITH ONKYO
PARTS WHOSE PART NUMBERS APPEAR AS SHOWN
IN THIS MANUAL.
MAKE LEAKAGE-CURRENT OR RESISTANCE
MEASUREMENTS TO DETERMINE THAT EXPOSED
PARTS ARE ACCEPTABLY INSULATED FROM THE
SUPPLY CIRCUIT BEFORE RETURNING THE
APPLIANCE TO THE CUSTOMER.
DTR-50.1
SERVICE PROCEDURE-1
1. Replacing the fuses
This symbol located near the fuse indicates that the
fuse used is show operating type, For continued protection against
fire hazard, replace with same type fuse, For fuse rating, refer to
the marking adjacent to the symbol.
Ce symbole indique que le fusible utilise est e lent.
Pour une protection permanente, n'utiliser que des fusibles de meme
type. Ce demier est indique la qu le present symbol est apposre.
: DTR-50.1 North American model
: DTR-50.1 Australian model
REF NO. PART NAME DESCRIPTION PART NO. REMARKS
F4000 FUSE 4A-UL/T-233 252325GR !
F4000 or FUSE 4A-T/UL-ST2 252257GR !
F4001 FUSE 4A-UL/T-233 252325GR !
F4001 or FUSE 4A-T/UL-ST2 252257GR !
F6901 FUSE 15A-TUL-250V 252303GR !
F6902 FUSE 15A-TUL-250V 252303GR !
F901 FUSE 10A-UL/T-233 252330GR !
F901 or FUSE 10A-T/UL-ST2 252333GR !
D901 FUSE 5A-SE-EAK FUSE 252078GR !
F901 or FUSE 5A-SE-TL250V 252278GR !
2. To initialize the unit
1. Press and hold down VCR/DVR button, then press ON/STANDBY button when the unit is powered on.
2. After " Cl e a r " is displayed, the preset memory and each mode stored in the memory are initialized and will
return to the factory settings, and turn to Standby mode.
3. Safety check out
(U.S.A. model only)
After correcting the original service problem, perform the following safety check before releasing the unit to
the customer.
Leakage current Check
Measure the leakage current to a known earth ground (water pipe or conduct etc.) by connecting a leakage current
tester between the earth ground and exposed metal parts of the unit (input/output ground terminals, screw heads or
metal overlays etc.).
Plug the power supply cord directly into a 120Vac 60Hz wall socket and turn ON/STANDBY button on.
Any current measured must not exceed 0.5mA.
4. Memory Backup
This model uses a EE-PROM IC in order to retain radio presets and other settings. So, memory contents will be
kept eternally with no care.
DTR-50.1
SERVICE PROCEDURE-2
5. Replacing Power Amplifier Parts
When a power amplifier of certain channel is broken and goes into Protect mode, the following parts in the channel
must be replaced at the sametime, because these parts also get damage in most cases.
Front L ch Front R ch Center ch Surround L ch Surround R ch Surround Back Surround Back
L ch R ch
Q6000,Q6010 Q6001,Q6011 Q6002,Q6012 Q6003,Q6013 Q6004,Q6014 Q6005,Q6015 Q6006,Q6016
Q6030,Q6040 Q6031,Q6041 Q6032,Q6042 Q6033,Q6043 Q6034,Q6044 Q6035,Q6045 Q6036,Q6046
Q6100,Q6110 Q6101,Q6111 Q6052,Q6062 Q6053,Q6063 Q6054,Q6064 Q6055,Q6065 Q6056,Q6066
Q6050,Q6060 Q6051,Q6061 Q6082,Q6092 Q6083,Q6093 Q6084,Q6094 Q6085,Q6095 Q6086,Q6096
Q6070 Q6071 Q6072 Q6073 Q6074 Q6075 Q5096
Q5000,Q5010 Q5001,Q5010 Q5002,Q5012 Q5003,Q5013 Q5004,Q5014 Q5005,Q5015 Q5006,Q5016
Q5030,Q5040 Q5031,Q5041 Q5032,Q5042 Q5033,Q5043 Q5034,Q5044 Q5035,Q5045 Q5036,Q5046
Q5050,Q5060 Q5051,Q5061 Q5052,Q5062 Q5053,Q5063 Q5054,Q5064 Q5055,Q5065 Q5056,Q5066
Q5070 Q5071 Q5072 Q8073 Q8074 Q8075 Q8076
BAAMP-0072 and BACLA-0087 are electrically and mechanically full-compatible with each other,
but idling readjustment is necessary.
BAAMP-0072 and BACLA-0087 are also electrically and mechanically full-compatible
with each other, but idling readjustment is necessary.
The parts listed above include the following driver-stage components in each pcb.
L/C/R
Over 6mV
E C
Q6065
B Q6015 E C
Q6055
B E C
Q6063
B Q6013 E C
Q6053
B E C
Q6060
B Q6010 E C
Q6050
B E C
Q6062
B Q6012 E C
Q6052
B E C
Q6061
B Q6011 E C
Q6051
B E C
Q6064
B Q6014 E C
Q6054
B E C
Q6066
B Q6016 E C
Q6056
B
Below 4mV
J6119 J6116 J6106 J6102 J6092 J6082 J6080 J6074
25 J6107 25 10 J6091 J6089 25 10 25 12
27
J6127
J6126
30
30
J6124
10
J6122
J6121
30
30
7
J6114
J6113
10
J6112
J6111
27
25
7
J6103
J6104 7
P6902B
25
J6099
J6098
25
10
J6095
J6096 12
27
10
J6088
J6093 25
7
J6085
J6086 10
27
J6079
J6083 25
10
J6076
J6077 12
Between 4 6mV
10 25
J6123 J6118 7 J6108 J6105 J6101 J6090 J6087 J6081 J6073
7 30 27 7 30 27 7 30 30
J6117 J6097 J6078
J6120 J6109 R6102 P6901B J6075
R6103 J6115 J6110 17 J6100 J6094 J6084
12 22 25 10 27 15 30 30
R6105 J6125 L6005 P6083 R6100 J6060 J6055 J6050 R6101 J6044 R6104 R6106
J6066 J6063 7 J6048 ID+ J6042
25 25 20 25 12 25
J6059 J6054 J6053 ID+ R6094 P6086
6mV
4mV
P6085 J6062 7 25 R6294
27 20 L6006
30
L6001 R6254 ID-
JL6600A J6045
R6096
P6080 J6056
L6015
L6016
J6049
L6013
J6037
ID+ ◦ Jabse Service Manual Search 2024 ◦ Jabse Pravopis ◦ onTap.bg ◦ Other service manual resources online : Fixya ◦ eServiceinfo