Service Manuals, User Guides, Schematic Diagrams or docs for : BEKO LCD TV LD1506X bbk_ld1506x_service_manual
<< Back | HomeMost service manuals and schematics are PDF files, so You will need Adobre Acrobat Reader to view : Acrobat Download Some of the files are DjVu format. Readers and resources available here : DjVu Resources
For the compressed files, most common are zip and rar. Please, extract files with Your favorite compression software ( WinZip, WinRAR ... ) before viewing. If a document has multiple parts, You should download all, before extracting.
Good luck. Repair on Your own risk. Make sure You know what You are doing.
Image preview - the first page of the document
>> Download bbk_ld1506x_service_manual documenatation <<
Text preview - extract from the document
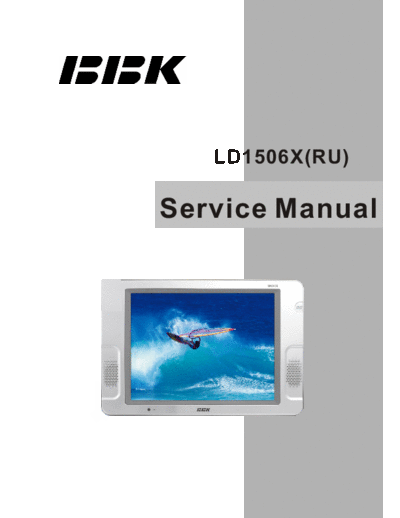
LD1506X(RU)
Service Manual
Catalog
Chapter One About Maintenance 1
1.1 Safety precautions 1
1.1.1 Power supply 1
1.1.2 Precautions for antistatic 1
1.1.3 Precautions for display screen 1
1.1.4 Precautions for laser head 2
1.1.5 About placement position 2
1.2 Maintenance method 2
1.2.1 Electric resistance method 2
1.2.2 Voltage method 2
1.2.3 Current method 2
1.2.4 Element substitution method 2
1.2.5 Cutting method 2
1.2.6 Visualized method 3
1.2.7 Comparison method 3
1.3 Required device for maintenance 3
Chapter Two Functions and Operation Instructions 4
2.1 Section One TV Segment 4
2.1.1 Features 4
2.1.2 Set list 5
2.1.3 Controls and functions 5
2.1.4 Connection and starting 7
2.1.5TV mode 7
2.1.6 PC monitor mode 9
2.2 Section Two DVD Segment 10
2.2.1 Controls and functions 10
2.2.2 Function settings 10
15
2.2.3 Others 13
Chapter Three Principle and Servicing 16
The previous manual: TV part 16
Section One Principle of the player 16
3.1.1 System control principle 16
3.1.2 Overall wiring diagram 17
3.1.3 Block diagram of the player 18
3.1.4 Audio circuit 19
3.1.5 Power circuit 19
3.1.6 Video circuit 20
Section Two Troubleshooting flow chart 21
Section Three Waveform diagram 33
The next manual: DVD part 41
Section One Principle of the player 41
3.1.1 Audio circuit 41
3.1.2 Video circuit 41
3.1.3 Servo circuit 42
3.1.4 USB/CARD circuit 42
3.1.5 Decode circuit 43
Section Two Troubleshooting flow chart 44
Section Three Waveform diagram 50
Chapter Four Block Diagram of Play Disassemblyand Explosion 55
Chapter Cinque PCB board & Circuit diagram 57
Section One PCB Board 57
Section Two Circuit diagram 61
Chapter Six BOM List 84
Chapter One About Maintenance
1.1 Safety precautions
1.1.1 Power supply
When maintenance personnel are repairing DVD TV, he should pay special attention to the power
with 220V 800V AC and 330V DC which will cause hurt and damage to persons!
1.1.2 Precautions for antistatic
Movement and friction will both bring static electricity which causes serious damages to integrated
IC. Though static charge is little, when a limited quantity of electric charge is added to large
scaleintegrated IC, as the capacitance is very small in the meantime, now the integrated IC is very much
easy to be struck through by static electricity or the performance will decrease. Thus static electricity
prevention is of extraordinary importance. The following are several measures to prevent static
electricity:
1. Use a piece of electric conduction metal with the length of about 2 metres to insert into the earth,
and Fetch the lead wire from the top of the surplus metal and connect to the required static electricity
device. The length and depth of the metal embedded under the earth should be determined according to
the wettability of the local soil. For humid places, it may be shorter, and longer and deeper for dry places.
If possible, it can be distributed and layed in terms of "#" shape.
2. On operating table-board, the antistatic table cushion should be covered and grounded.
3. All devices and equipments should be placed on the antistatic table cushion and grounded.
4. Maintenance personnel should wear antistatic wrist ring which should be grounded.
5. Places around the operating position should also be covered with electric conduction cushion or
Painted with antistatic paint.
1.1.3 Precautions for display screen
1. Display screen is breakable article, so please protect carefully when carrying and prevent fingers
or hard objects striking the screen to damage structure of the screen.
2. When cleaning screen, do not use organic chemicals. You should use cloth and use small
amount of special cleaning liquid in places difficult to clean.
-1-
1.1.4 Precautions for laser head
1. Do not stare at laser head directly, for laser emission will occur when laser head is working,
which will Hurt your eyes!
2. Do not use wiping water or alcohol to clean laser head, and you may use cotton swab.
1.1.5 About placement position
1. Never place TV in positions with high temperature and humidity.
2. Avoid placing near high magnetic fields, such as loudspeaker or magnet.
3. Positions for placement should be stable and secure.
1.2 Maintenance method
1.2.1 Electric resistance method
Set the multimeter in resistance position and test whether the numerical value of resistance of each
point in the circuit has difference from the normal value to judge the trouble spot. But in the circuit the
tested numerical value of resistance is not accurate, and the tested numerical value of integrated IC's
pins can only be used for reference, so the elements should be broken down for test.
1.2.2 Voltage method
Voltage method is relatively convenient, quick and accurate. Set the multimeter in voltage position
and test power supply voltage of the player and voltage of a certain point to judge the trouble spot
according to the tested voltage variation.
1.2.3 Current method
Set the multimeter in current position and test current of the player of a certain point to judge the
trouble spot. But when testing in current method, the multimeter should be series connected in the
circuit, which makes this method too trivial and troublesome, so it is less frequently used in reality.
1.2.4 Element substitution method
When some elements cannot be judged good or bad, substitution method may de adopted directly.
1.2.5 Cutting method
Cutting method should be combined with electric resistance method and voltage method to use.
This method is mainly used in phenomena of short circuit and current leakage of the circuit. When
cutting the input terminal voltage of a certain level, if voltage of the player rises again, it means that the
trouble lies in this level.
-2-
1.2.6 Visualized method
Directly view whether abnormalities of collision, lack of element, joint welding, shedding welding,
rosin joint, copper foil turning up, lead wire disconnection and elements burning up among pins of
Elements appear. Check power supply of the machine and then use hands to touch the casing of part of
elements and check whether they are hot to judge the trouble spot. You should pay more attention when
using this method to check in high voltage parts.
1.2.7 Comparison method
A same good PC board is usually used to test the correct voltage and waveform. Compared these
data with those tested through fault PC board, the cause of troubles may be found.
Through the above maintenance method, theoretical knowledge and maintenance experience, all
difficulties and troubles will be readily solved.
1.3 Required device for maintenance
Audio Generator
Digital oscillograph ( 100MHE)
SMD rework station
Multimeter
Soldering iron
Pointed-month pincers
Cutting nippers
Forceps
Electric screw driver
Terminals connecting cord
Headphone
Microphone
-3-
Chapter Two
Functions and Operation Instructions
2.1 Section One TV SEGMENT
2.1.1 Features
Technical Features
#High quality color TFT panel(15 inch for LD1506X, 19 inch for LD1906X and inch for LD2006X.)
#Maximum resolution 1024X768 for LD1506X,1440X900 for LD1906X,640X480 for LD2006X.
#Built-in DVD player with Slot-in mechanism
#Multisystem TV tuner with NICAM decoding
#Biuilt-in stereo audio system
#USB port to playback compatible files stored on flash memory of external devises(All modes
have two USB ports, with external HDD power supply.)
#Composite video ,audio input
#Component, RGB/SCART and VGA(Only for LD1906X and LD1506X)video inputs
#Digital coaxial output for multi-channel sound playback
#Headphones output
#Universal holder for furniture or wall fixation with 270 rotation angle
TV Channels Receiving and External Signal Playback
#Automatic and fine tuning functions with 100 channels memory
#Adjustable brightness, contrast, saturation, hue and 4 preset image settings
#Tone and sound balance adjustment and 4 preset audio settings
Disc playback mode
#Digital video playback: DVD-Video, Super VCD, VCD compatibility
#MPEG-4 standard support
#Digital audio playback: CD-DA, and HDCD compatibility
#Digital graphic albums playback: Kodak Picture CD and JPEG
#Compatible disc types: CD-R/CD-RW, DVD-R,/DVD-RW, DVD+R/DVD+RW
#Russia, Cls and Baltic States adaptation interface and filenames ID3-tags and CD-Text support
simplifies device operation
#"Q-Play" function provides direct playback and allows to skip commercial that is not possible to
rewind
#"Browser" function provides easy access to playback control
#Automatic screensaver function
#Parental control function to protect children from watching inappropriate discs
#Super wide range of operating power supplies(~100-240v) automatic short circuit protection
PC monitor mode(Only for LD1506X and LD1906X)
#Wide resolutions range
#RGB setting and 4 presets of color temperature
#Tone and sound balance adjustment and 4 preset audio settings
#External audio signal playback.
-4-
2.1.2 Set list
LCD TV 1pcs
Remote Control 1pcs
AAA Battery 2pcs
Power Adapter(only for LD1506X and LD1906X) 1pcs
Power Cord(only for LD1506X and LD1906X) 1pcs
RCA-RCA cord 1pcs
2XRCA-2XRCA cord 1pcs
Microphone 2pcs
Microphone cable 2pcs
Wall Mount Holder 1pcs
Kickstand 1pcs
Screw M5X15 1pcs
Screw M4X10 1pcs
Screw PA5X25 4pcs
Screw PM4X10 4pcs
Expandable pipe 4pcs
User manual 1pcs
Warranty Card 1pcs
2.1.3 CONTROLS AND FUNCTIONS
(1) Panel controls and indication
For LD1506X
Front panel(Panel controls and
For LD1906X and LD2006X indication depend on a model of LCD TV.)
Left panel _CH+button
3
1 SETUP button Press to switch between channels/to
Press to switch to setup mode choose menu item.
2 _VOL+button 4 SOURCE button
Press to adjust the volume. Press to choose the playback mode.
-5-
5 STANDBY button Right panel
Press to switch on the device/into 12 Disc tray
standby mode. 13 USB port
6 POWER button 14 EJECT button
Turn on/off the power. Press to open/close the disc tray.
7 Headphones output 15 STOP button
8 Microphone input 1 Press to stop the playback.
9 Microphone input 2 16 PLAY/PAUSE button
Front panel Press to playback/pause.
10 Remote control sensor
11 Power supply indicator
(2) Remote control general view
1 EJECT button
Press to open/close the disc tray.
2 LANG button
Press to change language.
3 DISP button
Press to display the disc information.
4 NICAM button
Press to choose audio mode.
5 Numeric buttons
6 BROWSE button
Press to turn on/off the browser function.
7 CURSOR buttons (UP/ DOWN/ LEFT
/RIGHT)
8 OK button
9 SETUP button
Press to switch to setup mode.
10 Button
Press to turn on/off the "Virtual Keyboard"
function.
11 SOURCE button
Press to change the TV /DVD /AV/ SCART/
YPBPR /VGA/ mode.
12 Button
Press to start rewind/rewind scanning.
13 Button
Press to skip backward.
14 REPEAT button
Press to repeat.
15 A-B button
Press to repeat the selected section.
16 Button
Press to turn on/off the sound.
17 VOLUME+/-button
Press to adjust the volume.
-6-
18 USB/DVD button 3 SCART socket
Press to select USB/DVD mode. Meant for external audio video signal
19 Button source connection. There is no need to
Press to skip forward. use additional audiocord.
20 Button 4 Y Cb(Pb) Cr(Pr)
Press to stop the playback. 5 PC AUDIO IN
21 Meant for PC stereo audio output
Button
Press to forward scanning. connection.
22 Button 6 COAXIAL OUT
Press to playback/pause. Meant for multi-channel sound playback.
23 ZOOM+/-button 7 AUDIO VIDEO IN
Press to zoom in/out. Used for external signal source connection.
24 CANCEL button 8 12 V socket
Press to go one level back/cancel current Meant for adapter connection.
operation.
25 CH button 2.1.5 TV MODE
Press to switch between channels /to This LCD TV can store up to 100 channels
choose menu item. and enables to scan channels thought automatic,
26 MENU / button manual and fine tuning scanning mode. Built-in
DVD disk menu/PBC function/Press to TV tuner supports stereo audio playback in
return to the previous channel. NICAM system.
27 Q-PLAY button (1) Adjusted channels selection
Press to turn the Q-PLAY mode on. #Press +CH-buttons on the left panel or CH
28 KARAOKE button buttons on the remote control each time, when
Press to change the subtitles language. you want to change a channel.
29 SUBT button #Use numeric buttons to enter the number of the
Press to change the subtitles language. channel.
30 Button #Press button to return to the previous
Press to switch on the device/into standby channel.
mode. (2) Default picture settings
2.1.4 CONNECTION AND STARTING selection
SELECT ENTER RETURN SETUP
#You may select one of the default picture
(1 )Switching interfaces
settings:
For LD1506X and LD1906X USER, STANDARD, DYNAMIC and SOFT.
#You may adjust necessary parameters in the
device menu.
#Turn to Picture item on this page for details.
For LD2006X
(3) Default sound settings
selection
#You may select one of the default sound
settings:
USER, MUSIC, FILM and NEWS.
#You may adjust necessary parameters in the
1 RF input device menu.
Meant for antenna connection. #Turn to page.13 for details.
2 VGA port
Meant for PC connection.
-7-
(4 )Accompanying sound type
#Only some of the TV channels have stereo
accompanying sound in NICAM system.
#Press NICAM button to select accompanying
sound.
(5 ) TV settings
#Press SETUP button to display the menu.
#Use cursor buttons on the remote control or (8) TV setup
+CH-buttons on the left panel to select the Select TV SETUP item to adjust channels.
item. Use buttons to adjust selected CHANNEL, COLOR SYSTEM, SOUND
parameter. Use OK button for confirmation. SYSTEM, FINE TUNING, AUTO SEARCH,
Press SETUP button again to return to the MANUAL SEARCH and CHANNEL EDIT.
main menu or to exit TV SETUP. #CHANNEL item enables to select the number of
adjustable channel.
#CHANNEL EDIT submenu enables to select,
skip and swap the channel.RETURN SETUP
#CHANNEL parameter enables to select current
channel.
#SKIP function enables to make current channel
inaccessible while using +CH-button to browse
(6) Picture channels.
#Select PICTURE item to adjust picture
parameters.
#You may adjust BRIGHTNESS, CONTRAST,
SATURATION, TINT, SHARPNESS and
COLOR TEMP.
#SWAP function enables to select the channel
number to swap with current channel.
#SAVE parameter enables to confirm the swap
function.
NOTE #FINE TUNING item enables to adjust the
You can't adjust TINT while watching TV channel frequency accurately.
channels. #MANUAL SEARCH item enables to change
channel settings.
#AUTO SEARCH item enables to adjust channel
setting automatically.
#COLOR SYSTEM item can be changed
between: AUTO, PAL and SECAM. We
recommend to set this item to AUTO.
#SOUND SYSTEM item can be changed
(7) Sound between: B/G, D/K, Land I.
#Select SOUND item to adjust sound
parameters.
#You may adjust BALANCE, BASS, TREBLE
and NICAM.
ATTENTION! We recommend watching TV at
halfof maximum level of the sound. Continuous
listening at higher level may lead to hearing
reduction.
-8-
(9) Function
You may select LANGUAGE,
TRANSPARENCY, SLEEP and RATIO.
#LANGUAGE item enables to select the OSD
language.
#TRANSPARENCY item enables to adjust
transparency of OSD.
#SLEEP item enables to set the sleep timer.
(2)Sound
Select SOUND item to adjust sound
#RATIO(only for LD1906X)item can be changed
parameters.
between 16:9 and 4:3.
You may adjust BALANCE, BASS, TREBLE
#RESET item enables to reset all values to
and NICAM.
default.
(10) Video settings
#Press SETUP button to display the menu. (3)Monitor setup
#In external video signal playback mode the Select MONITOR item to adjust such
menu is the same as the menu, described on parameters as PHASE, FREQUENCY, H-
pages 12and 13. POSITION and V-POSITION.
NOTE
In external video signal playback mode TV
SETUP item is inaccessible.
2.1.6 PC MONITOR MODE
(only for LD1506X and LD1906X.)
(1)Picture
Select PICTURE item to adjust picture
(4)Function
parameters. You may select LANGUAGE,
You may adjust BRIGHTNESS, CONTRAST, TRANSPARENCY, SLEEP and RADIO.
COLOR TEMPERARURE and AUTO CONFIG. #LANGUAGE item enables to select the OSD
language.
#TRANSPARENCY item enables to adjust
transparency of OSD.
#SLEEP item enables to set the sleep timer.
#RATIO(only for LD1906X) item can be changed
between 16:9 and 4:3.
#RESET item enables to reset all values to
#Select COLOR TEMPERATURE subment to defaule except ratio function.
adjust color temperature of the picture.
#COLOR TEMP. Item can be set to :USER,
NORMAL, WARM and COOL.
#RED, GREEN and BLUE items enables to
adjust RGB value of color temperature.
#Use AUTOCONFIG to configure display
parameters automatically.
NOTE:
The picture can be displayed incorrectly
while adjusting.
-9-
2.2 Section Two DVD SEGMENT
2.2.1 Controls and functions
Front panel controls
For LD1506X For LD1906X and LD2006X
USB port Two USB ports
EJECT button Disc tray
Press to open/close the disc tray. EJECT button
STOP button Press to open/close the disc tray.
Press to stop the playback. STOP button
PLAY/PAUSE button Press to stop the playback.
Press to playback/pause. PLAY/PAUSE button
Disc tray Press to playback/pause.
Note:
This model does not support the 8cm disc. Do not insert that type of disc into this device to avoid disc
jam.
2.2.2 FUNCTION SETTINGS
(1) Function selection and change
#Press the SETUP key to show the setup menu. You will see the following image on the screen, as show
on the figure:
#Select the desired menu item using the UP/DOWN buttons button; press the OK key for confirmation.
1.For example, if you wish to change the image settings, you have to select the image item and press
the OK or RIGHT key.
Language Setup menu TV system AUTO AUTO
Image DVD menu TV format 4:3 PAL
Sound Sound track Sharpness M. NTSC
Playback Subtitle Off
Gamma Off.
Karaoke Mp4 Subtitles
Brightness +48
Preference
Parental control Contrast +48
Initial help Hue 0
Reset settings Saturation 0
Exit
- 10 -
2.Using the UP/DOWN buttons, select the #If the language you selected is not recorded on
desired item and press OK or RIGHT button. the DVD disc, another available language will
For example, select the Sharpness item. be displayed.
Settings will appear on the screen. Then select 5.MP4 Subtitles: selection of subtitles language
the desired sharpness level and press OK for #Options: Russian, English, Ukrainian and
confirmation. Romanian.
#Default option: English.
TV system AUTO
TV format 4:3 (3) Image settings menu
High
Sharpness L. 1. TV system: TV system selection
Medium
Gamma Off. #Options: Auto, PAL, NTSC.
Low
Brightness +48
#Default option: PAL.
Contrast +48
Hue 0
2.TV Format: image ratio settings
Saturation 0 #Options: 4:3 pan& scan, 16:9 letterbox and 16:9
TV,4:3 LB.
3. Press LEFT for exit to previous menu level. #Default option: 4:3 LB.
4. Press SETUP to exit setup menu. #Some discs are recorded with support of only
one ratio. The selected ratio must comply with
(2) Language settings
the TV screen.
1. Setup menu: interface language set-up
#Options: Russian, English, Ukrainian, TV system Auto AUTO
Romanian. TV format 4:3 LB PAL
#Default option: English. Sharpness L. NTSC
Gamma Off.
Setup menu
Brightness 0
DVD menu English
Contrast 0
Soundtrack
Hue 0
Sbutitles Off
Saturation 0
2.DVD menu: selection of disc menu language
3. Sound: selection of translation language 3.Sharpness: image sharpness adjustment
#Disc menu/translation language options: #Options: High, Middle, Low.
Russian, English, Estonian, Lithuanian, Kazakh, #Default option: Middle.
Romanian, Belarusian, Ukrainian, Chinese, 4. Gamma: adjustment of image color
Others. temperature
#Default menu/translation language option: #Options: High, Middle, Low, Off.
English. #Default option: Off.
#Selection of other languages: select the 5.Brightness: adjustment of image
OTHERS item using the wheel and press OK. brightness
Enter the language code using the numeric 6.contrast: adjustment of image contrast
buttons and press OK. 7.Hues: adjustment of image hues
#If the language you selected is not recorded on 8.Saturation: adjustment of image saturation
the DVD disc, another available language will Adjustment of image brightness, contrast,
be used. hues and saturation:
4. Subtitles: selection of subtitles language #Select the desired item of the image adjustment
#Options: Off, Russian, English, Estonian, section using the UP/DOWN buttons. Press OK
Lithuanian, Kazakh, Romanian, Belarusian, or RIGHT key to start adjusting the relevant
Ukrainian, and Chinese. option.
#Default option: off. #Change the option value using the wheel.
#Selection of other languages: select the #Upon completion press the LEFT button of the
OTHERS item using the wheel and press OK. UP/DOWN buttons to return to image setup
Enter the language code using numeric buttons menu.
and press OK. (4) Sound settings menu
- 11 -
1.Digital audio output #If On option is set, while reproducing discs, a
a).SPDIF format: set-up of digital audio menu will appear, in which you can select the
output options. order of playing the disc content. If the Off
#Options: RAW, PCM. option is set, the reproducing of content is
#Default options: RAW. performed in the order, in which it is recorded
#When you select the RAW option, the not
decoded signal is transferred to the LCD Tv's DVD Advertisemenu No
digital outputs, the decoded signal is VCD/SVCD
Files All types
transferred to analog outputs. Decoding is
Repeat off
performed by the built-in decoder of the LCD TV.
This feature is meant to ensure that signal 3.Files: selection of reproduced files on the
decoding at digital outputs is performed by an disc
external device(e.g.an amplifier). #Options: Audio, Pictures, Video, All types.
#If you select the PCM option, a PCM coded #Default option: All types.
signal will be transferred to the LCD Tv's digital 4.Repeat: file repeat mode
outputs. #Options: Off, Single, All.
#Default option: Off.
Digital output SPDIF format RAW (6) Karaoke settings menu
Tuning LPCM 48kHz
1.Microphone: microphone on/off
#Options: On, Off.
B)LPCM:set-up of digital audio output #Default option: On.
options to comply with different amplifiers 2.Kar.help: karaoke -disc playback mode
and receivers. #Options: L Channel, R Channel, No ast, No voc.
#Options: 48kHz 16 bit, 96 KHz 24 bit,192kHz 24 #Default option: No voc assist.
bit.
Microphone On On
#Default option: 48kHz 16 bit.
Kar.Help No ast. Off
2. Sound correction
Volume 5
A)Equalizer: equalizer modes Echo 5
#Options: Off, rock, pop, live dance music,
Techno classics, soft . 3.Volume:
#Default option: off. Microphone: microphone sound volume level
B)Echo: echo effects #Using the UP/DOWN buttons adjust the
#Options: Off, concert, living room, hall, microphone volume level.
Bathroom, cave, arena, church. #Press LEFT key of the UP/DOWN buttons to
#Default option: off. return to karaoke settings menu.
C)Tone balance: adjustment of tone balance
level.
#Adjust the tone balance level using the cursor
buttons.
#Press the LEFT button to return to sound
correction set-up menu. 4.Echo:echo level while playing the karaoke-
(5) Playback settings disc
1. DVD #Adjust the echo level Using the UP/DOWN
Advertisement skip: skip the unskippable buttons.
block while playing a DVD disc. #Press LEFT key of the UP/DOWN buttons to
#Options: Yes, No. return to karaoke settings menu.
#Default option: number
2. VCD/SVCD
PBS menu: PBC menu on/off
#Options: On, Off.
#Default option: On.
- 12 -
(7) Preference settings (9) Initial setup menu
1.Screensaver: screen saver on/off #Press the RIGHT key to enter the initial settings
#Options: On, Off. menu, then select the desired item using the
#Default option: On. cursor buttons and press OK key for
2.Gr.equalizer: spectrum analyzer confirmation.
#Options: On, Off. #While being in this menu section, you cannot
#Default option: Off. return to the previous level by pressing the
Auto
Screen saver On On
PAL
Gr.equalizer Off Off
NTSC
(8) Parental control settings (10) Reset settings to default
#Resetting all settings and restoring default
1.Category: set-up of age restrictions to
options, except age restrictions level and
prevent children from seeing undesirable
Password.
discs.
#Options: Any, Kid, G,PG, PG-13, PGR, R, NC-
17. any Load factory settings
Kid
G
Allowed.. Any PG OK Cancel
PG-13
Set password
PGR
R (10) Exit settings menu
NC-17
#Select the exit item using the UP/DOWN
2.Change password: set-up of a four-digit buttons and press the OK key to exit the menu.
password to change the level of age
Language
restrictions. Image
#Default option: 7890 Sound
Playback
Old password Preference
Parental control
New password
Initial setup
Verify
Reset to defaults
OK Cancel Exit
2.2.3 OTHERS
(1) Useful notes
#To extend the service life of your LCD TV make pauses of not less than 30 seconds between switching
off and repeatedly switching on the LCD TV.
#Disconnect the LCD TV from the wall outlet after shutdown.
#Some LCD TV'S functions may not be applied to some discs.
#Use supply sources of rated voltage, otherwise the LCD TV may not function or be damaged.
#In case of the LCD TV's occasional stops, please switch the power supply off and then on again.
(2)Trouble shooting
Please check probable causes of malfunction before addressing the service center.
Sign of trouble Cause of trouble Act ions t o ellminate the t rouble
1.Poor audio cable c onnection.
1.Mak e proper connect ion.
2.Disc dirt y or damaged.
No sound 2.Clean the disc .
3.Sound disabled by the MUTE
3.Pres s the MUTE button.
button.
- 13 -
1.Poor video cable c onnection.
2.Incorrect setti ngs of your TV 1.Mak e proper connect ion.
set. 2.Correct the setti ngs of your TV s et.
No image
3.The TV is in t he progressi ve 3.Place the TV in the int erlaced s can mode
scan mode while y our TV set through the TV's menu.
does not support t his mode.
1.inc orrect TV c olor sy stem
1.Set the appropriate color s ystem via the
selec ted.
Blac k and whit e image menu: S ETUP>Image> TV scan.
2.Color level on the TV set
2.Readjus t the c olor sy stem of your TV set .
adjust ed incorrec tly .
1.Dis c not insert ed.
1.Insert the dis c.
2.Dis c ins erted inc orrectly.
Disc s cannot be read 2.Inst all the di sc with the label side facing up.
3.Condensat e on the DVD
3.Switch the TV on without disc for an hour.
player's laser head.
1.Microphone is unplugged. 1.Connect the microphone.
Microphone does not
2.Low level of the mic rophone's 2.Adjust the level of the mic rophone's sound
operate
sound volume. volume.
1.Remote control is i ncorrect ly
1.Use t he remote c ontrol ac cording t o the
direct ed at the TV's screen.
Remote c ontrol does not manual.
2.Dis tance to the TV is in
operate 2.Decreas e the dis tance to the TV.
excess of 8 meters.
3.Replac e both batt eries.
3.Run out bat teries .
1.W ait5-10 s econds and the device will
1.Disc is recorded inc orrectly. automat ically t eturn to normal st ate.
some functions do not
2.Incorrect key sequence. 2.Repeat t he operation one more t ime.
work
3.St atic voltage on the housing. 3.Switch the device off for 1-2 minutes and t hen
switch it on again.
1.Incorrect TV set setting.
Unstable image or 1.Correct the TV set settings . 2.Res et the TV
2.There is s omething wrong with
abnormal pic ture col or set to default s etti ng.
the data i n the E P ROM.
(3)Technical characteristics
LD1506X LD1906X LD2006X
Display Type TFT,colored
class ll(ISO 13406-2)
Size(") 15 19 20
Height(mm) 228.19 256.5 306
Widt h(mm) 304.13 410.4 408
Dot Pitch(H mm ◦ Jabse Service Manual Search 2024 ◦ Jabse Pravopis ◦ onTap.bg ◦ Other service manual resources online : Fixya ◦ eServiceinfo