Service Manuals, User Guides, Schematic Diagrams or docs for : Keithley 172_173 28262C(Model172_252C173)
<< Back | HomeMost service manuals and schematics are PDF files, so You will need Adobre Acrobat Reader to view : Acrobat Download Some of the files are DjVu format. Readers and resources available here : DjVu Resources
For the compressed files, most common are zip and rar. Please, extract files with Your favorite compression software ( WinZip, WinRAR ... ) before viewing. If a document has multiple parts, You should download all, before extracting.
Good luck. Repair on Your own risk. Make sure You know what You are doing.
Image preview - the first page of the document
>> Download 28262C(Model172_252C173) documenatation <<
Text preview - extract from the document
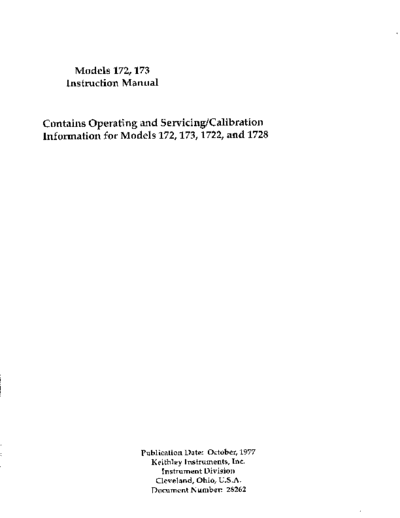
Models 172,173
Instruction Manual
Contains Operating and Servicing/Calibration
Information for Models 172,173,1722, and 1728
Publication Date: October, 1977
Keithley Instruments, Inc.
Instrument Division
Cleveland, Ohio, U.S.A.
Document Number: 28262
INSTRUCTION MANUAL
Dlgltat Multlmeter
Models 172,173
[Contalnr Operating and SafuWno/~bmtlon
In!omuNon For Moddr 172,173,1722, and 1728.1
`1 KEITHLEY INSTRUMENTS m
INSTRUCTION MANUAL
Digital Multimeter
Models 172, 173
@COPYRIGHT 1976, KEITHLEY INSTRUMENTS, INC.
THIRD PRINTING, OCT. 1977, CLEVELAND, OHIO U.S.A.
DOCUMENT NO. 28262, REVISION CODE CC
INSTRUCTION MANUAL
Dlgltal hlultlmeler
Models 172,173
CONTENTS
I Section Page
CONTENTS ......................... .. ii
ILLUSTRATIONS. : : : : : : : : : : : : : : : : : : : : : : iii
SPECIFICATIONS ............ "
I. GENERAL INFORMATION. ....... : : : : : : : : : : : : : : : : : : : : : : I-I
l-l. INTRODUCTION . . . . . . . . . . . . . . . . . . . . . . . . . I-l
I l-2.
l-3.
FEATURES . . . . . . . . .
QARRANTY INFORMATION . . . : : : : : : : : : : : : :
. . . . . l-1
. . . l-l
1-4. CHANGE NOTICE. . . . . . . . . . l-l
I l-5.
l-6.
OPTIONAL MODEL 1728 RECHARGEABL; ;A;T;R;
OPTIONAL MODEL 1722 DIGITAL INTERFACE.
PACK: : : :
. . . . . . . .
.
.
.
.
. .
. .
1-I
. 1-l
. . . . . . 2-l
. . . . . . 2-l
. . . . . . 2-l
. . 2-l
OPERATING INSTRUCTIONS ................... . . . . . 3-l
3-l. GENERAL ........................ . . . . . , 3-l
3-2. HOW TO SELECT POWER. ................. . . . . . 3-l
;I;. HOW TO SELECT FUNCTION................................ . . 3-2
HOW TO SELECT RANGE. . . . . 3-3
HOW TO MEASURE VOLTAGE ........ . . 3-4
HOW TO MEASURE CURRENT (MODEL 172 ONLY): : : : : : : : . . . . 3-5
HOW TO MEASURE CURRENT (MODEL 173 ONLY). . . . . 3-6
HOW TO MEASURE RESISTANCE. .. .. ... : : : : : : : . . . . 3-7
FURTHER MEASUREMENT CONSIDERATIONS . . . . 3-8
;I?;. HOW TO USE MODEL 172/173 OFF-GROUND: : : : : : : : : : . . . 3-11
I 3-11. HOW TO USE OPTIONAL PROBES AND SHUNTS. ........ . . . . . . . 3-12
3-12. HOW TO USE THE MODEL 1722 DIGITAL INTERFACE. ..... . . . . 3-13
, 4. ACCESSORIES .................... . . . . . . . 4-l
I 4-l. GENERAL..................:::: :: . * . . 4- 1
POWER OPTIONS. .................... . . . . . . 4-l
ISOLATED DIGITAL OUTPUT. ........ * . . . . . 4-l
4-4. RACK MOUNTING. ............. : : : : : : : . . . * . . 4-l
4-5. PROBE AND SHUNTS ................... . * * . . . 4-4
4-6. CABLES AND CONNECTORS. ................ . . . . . . 4-5
4-7. MISCELLANEOUS. .................... . . . . . . 4-5
I:5. THEORY OF OPERATION.
5-l.
....................
GENERAL ........................
.
.
.
.
.
.
. . . 5-l
. . . 5-1
INPUT SIGNAL CONDITIONING. .............. . . . . . . 5-2
I POWER SUPPLY, SCHEMATIC NO. 28067D .......... . . . . . . 5-9
DISPLAY BOARD PC-403 SCHEMATIC NO. 274780. ...... . . . . . . 5-10
CURRENT BOARD, SCHEMATIC NO. 27478D. ......... . . . . . . 5-12
i MODEL 1728 RECHARGEABLE BATTERY PACK .........
ANALOG-TO-DIGITAL CONVERTER. .............
.
.
.
.
.
.
. . . S-13
. . . 5-13
MODEL 1722 DIGITAL INTERFACE .... . . . . . . 5-22
I 5-9. DETAILED II-WIRE OHMS OPERATION ... : : : : : : : : : . . . . . . 5-26
ii AA
I INSTRUCTION MANUAL
Digllel Mulllmeter
Model8 172. 173
CONTENTS (continued)
I
/section Page
>_I
6. MAINTENANCE. ................ 6-1
6-1. GENERAL. ............... : : : : : : : : : : : : : : : : : 6-1
6-2. REQUIRED TEST EQUIPMENT. ........................ 6-I
6-3. PERFORMANCE VERIFICATION 6-3
6-4. ADJUSTMENT/CALIBRATION PR&D;R; : : : : : : : : : : : : : : : : : : : : 6-15 /
6-5. TROUBLESHOOTING AND REPAIR , . 6-19,
7. REPLACEABLE PARTS. . . . . . . . . . : : : : : : : : : : : : : : : : : : : : : J-1 1
7-1. GENERAL. . .
7-2. ORDERING INFORMATiON : : : : : : : : : : : : : : : : : : : : : : : : : : ;:; j
J-3. SCHEMATICS . . . . . . . . . . . . . . . . . . . . . . . . . . . . . . J-1 )
ILLUSTRATIONS
Fi g ure No. Title Page
I Dimensional Data. .......................... iv
Tilt Bail Positions ......................... vi
: Front Panel ............................. t-2
4 Bottom View Showing Line Cord .................... l-3
Rear Panel Showing Current Fuse and Check Points. .......... 2-2
2 Model 1728 Rechargeable Battery Pack. ................ 2-4
Installation of Battery Pack. .................... 2-5
z Front Panel Pushbutton Selection. .................. 3-3
9 Typical Model 172 Current Display .................. 3-5
IO Typical Model I73 Current Display .................. 3-6
II Typical 2 WIRE Resistance Measurement ................ 3-J
12 Typical 4 WIRE Resistance Measurement ................ 3-9
13 Semiconductor Diode and Transistor Testing. ............. 3-10
I4 Illustration of Floating Operation. ................. 3-11
I5 Model 1722 Digital Output Interface ................. 3-14
16 Installation of Model 1722. ..................... 3-15
17 Connector Pin Identification. .................... 3-17
18 Card-Edge Connectors. ........................ 3-17
19 Location of Jumpers and Pull-Ups on Model 1722. ........... 3-18
20 Model 1010 Single Rack Mounting Kit. .............. .4-Z
21 Model 1017 Dual Rack Mounting Kit. ............... : : .4-4
22 Overall Block Diagram of Model lJ2/173 ............. : . .5-l
23 DC Volts Input Circuit ....................... .5-4
24 Simplified AC Attenuator Circuit ....... .5-6
25 AC Converter Circuit ............ 1 : `.`.`: : : : : : : . .5-6
26 Digital Display Multiplex Scheme .................. .5-II
27 Basic Functional Blocks of A/D Converter .............. .5-14
28 Basic Charge-Balance Converter ................... .5-15
29 Operating Waveforms of A/D Converter ................ .5-16
30 Simplified Schematic of A/D Converter. ............... .5-18
Detailed Schematic of A/D Converter. ................ .5-20
;: A/D Converter System Timing. .................... .5-21
Model 1722 Block Diagram ...................... .5-24
;:a. Simplified Ohms Diagram (Shown in Z-WIRE Configuration). ...... .5-25
34b. Four-Wire Ohms Measuring Technique ................. .5-25
-
nb
I INSTRUCTION MANUAL
Digltal Multimeter
Models 172, 173
12.75
(324)
I
DIMENSIONS IN INCHES (MM)
FIGURE 1. Dimensional Data.
na
I INSTRUCTION MANUAL
Digllal Multimeter
Model, 172, 173
SPECIFICATIONS
AA
INSTRUCTION MANUAL
Digital Mullimeler
Models 172.173
LEVEL POSITION - TILTBAIL AT FRONT
r
HANGING POSITIOI;
SHELF POSITION
45' POSITION LEVEL POSITION - TILTBAIL AT REAR
FIGURE 2. Tilt Bail Positions.
AA
vi
INSTRUCTION MANUAL GENERAL INFORMATION
Digital Multimeter
Models 172. 173
I SECTION I. GENERAL INFORMATION
l-l. INTRODUCTION. The Models 172 and 173 Digital Multimeters are wide-range, general-
purpose measuring instruments, capable of measuring ac/dc voltage, ac/dc current, and
resistance.
l-2. FEATURES
a. Automatic Ranging and Polarity
b. Manual Range Selection and Range Hold
C. HI and LO Otxns Capability
d. Line Operation
e. Optional Battery Operation, Model 1728.
f. Floating Capability to ?lbOOV peak
9. Optional Isolated Digital Interface, Model 1722
l-3. WARRANTY INFORMATION. The warranty is stated on the inside front cover of the
manual. If there is a need for service, contact your Keithley representative or author-
ized repair facility as given in OUT catalog.
l-4. CHANGE NOTICE. Improvements or changes to the instrument not incorporated into the
manual will be explained on a change notice sheet attached to the inside back cover of
the manual.
l-5. OPTIONAL MODEL 1728 RECHARGEABLE BATTERY PACK. The Model 1728 is an accessory
batterY pack which enables either line or battery operation. The Model 1728 has built-
in recharging circuitry. The Model 1728 is field-installed on the Model 172/173 chasis.
l-6. OPTIONAL MODEL 1722 DIGITAL INTERFACE. The model 1722 is a field-installable
digital
~~~~ output option. It provides isolated open-collector BCD outputs and control lines.
IMPORTANT
The A symbol can be found in various places in this Instruction Manual. Carefully
read the associated CAUTION statements with regard to proper use and handling of the
instrument. Damage to the instrument may occur if these precautions are ignored.
The t symbol can be found in various places in this Instruction Manual. This symbol
indicates those areas on the instrument which are potential shock hazards. Carefully
read the associated WARNING statements with regard to proper use and handling of the
instrument. Serious personal injury may result if these precautions are ignored.
cc l-l
~
GENERAL INFORMATION INSTRUCTION MANUAL
Digital Multimeter
Models 172.173
FUNCTION AND UNITS DISPLAY (my)
INPUT HI AND LO, UPPER PAlR
(OHMS SOURCE. LOWER PAIR)
VOLTAGE FUNCTION (OUT)
AHPERES FUNCTION (IN)
DC FUNCTION
AUTORANG, NG (OUT)
MANUAL RANGING (IN)
\\
LINE POWER
(LINE AND EAT MUST BE OUT FOR BATTERY CHARGE)
FIGURE 3. Model 173 Front Panel
l-2 CC
I
INSTRUCTION MANUAL GENERAL INFORMATION
Dlgllal Multlmeler
Modelr 172,173
I -3
I GENERAL INFORMATION INSTRUCTION MANUAL
Digllal Mullimeter
Models 172.173
I 172. 173 CONDENSED OPERATING INSTRUCTIONS 1
FUNCTION
II ME&RE SELECTION (SE%%f,
, , 3, 101.9999A LP'.. .I.... '"".q /
II
1 ( HlllOD
OVERRANGE:FIRST DIGIT 3. REMAINING IIICITS
IRICKLECHARGES
LINE
OUl.CHARGES DISCHARGED 1728 IN I6 HOURS,
IN.OPERATESlNSTRUMENTfOR6HOUASFROM 1728BAT PACK,
RAT. IfINSTAtLEO.FRON7PANELLOBAT LlGHTCIIMFSflNIf RdTTlAY
1 OPERATlONWOULOCAUSEfAULTYREAOlNGS
SELFTEST(REARPANEL))
CONNECT~NG~NPUTHITODCTERMINALW~~~CAIJSE~NSTRUMENT
DC
~~~~~~~f'PROX.5VINOCVOLTSANOImAINOCAMPS.
CONNECTlNGlNPUTHITOACTERMINALWlttCAUSElNSTRUMENT
IIAC 1 T""'*"""PROX.6VINACVOLTSANDl.2mAINACAMPS.
II n ) CONNECTlNGlNPUTHITOQlERMINAtWIttCAUSElNSTRUMENT
l`
1 TIJREADAPPROX.10kIN2TERMlNALOHMS. I
TO OPEN INSTRUMENT:CAUTION-DISCONNECTLINE CORD.LOOSEN (4) SCREWS (THIS
SIOE). HOLD INSTRUMENT TOGETHER AND TURN OVER.TltT TOP COVER BACK AND UP,
DISCONNECT (2) CONNECTORS (CURRENT FUSE LINE AND SELF CHECK).
I l-4 AB
INSTRUCTION MANUAL INITIAL PREPARATION
Digital Mulllmeler
Models 172. 173
I SECTION 2. INITIAL PREPARATION
2-l. GENERAL. This section provides information needed for incoming inspection and
preparation for use.
2-2. INSPECTION. The Model 172/173 was carefully inspected both mechanically and elec-
trically before shipment. Upon receiving the instrument, check for any obvious damages
which may have occurred during transit. Report any damages to the shipping agent. To
verify the electrical specifications, follow the procedures given in Section 6.
2-3. PREPARATION FOR USE. The Model 172/173 is shipped ready-to-use. The instrument
can be powered from line voltage or from rechargeable nickel-cadmium batteries (when the
optional Model 1728 Rechargeable Battery Pack is installed).
a. Line Power. The Model 172/173 has an attached three-wire line cord which mates with
third-wire grounded receptacles (NEMA 5-l5P). The permanently installed line cord is
stored by wrapping the cord around the base of the instrument as shown in Figure 4.
CAUT I ON
This instrument has an internal line power selector switch that must be set to
234V position for operation above 125 volts rms, 50-60 HZ.
1. How to Set the Internal Line Voltage Switch (~601). The Model 172/173 has a
two position slide switch located on the main circuit board. To set the switch for
operation above I.25 volts the switch setting must be changed. The top cover must be
removed to gain access to the circuit board as described in MAINTENANCE section.
WARNING
Disconnect the line cord before removing the top cover of the instrument. Line
voltage is present at various points on the circuit board and represents a SHOCK
t HAZARD.
NOTE
Other line voltage ranges are available when wiring modifications are made to
transformer T601 as shown on schematic 28067~1.
TABLE 2-l.
Summary of Standard and Optional Line Voltages
Standard Optional
I05 to 125 V rms 90 - 105 v rills
Transformer wiring
210 to 250 v rms 195 - 210 v rms > must be modified
2-l
.INITIAL PREPARATION INSTRUCTION MANUAL
Digital Mullimeler
Models 172.173
SELF FUSE
FIGURE 5. Rear Panel Showing Current Fuse and Check Points
2-2 AA
STRUCTION MANUAL INITIAL PREPARATION
.gllel MultImeter
~~Modelr 172, 173
2. Line Fuse Requirement. The Model 172/173 use a single line fuse to protect the
line-operated power supply. The fuse is a 3 AB or 3 AG, slow-blow type. Replace with
l/4 ampere for 117 volts operation or l/8 ampere for 234 volts.
IMPORTANT
A Replace fuse with correct rating otherwise damage to the instrument could result.
3. How to Replace the Line Fuse. The fuse is installed on the main circuit board
as shown in Figure 36 (page 6-10). The top cover must be removed to gain access to the
circuit board as described in Section 6. Use Keithley FU-17 for 117 V; FU-20 for 234V.
WARNING
Disconnect the line cord before removing the top cover of the instrument. Line
voltage is present at various points on the circuit board and represent a SHOCK
t HAZARD.
CAUTION
The fuse installed on the rear panel of the Model 172/173 is used only for current
A range protection. This fuse is -not a line voltage protection fuse.
b. Battery Power. To operate the Model 172/173 from batteries, the Model 1728
Rechargeable Battery Pack must be installed. The Model 1728 can be either field or
factory-installed (at the time the Model 172/173 is purchased).
NOTE
The Model 1728 Rechargeable Battery Pack can be installed by the user within the
Model 172/173 at any time. However, if the Model 1722 Digital Output is already
installed, the Model 1728 cannot be used simultaneously.
1. How to Install the Model 1728 Rechargeable Battery Pack. The batteries furnished
with the Model 1728 are already installed in the battery pack. The battery pack in-
cludes 7 rechargeable "C" cells (l.ZV, 2 AMP Hr) and two 19.2 volt packs (sixteen l.ZV-
cells per pack). See Figure 6.
a) Check the fuses on the Battery Pack. Three fuses are used. All are I ampere,
3AB or 3 AG, Slo-Blo types, Keithley Part No. FU-IO.
b) Check for proper installation of batteries in the Battery Pack. If replacement
battery cells are to be installed, be certain to observe the proper polarity of the
individual cells as shown in Figure 6.
c) To install the Battery Pack, turn the instrument over so that the bottom cover
faces up. Loosen four slotted screws on the bottom cover as shown in Figure 4. The
screws are captive, that is they cannot be removed completely. Turn over the instru-
ment with the top cover facing up, taking care to hold the top and bottom covers to-
gether. Carefully remove the top cover to gain access to the printed circuit board.
There are 2 connections between the top cover and the main circuit board which must
be temporarily removed in order to free the top cover. Check to see that the four
insulating spacers are in position on the circuit board as shown in Figure 7. Plug
the two S-wire connectors (J401, J402) into the mating receptacles (~602, P606) tak-
ing care to orient the connectors as shown. Place the Model 1728 in position on the
spacers with the pack oriented as shown in Figure 7. Replace the connectors from the
top cover to the circuit board. Replace the top cover. Turn over the instrument with
the bottom cover facing up and tighten down the four slotted-head screws.
I B 2-3
INITIAL PREPARATION INSTRUCTION MANUAL
Digilal Mullimeler
Models 172. 173
J402
a..-- - .~
FIGURE 6. Model 1728 Rechargeable Battery Pack.
INSTRUCTION MANUAL INITIAL PREPARATION
Digital Multimeter
Models 172.173
WARNI NG
Disconnect the line cord on the instrument before the Battery Pack is installed,
Line voltage is present at various places on the circuit board and is a SHOCK
t HAZARD.
FIGURE 7. Installation of Battery Pack.
I CB 2-5
INITIAL PREPARATION INSTRUCTION MANUAL
Digilal Multimeler
Models 172.173
TABLE 2-2.
Summary of Batteries Used in the Model 1728
Description Quantity Voltage Keithley Part No.
I 2V "C" ccl I
(; AMP-HR) 7 8.4v BA- 30
I
+19.2V
(l6-l.2V
pack
cells)
1
I +19.2v I BA-31
-19.2V pack
I -19.2v BA-3 I
(16-l.2V cells)
CAUTION
The Model 1728 is shipped from the factory in an uncharged condition. Therefore
the pack should be installed in the Model 172/173 and charged prior to use.
A
2. How to Check Batteries.
a) The Model 172/173 has a built-in LO BAT indicator to permit easy determination
of battery condition. The Model 172/173 also has an individual test point on the
bottom panel usually needed only for troubleshooting purposes (see Figure 4.).
b) The LO BAT indicator will be lighted when the Battery Pack goes belag normal
operating voltage. When the indicator turns on the Model 172/173 should be s,+jitched
to LINE or OFF to permit recharging of the Pack.
C) The test point may be checked at any time using the Model 172/173 or other mea-
suring instrument. Then voltages are summarized in Table 2-3.
IMPORTANT
The instrument must be operated in BAT mode in order to obtain a valid battery con-
dition at test point "A". This will ensure that the batteries are supplying power
to the instrument. If the voltage is measured when the Model 172/173 is operated
in the LINE mode a different reading may be observed since the batteries are being
charged.
TABLE 2-3.
Summary of Battery Voltage Levels (BAT mode)
Acceptable Battery Levels
Test Recharge Battery
Point Range ) Normal if Below Tested
I'A" ITV + t20.5V +19.2 ITV BT402
3. How to Charge the Batteries. The Model 1728 provides built-in recharging cir-
cui try. The Model 172/173 must be connected to line voltage. Recharging occurs at the
most rapid rate when the Model 172/173 is set to OFF. Typically, the recharge time is
2.5 hours per hour of discharge.
CAUT I ON
A Overcharging
may shorten
the batteries
the life of the
will raise
batteries.
the internal temperature of the battery pack and
2-6 CB
INSTRUCTION MANUAL OPERATING INSTRUCTIONS
Digital Multimeter
Models 172. 173
SECTION 3. OPERATING INSTRUCTIONS
3- 1. GENERAL. This section provides information needed to operate the Model 172/173
for measurement of voltage, current and resistance.
3-2. HOW TO SELECT POWER. The Model 172/173 may be powered from line voltage or re-
chargeable nickel-cadmium batteries (when the Model 1728 is installed). The Model l72/
173 has a built-in line-voltage power supply and power cord.
NOTE
The accessory llodel 1726 Rechargeable Battery Pack may be ordered at
the time of
purchase of the Model 172/173 or may be purchased and field-installed at a later
time if so desired. The Model 1728 features plug-in wiring and, as a result, no
modifications need to be made to the Model 172/173 chassis.
a. How to Operate from Line Power. The Model 172/173 can be powered from line volt-
age over four ranges from a minimum of 90 V rms to a maximum of 250 V rms. Table 3-l
summarizes the line voltages permitted.
I . Set the internal line voltage switch to either ll7V or 234V.
2. Plug the line cord into source of line power.
3. Depress LINE pushbutton.
NOTE
Power on will be indicated by a lighted display with one or more digits and mea-
surement unit showing.
TABLE 3-1.
How to Set Line Voltage
_.
Range Switch Transformer
Desired 5601 Modification:`: -;
go- 105V ll7V yes ;`; <
◦ Jabse Service Manual Search 2024 ◦ Jabse Pravopis ◦ onTap.bg ◦ Other service manual resources online : Fixya ◦ eServiceinfo