Service Manuals, User Guides, Schematic Diagrams or docs for : Philips Symptom Cure 17-04-2004 References FMxx_Ticking_noise_rework_instructions
<< Back | HomeMost service manuals and schematics are PDF files, so You will need Adobre Acrobat Reader to view : Acrobat Download Some of the files are DjVu format. Readers and resources available here : DjVu Resources
For the compressed files, most common are zip and rar. Please, extract files with Your favorite compression software ( WinZip, WinRAR ... ) before viewing. If a document has multiple parts, You should download all, before extracting.
Good luck. Repair on Your own risk. Make sure You know what You are doing.
Image preview - the first page of the document

>> Download FMxx_Ticking_noise_rework_instructions documenatation <<
Text preview - extract from the document
1.     FM24 "Ticking noise" rework instructions

1.1.   SYMPTOM:

       Loud cabinet ticking noises during warming up / cooling down.


1.2.   CURE:

       Create a small space between the glass plate and the cabinet, filled with a flexible material, in this case
       sticky tape (e.g. Scotch "Magic Tape 810").

       1.   Place the set face down on a soft surface.
       2.   Lift and remove the metal rear cover plate.
       3.   Lift and remove the plastic rear cover.
       4.   Disconnect the cable at the LED/Switch panel.
       5.   Remove the "ESM Filter" panel at the left bottom (if present).
       6.   Remove all fixation screws of the (metallised) shielding frame (do NOT remove the PDP from the
            frame).
       7.   Lift and remove the frame together with the PDP and PWBs attached to it, and store it at on a soft
            surface.

       Now, do the following:
       8. First, lift and remove the Glass Plate from the Front Assy, and store it in a safe place.
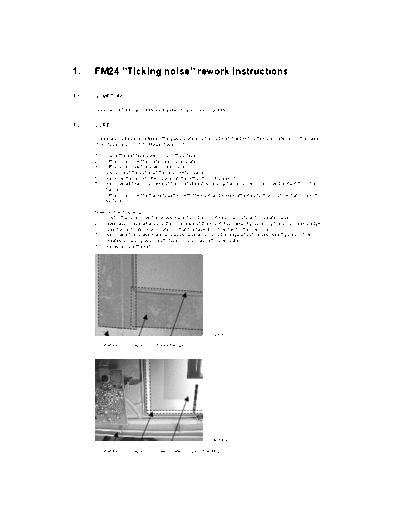
       9. Now, apply tape all around the inner side of the Front Assy, exactly covering the small raised edge
           (see figure 1). Work accurate, so that the tape is not visible for the customer!
       10. Next, take the Glass Plate and apply tape all around the edge at both sides (see figure 2). This
           creates a hard (glass) - soft (tape) - hard (cabinet) construction.
       11. Re-assemble the set.


                                                             Figure 1

       Front assy       Tape        Raised edge


                                                              Figure 2

       Front assy       Tape        Glass plate (copper shielding)
◦ Jabse Service Manual Search 2024 ◦ Jabse Pravopis ◦ onTap.bg ◦ Other service manual resources online : Fixya ◦ eServiceinfo