Service Manuals, User Guides, Schematic Diagrams or docs for : RCA TV RCA-GE_CTC186_187_Training
<< Back | HomeMost service manuals and schematics are PDF files, so You will need Adobre Acrobat Reader to view : Acrobat Download Some of the files are DjVu format. Readers and resources available here : DjVu Resources
For the compressed files, most common are zip and rar. Please, extract files with Your favorite compression software ( WinZip, WinRAR ... ) before viewing. If a document has multiple parts, You should download all, before extracting.
Good luck. Repair on Your own risk. Make sure You know what You are doing.
Image preview - the first page of the document
>> Download RCA-GE_CTC186_187_Training documenatation <<
Text preview - extract from the document
CTC186/187
SERVICE ADJUSTMENTS - CHASSIS/TUNER ALIGNMENT
Service Menu
The service menu is provided to facilitate instrument volume +/- keys before other parameters may be selected.
alignment and service adjustments. The service menu is NOTE: If the channel up/down buttons are pressed without
accessed by pressing two combinations of buttons on the front the correct security pass-number set, the service
panel keyboard. With the instrument on press and hold the mode is exited.
menu button and simultaneously press the power button, then There are three main groups of parameters: the service
while continuing to hold the menu button release the power adjustment parameters, the chassis alignment parameters, and
button and press the volume + button. The instrument should the tuner alignment parameters. The chassis and tuner
immediately display a one line menu on the screen, release alignment parameters are each preceded by a security pass-
buttons. number for added protection. Most of the service adjustment
and chassis alignment parameters correspond to individual
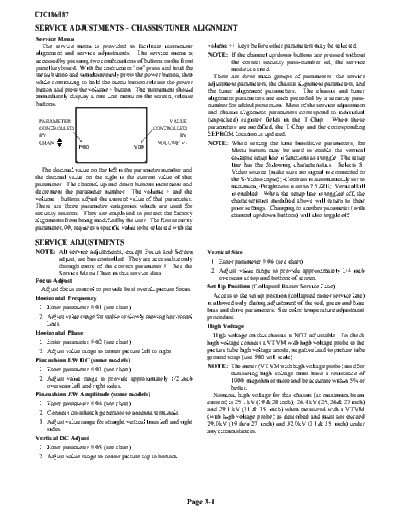
PARAMETER VALUE (unpacked) register fields in the T-Chip. When these
CONTROLLED CONTROLLED parameters are modified, the T-Chip and the corresponding
BY BY EEPROM location is updated.
CHAN v
w VOLUME +/- NOTE: When setting the kine bias/drive parameters, the
P00 V00
Menu button may be used to enable the vertical
collapse setup line-it functions as a toggle. The setup
line has the following characteristics: -Selects S-
The decimal value on the left is the parameter number and Video source (make sure no signal is connected to
the decimal value on the right is the current value of that the S-Video input); -Contrast is automatically set to
parameter. The channel up and down buttons increment and minimum; -Brightness is set to 7.5 IRE; -Vertical kill
decrement the parameter number. The volume + and the is enabled. When the setup line is toggled off, the
volume - buttons adjust the current value of that parameter. characteristics modified above will return to their
There are three parameter catagories which are used for prior settings. Changing to another parameter (with
security reasons. They are employed to protect the factory channel up/down buttons) will also toggle off
alignments from being modified by the user. The first security
parameter, 00, requires a specific value to be selected with the
SERVICE ADJUSTMENTS
NOTE: All service adjustments, except Focus and Screen Vertical Size
adjust, are bus controlled. They are accessable only 1. Enter parameter # 06 (see chart).
through entry of the correct parameter #. See the
Service Menu Chart in this service data. 2. Adjust value range to provide approximately 1/4 inch
Focus Adjust overscan at top and bottom of screen.
Adjust focus control to provide best overall picture focus. Set Up Position (Collapsed Raster Service Line)
Horizontal Frequency Access to the set up position (collapsed raster service line)
is allowed only during adjustment of the red, green and blue
1. Enter parameter # 01 (see chart). bias and drive parameters. See color temperature adjustment
2. Adjust value range for stable or slowly moving horizontal procedure.
lines. High Voltage
Horizontal Phase High voltage on this chassis is NOT adjustable. To check
1. Enter parameter # 02 (see chart). high voltage connect a VTVM with high voltage probe to the
2. Adjust value range to center picture left to right. picture tube high voltage anode, negative lead to picture tube
Pincushion EW DC (some models) ground strap (use 500 volt scale).
1. Enter parameter # 03 (see chart). NOTE: The meter (VTVM with high voltage probe) used for
measuring high voltage must have a resistance of
2. Adjust value range to provide approximately 1/2 inch 1000 megohm or more and be accurate within 5% or
overscan left and right sides. better.
Pincushion EW Amplitude (some models) Nominal high voltage for this chassis (at maximum beam
1. Enter parameter # 04 (see chart). current) is 25.1 kV (19 & 20 inch), 26.4 kV (25, 26 & 27 inch)
and 29.1 kV (31 & 35 inch) when measured with a VTVM
2. Connect crosshatch generator to antenna terminals.
(with high voltage probe) as described and must not exceed
3. Adjust value range for straight vertical lines left and right 29.0kV (19 thru 27 inch) and 32.0kV (31 & 35 inch) under
sides. any circumstances.
Vertical DC Adjust
1. Enter parameter # 05 (see chart).
2. Adjust value range to center picture top to bottom.
Page 3-1
SERVICE ADJUSTMENTS (Continued)
X-Radiation Protection Shutdown Check
2. Allow for instrument warm up and adjust user controls or
NOTE: When service is required, especially in the maximum brightness and contrast levels.
horizontal deflection, high voltage, or regulated B+
circuits the X-Radiation Protection circuit should be 3. Locate the x-ray protect test stakes labeled XRP1 and
tested for proper operation as follows: XRP2(J4901 located to the rear and center of the chassis).
1. Apply 120 volts AC using a variac (variable AC) 4. Momentarily short stake XRP1 to stake XRP2. The
transformer for accurate AC input voltage. instrument must shutdown and then restart.
SERVICE MENU CHART
NOTE: During the Service Menu Mode the channel up/dn will change the parameter # while the volume +/- will change the value
range. Therefore channel changes, when in the service menu mode, must be accomplished by random access using the
remote transmitter. To access channels 100 thru 125, press and hold the channel 1 button on the remote control until the
number 1, and two dashes are displayed on the screen, then press the second two digits.
Parameter # Parameter Name Value Range Comment:
Chan to Vol to
Change adjust
00 Pass No. for Serv. adjust Must set to 76 May not advance until value set
Service Adjustment Parameters
01 Horiz. Freq. 00-63 Sync is killed
02 Horiz. Phase 00-15
03 EW DC (width) 00-15 Some models
04 EW Amplitude 00-07 Some models
05 Vertical DC 00-15
06 Vertical size 00-31
07 Red Bias 00-127 Press Menu button for setup line
08 Green Bias 00-127 Press Menu button for setup line
09 Blue Bias 00-127 Press Menu button for setup line
10 Red Drive 00-63 Press Menu button for setup line
11 Green Drive 00-63 Press Menu button for setup line
12 Blue Drive 00-63 Press Menu button for setup line
13 Security pass no. for chassis align Must set to May not advance to higher param.
parameters 77 until value set
Chassis Alignment Parameters
14 PLL Tuning 00-63
15 4.5 MHz Trap 00-7
16 Video Level 00-7
17 FM Level 00-15
18 B+ Trim 00-15 CTC175 only
19 RF AGC 00-31
20 D-PIP chroma 00-127
21 D-PIP tint 00-255 Wraps around
22 D-PIP brightness 00-31
23 D-PIP contrast 00-63
24 Factory tint 00-63
25 dbx: input level 00-15 Refer to DBX alignment procedure
26 dbx: stereo VCO free run freq. 00-63 Refer to DBX alignment procedure
27 dbx: SAP VCO free run freq. 00-15 Refer to DBX alignment procedure
28 dbx: stereo low pass filter 00-63 Refer to DBX alignment procedure
29 dbx: SAP band pass filter 00-15 Refer to DBX alignment procedure
30 dbx: wideband alignment 00-63 Refer to DBX alignment procedure
31 dbx: spectral alignment 00-63 Refer to DBX alignment procedure
32 Security pass no. for tuner alignment Must set to May not advance to higher param.
78 until value set
Page 3-2
CTC186/187
SERVICE ADJUSTMENTS - CHASSIS ALIGNMENT
Test Equipment Required
External Marker Generator-Capable of furnishing 41.25
MHz, 45.75 MHz and 4.5 MHz markers and AF modulation. FM Level (Wideband Audio)
Digital Voltmeter 1. Enter parameter # 17 (see chart).
External Bias Supply-Well regulated, isolated AC operated 2. Connect signal generator to sound output TP1201 (pin 55
variable DC bias supply. of U1001) with 4.5 MHz carrier, 1 KHz modulation, with
25 KHz deviation
NOTE: All alignment adjustments, are bus controlled. They
are accessable only through entry of the correct code. 3. Apply 4.0 volts DC bias to IF AGC TP2305.
See the parameter # and value range adjustment 4. Connect oscilloscope to TP1202 (WBA output pin 3
chart in this service data. U1001).
5. Adjust value range for 1.2 volt p-p indication of the 1KHz
PLL Tuning (IF VCO Free Run) component (a 1.8 KHz component also exists).
1. Enter parameter # 14 (see chart).
2. Apply 4.0 volt DC bias to IF AGC TP2305 (pin 14 of RF AGC
U1001). The RF AGC has been preset at the time of manufacture for
3. Short RF AGC TP7102 (tuner side of R2313) to ground. optimum operation over a wide range of RF signal input
4. Apply 41.25 MHz marker (300 mV output)) to IF input conditions. Readjustment should not be required unless
(pin 1 of SF2301). the tuner has been repaired, IC 1001 has been replaced, IC
5. Connect oscilloscope to TP1201 (pin 55 of U1001). Set 3101 has been replaced, IC 3201 has been replaced, or
scope for 1uS per division.
unusual signal conditions exist such as:
6. Adjust parameter reading to provide a 2.2uS sine wave
response 1. Cable TVadjacent channel interference.
2. Picture bending and/or channel 6 color beats which are
usually due to excessive RF signal input. This occurs
NOTE: If a 2.2uS sine wave response cannot be achieved set when the receiver location is too close to the transmitting
parameter reading to approximate mid range and tower. It may also occur when the receiver is connected
adjust L2302 for a 2.2uS response. to an antenna distribution system where the RF signal has
been amplified. The signal should be attenuated at the
L2302 is preset at the time of manufacture and antenna input to a more satisfactory level.
should require no further adjustment unless a 3. Picture Noise caused by broadcast noise or weak
2.2uS response cannot be achieved during the signal. If the broadcast is clean and the received signal
parameter adjustment. is at least 1 mV, the picture will be noise free in any area.
4.5 MHz Trap
1. Enter parameter # 15 (see chart).
NOTE: Adjustment of the RF AGC parameters may not have
2. Short RF AGC TP7102 (tuner side of R2313) to ground. any visible effect except under unusual conditions.
3. Apply 45.75 MHz (300mV output) and 41.25 MHz Ajusting the RF AGC to one extreme of its
(100mV output) to IF input (pin 1 of SF2301). parameter limits will usually provide a relatively
4. Connect oscilloscope to TP2302 (pin 63 of U1001). poor signal-to-noise ratio, while adustment to the
5. Adjust parameter reading to produce minimum 4.5 MHz other extreme of its parameter limits will cause a
indication (sine wave just stops losing amplitude). degradation of overload conditions such as channel
6 color beats or Cable TV adjacent channel
interference. If the RF AGC parameter setting is
Video Level adjusted, check all local channels for proper
1. Enter parameter # 16 (see chart). operation. Use weakest local signal to adjust RF
AGC parameter setting.
2. Connect color bar generator to anteanna input (100%
modulation) set for super pulse display.
3. Connect oscilloscope to TP2302 (pin 63 of U1001).
4. Adjust value range to produce 2.0 volt p-p (sync to white)
response.
Page 3-3
CTC186/187
SERVICE ADJUSTMENTS - COLOR TEMPERATURE ADJUSTMENT (Preferred Method)
NOTE: See service adjustment chart for sequence required NOTE: Each time a parameter is exited and a new parameter
to obtain entry to color temperature adjustment is entered the Menu button (on instrument front
parameters. panel) must be pressed to reinstate the setup line.
1. Preset Video controls: 8. Set brightness and contrast controls to maximum.
Color Set to minimum. 9. Enter access codes for the color drive controls (10 for
Contrast Set to minimum. red, 11 for green and 12 for blue) in random sequence.
Brightness Set to mid-range. Adjust their respective parameters to obtain a 6500
degree kelvin color temperature (warm white) raster.
2. Set instrument for Auxiliary Input (Channel 00) Make
sure that there is no signal input to the SVHS input on 10. Check the low light to high light gray scale tracking
models with SVHS jacks. (black and white picture). Should any color other than
gray or white be dominant in low light to high light areas
3. Preset red, green and blue drive parameter values to the color temperature settings have not been properly
mid-range (approximate setting of 32). performed. Repeat the procedure if necessary.
4. Enter parameter # 07 for red bias adjustment. Press NOTE: Color bias adjustments affect the low light (dark)
Menu button (on instrument front panel) for setup line. areas while color drive adjustments affect the high
NOTE: Access to the set up line (collapsed raster service light (white) areas.
line) is only allowed during adjustment of the drive
and bias parameters. D-PIP Adjustment
5. Using an DC voltmeter, preset red, green and blue bias NOTE: See service adjustment chart for sequence required
parameters to provide 120 volts DC at the collector of to obtain entry to D-PIP adjustment parameters.
their respective output transistors on the kine socket
circuit board. 1. Enter parameter # 23 for chroma level adjustment.
NOTE: When the voltmeter probe is placed on the green Adjust value level to match big pix chroma level.
cathode, the Service Menu On-Screen-Display may 2. Enter parameter # 24 for tint level adjustment. Adjust
be difficult to read. value level to match big pix tint level.
6. Adjust the screen control to just produce a centerline
(red, green or blue). 3. Enter parameter # 25 for brightness level adjustment.
Adjust value level to match big pix brightness level.
7. Enter parameter #s for the remaining two bias control
colors and obtain proper mix to produce a white setup 4. Enter parameter # 26 for contrast level adjustment.
line. Adjust value level to match big pix contrast level.
STEREO (MPX) ADJUSTMENT 3. Connect an AC voltmeter to MPX CBA pin #JS106,
NOTE: Make sure that the EXPANDED STEREO function RIGHT CHANNEL OUTPUT. This is also the
is turned off, otherwise the stereo separation and bottom end of R612. (Do not use the top end, or
output amplitudes will be in error. oscillations may result.) Adjust the parameter value
The following alignments must be performed in the using the volume control buttons to set the DAC
order given. (parameter value) for an output level as close to 489
mV rms as possible. Each value step will change the
Set-up output level by about 25 mv.
1. Unsolder and lift the bottom end of R1609 from the 4. Observe on an oscilloscope that the audio output at
circuit board (end closest to Main circuit board) . This is MPX CBA pins #5 (LEFT) and #6 (RIGHT) are
the Wideband Audio input (WBA) to the CXA1734 clean and undistorted.
stereo IC. 5. Confirm that the rms amplitude of both pins #5 and
2. Connect an audio generator to the unsoldered end of #6 are within 20 mVrms of each other.
R1609 (WBA).
NOTE: If the final DAC alignment value is not within
Attenuator the range of 7 - 11, check to make sure that the
1. Enter parameter # 25 (see chart) signal amplitude is proper. (Do not use 1KHz,
because the internal deemphasis filter will cause
2. Adjust the generator output for 100 Hz, 424 mV rms, +/ an amplitude error.)
- 10 mV. This corresponds to a full 25KHz carrier
deviation mono audio signal from the sound IF.
Page 3-4
CTC186/187
SERVICE ADJUSTMENTS - STEREO (MPX) (Continued)
Stereo VCO
This alignment is also a course adjustment for the next 6. Average the parameter value settings from steps 4 and 5.
alignment. Set the parameter value to this averaged value. This is the
1. Enter parameter # 26 (see chart). Remove the audio proper alignment value for Stereo Lowpass Filter.
generator connection from the bottom end of R1609.
False VCO frequency will be generated if WBA input is SAP Bandpass Filter
not open. 1. Enter parameter # 29 (see chart)
2. Connect a frequency counter to MPX CBA pin #6. (4 x 2. Adjust audio generator for 88 KHz, 206 mV rms, +/- 10
fH vco is automatically routed to pin #6 when in mv.
parameter #26 is selected).
3. Adjust the parameter value to 0. Observe TV screen. No
3. Adjust the parameter value for a frequency of 62,936 Hz star (*) should be present.
+/- 200 Hz. (4 x fH). The frequency increment for each
DAC step is approximately 300 Hz. 4. Increment the parameter value once per second or slower
until the star (*) becomes present. Record this value
SAP VCO setting. (A flashing * is OK. Usually, one more value
This is not a direct frequency measurement. It uses the increment will stop the flashing.)
internal status registers of the stereo IC to indicate PLL lock.
The previous alignment (STVCO) is a coarse adjust for this 5. Set the parameter value to step # 15. Observe that no * is
alignment. present. Decrement the parameter value until * once
again becomes present. Record this value setting.
1. Enter parameter # 27 (see chart).
6. Average the value settings from steps 4 and 5. Set the
2. Connect an audio generator as described in Set-up and parameter value to this averaged value. This is the proper
adjust for 78.67 KHz, 254 mv rms, +/- 10 mv. alignment value.
3. Adjust the parameter value to 0. Observe TV screen. No
star (*) should be present.
Wideband/Spectral Separation
4. Increment the parameter value once per second or slower This alignment is for the dbx wideband detector.
until the star (*) becomes present. Record this value
setting. (A flashing * is OK. Usually, one more value 1. Enter parameter # 30 (see chart).
increment will stop the flashing.) 2. Set stereo generator for stereo left channel only signal,
5. Set the parameter value to step # 15. Observe that no * is 300 Hz, 85 mV rms at 30%modulation.
present. Decrement the parameter value until * once 3. Connect AC rms voltmeter to the MPX CBA pin #6.
again becomes present. Record this value setting. 4. Set the parameter value to step # 31 (DAC midpoint).
6. Average the paremeter value settings from steps 4 and 5. 5. Start incrementing the parameter value (or
Set the parameter value to this averaged value. This is the decrementing, as necessary) while observing voltmeter
proper alignment value for SAP VCO. Setting will reading. Find the parameter value setting which produces
usually be 6 - 10. If not, verify that the previous steps a minimum voltmeter reading (null setting). Record this
were done properly. value setting. The exact null setting will typically be
difficult to determine, because the null range is rather
Stereo Lowpass Filter broad.
This alignment is also a course adjustment for the next 6. Measure MPX CBA pin #5, left channel out, and check
alignment. for at least 20 dB separation between left and right
1. Enter parameter # 28 (see chart) channel outputs.
2. Adjust audio generator for 9.4 KHz, 1.04 V rms at WBA 7. Enter parameter # 31 (see chart).
input. 8. Increase the generator from 300 Hz to 3000 Hz and repeat
3. Set the parameter value to step # 0. Observe TV screen. steps 3 thru 6.
No STEREO indicator should be present.
4. Increment the parameter value once per second or slower NOTE: If a generator capable of producing 3000 Hz is not
until STEREO indicator becomes present. Record this available, set the parameter value to the preset of 31.
value setting. (It is OK for the STEREO indicator to
flash. Usually, one more value increment will stop the 9. Return the generator to 300 Hz and the parameter to 30.
flashing.) 10. Increment (or decrement) the parameter value for
5. Set the parameter value to step # 63. Observe that no minimum voltmeter reading (null setting).
STEREO indicator is present. Decrement the value
until STEREO indicator once again becomes present.
Record this value setting.
Page 3-5
CTC186/187
SERVICE ADJUSTMENTS - TUNER ALIGNMENT
Equipment Required NOTE: Monitor RF AGC at + leg of C2306 (TP7102) or pin
12 of the T-Chip (U1001) and adjust for minimum
TOB Service Alignment Fixture- RCA Stock No 215568 voltage each step. Top and bottom covers must be in
(TAG001) place with bottom cover soldered. The entire
VCR- Used as signal source for TOB service alignment electronic tuner alignment procedure, once started,
fixture (tuner service modulator). must be completed in its entirety.
DVM- Digital volt meter.
External DC Power Supply- Voltage source to power
service modulator.
Electronic Tuner Alignment Parameters
Parameter # Parameter Name Value Range Parameter # Parameter Name Value Range
Chan to Volume to Chan to Volume to
Change adjust Change adjust
100 Ch. 2 secondary 00-63 128 Ch. 50 primary 00-63
101 Ch. 2 primary 00-63 129 Ch. 50 single 00-63
102 Ch. 2 single 00-63 130 Ch. 51 secondary 00-63
103 Ch. 6 secondary 00-63 131 Ch. 51 primary 00 63
104 Ch. 6 primary 00-63 132 Ch. 51 single 00-63
105 Ch. 6 single 00 63 133 Ch. 57 secondary 00-63
106 Ch. 14 secondary 00-63 134 Ch. 57 primary 00-63
107 Ch. 14 primary 00-63 135 Ch. 57 single 00-63
108 Ch. 14 single 00-63 136 Ch. 63 secondary 00-63
109 Ch. 17 secondary 00-63 137 Ch. 63 primary 00-63
110 Ch. 17 primary 00-63 138 Ch. 63 single 00 63
111 Ch. 17 single 00 63 139 Ch. 76 secondary 00-63
112 Ch. 18 secondary 00-63 140 Ch. 76 primary 00-63
113 Ch. 18 primary 00-63 141 Ch. 76 single 00-63
114 Ch. 18 single 00-63 142 Ch. 83 secondary 00-63
115 Ch. 13 secondary 00-63 143 Ch. 83 primary 00-63
116 Ch. 13 primary 00-63 144 Ch. 83 single 00-63
117 Ch. 13 single 00-63 145 Ch. 93 secondary 00-63
118 Ch. 34 secondary 00-63 146 Ch. 93 primary 00-63
119 Ch. 34 primary 00-63 147 Ch. 93 single 00-63
120 Ch. 34 single 00-63 148 Ch. 110 secondary 00-63
121 Ch. 37 secondary 00-63 149 Ch. 110 primary 00-63
122 Ch. 37 primary 00-63 150 Ch. 110 single 00-63
123 Ch. 37 single 00-63 151 Ch. 117 secondary 00-63
124 Ch. 48 secondary 00-63 152 Ch. 117 primary 00 63
125 Ch. 48 primary 00-63 153 Ch. 117 single 00-63
126 Ch. 48 single 00-63 154 Ch. 125 secondary 00-63
127 Ch. 50 secondary 00-63 155 Ch. 125 primary 00-63
156 Ch. 125 single 00-63
Page 3-6
CTC186/187
SERVICE ADJUSTMENTS - TUNER ALIGNMENT (Continued)
Tuner Coil Alignment (Mechanical) 12. Set parameter value range to 31.
13. Expand or compress L105 for minimum RF AGC
NOTE: The tuner coil alignment is preset at the time of voltage.
manufacture and should require no further
14. Enter parameter 155 and set parameter value range to 31.
adjustment.The following recommended procedure
should be performed only in the unlikely event that 15. Expand or compress L104 for minimum RF AGC
complete tuner alignment is necessary (when voltage.
necessary this procedure must be performed prior to 16. Enter parameter 156 and set parameter value range to 31.
the electronic tuner alignment). Bottom cover must 17. Expand or compress L102 for minimum RF AGC
be in place and soldered. Use a plastic or wooden voltage.
stick for knifing coils.
18. Manually tune instrument and tuner service modulator to
channel 50 (band 2) and enter parameter 127.
19. Set parameter value range to 31.
1. Manually tune instrument and tuner service modulator to
channel 125 (Band 3) and enter parameter # 154. 20. Expand or compress L113 for minimum RF AGC
voltage.
2. Connect DVM to tuner side of R7525.
21. Enter parameter 128 and set parameter value range to 31.
3. If voltage reading is not between 4.55V and 4.75V
expand or compress L303 to set voltage within these 22. Expand or compress L111 for minimum RF AGC
limits. voltage.
4. Manually tune instrument and tuner service modulator to 23. Enter Parameter 129 and set parameter value range to
channel 50 (Band 2) and enter parameter # 127. 31.
5. Retain DVM connection step 2. 24. Expand or compress L107 for minimum RF AGC
voltage.
6. If voltage reading is not between 4.80V and 5.00V
expand or compress L304 to set voltage within these 25. Manually tune instrument and service modulator to
limits. channel 17 (band 1) and enter parameter 109.
7. Manually tune instrument and tuner service modulator to 26. Set parameter value range to 31.
channel 17 (Band 1) and enter parameter # 109. 27. Expand or compress L114 for minimum RF AGC
8. Retain DVM connection step 2. voltage.
9. If voltage reading is not between 4.40V and 4.60V 28. Enter parameter 110 and set parameter value range to 31.
expand or compress L305 to set voltage within these 29. Expand or compress L112 for minimum RF AGC
limits. voltage.
10. Manually tune instrument and tuner service modulator to 30. Enter parameter 111 and set parameter value range to 31.
channel 125 (band 3) and enter parameter 154. 31. Expand or compress L106 for minimum RF AGC
11. Connect DVM to positive leg of C7503 (RF AGC to voltage.
tuner). 32. Perform electronic tuner alignment in its entirety.
Page 3-7
CTC186/187
TUNER VOLTAGE
U7301
CHARTS
OFF-AIR OPERATION U7401
Pin Lo V Chan. Hi V Chan. UHF Chan. Lo V Hi V UHF
No. 2 6 7 13 14 40 69 1. 1.75V 2.1IV 1.72V
1. 5.43V 5.42V 5.38V 5.38V 5.30V 5.22V 5.30V 2. 2.11V 2.11V 2.11V
2. 2.93V 2.98V 2.95V 2.95V 3.18V 3.16V 3.18V 3. 2.11V 2.11V 2.11V
3. 7.80V 7.81V 7.75V 7.69V 7.56V 7.51V 7.56V 4. 4.78V 4.78V 4.78V
4. 2.99V 2.99V 2.96V 2.97V 3.18V 3.16V 3.18V 5. 4.71V 4.71V 4.71V
5. 7.82V 7.81V 7.75V 7.71V 7.56V 7.51V 7.56V 6. 0V 0V 0V
6. 0V 0V 0V 0V 0V 0V 0V 7. 1.32V 1.32V 1.34V
7. 3.06V 3.06V 3.04V 3.01V 0V 0V 0V 8. 11.5V 0V 0V
8. 9.06V 9.03V 8.97V 8.89V 8.84V 8.80V 8.84V 9. 7.41V 7.41V 0V
9. 3.02V 3.02V 2.98V 2.98V 3.36V 3.33V 3.36V 10. 4.85V 4.85V 4.85V
10. 3.25V 3.25V 3.22V 3.19V 2.88V 2.87V 2.88V 11. 2.30V 2.30V 2.30V
11. 4.94V 5.00V 5.06V 5.02V 9.62V 9.58V 9.62V 12. 2.30V 2.30V 2.30V
12. 3.25V 3.23V 3.22V 3.19V 2.87V 2.87V 2.88V 13. 0V 0V 0V
13. 0V 0V 0V 0V 0V 0V 0V 14. 0.60V 0.60V 0.60V
14. 9.05V 9.04V 8.97V 8.90V 5.43V 5.39V 5.46V
15. 3.43V 3.43V 3.40V 3.37V 2.88V 2.84V 2.88V Q7101
16. 3.44V 3.43V 3.40V 3.38V 2.89V 2.89V 2.89V Lo V Hi V UHF
2 7 14
Gl 0V 0V 4.84V
U7501
G2 5.03V 6.54V 7.19V
Pin Lo V Hi V UHF D 0.16V 0.20V 11.3V
No. 2 6 7 13 14 40 69 S 0.19V 0.17V 4.83V
1. 1.36V 1.96V 1.58V 1.93V 1.74V 2.90V 4.84V
2. 1.36V 1.96V 1.58V 1.93V 1.74V 2.90V 4.84V Q7102
Gl 4.64V 4.58V 4.61V
3. 1.35V 1.95V 1.57V 1.92V 1.73V 2.89V 4.83V
G2 5.32V 6.85V 7.19V
4. 33.0V 33.0V 33.0V 33.0V 33.0V 33.0V 33.0V
D 11.3V l1.2V 11.4V
5. 1.06V 1.74V 1.47V 1.87V 1.46V 2.53V 4.08V
S 4.08V 4.20V 11.3V
6. 1.06V 1.74V 1.47V 1.87V 1.46V 2.54V 4.09V
7. 1.06V 6.05V 4.09V 7.03V 3.95V 11.8V 23.2V
Q7401
8. 0.68V 4.57V 3.46V 6.19V 4.41V 12.3V 24.0V
E 0V 0V 0V
9. 1.01V 1.54V 1.39V 1.76V 1.52V 2.60V 4.19V
B 0.60V 0.60V 0.60V
10. 1.01V 1.54V 1.39V 1.76V 1.52V 2.60V 4.19V
11. 0V 0V 0V 0V 0V 0V 0V C 2.06V 3.85V 17.8V
12. 1.05V 1.75V 1.36V 1.72V 1.44V 2.51V 4.15V
13. 1.05V 1.75V 1.36V 1.72V 1.44V 2.51V 4.15V Q7402
14. 1.01V 6.10V 3.24V 5.92V 3.78V 11.6V 23.6V E 11.4V 11.2V 11.3V
B 11.3V 10.5V 10.6V
C -14.9V 11.1V 11.2V
Q7403
E 0V 0V 0V
B 0.70V 0.70V 0V
C 0.10V 0.10V 11.3V
Q7404
E 11.4V 11.2V 11.3V
B 11.0V 10.9V 10.6V
C 0.llV 0.llV 11.3V
Page 3-8
CTC186/187
TUNER VOLTAGE
U7301
CHARTS
CABLE OPERATION U7401
Pin Band 1 Band 2 Band 3 Band 1 Band 2 Band 3
No. 2 17 18 50 51 75 99 2 18 51
1. 5.44V 5.40V 5.41V 5.40V 5.30V 5.28V 5.48V 1. 1.75V 1.74V 1.74V
2. 2.99V 2.96V 2.96V 2.96V 3.18V 3.17V 3.00V 2. 2.11V 2.11V 2.11V
3. 7.80V 7.78V 7.77V 7.75V 7.57V 7.57V 7.89V 3. 2.11V 2.11V 2.11V
4. 2.99V 2.96V 2.96V 2.97V 3.18V 3.17V 3.00V 4. 4.78V 4.78V 4.78V
5. 7.82V 7.78V 7.75V 7.77V 7.56V 7.57V 7.89V 5. 4.71V 4.71V 4.71V
6. 0V 0V 0V 0V 0V 0V 0V 6. 0V 0V 0V
7. 3.06V 3.04V 3.05V 3.05V 0V 0V 3.08V 7. NC NC NC
8. 9.02V 9.01V 8.97V 8.89V 8.84V 8.83V 9.14V 8. 11.5V 0V 0V
9. 3.02V 3.02V 2.98V 2.98V 3.36V 3.35V 3.01V 9. 7.47V 7.42V 0V
10. 3.25V 3.23V 3.22V 3.23V 2.88V 2.87V 3.28V 10. 4.85V 4.85V 4.85V
11. 4.96V 5.04V 5.06V 5.16V 9.62V 9.58V 5.14V 11. 2.30V 2.30V 2.30V
12. 3.26V 3.23V 3.22V 3.23V 2.87V 2.87V 3.28V 12. 2.30V 2.30V 2.30V
13. 0V 0V 0V 0V 0V 0V 0V 13. 0V 0V 0V
14. 9.05V 9.00V 8.97V 9.00V 5.43V 5.42V 9.13V 14. 0.60V 0.60V 0.60V
15. 3.43V 3.41V 3.42V 3.41V 2.88V 2.87V 3.46V
16. 3.41V 3.41V 3.40V 3.41V 2.89V 2.89V 3.47V Q7101
Band 1 Band 2 Band 3
2 17 51
U7501
Gl 0V 0V 4.84V
G2 5.05V 4.17V 7.19V
Pin Band 1 Band 2 Band 3
D 0V 0.10V 11.3V
No. 2 17 18 50 51 75 99
S 0.10V 0.10V 4.83V
1. 1.36V 4.63V 1.30V 5.52V 1.20V 2.21V 2.86V
2. 1.36V 4.63V 1.30V 5.52V 1.20V 2.21V 2.86V
Q7102
3. 1.36V 4.63V 1.30V 5.52V 1.20V 2.21V 2.86V
Gl 4.59V 4.65V 4.61V
4. 33.0V 33.0V 33.0V 33.0V 33.0V 33.0V 33.0V
G2 5.44V 4.50V 7.19V
5. 1.06V 3.62V 1.16V 4.68V 0.99V 1.90V 2.54V
D 11.3V l1.2V 11.1V
6. 1.06V 3.62V 1.16V 4.68V 0.99V 1.90V 2.54V
S 4.08V 3.71V 11.0V
7. 1.06V 19.8V 1.78V 27.6V 0.54V 7.2V 11.9V
8. 0.68V 24.2V 1.03V 25.3V 0.86V 7.63V 12.5V
Q7401
9. 1.01V 4.22V 1.10V 4.38V 1.01V 1.96V 2.62V E 0V 0V 0V
10. 1.01V 4.22V 1.10V 4.38V 1.01V 1.96V 2.62V
B 0.60V 0.60V 0.60V
11. 0V 0V 0V 0V 0V 0V 0V
12. 1.05V 4.36V 1.07V 4.76V 0.99V 1.86V 2.66V C 2.06V 1.65V 1.00V
13. 1.05V 4.36V 1.07V 4.76V 0.99V 1.86V 2.66V
14. 1.01V 25.2V 1.12V 28.1V 0.54V 6.91V 12.7V Q7402
E 11.3V 11.4V 11.4V
B 11.4V 10.6V 10.6V
C -14.5V 11.2V 11.2V
Q7403
E 0V 0V 0V
B 0.70V 0.70V 0V
C 0.10V 0.10V 11.3V
Q7404
E 11.4V 11.4V 11.3V
B 11.0V 10.9V 10.6V
C 0.llV 0.llV 11.3V
Page 3-9
◦ Jabse Service Manual Search 2024 ◦ Jabse Pravopis ◦ onTap.bg ◦ Other service manual resources online : Fixya ◦ eServiceinfo