Service Manuals, User Guides, Schematic Diagrams or docs for : Samsung LCD TV GSD40SEN chassis samsung_gsd27sen_chassis_le27s73bd_lcd
<< Back | HomeMost service manuals and schematics are PDF files, so You will need Adobre Acrobat Reader to view : Acrobat Download Some of the files are DjVu format. Readers and resources available here : DjVu Resources
For the compressed files, most common are zip and rar. Please, extract files with Your favorite compression software ( WinZip, WinRAR ... ) before viewing. If a document has multiple parts, You should download all, before extracting.
Good luck. Repair on Your own risk. Make sure You know what You are doing.
Image preview - the first page of the document
>> Download samsung_gsd27sen_chassis_le27s73bd_lcd documenatation <<
Text preview - extract from the document
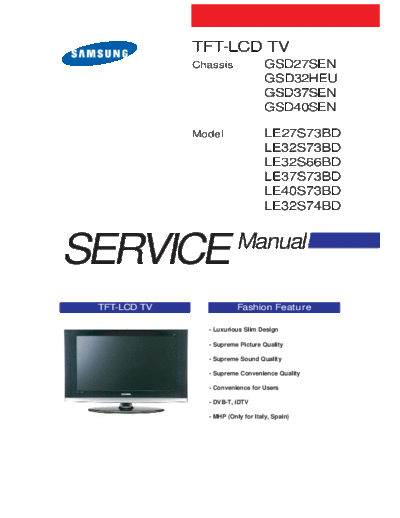
TFT-LCD TV
Chassis GSD27SEN
GSD32HEU
GSD37SEN
GSD40SEN
Model LE27S73BD
LE32S73BD
LE32S66BD
LE37S73BD
LE40S73BD
LE32S74BD
SERVICE Manual
TFT-LCD TV Fashion Feature
- Luxurious Slim Design
- Supreme Picture Quality
- Supreme Sound Quality
- Supreme Convenience Quality
- Convenience for Users
- DVB-T, iDTV
- MHP (Only for Italy, Spain)
Copyright Trademarks
2007 by Samsung Electronics Co., Ltd. Samsung is the registered trademark of Samsung
Electronics Co., Ltd.
All rights reserved.
LE27S73BD/LE32S66BD/LE37S73BD/
This manual may not, in whole or in part, be copied, LE40S74BD and Macmaster Cable Adapter are
photocopied, reproduced, translated, or converted to any trademarks of Samsung Electronics Co., Ltd.
electronic or machine readable form without prior
written permission of Samsung Electronics Co., Ltd. Macintosh and Power Macintosh are trademarks of
Apple Computer, Inc.
LE27S73BD/LE32S66BD/LE37S73BD/
LE40S74BD Service Manual All other trademarks are the property of their respective
owners.
First edition April 2007.
Printed in Korea.
ii
Contents
1. Precautions .........................................................................................................................................................1-1
1
1-1 Safety Precautions ....................................................................................................................................... 1-1
1-2 Servicing Precautions .................................................................................................................................... 1-2
1-3 Static Electricity Precautions ........................................................................................................................... 1-3
1-4 Installation Precautions.................................................................................................................................... 1-4
2. Product specifications ..........................................................................................................................................2-1
2
2-1 Fashion Feature ............................................................................................................................................. 2-1
2-2 Technical and Environmental Specifications......................................................................................................... 2-2
2-3 LE27S73BD Specifications .............................................................................................................................. 2-4
2-4 LE32S73BD Specifications .............................................................................................................................. 2-5
2-5 LE37S73BD Specifications .............................................................................................................................. 2-6
2-6 LE40S73BD Specifications .............................................................................................................................. 2-7
2-7 DTV Specification .......................................................................................................................................... 2-8
2-8 Spec Comparison .......................................................................................................................................... 2-9
2-9 Option Specification .................................................................................................................................... 2-10
3. Alignments and Adjustments .................................................................................................................................3-1
3
3-1 Service Instruction ....................................................................................................................................... 3-1
3-2 How to Access Service Mode ........................................................................................................................... 3-2
3-3 Factory Data ................................................................................................................................................ 3-3
3-4 Service Adjustment ....................................................................................................................................... 3-6
3-5 Software Upgrade .......................................................................................................................................... 3-8
3-6 DTV Program Download & Generals .................................................................................................................. 3-9
4. Troubleshooting ................................................................................................................................................4-1
4
4-1 First Checklist for Troubleshooting .....................................................................................................................4-1
4-2 Checkpoints by Error Mode .............................................................................................................................. 4-2
5. Exploded View and Parts List .................................................................................................................................5-1
5
5-1 LE27S73BD Exploded View ........................................................................................................................... 5-1
5-2 LE27S73BD Parts list .................................................................................................................................... 5-2
5-3 LE32S66BD Exploded View ........................................................................................................................... 5-3
5-4 LE32S66BD Parts list .................................................................................................................................... 5-4
5-5 LE37S73BD Exploded View ........................................................................................................................... 5-5
5-6 LE37S73BD Parts list .................................................................................................................................... 5-6
5-7 LE40S73BD / LE40S74BD Exploded View ......................................................................................................... 5-7
5-8 LE40S73BD / LE40S74BD Parts list .................................................................................................................. 5-8
6. Electrical Parts List .............................................................................................................................................6-1
6
6-1 LE27S73BD Parts List .................................................................................................................................... 6-1
6-2 LE32S66BD Parts List ................................................................................................................................. 6-25
6-3 LE37S73BD Parts List ................................................................................................................................. 6-47
6-4 LE40S73BD / LE40S74BD Parts List ............................................................................................................... 6-68
Contents
7. Block Diagram ...................................................................................................................................................7-1
7
7-1 Main Block Diagram ....................................................................................................................................... 7-1
7-2 DTV Block Diagram ....................................................................................................................................... 7-2
7-3 DTV Block Diagram(Only for Italy/Spain) ............................................................................................................ 7-5
7-4 DTV Power Block Diagram .............................................................................................................................. 7-6
8. Wiring Diagram ...................................................................................................................................................8-1
8
8-1 LE27S73BD/LE32S73BD/LE37S73BD/LE40S73BD Wiring Diagram ........................................................................ 8-1
8-2 Main Board Layout ....................................................................................................................................... 8-2
8-3 PIN characteristic .......................................................................................................................................... 8-5
8-4 Power Board Layout ....................................................................................................................................... 8-6
9. Schematic Diagrams .............................................................................................................................................9-1
9
10. Operating Instructions and Installation.....................................................................................................................10-1
1
10-1 Front ...................................................................................................................................................... 10-1
10-2 Connection Panel ....................................................................................................................................... 10-2
10-3 Remote Control .......................................................................................................................................... 10-5
10-4 Installing the Stand .................................................................................................................................... 10-6
10-5 Installing the Wall Mount Kit ........................................................................................................................ 10-6
11. Disassembly and Reassembly ..............................................................................................................................11-1
1
11-1 Disassembly ............................................................................................................................................. 11-1
11-2 Reassembly ............................................................................................................................................. 11-5
12. PCB Diagram ...................................................................................................................................................12-1
1
12-1 27" Main PCB Diagram .............................................................................................................................. 12-1
12-2 32", 37", 40" Main PCB Diagram .................................................................................................................. 12-2
12-3 DTV MODULE PCB Diagram (Only for Italy/Spain) .......................................................................................... 12-3
12-4 DTV MODULE PCB Diagram ........................................................................................................................ 12-4
13. Circuit Descriptions .............................................................................................................................................13-1
1
13-1 Main Signal Description .............................................................................................................................. 13-1
13-2 DTV Signal Description .............................................................................................................................. 13-2
13-3 DTV Signal Description (Only for Italy/Spain) ................................................................................................... 13-3
13-4 RF/DTV Tuner (DNOS303ZH261B(S)) SPEC.. ................................................................................................ 13-4
13-5 DTV MAIN ChipSet .................................................................................................................................... 13-8
13-6 DTV MAIN Chipset (Only for Italy/Spain) ...................................................................................................... 13-11
14. Reference Infomation ..........................................................................................................................................14-1
1
14-1 Technical Terms ....................................................................................................................................... 14-1
14-2 Pin Assignments ....................................................................................................................................... 14-4
14-3 Timing Chart ............................................................................................................................................. 14-7
14-4 Panel Description .................................................................................................................................... 14-11
Samsung Electronics Co.,Ltd.
- This Service Manual is a property of 416, Maetan-3Dong, Yeongtong-Gu, Suwon City,
Samsung Electronics Co., Ltd. Gyeonggi-Do, Korea, 443-742
Any unauthorized use of Manual can be Printed in Korea
punished under applicable International P/N : BN82-00139V-00
and/or domestic law. URL : http://itself.sec.samsung.co.kr/
3 Alignments and Adjustments
3 Alignments and Adjustments
3-1 Service Instruction
1. Usually, a color TV-VCR needs only slight touch-up adjustment upon installation.
Check the basic characteristics such as height, horizontal and vertical sync.
2. Use the specified test equipment or its equivalent.
3. Correct impedance matching is essential.
4. Avoid overload. Excessive signal from a sweep generator might overload the front-end
of the TV. When inserting signal markers, do not allow the marker generator to distort
test result.
5. Connect the TV only to an AC power source with voltage and frequency as specified on
the backcover nameplate.
6. Do not attempt to connect or disconnect any wire while the TV is turned on. Make sure
that the power cord is disconnected before replacing any parts.
7. To protect aganist shock hazard, use an isolation transform.
3-1
3 Alignments and Adjustments
3-2 How to Access Service Mode
3-2-1 Entering Factory Mode
" "
Power OFF INFO MENU MUTE Power ON
- If you have Factory remote - control
PICTURE ON DISPLAY FACTORY
- The buttons are active in the service mode.
1. Remote - Control Key : Power, Arrow Up, Arrow Down, Arrow Left
Arrow Right, Menu, Enter, Number Key(0~9)
2. Function - Control Key : Power, CH +, CH -, VOL +, VOL -,
Menu, TV/VIDEO(Enter)
3-2-2 Panel Check
Specially for LE32R71B, You have to check Panel Maker Because of different adjustments as follows.
First of all, Check the label rating!
1) Label Rating File
* If not printed you could consider S(sec) panel mark.
2) If Panel Mark is "A", Set the factory mode indicating as follows.
* Option Byte
1. Inch Option 32"
2. Gamma 32"AUO
3. Panel Option AUO
Others are same shown below.
3-2
3 Alignments and Adjustments
3-3 Factory Data
1. Calibration
2. Option Table XXXX XXXX
3. White Balance
4. SVP-PX
5. Option Block
6. STV8257/STA323W
7. YC Delay
8. Adjust
9. I2C Check
10. W/B MOVIE
11. Checksum
12. Reset
13. Spread Spectrum
T-BRDMPEUD-0036 (Main Micom Ver)
T-CBGMPEUS-0004 (Sub Micom Ver)
Month / Day / Year / Hour / Min. / Sec.
3-3
3 Alignments and Adjustments
1. Calibration
1) AV Calibration
2) COMP Calibration
3) PC Calibration
4) HDMI Calibration
2. Option Table XXXX XXXX
Inch Option 27/32/37/40 27" 32" 37" 40"
Gamma Off/AUO/CMO/AMLCD CMO Off/CMO AUO AMLCD
Panel Option AUO/CMO/AMLCD/AMLCD_INT/ CMO AMLCD_INT/ AUO AMLCD_INT
Panel3/4/5/6 AUO_MVA
2HDMI On/Off Off Off Off Off
Brt.Sensor On/Off Off Off Off Off
Energy Save On/Off On On On On
LBE/FBE On/Off Off Off Off Off
FRC (Micronas) On/Off Off Off Off Off
FRC2X On/Off Off Off Off Off
LNA On/Off On On On On
Carrier Mute On/Off Off Off Off Off
Language 18 Language Support English English English English
Auto FM On/Off On On On On
High Deviation On/Off Off Off Off Off
TTX On/Off On On On On
TTX List Flof/List Flof Flof Flof Flof
ACR On/Off Off Off Off Off
Dynamic CE On On On On
Dynamic Dimming On On On On
Turner TOP 8 8 8 8
TTX Group Auto/West/East/Russian/Greek/ Auto Auto Auto Auto
Turkey/Arabic/Farsian/Arab, Hbrw
Auto Power On/Off On On On On
Magazine LNA On/Off Off Off Off Off
Volume Mode Fix Small Small Small Small
Shop Mode On/Off Off Off Off Off
Debug On/Off Off Off Off Off
Ch. Table SUWON SUWON SUWON SUWON
iDTV_Cntry UK/France/Germay/Sweden/ UK/Spain/Finland UK/Spain/Finland UK/Spain/Finland UK/Spain/Finland
Italy/Spain/Finland
Dynamic Contrast On/Off Off Off Off Off
3-4
3 Alignments and Adjustments
3. White Balance
No Item Range TV/AV Component PC DVI(HDMI)
1 Sub-Brightness 0~255 80 115 128 140
2 R-offset 0~255 120 130 128 129
3 G-offset 0~255 128 128 128 128
4 B-offset 0~255 113 128 128 128
5 Sub-Contrast 0~63 36 32 32 28
6 R-Gain 0~255 140 129 128 130
7 G-Gain 0~255 128 128 128 128
8 B-Gain 0~255 150 129 128 120
4. SVP-EX
1) Comb Filter
No Item Range EEPROM NTSC PAL SECAM Control IC Remark
1 Y-Filter 0~255 80h X
2) Peaking
No Item Range EEPROM TV AV Component Control IC Remark
1 Y-Peaking 0~255 80h X
2 Peaking Delay 0~255 80h X
3 Peaking Gain 0~255 80h X
4 Peaking Width 0~255 80h X
5 Peaking f0 0~255 80h X
3) NR
No Item Range EEPROM TV/AV/S-Video Component PC Control IC Remark
1 Y-NR-Off 0~255 80h X
2 C-NR-Off 0~255 80h X
3 Y-NR-ON 0~255 80h X
4 C-NR-ON 0~255 80h X
4) Delnterlace
No Item Range EEPROM TV/AV/S-Video Component PC Control IC Remark
1 Monitor 0~255 80h X
3-5
3 Alignments and Adjustments
5) Picture Gain Adjust
No Item Range EEPROM TV/AV/S-Video Component PC DVI/HDMI
1 TCD3 Contrast 0~255 AV Calibration(78h) 78h 78h 78h
2 TCD3 Brightness 0~255 AV Calibration(20h) 20h 20h 20h
3 TCD3 CR Saturation 0~255 78h 78h 78h 78h
4 TCD3 CB Saturation 0~255 78h 78h 78h 78h
5 TCD3 YC Delay 0~15 00h 00h 00h 00h
6 Analog Y offset 00~255 40h 3 40h 40h
7 Analog PB offset 00~255 80h DTV Calibration(80h) 80h 80h
8 Analog PR offset 00~255 80h DTV Calibration(80h) 80h 80h
9 Analog Y Gain 00~255 D6h DTV Calibration(D6h) D6h D6h
10 Analog PB Gain 00~255 FEh FEh FEh FEh
11 Analog PR Gain 00~255 FEh FEh FEh FEh
12 Black Level Setting 00~255 00h
13 Brightness (SVP) 0~255 00h
5. MST9883
No Item Range EEPROM TV/AV/S-Video Component PC DVI/HDMI
1 R-offset 00~255 151 (SC1 RGB) PC Calibration(128)
2 G-offset 00~255 151 (SC1 RGB) PC Calibration(128)
3 B-offset 00~255 151 (SC1 RGB) X PC Calibration(128) X
4 R-Gain 00~255 123 (SC1 RGB) PC Calibration(192)
5 G-Gain 00~255 123 (SC1 RGB) PC Calibration(192)
6 B-Gain 00~255 123 (SC1 RGB) PC Calibration(192)
6. MSP34XX/44XX
No Item Range EEPROM PAL
1 FM-Prescale 00~255 20h
2 NT-M-Prescale 00~255 20h
3 SECAM-L-Prescale 00~255 22h
4 NICAM-Prescale 00~255 42h
5 AV-Prescale 00~255 1Ah
6 12S_1 Prescale 00~255 10h
7 12S_12 Prescale 00~255 10h
8 Carrier Mute 00~255 42h
9 Pilot High 00~255 14
10 Pilot Low 00~255 7
3-6
3 Alignments and Adjustments
7. YC Delay
No Item Range EEPROM TV/AV/S-Video Component PC DVI/HDMI
1 RF PAL-B/G 00~255 77h
2 RF PAL-D/K 00~255 88h
3 PF PAL-I 00~255 66h
4 RF SECAM-B/G 00~255 88h
5 PF SECAM-D/K 00~255 77h
6 RF SECAM-L/L' 00~255 88h
7 RF NTSC 3.58 00~255 66h 88h 88h 88h
8 RF NTSC 4.43 00~255 CCh
9 AV PAL 00~255 77h
10 AV SECAM 00~255 BBh
11 AV NTSC 3.58 00~255 66h
12 AV NTSC 4.43 00~255 CCh
13 AV PAL60 00~255 77h
8. Adjust
No Item Range EEPROM TV/AV/S-Video Component PC DVI/HDMI Control IC Remark
1 Video Mute Time 10
2 Melody Volume 0~20 5
Ana_Dimm_Max FEH
3 TTX Contrast 0~100 50
4 TTX Brightness 0~100 50
5 TTX Color 0~100 50
6 Dynamic Contrast 0~100 100
7 Dynamic Brightness 0~100 50 Dynamic
8 Dynamic Color 0~100 55 Mode
9 Dynamic Sharpness 0~100 75
10 Standard Contrast 0~100 80
11 Standard Brightness 0~100 50 Standard
12 Standard Color 0~100 50 Mode
13 Standard Sharpness 0~100 50
14 Movie Contrast 0~100 70
15 Movie Brightness 0~100 50 Movie
16 Movie Color 0~100 25 Mode
17 Movie Sharpness 0~100 45
No Item Range EEPROM TV/AV/S-Video Component/PC/HDMI
1 LNA PLUS
2 RFDB_1 Level 1
3 RFDB_2 Level 5 X P4 CVD2 0x7F
4 RFDB_3 Level 10 [07..00]
5 RFDB_4 Level 16
3-7
3 Alignments and Adjustments
9. 12C Check
10. Chip Debugger : OFF
11. Checksum XXXX XXXX
12. Reset
13. Spread Spectrum
1 Spectrum ON
2 Delta -3
3 Positive 8
4 Negative 2
3-8
3 Alignments and Adjustments
3-4 Service Adjustment
3-4-1 White Balance - Calibration
If picture color is wrong, do calibration first.
Equipment : CA210, Patten : chess pattern
Execute calibration in Factory Mode
Source AV : PAL composite, Component : 1280*720/60Hz
PC : 1024*768/60Hz
( chess patten )
3-4-2 White Balance - Adjustment
If picture color is wrong, check White Balance condition.
Equipment : CA210, Patten : Toshiba
Adjust W/B in Factory Mode
Sub brightness and R/G/B Offset controls low light region
Sub contrast and R/G/B Gain controls high light region
Source AV : PAL composite, Component : 1280*720/60Hz
HDMI[DVI] : 1280*720/60Hz
[ Test Pattern : MSPG-945 Series Pattern #16 ]
*Color temperature
1500K +/-500, -6 ~-20 MPCD
*Color coordinate
H/L : 267/263 +/- 2 35.0 Ft +/- 2.0Ft
L/L : 270/260 +/- 3 1.5 Ft +/- 0.2Ft
Toshiba Patten
3-9
3 Alignments and Adjustments
3-4-3 Conditions for Measurement
1. On the basis of toshiba ABL pattern : High Light level (57 IRE)
- INPUT SIGNAL GENERATOR : MSPG-925LTH
* Mode NO 2 : 744X484@60 Hz
NO 6 : 1280X720@60 Hz
NO 21 : 1024X768@60 Hz
* Pattern NO 36 : 16 Color Pattern
NO 16 : Toshiba ABL Pattern
2. Optical measuring device : CA210 (FL)
Please use the MSPG-925 LTH generator for model LE26M51B/LE32M51B/LE40M51B/LE46M51B.
3-4-4 Method of Adjustment
1. Adjust the white balance of AV, Component and DVI Modes.
(AV Component)
a) Set the input to the mode in which the adjustment will be made
(RF DTV PC DVI).
* Input signal - VIDEO Mode : Model #2 (744*484 Mode), Pattern #16
- DTV,DVI Mode : Model #6 (1280*720 Mode), Pattern #16
- HDMI Mode: Model #6(1280*720 Mode), Pattern #16
b) Enter factory color control, confirm the data.
c) Adjust the low light. (Refer to table 1, 2 in adjustment position by mode)
- Adjust sub - Brightness to set the 'Y' value.
- Adjust red offset ('x') and blue offset ('y') to the color coordinates.
Picture 4-2 Toshiba ABL Pattern
Low light
Measurement point
* Do not adjust green offset data.
d) Adjust the high light. (Refer to table 1, 2 in adjustment position by mode)
- Adjust red gain ('x') and blue gain ('y') to the color coordinates.
* Do not adjust the green gain and sub-contrast (Y) data.
3-10
3 Alignments and Adjustments
3-5 Software Upgrade
3-5-1 How to Update Flash ROM
1. Installthe Flash Downloader
ConnectSet(Service Jack)and Jig Cable to execute Program Update.
2. Flash Downloader program update
-Before Turning on the set,Click "connect"which is under of OSD Screen!
-Turn on the Set.
3-11
3 Alignments and Adjustments
3-6 DTV Program Download & Generals
3-6-1 Software Version Check Method
Press the MENU key and select System.
Where you can find the Prodect Information menu in it.
When you press the Product Information you can find the Software Version.
3-6-2 Serial Download
Method
1) Turn off LCD-TV.
2) Connect the RS-232 cable to the
LCD-TV
3) Execute the sv2_fr.exe file.
4) Assign the path of samsung.tvz
file (application image)
5) Execute the progress follow the
screen until step 2.
6) Turn On the LCD-TV.
7) If the LCD-TV turn on during the sv2_fr.exe execution, it will automatically find the COM port and
execute the upgrade.
3-6-3 Hyper Terminal Setting
Set the hyper terminal to observe the progress of the TV via the RS-232 cable.
Set up hyper terminal.
1) When setting up a hyper terminal, set it in sub-program.
2) Enter a new name.
3) Select a modem port. (com 1 and direct connection.)
4) Set the bit/second to 115200.
5) Set the data bit to 8.
6) No parity bit.
7) Set stop bit to 1.
8) No flow control.
9) Save in memory.
10) At this point, the new hyper terminal is ready.
3-6-4 Resetting the System Parameters
1) Press the MENU button and select the Reset menu of System.
2) Press the secret number.
3) Press the RED, GREEN, YELLOW, BLUE button in order, after the Reset execute.
4) In a few minutes, DTV will booting again.
3-12
3 Alignments and Adjustments
Memo
3-13
10 Operating Instructions and Installation
10 Operating Instructions and Installation
10-1 Front
- The product colour and shape may vary depending on the model.
1. SOURCE 5. Speakers
Toggles between all the available input sources
(TV, Ext.1 , Ext.2, AV, S-Video, Component, PC, 6. Rremote Control Sensor
HDMI1, HDMI2). Aim the remote control towards this spot on the TV.
In the on-screen menu, use this button as you use the
ENTER button on the remote control. 7. (Power)
Press to turn the TV on and off.
2. MENU
Press to see an on-screen menu of your TV's features. 8. Power Indicator
Blinks and turns off when the power is on and lights
3. up in stand-by mode.
Press to decrease or increase the volume.
In the on-screen menu, use the buttons as
you use the and buttons on the remote control.
4. C/P.
Press to change channels.
In the on-screen menu, use the C/P. buttons
as you use the and buttons on the remote control.
(Without the Remote Control, you can turn on the TV
by using the Channel buttons.)
10-1
10 Operating Instructions and Installation
10-2 Connection Panel
- Whenever you connect an external device to your TV, make sure that power on the unit is turned off.
- When connecting an external device, match the colour of the connection terminal to the cable.
10-2
10 Operating Instructions and Installation
1. Connecting HDMI/DVI
- Supports connections between HDMI-connection-enabled AV devices (Set-Top Boxes, DVD players, AV receivers
and digital TVs).
- No additional Audio connection is needed for an HDMI to HDMI connection.
What is HDMI?
- "High Definition Multimedia interface" allows the transmission of high definition digital video data and
multiple channels of digital audio ( 5.1 channels).
- The HDMI/DVI terminal supports DVI connection to an extended device with the appropriate cable (not supplied).
The difference between HDMI and DVI is that the HDMI device is smaller in size, has the HDCP
(High Bandwidth Digital Copy Protection) coding feature installed, and supports multi - channel digital audio.
You should use the DVI-to-HDMI cable or DVI-HDMI Adapter for the connection, and the "R - AUDIO - L"
terminal on DVI for sound output.
- When connecting this product via HDMI or DVI to a Set Top Box, DVD Player or Games Console etc, make
sure that it has been set to a compatible video output mode as shown in the table below.
Failure to observe this may result in picture distortion, image breakup or no picture.
Supported modes for DVI or HDMI
480i 480p 576i 576p 720p 1080i
50Hz X O X O O O
60Hz X O X X O O
Component O O O O O O
- Do not attempt to connect the HDMI/DVI connector to a PC or Laptop Graphics Card.
(This will result in a blank screen being displayed)
3. Connecting Set-Top Box, VCR or DVD
Connector Input Output
Video Audio (L/R) RGB Video + Audio (L/R)
EXT 1 Only TV or DTV output is available.
EXT 2 Output you can choose.
- Inputs or outputs for external devices, such as VCR, DVD, video game device or video disc players.
5. Connecting External A/V Devices
- Connect RCA or S-VIDEO cable to an appropriate external A/V device such as VCR, DVD or Camcorder.
- Connect RCA audio cables to "R - AUDIO - L" on the rear of your set and the other ends to corresponding audio
out connectors on the A/V device.
- Headphone may be connected to the headphone output ( 4 ) on the rear of your set. While the headphone is
connected, the sound from the built-in speakers will be disabled.
6. SERVICE
- Service connection for qualified service engineer.
7. Connecting AUDIO
- Connect RCA audio cables to "R - AUDIO - L" on the rear of your set and the other ends to corresponding audio
in connectors on the Amplifier or DVD Home Theater.
8. Connecting Computer
- Connect the D- Sub cable (optional) to "PC (PC IN)" on the rear of your set and the other end to the Video Card of
your computer.
- Connect the stereo audio cable (optional) to "AUDIO (PC IN)" on the rear of your set and the other end to "Audio
Out" of the sound card on your computer.
9. Connecting Component Devices (DTV/DVD)
- Connect component video cables (optional) to component connector ("PR", "PB", "Y") on the rear of your set and
the other ends to corresponding component video out connectors on the DTV or DVD.
- If you wish to connect both the Set-Top Box and DTV (or DVD), you should connect the Set-Top Box to the DTV
(or DVD) and connect the DTV (or DVD) to component connector ("PR", "PB", "Y") on your set.
- The PR, PB and Y connectors on your component devices (DTV or DVD) are sometimes labeled Y, B-Y and R-Y
or Y, Cb and Cr.
- Connect RCA audio cables (optional) to "R - AUDIO - L" on the rear of your set and the other ends to
corresponding audio out connectors on the DTV or DVD.
- This LCD TV displays its optimum picture resolution in 720p mode.
- This LCD TV displays its maximum picture resolution in 1 080i mode.
10. Kensington Lock
- The Kensington lock (optional) is a device used to physically fix the system when used in a public place.
- If you want to use a locking device, contact the dealer where you purchased the TV.
- The place of the Kensington Lock may be different depending on its model.
10-3
10 Operating Instructions and Installation
11. DIGITAL AUDIO OUT (OPTICAL)
- Connect to a Digital Audio Component.
12. Connecting CI (Common Interface) CARD
- When not inserting "CI CARD" in some channels,
"Scrambled Signal" is displayed on the screen.
- The pairing information containing a telephone
number, CI CARD ID, Host ID, and other information
Please insert will be displayed in about 2~3 minutes. If an error
the card as message is displayed, please contact your service
shown provider.
- When the channel information configuration has
CI CARD
finished, the message "Updating Completed" is
displayed, indicating that the channel list is now
updated.
TV Rear Panel
- You must obtain a CI CARD from a local cable
service provider. Remove the CI CARD by
carefully pulling it out with your hands since
13. Service Port
dropping the CI CARD may cause damage to it.
- Service connection for qualified service engineer.
10-4
10 Operating Instructions and Installation
10-3 Remote Control
1. Selects a target device to be controlled by the
Samsung remote control (TV, DVD, STB,
CABLE, VCR)
2. Television Standby button
3. Number buttons for direct channel access
4. One/Two-digit channel selection
5. It display "Channel Manager" on the screen.
6. Selects the TV mode directly
7. VCR/DVD Functions
Rewind, Stop, Play/Pause,
Fast/Forward
8. Volume increase
Volume decrease
9. Temporary sound switch-off
10. Menu display and change confirmation
11. Electronic Program Guide (EPG) display
12. Picture-In-Picture On / Off
13. Picture freeze
14. Picture effect selection
15. Sound effect selection
16. Adjusts 5 separate devices - TV, DVD,
STB, CABLE, or VCR.
17. Available source selection
18. Previous channel
19. DTV menu display
20. Automatic Power-off
21. P : Next channel
P : Previous channel
22. Exit the OSD
23. Control the cursor in the menu
24. Use to see information on the current broadcast
27. Picture size selection
28. Digital subtitle display
29. Sound mode selection
30. SRS TSXT selection
31. When your remote does not work, change
the batteries and press the "RESET" button
for 2-3 seconds before use.
Teletext Functions
6. Exit from the teletext display
10. Teletext index
12. Teletext hold
14. Teletext size selection
17. Teletext mode selection (LIST/FLOF)
18. Teletext sub page
21. P : Teletext next page
P : Teletext previous page
22. Teletext cancel
24. Teletext reveal
25. Alternately select Teletext, Double, or Mix.
26. Fastext topic selection
29. Teletext store
The performance of the remote control may be affected by bright light.
This is a special remote contro for the visually impaired, and has Braille points on the Power, Channel
and Volume buttons.
10-5
10 Operating Instructions and Installation
10-4 Installing the Stand
1. Place the TV faced down on a soft cloth or cushion on a table.
2. Put the stand into the hole at the bottom of the TV.
3. Insert screw into the hole indicated and tighten.
The stand is installed for models with the screen size of 40 inch and above.
10-5 Installing the Wall Mount Kit
Wall mount items (sold separately) allow you to mount the TV on the wall.
For detailed information on installing the wall mount, see the instructions provided with the Wall Mount
items. Contact a technician for assistance when installing the wall mounted bracket.
Samsung Electronics is not responsible for any damage to the product or injury to yourself or others if you
elect to install the TV on your own.
Remove the stand and cover the bottom hole with a cap and fasten with two screws.
10-6
8 Wiring Diagrams
8 Wiring Diagram
8-1 LE27S73BD/LE32S73BD/LE37S73BD/LE40S73BD Wiring Diagram
8-1
8 Wiring Diagrams
8-2 Main Board Layout
8-2
8 Wiring Diagrams
8-3 PIN characteristic
CN1001 - Main Board power supply
PIN 1 2 3 4 5 6 7 8 9 10 11 12 13 14 15 16
NAME B12V GND B5V B5V B5V GND GND GND B12VS B12VS B12VS GND GND GND A5V A5V
Function Define
- 12V B5V_VCCA, B5V_VCCB, IC611 POWER SUPPERLY
- 5V B5V, B3.3V, B2.5V_VDD, B3.3VD, VCC50
- 12VS B12VS
CN1002 / CN1003 - SPEAKER CONNECTOR
PIN 1 2 3 PIN 1 2
NAME R-OUT NOP R-REFERENCE NAME L-OUT L-REFERENCE
8-3
8 Wiring Diagrams
CN5001 - Front control
PIN 1 2 3 4 5 6 7 8 9 10 11 12 13 14 15
NAME GND GND A5V - KEY KEY GND - IR - LED_ LED_ GND SDA SCL
INPUT1 INPUT2 GREEN LED
Function Define
- A5V Front control board poewr supply
- KEY INPUT1,2/SDA/SCL Key control, from the memu, change up/down Etc.
- IR Remote control signal
- LED_GREEN/LED_RED Control the timing and stand by LED color
CN4002 - Panel control
PIN 1 2 3 4 5
NAME SW_inverter Ana_dimming PWM_dimming GND SENSOR POWER
Function Define
- SW_inverter panel inverter control, about 5V
- Ana_dimming panel dimming control
- PWM_dimming panel PWM control, duty 40% ~ 90%
- SENSOR POWER brightness sensor power supply
8-4
8 Wiring Diagrams
CN4004 - LVDS Signal
PIN NAME PIN NAME
1 VCC 16 TXOUTCLK +
2 VCC5P 17 TXOUTCLK -
3 VCC5P 18 GND
4 VCC5P 19 TXOUT2 +
5 VCC5P 20 TXOUT2 -
6 GND 21 GND
7 GND 22 TXOUT1 +
8 NOP (NOT USE) 23 TXOUT1 -
9 SDA 1 24 GND
10 SCL 1 25 TXOUT0 +
11 PANEL_SYNC_EN 26 TXOUT0 -
12 GND 27 GND
13 TXOUT3 + 28 SW_INVERTER
14 TXOUT3 - 29 ANA_DIMMING
15 GND 30 PWM_DIMMING
8-5
8 Wiring Diagrams
8-4 Power Board Layout
8-6
8 Wiring Diagrams
CNB811 - Stand by supply
PIN I 2 3
NAME Live Netural SW_POWER
VOLTAGE AC AC ON/OFF
Functing Define
- Refer to : CN802 function define
CNM801 - Main Board power supply
PIN 1 2 3 4 5 6 7 8 9 10 11 12 13 14
NAME 12V GND 5V 5V 5V GND GND GND 12V 12V 12V GND GND GND
Functing Define
- Refer to : CN801 function define
CNM804 - Panel control
PIN 1 2 3 4 5
NAME SW_inverter Ana_dimming PWM_dimming GND SENSOR POWER
Functing Define
- Refer to : CN815 function define
8-7
8 Wiring Diagrams
CN801 - Main Board power supply
PIN 1 2 3 4 5 6 7 8 9 10 11 12 13 14
NAME 24V 24V 24V 24V 24V GND GND GND GND GND GND B/L A_D P_D
Functing Define
- 24V LAMP INVERTER Voltage
- B/L Brightness sensor power
- A_D ANA_DIMMING
- P_D PWM_DIMMING
8-8
12 PCB Diagram
12 PCB Diagram
12-1 27" Main PCB Diagram
12-1
12 PCB Diagram
12-2 32", 37", 40" Main PCB Diagram
12-2
12 PCB Diagram
12-3 DTV MODULE PCB Diagram (Only for Italy/Spain)
12-3
12 PCB Diagram
12-4 DTV MODULE PCB Diagram
12-4
6 Electrical Parts List
6 Electrical Parts List
-You can search for updated part codes through ITSELF web site.
URL : http://itself.sec.samsung.co.kr/
6-1 LE27S73BD Parts List
Level Loc. No. Code No. Description & Specification Q'ty SA/SNA
0 LE27S73BDX/FID LE27S73BD,R62A/27S70-GSD,27,LCD-TV,FINLA 0
0.1 M0001 BN90-00978D ASSY COVER FRONT;27S73,EO,ABS+PMMA,HB,BK 1 S.N.A
..2 M0081 6006-001096 SCREW-TAPTITE;BH,+,WP,B,M4.0,L12,ZPC(BLK 4 S.N.A
..2 T0175 BN96-03279A ASSY SPEAKER P;16ohm,Sonoma 26,Left,5W,N 1 S.A
..2 T0175 BN96-03280A ASSY SPEAKER P;16ohm,Sonoma 26,Right,5W, 1 S.A
..2 T0003 BN96-03836D ASSY COVER P-FRONT;27S73,EO,ABS+PMMA,HB, 1 S.A
...3 M0162 6502-001067 CABLE CLAMP;DAFC-1300,ID2.2,T5.2,NYLIN6/ 2 S.N.A
...3 T0060 BN61-01655A SPRING ETC;STS-304 SUS,D8,L12,T0.5 1 S.N.A
...3 CCM1 BN63-02183F COVER-SHEET;Rhcm,PE Vinyl,T0.05,900mm,20 1.118 S.N.A
...3 M0112 BN63-02656D COVER-FRONT;27S73,EO,ABS+PMMA,HB,BK23,S/ 1 S.N.A
...3 T0056 BN63-02658A COVER-DECORATION;GSM27KE,HIPS,HB,GR503,S 1 S.N.A
...3 T0059 BN64-00379A INDICATOR LED;ROME-II,23,PC,CLEAR 1 S.N.A
...3 T0061 BN64-00453A WINDOW-REMOCON;32R71,PC,V0,VIOLET,DIFFUS 1 S.N.A
...3 T0022 BN64-00467A KNOB CONTROL;SONOMA26,32,40,ABS,-,-,-,V0 1 S.N.A
...3 T0023 BN64-00476A KNOB POWER;SONOMA,26,32,40,HIPS,HB,GR503 1 S.N.A
...3 T0054 BN64-00477A KNOB-DECORATION;SONOMA26,32,40,ABS,HB,GR 1 S.N.A
...3 M0146 BN96-03437A ASSY BOARD P-POWER;BORDEAUX2,CT5000-4150 1 S.A
...3 M0145 BN96-03466A ASSY BOARD P-FUNCTION;SONOMA,SJ06-01-008 1 S.A
...3 T0067 BP60-00032K SPACER-SCREEN;56L5,EVA,V0,T1.0,295 6 S.N.A
...3 M0081 6003-001188 SCREW-TAPTITE;BH,+,B,M4,L10,YEL,SWRCH18A 2 S.N.A
...3 M0081 6003-001188 SCREW-TAPTITE;BH,+,B,M4,L10,YEL,SWRCH18A 1 S.N.A
...3 M0081 6003-001188 SCREW-TAPTITE;BH,+,B,M4,L10,YEL,SWRCH18A 2 S.N.A
0.1 M0002 BN90-00979D ASSY COVER REAR;27S73,EO,HIPS,HB,BK500,P 1 S.N.A
..2 T0081 6002-001294 SCREW-TAPPING;BH,+,,M4,L16,ZPC(BLK) 2 S.A
..2 T0081 6002-001294 SCREW-TAPPING;BH,+,,M4,L16,ZPC(BLK) 9 S.A
..2 M0013 BN96-03837B ASSY COVER P-REAR;27S73,EO,-,HIPS,HB,BK5 1 S.A
...3 T0101 BN61-02058A BRACKET-WALL;23,27,MGM,SECC,T1.6 2 S.N.A
...3 M0006 BN63-02657B COVER-REAR;27S73,EO,HIPS,HB,BK500,SONOMA 1 S.N.A
...3 T0071 BN64-00444E INLAY-TERMINAL;CAMBRIDGE,26,PS SHEET,T0. 1 S.N.A
...3 T0064 BN65-00002A CLAMPER CORE;BORDEAUX,PP,V0,BLK 1 S.N.A
...3 M0081 6003-001188 SCREW-TAPTITE;BH,+,B,M4,L10,YEL,SWRCH18A 4 S.N.A
0.1 M0216 BN90-01005A ASSY STAND;27T70,ABS+PMMA,HB,BK23,H/GLOS 1 S.N.A
..2 T0524 6902-000561 BAG PE;HDPE+NITRON(DOUBLE),T0.015+T0.5,W 1 S.N.A
..2 M0013 BN96-03945A ASSY STAND P-BASE;SONOMA 27,ABS+PMMA,HB, 1 S.A
...3 T0081 6002-001294 SCREW-TAPPING;BH,+,,M4,L16,ZPC(BLK) 3 S.A
...3 M0081 6003-001239 SCREW-TAPTITE;FH,+,B,M4,L10,ZPC(YEL),SWR 6 S.A
...3 BN61-01830A BRACKET-STAND BOTTOM;26 MILANO,SECC,T2.0 1 S.N.A
...3 T0920 BN61-02369A GUIDE-STAND;SONOMA 26,HIPS V0,BK500 1 S.N.A
...3 CCM1 BN63-02183D COVER-SHEET;Rhcm,PE Vinyl,T0.05,680mm,20 0.4 S.N.A
...3 T0004 BN63-02696A COVER-STAND BASE;GML26,ABS+PMMA,HB,BK23, 1 S.N.A
...3 T0132 BN73-00052A RUBBER FOOT;ARES 17,SILICON,DIA 17 * T1. 6 S.N.A
0.1 T0852 BN91-00948A ASSY LCD-CMO;LE27T51BX/*,TORINO 1 S.N.A
..2 M0215 BN07-00136A LCD-PANEL;V270B1-L01,Torino,8BIT,638.5*3 1 S.A
0.1 M0017 BN91-01166B ASSY CHASSIS;LE27S73BDX/FID 1 S.N.A
..2 M0014 BN94-01063B ASSY PCB MAIN;LE27S73BDX/FID 1 S.A
...3 ◦ Jabse Service Manual Search 2024 ◦ Jabse Pravopis ◦ onTap.bg ◦ Other service manual resources online : Fixya ◦ eServiceinfo