Service Manuals, User Guides, Schematic Diagrams or docs for : Samsung LCD TV LE40R72B LE26R71B_SB-ET-EX-SI_4815720142
<< Back | HomeMost service manuals and schematics are PDF files, so You will need Adobre Acrobat Reader to view : Acrobat Download Some of the files are DjVu format. Readers and resources available here : DjVu Resources
For the compressed files, most common are zip and rar. Please, extract files with Your favorite compression software ( WinZip, WinRAR ... ) before viewing. If a document has multiple parts, You should download all, before extracting.
Good luck. Repair on Your own risk. Make sure You know what You are doing.
Image preview - the first page of the document
>> Download LE26R71B_SB-ET-EX-SI_4815720142 documenatation <<
Text preview - extract from the document
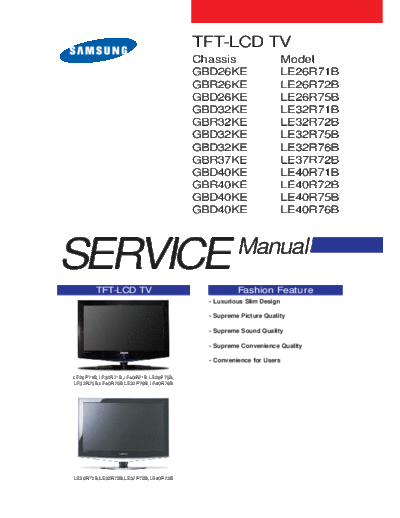
TFT-LCD TV
Chassis Model
GBD26KE LE26R71B
GBR26KE LE26R72B
GBD26KE LE26R75B
GBD32KE LE32R71B
GBR32KE LE32R72B
GBD32KE LE32R75B
GBD32KE LE32R76B
GBR37KE LE37R72B
GBD40KE LE40R71B
GBR40KE LE40R72B
GBD40KE LE40R75B
GBD40KE LE40R76B
SERVICE Manual
TFT-LCD TV Fashion Feature
- Luxurious Slim Design
- Supreme Picture Quality
- Supreme Sound Quality
- Supreme Convenience Quality
- Convenience for Users
LE26R71B,LE32R71B,LE40R71B,LE26R75B,
LE32R75B,LE40R75B,LE32R76B,LE40R76B
LE26R72B,LE32R72B,LE37R72B,LE40R72B
Samsung Electronics Co.,Ltd.
- This Service Manual is a property of 416, Maetan-3Dong, Yeongtong-Gu, Suwon City,
Samsung Electronics Co., Ltd. Gyeonggi-Do, Korea, 443-742
Any unauthorized use of Manual can be Printed in Korea
punished under applicable International P/N : BN82-00139B-01
and/or domestic law. URL : http://itself.sec.samsung.co.kr/
3 Alignments and Adjustments
3 Alignments and Adjustments
3-1 Service Instruction
1. Usually, a color TV-VCR needs only slight touch-up adjustment upon installation.
Check the basic characteristics such as height, horizontal and vertical sync.
2. Use the specified test equipment or its equivalent.
3. Correct impedance matching is essential.
4. Avoid overload. Excessive signal from a sweep generator might overload the front-end
of the TV. When inserting signal markers, do not allow the marker generator to distort
test result.
5. Connect the TV only to an AC power source with voltage and frequency as specified on
the backcover nameplate.
6. Do not attempt to connect or disconnect any wire while the TV is turned on. Make sure
that the power cord is disconnected before replacing any parts.
7. To protect aganist shock hazard, use an isolation transform.
3-1
3 Alignments and Adjustments
3-2 How to Access Service Mode
3-2-1 Entering Factory Mode
1. To enter "Service Mode" Press the remote -control keys in this sequence :
- If you do not have Factory remote - control
- If you have Factory remote - control
- The buttons are active in the service mode.
1. Remote - Control Key : Power, Arrow Up, Arrow Down, Arrow Left
Arrow Right, Menu, Enter, Number Key(0~9)
2. Function - Control Key : Power, CH +, CH -, VOL +, VOL -,
Menu, TV/VIDEO(Enter)
3-2-2 Panel Check
Specially for LE26,32R7**, You have to check Panel Maker Because of different adjustments as follows.
First of all, Check the label rating!
1) Label Rating File
If Panel Mark is "A", Set the factory mode Panel BOM(Bill of material) : BN07-00247A
indicating as follows. Connector between Panel and Power Unit
: BN39-00603M (300mm)
Panel BOM(Bill of material) : BN07-00289A * Option Byte
Connector between Panel and Power Unit 1. Gamma "AMLCD"
: BN39-00603M (300mm) 2. Panel Option "AMLCD_INT"
If Panel Mark is "C" , Set the Factory mode
* Option Byte indicating as follows.
1. Gamma "AUO" Panel BOM(Bill of Material) : BN07-00207A
2. Panel Option "AUO" Connecotor between Panel and Powe Unit :
BN39-00659A(200mm)
If Panel Mark is "S" or not printed. * Option Byte
Set the factory mode indicating as follows. 1. Gamma " CMO "
2. Panel Option " CMO "
Others are same shown below.
3-2
3 Alignments and Adjustments
3-3 Factory Data
1. Calibration
2. Option Table XXXX XXXX
3. White Balance
4. SVP-FX
5. Option Block
6. STV8257/STA323W
7. YC Delay
8. Adjust
9. I2C Check
10. W/B MOVIE
11. Checksum
12. Reset
13. Spread Spectrum
T-MILMPEU-1006 (Main Micom Ver)
T-MILMPEUS-1002 (Sub Micom Ver)
Month / Day / Year / Hour / Min. / Sec.
1. Calibration
1) AV Calibration
2) DTV Calibration
3) PC Calibration
2. Option Table XXXX XXXX
Inch Option 32" Carrier Mute ON TTX Group Auto
Gamma OFF Language English Auto Power ON
Panel Option AMLCD_INT Auto FM ON ---- OFF
2HDMI OFF High Deviation OFF ---- G
Brt.Sensor OFF TTX ON ---- OFF
EnergySave ON TTX List ON Debug OFF
LBE/FBE OFF ACR OFF Ch.Table SUWON
FRC(Micronas) OFF Dynamic CE ON iDTV_Cntry UK
FRC(Samsung) OFF Dynamic Dimming ON Dynamic Contrast OFF
LNA OFF Tuner TOP 10
3-3
3 Alignments and Adjustments
3-4
3 Alignments and Adjustments
3-5
3 Alignments and Adjustments
3-4 Service Adjustment
3-4-1 White Balance - Calibration
If picture color is wrong, do calibration first.
Equipment : CA210, Patten : chess pattern
Execute calibration in Factory Mode
Source AV : PAL composite, Component : 1280*720/60Hz
PC : 1024*768/60Hz
( chess patten )
3-4-2 White Balance - Adjustment
If picture color is wrong, check White Balance condition.
Equipment : CA210, Patten : Toshiba
Adjust W/B in Factory Mode
Sub brightness and R/G/B Offset controls low light region
Sub contrast and R/G/B Gain controls high light region
Source AV : PAL composite, Component : 1280*720/60Hz
HDMI[DVI] : 1280*720/60Hz
[ Test Pattern : MSPG-945 Series Pattern #16 ]
*Color temperature
1500K +/-500, -6 ~-20 MPCD
*Color coordinate
H/L : 267/263 +/- 2 35.0 Ft +/- 2.0Ft
L/L : 270/260 +/- 3 1.5 Ft +/- 0.2Ft
Toshiba Patten
3-6
3 Alignments and Adjustments
3-4-3 Conditions for Measurement
1. On the basis of toshiba ABL pattern : High Light level (57 IRE)
- INPUT SIGNAL GENERATOR : MSPG-925LTH
* Mode NO 2 : 744X484@60 Hz
NO 6 : 1280X720@60 Hz
NO 21 : 1024X768@60 Hz
* Pattern NO 36 : 16 Color Pattern
NO 16 : Toshiba ABL Pattern
2. Optical measuring device : CA210 (FL)
Please use the MSPG-925 LTH generator for model LE26M51B/LE32M51B/LE40M51B/LE46M51B.
3-4-4 Method of Adjustment
1. Adjust the white balance of AV, Component and DVI Modes.
(AV Component)
a) Set the input to the mode in which the adjustment will be made
(RF DTV PC DVI).
* Input signal - VIDEO Mode : Model #2 (744*484 Mode), Pattern #16
- DTV,DVI Mode : Model #6 (1280*720 Mode), Pattern #16
- HDMI Mode: Model #6(1280*720 Mode), Pattern #16
b) Enter factory color control, confirm the data.
c) Adjust the low light. (Refer to table 1, 2 in adjustment position by mode)
- Adjust sub - Brightness to set the 'Y' value.
- Adjust red offset ('x') and blue offset ('y') to the color coordinates.
Picture 4-2 Toshiba ABL Pattern
Low light
Measurement point
* Do not adjust green offset data.
d) Adjust the high light. (Refer to table 1, 2 in adjustment position by mode)
- Adjust red gain ('x') and blue gain ('y') to the color coordinates.
* Do not adjust the green gain and sub-contrast (Y) data.
3-7
3 Alignments and Adjustments
d) Adjust the high light. (Refer to table 1, 2 in adjustment position by mode)
- Adjust red gain ('x') and blue gain ('y') to the color coordinates.
* Do not adjust the green gain and sub-contrast (Y) data.
Picture 4-3 Toshiba ABL Pattern
High light
Measurement point
3-8
3 Alignments and Adjustments
3-5 Software Upgrade
3-5-1 How to Update Flash ROM
1. Installthe Flash Downloader
ConnectSet(Service Jack)and Jig Cable to execute Program Update.
2. Flash Downloader program update
-Before Turning on the set,Click "connect"which is under of OSD Screen!
-Turn on the Set.
3-9
3 Alignments and Adjustments
Memo
3-10
7 Block Diagrams
7 Block Diagram
- This Document can not be used without Samsung's authorization
FLASH MEMORY
AT49BV802
M30840
SUB
MICOM
OPTION
LM4810
74HC
STA323W
SOUND OUT
MAX232
7-1
7 Block Diagrams
Memo
7-2
13 Circuit Descriptions
13 Circuit Descriptions
13-1 Block description
Bordeaux consists of three main blocks
1. Main board : Video signal processing
2. IP board : Power supply & Inverter
3. T-con board : LCD Panel control
13-1
13 Circuit Descriptions
SMPS INVERTER
Bordeaux consists of three main blocks
1. Main board : Video signal processing
2. SMPS : Power supply
3. T-con board : LCD Panel control
13-2
13 Circuit Descriptions
13-2 Main Block
13-3
13 Circuit Descriptions
13-3 SMPS Board
13-3-1 26", 32" SMPS Block
13-3-2 26", 32" SMPS Block
13-4
13 Circuit Descriptions
13-3-3 26" , 32" SMPS Block
13-3-4 26" , 32" SMPS Block
13-5
13 Circuit Descriptions
13-6
13 Circuit Descriptions
13-3-5 32" , 40" IP Board
13-3-6 32" , 40" IP Board
13-7
13 Circuit Descriptions
Memo
13-8
8 Wiring Diagrams
8 Wiring Diagram
8-1 LE26R71B/LE26R72B/LE26R75B/LE32R71B/LE32R72B/LE32R75B/LE32R76B/LE37R72B/LE40R71B/LE40R72B/LE40R75B/LE40R76B Wiring Diagram
8-1
8 Wiring Diagrams
8-2 Main Board Layout
8-2
8 Wiring Diagrams
8-3 PIN characteristic
CN800 - Main Board power supply
PIN 1 2 3 4 5 6 7 8 9 10 11 12 13 14 15 16
NAME B12V GND B5V B5V B5V GND GND GND B12VS B12VS B12VS GND GND GND A5V A5V
Function Define
- B12V B8V, B5V-T
- B5V B5V-1, B5V, 5V-P, B1.8V
- B12VS B12VS
- A5V A5V, A3.3V-3, A3.3V, A3.3V-1, B3.3V, A1.8V
CN600 / CN601 - SPEAKER CONNECTOR
PIN 1 2 3 PIN 1 2
NAME R+ NC R- NAME L+ L-
8-3
8 Wiring Diagrams
CN221 - Front control
PIN 1 2 3 4 5 6 7 8 9 10 11 12 13 14 15
NAME SDA-T SCL-T GND KEY LED GND A5V GND IR KEY KEY GND IDENT HP-L HP-R
INPUT1 INPUT1 INPUT2 HP
Function Define
- A5V Front control board poewr supply
- KEY INPUT1,2/SDA/SCL Key control, from the memu, change up/down Etc.
- IR Remote control signal
- LED Control the timing and stand by LED color
CN501 - Panel control
PIN 1 2 3 4 5
NAME SW_inverter Ana_dimming PWM_dimming GND GND
Function Define
- SW_inverter panel inverter control, about 3.3V
- Ana_dimming panel dimming control
- PWM_dimming panel PWM control, duty 40% ~ 90%
8-4
8 Wiring Diagrams
8-5
8 Wiring Diagrams
8-4 Power Board Layout
8-6
8 Wiring Diagrams
CN801 - AC Input
PIN I 2
NAME Live Netural
VOLTAGE AC AC
Functing Define
- Refer to : AC Input
CN801 - Main Board power supply
PIN 1 2 3 4 5 6 7 8 9 10 11 12 13 14 15 16
NAME 13V GND 5.4V 5.4V 5.4V GND GND GND 12V 12V 12V GND GND GND ST7V PWR
Functing Define
- ST7V Stand-By Output
- PWR Power On/Off Control
- Refer to : CN801 function define
CNM804 - Panel control
PIN 1 2 3 4 5
NAME SW_inverter Ana_dimming PWM_dimming GND SENSOR POWER
Functing Define
- Refer to : CN815 function define
8-7
8 Wiring Diagrams
CN802 - Inverter power supply
PIN 1 2 3 4 5 6 7 8 9 10 11 12 13 14
NAME 24V 24V 24V 24V 24V GND GND GND GND GND GND B/L A_D P_D
Functing Define
- AMLCD Panel Inverter Power
- 24V LAMP INVERTER Voltage
- B/L Brightness sensor power
- A_D ANA_DIMMING
- P_D PWM_DIMMING
CN803 - Inverter power supply
PIN 1 2 3 4 5 6 7 8 9 10 11 12 13 14
NAME 24V 24V 24V 24V 24V GND GND GND GND GND A_D B/L P_D GND
Functing Define
- AUO Panel Inverter Power
- 24V LAMP INVERTER Voltage
- B/L Brightness sensor power
- A_D ANA_DIMMING
- P_D PWM_DIMMING
8-8
8 Wiring Diagrams
8-9
8 Wiring Diagrams
CN801 - AC Input
PIN I 2
NAME Live Netural
VOLTAGE AC AC
Functing Define
- Refer to : AC Input
CN801 - Main Board power supply
PIN 1 2 3 4 5 6 7 8 9 10 11 12 13 14 15 16
NAME 13V GND 5.4V 5.4V 5.4V GND GND GND 12V 12V 12V GND GND GND ST7V PWR
Functing Define
- ST7V Stand-By Output
- PWR Power On/Off Control
- Refer to : CN801 function define
CNM804 - Panel control
PIN 1 2 3 4 5
NAME SW_inverter Ana_dimming PWM_dimming GND SENSOR POWER
Functing Define
- Refer to : CN815 function define
8-10
8 Wiring Diagrams
CN803 - Inverter power supply
PIN 1 2 3 4 5 6 7 8 9 10 11 12 13 14
NAME 24V 24V 24V 24V 24V GND GND GND GND GND GND B/L A_D P_D
Functing Define
- AMLCD Panel Inverter Power
- 24V LAMP INVERTER Voltage
- B/L Brightness sensor power
- A_D ANA_DIMMING
- P_D PWM_DIMMING
CN804 - Inverter power supply
PIN 1 2 3 4 5 6 7 8 9 10 11 12 13 14
NAME 24V 24V 24V 24V 24V GND GND GND GND GND B/D P_L GND B/L
Functing Define
- CMO Panel Inverter Power
- 24V LAMP INVERTER Voltage
- B/L Brightness sensor power
- P_D PWM_DIMMING
8-11
8 Wiring Diagrams
Memo
8-12
11 Disassembly and Reassembly
11 Disassembly and Reassembly
This section of the service manual describes the disassembly and reassembly procedures for the TFT-LCD
TV.
WARNING : This monitor contains electrostatically sensitive devices. Use caution when
handling these components.
11-1 Disassembly
Cautions : 1. Disconnect the monitor from the power source before disassembly.
2. Follow these directions carefully; never use metal instruments to pry apart the
cabinet.
Description Picture Description
1. Place monitor face down on cushioned table.
Remove screws from the rear cover.
Remove screws from the stand.
11-1
11 Disassembly and Reassembly
Description Picture Description
2. Lift up the rear cover and remove the stand.
3. Remove Screws from the stand BRKT and lift
up the stand BRKT.
11-2
11 Disassembly and Reassembly
Description Picture Description
4. Disonnect cable from the boards.
5. Remove screws from the boards and lift up the
boards.
11-3
11 Disassembly and Reassembly
Description Picture Description
6. Remove screw from the side connector.
Remove screws from the panel BRKT.
7. Lift up the panel BRKT.
11-4
11 Disassembly and Reassembly
Description Picture Description
8. Lift up the LCD panel.
11-2 Reassembly
Reassembly procedures are in the reverse order of disassembly procedures.
11-5
11 Disassembly and Reassembly
Memo
11-6
6 Electrical Parts List
6 Electrical Parts List
-You can search for updated part codes through ITSELF web site.
URL : http://itself.sec.samsung.co.kr/
6-1 LE26R71B Parts List
Level Loc. No. Code No. Description & Specification Q'ty SA/SNA
0 LE26R71BX/NWT LE26R71B,Q52A/26R70-GBD,26,LCD-TV,UKRAIN 0
1 M0001 BN90-00844A ASSY COVER FRONT;LE26R71BX/XEC,BORDEAUX 1 SNA
..2 T0003 BN96-03012A ASSY COVER P-FRONT;26R71,EO,ABS+PMMA,HB, 1 SA
...3 M0081 6003-001003 SCREW-TAPTITE;BH,+,B,M4,L12,ZPC(BLK),SWR 2 SNA
...3 M0081 6003-001003 SCREW-TAPTITE;BH,+,B,M4,L12,ZPC(BLK),SWR 2 SNA
...3 T0060 BN61-01655A SPRING ETC;STS-304 SUS,D8,L12,T0.5 1 SA
...3 CCM1 BN63-02183F COVER-SHEET;Rhcm,PE Vinyl,T0.05,900mm,20 1.118 SNA
...3 M0112 BN63-02331A COVER-FRONT;26R71,EO,ABS+PMMA,HB,BK23,S/ 1 SNA
...3 T0056 BN63-02333A COVER-DECORATION;26R71,HIPS,HB,GR503,BLM 1 SNA
...3 T0023 BN64-00342A KNOB POWER;ROME,40,PC,VIOLET 1 SNA
...3 T0059 BN64-00366A INDICATOR LED;ROME-I,PC,CLEAR,ALL MODEL 1 SNA
...3 T0054 BN64-00443A KNOB-DECORATION;32R71,ABS,HB,GR503,VACUU 1 SNA
...3 T0061 BN64-00453A WINDOW-REMOCON;32R71,PC,V0,VIOLET,DIFFUS 1 SNA
...3 BN96-03404A ASSY BOARD P-FUNCTION&KNOB;Bordeaux,CT50 1 SNA
....4 T0022 BN64-00442A KNOB CONTROL;26,32,40R71,PC,BLK,ACRYL CL 1 SNA
....4 M0145 BN96-03045A ASSY BOARD P-FUNCTION;BORDEAUX,FUNCTION 1 SA
...3 M0146 BN96-03405A ASSY BOARD P-POWER;BORDEAUX1,CT5000-4140 1 SA
..2 T0175 BN96-03053A ASSY SPEAKER P;16ohm,Bordeuax 26,Left,5W 1 SA
..2 T0175 BN96-03054A ASSY SPEAKER P;16ohm,Bordeuax 26,Right,5 1 SA
1 M0002 BN90-00846A ASSY COVER REAR;26R71,EO,BORDEAUX 1 SNA
..2 T0081 6002-001294 SCREW-TAPPING;BH,+,,M4,L16,ZPC(BLK) 2 SA
..2 T0081 6002-001294 SCREW-TAPPING;BH,+,,M4,L16,ZPC(BLK) 13 SA
..2 M0013 BN96-03014A ASSY COVER P-REAR;26R71,EO,-,ABS+PMMA,HB 1 SA
...3 T0101 BN61-02058A BRACKET-WALL;23,27,MGM,SECC,T1.6 2 SNA
...3 M0006 BN63-02332A COVER-REAR;26R71,EO,SO,CO,ABS+PMMA,HB,BK 1 SNA
...3 T0071 BN64-00444A INLAY-TERMINAL;26R71,(BLK),PS SHEET,T0.5 1 SNA
...3 CCM1 BN63-02183F COVER-SHEET;Rhcm,PE Vinyl,T0.05,900mm,20 0.6 SNA
...3 T0064 BN65-00002A CLAMPER CORE;BORDEAUX,PP,V0,BLK 1 SNA
1 M0216 BN90-00848A ASSY STAND;26R71,BORDEAUX 1 SNA
..2 M0013 BN96-03017A ASSY STAND P-BASE;26R71,ABS+PMMA,HB,BK23 1 SA
...3 T0081 6002-001294 SCREW-TAPPING;BH,+,,M4,L16,ZPC(BLK) 4 SA
...3 M0081 6003-001239 SCREW-TAPTITE;FH,+,B,M4,L10,ZPC(YEL),SWR 4 SA
...3 BN61-02192A GUIDE-STAND;26,32R71,ABS,V0,BLK 1 SNA
...3 BN61-02202A BRACKET-STAND BOTTOM;BORDEAUX 26,SECC,T2 1 SNA
...3 BN61-02204A HOLDER-SWIVEL RING;26,32R71,ACETAL,BLK 1 SNA
...3 BN61-02232A HOLDER-SWIVEL RING;32R71,ACETAL NATUAL,T 1 SNA
...3 BN61-02233A HOLDER-SWIVEL RING;32R71,ACETAL NATUAL,B 1 SNA
...3 BN61-02236A BRACKET-HINGE SWIVEL;BORDEAUX 32,SECC,T1 1 SNA
...3 BN63-02322A COVER-STAND SUB;32R71,ABS+PMMA,HB,BK23,H 1 SNA
...3 T0004 BN63-02335A COVER-STAND BASE;26R71,ABS+PMMA,HB,BK23, 1 SNA
...3 T0132 BN73-00052A RUBBER FOOT;ARES 17,SILICON,DIA 17 * T1. 4 SNA
...3 CCM1 BN63-02183D COVER-SHEET;Rhcm,PE Vinyl,T0.05,680mm,20 0.4 SNA
...3 T0514 BN61-02367A BRACKET-SUPPORT;BORDEAUX 32,SECC,T2.0 1 SNA
..2 T0524 6902-000241 BAG PE;NITRON/HDPE,T0.5/T0.012,W600,L600 1 SNA
1 M0017 BN91-01005C ASSY CHASSIS;LE26R71BX/XEC,BORDEAUX 1 SA
..2 M0014 BN94-00847A ASSY PCB MAIN;LE26R71BX,Q52A 1 SA
...3 T0245 0202-001522 SOLDER-WIRE FLUX;LFA3-107,-,D1.2,96.5Sn/ 0.25 SNA
...3 JA709 3701-001294 CONNECTOR-DSUB;15P,3R,FEMALE,STRAIGHT,AU 1 SA
...3 CN330 3711-004068 HEADER-BOARD TO CABLE;BOX,5P,1R,2MM,ANGL 1 SA
...3 CN503 3711-005884 HEADER-BOARD TO BOARD;BOX,30P,2R,2mm,ANG 1 SA
...3 CN330 3711-005942 HEADER-BOARD TO CABLE;BOX,16P,1R,2mm,STR 1 SA
6-1
6 Electrical Parts List
Level Loc. No. Code No. Description & Specification Q'ty SA/SNA
...3 JA701_EU 3722-000498 JACK-SCART;21P,-,SN,BLK,NO 1 SA
...3 JA702_EU 3722-000498 JACK-SCART;21P,-,SN,BLK,NO 1 SA
...3 JA330 3722-001061 JACK-PHONE;1P,3.6PI,AG,BLK,N 1 SA
...3 JA330 3722-001061 JACK-PHONE;1P,3.6PI,AG,BLK,N 1 SA
...3 JA330 3722-001061 JACK-PHONE;1P,3.6PI,AG,BLK,N 1 SA
...3 JA332 3722-001734 JACK-VHS;4P,SN,BLK,STRAIGHT 1 SA
...3 JA333 3722-002360 JACK-PIN;3P,AU,GRN/BLU/RED,STRAIGHT 1 SA
...3 JA333 3722-002362 JACK-PIN;2P,Sn,WHT/RED,STRAIGHT 1 SA
...3 JA333 3722-002362 JACK-PIN;2P,Sn,WHT/RED,STRAIGHT 1 SA
...3 JA333 3722-002362 JACK-PIN;2P,Sn,WHT/RED,STRAIGHT 1 SA
...3 JA333 3722-002363 JACK-PIN;3P,Sn,YEL/WHT/RED,STRAIGHT 1 SA
...3 T0562 6046-001013 STAND OFF;M3,L5,Ni PLT,SUM24L,#4-40 2 SNA
...3 CIS3 BN40-00079A TUNER;TCPW3001PD32S(H),TCPW3001PD32S(H), 1 SA
...3 M0107 BN63-01847A SHIELD-COVER;ROME,SECC,T0.3,49.5,79.5,HE 1 SNA
...3 CIS8 BN73-00024C SILICON/RUBBER-BERGQUIST;VENUS 32,40",SI 1 SNA
...3 T0510 BN97-00807A ASSY SMD-MAIN;LE26R71B,Q52A,Bordeaux 1 SNA
....4 CIS5 0202-001477 SOLDER-CREAM;LST309-M,-,D20~45◦ Jabse Service Manual Search 2024 ◦ Jabse Pravopis ◦ onTap.bg ◦ Other service manual resources online : Fixya ◦ eServiceinfo