Service Manuals, User Guides, Schematic Diagrams or docs for : . Car Manuals Nissan 300ZX 1984-1985,1988,1990,1994-1996 Approved 1984 Manual Transmission
<< Back | HomeMost service manuals and schematics are PDF files, so You will need Adobre Acrobat Reader to view : Acrobat Download Some of the files are DjVu format. Readers and resources available here : DjVu Resources
For the compressed files, most common are zip and rar. Please, extract files with Your favorite compression software ( WinZip, WinRAR ... ) before viewing. If a document has multiple parts, You should download all, before extracting.
Good luck. Repair on Your own risk. Make sure You know what You are doing.
Image preview - the first page of the document
>> Download Manual Transmission documenatation <<
Text preview - extract from the document
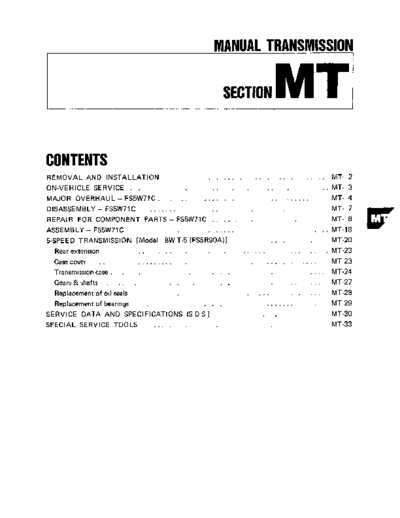
MANUAL TRANSMISSION
I
CONTENTS
REMOVAL AND INSTALLATION ...... ...... .... MT-2
ON-VEHICLE SERVICE . . .. .. _.
MT- 3
MAJOR OVERHAUL - FS5W71C. ... ...... ........ Mi- 4
DISASSEMBLY - FS5W71C ....... .. MT- 7
REPAIR FOR COMPONENT PARTS-FS5W71C ..... MT- a
ASSEMBLY - FS5W71C ...... , .. MT-18
5-SPEED TRANSMISSION [Model BW T-5 (FS5R90AIl ... MT-20
Rear extension .. ... ..... . . . . . . MT-23
Case cover .. ......... ......... MT-23
Transmission case . . . . . .... MT-24
Gearstkshafts . . . . . . . . .. ... MT-27
Replacement of oil seals .... ..... MT-28
Replacement of bearings . . I . ....... . MT-29
SERVICE DATA AND SPECIFICATIONS (S D S ) . . MT-30
SPECIAL SERVICE TOOLS .... MT-33
REMOVAL AND INSTALLATION
Installation
Remove exhaust front tube, catalytic converter a Tighten bolts securing transmission t o engine
and exhaust manifold connecting tube These bolts have different lengths.
Refer t o EM section.
a Remove propeller shaft.
Refer to PD section
Insert plug into rear oil seal after removing pro-
peller shaft.
a Support engine by placing a jack under oil pan.
CAUTION:
a Be careful not to damage spline, sleeve yoke
and rear oil seal, when removing propeller
shaft.
Do not place lack under the oil pan drain plug.
a Remove shift lever 22.291
\ BW T-5 (FS5R90A) SMT978
Fill transmission with recommended gear oil
FS5W71C \ SMTOlZA
WARNING:
Support Manual Transmission, while removing I t .
MT-2
ON-VEHICLE SERVICE
0 Rear extension oil seal.
I
MT-3
MAJOR OVERHAUL-FS5W71C
Case Components
MT-4
MAJOR OVERHAUL-FS5W71C
Gear Components
3rd main gear
Coupling sleeve 7 Needle bearing
TmGearoiI
Pilot bearing Gear 011 3rd & 4th synchroi
Pay attention to ~ t s
Baulk ring Gear uu
M a n drive gear ball bearing -,
Snap r
c )
r Mainshaft ball bearing
Mainshaft
I
Speedometer drive geai
1st 8 2nd synchronizer hub
2nd main gear- @ ?
A Snap ring
Counterrhaft lock nut *
110 0 - 13.0,12.94)
Reverse ~ounter
gear
Countershaft rear end
Reverse main gear Overdrive counter gear
gear spacer
Reverse idler gear
lnsen retainer
Reverse idler thrust
0 D (5th) synchronaer hub *
Reverse idler gear bearing
Rwerre idler thrust washer
Reverse idler shaft
* Always replace
counter front bearing
* Select with proper thickness.
SMT980 N m (kg-m, ft-lb) * pay a n e m o n to Itsdlrectlon.
MT-5
MAJOR OVERHAUL-FS5W71C
Shift Control Components
DlSASSEMBLY-IFS5W71C
1 Remove control housing, check ball and 4 Separate transmission case from adapter plate
plunger.
TM753
5. Set up Tool on adapter plate
W SMT982
2 Remove rear extension by lightly tapping it.
6 0
TM754
6 Remove check ball plugs, check springs, and
SMT983
check balls.
7 Drive out retaining pins Then drive out fork
rods and remove interlock balls
3. Remove front cover, gasket, countershaft front
bearing shim, and main drive bearing snap ring
SMTOll
MT-7
REPAIR FOR COMPONENT PARTS-FS5W71C
Forks and Fork Rods Gears and Shafts
INSPECTION D ISASSEMBLY
Check for wear, scratches, projection or dam- 1. Before disassembly, measure each gear end
age. play.
0 If end play IS not within the specified limit, dis-
assemble and check the parts
Replace any part which IS worn or damaged
SMT137
Mainshaft or bushing
WL
SMT025
Gear I End play mrn (in1
1st 0 3 1 . 0 3 7 (00122 - 0 01461
2nd 0 11 - 0 17 (00043- 0 00671
3rd 0 1 1 - 0 17 (00043 - 0 00671
OD 032-035(00126-00138~
Reverse idler 0 05 - 0 50 (00020 - 0 01971
2 Mesh 2nd and reverse gear, then draw out
counter front bearing.
TM398
MT-8
REPAIR FOR COMPONENT PARTS-FS5W71C
Gears and S ifts (Cont'd)
3 Remove snap ring and draw out counter drive 7 Draw out reverse counter gear and spacer.
gear with main drive gear 8 Remove snap ring from reverse idler shaft, and
draw out reverse idler gear
9 Remove snap rings, steel ball, speedometer gear
and bearing
-37 \ \
II \ \ .' . .-
I
SMT023
KV32101330
4 Remove snap ring and draw out 3rd & 4th
synchronizer and 3rd gear TM760
5 Release staking on counter gear nut and main-
shaft nut and loosen these nuts
10. Remove mainshaft nut, thrust washer, steel
ball, steel roller, needle bearing, 0 D gear and
baulk ring
11 Remove 0 D gear bushing, insert retainer and
0 D synchronizer.
TM757
Mainshaft nut: Left-hand thread
6 Pull out counter 0.D gear with bearing
MT-9
REPAIR FOR COMPONENT PARTS-FS5W71C
Gears and S ifts (Cont'd)
12. Draw out mainshaft assembly together with b u l k rings
counter gear, by tapping rear end of mainshaft 0 If found to be deformed, cracked or otherwise
- d counter gear. damaged excessively, replace baulk ring
SMT026
0 Place baulk ring in position on gear cone
While holding baulk ring against gear as far as it
will go, measure gap between baulk ring and
gear
If the clearance is smaller than the wear limit,
13 Remove thrust washer, steel ball, and 1st gear replace baulk ring.
Be careful not t o lose steel ball.
Baulk ring to gear clearance:
14 Press out 1st gear mainshaft bushing together Standard
with 2nd gear. 1 s t & 2nd gear
1.00 - 1.40 mm
(0.0394 - 0 0551 in)
d
3rd & main drive gear
-
1.20 1.60 mm
-
(0.0472 0 0630 in)
O.D. gear
-
1.OO 1.40 mm
(0.0394 - 0.0551 in)
Wear limit
H
1st & 2nd gear
0.5 mm (0.020 in)
3rd & main drive gear
0.8 mm (0.031 in)
O.D. gear
TMMSA
0.5 mm (0.020 in)
h u l k ring to
gear clearance
INSPECTION
0 Check all gears for excessive wear, chips and
0
cracks, replace as required.
Check shaft for bending, cracks and wear, if
necessary, replace w SMT140
MT-10
REPAIR FOR COMPONENT PARTS-FS5W71C
Gears and S ifts (Cont'd)
Shifting inserts and springs 3rd & 4 t h
If worn excessively, worn unevenly, deformed, or
damaged, replace
SMT994
SMTO64 OD
ASSEMBLY
Note:
Apply gear oil t o each part.
Needle bearings
Baulk rings
Shafts
Gears
Oil seals
1 Place inserts 0 D (5th) synchronizer SMT986
1st & 2nd hub
2 Assemble 2nd gear and 1st & 2nd synchronizer
assembly, then press 1st gear bushing on main-
shaft
MT-11
REPAIR FOR COMPONENT PARTS-FS5W71C
Gears and 5 Bfts (Cont'd)
3 Assemble 1st gear, steel ball, and thrust washer 7. Install 3rd main gear, and 3rd & 4th synchroni-
on mainshaft zer assembly
Before installing steel ball and thrust washer apply Pay attention t o direction of synchronizer.
grease to them.
Front
~
SMT008A
TM358
4 Install counter rear bearing to adapter plate 8 Install thrust washer on mainshaft and secure
5 Press mainshaft assembly to adapter plate using it with mainshaft front snap ring
Tool. Select proper snap ring that will minimize clear-
ance of groove in mainshaft.
KV31100401
TM439
6 Press counter gear into adapter plate.
TMMl
Mainshaft front snap ring'
Parts number Thickness mm (in)
32263-V5201 I 2.5 (0.098)
32263-V5202 2.6 (0.102)
9. Apply gear oil to mainshaft pilot bearing and
install it on mainshaft
MT-12
REPAIR FOR COMPONENT PARTS-FS5W71C
Gears and S ifts (Cont'd)
10 Press counter drive gear with main drive gear
using Tool. Parts number Thickness mm (in)
-
Pay attention to direction of counter front gear. 32215-9000 1 4 ( 0 055)
32215-E9001 1 5 (0.059)
a
322 15-9002 1.6 (0.063)
ST23860000
12 Press counter gear front bearing onto counter
gear
KV31100401
TM442
ST22360002
-Ba
Front 4 t
t--
13. Install idler gear to reverse idler shaft
11 Secure counter drive gear with snap ring
Select proper snap ring that will minimize clear- Front c
ance of groove in countershaft.
TM366
MT-13
REPAIR FOR COMPONENT PARTS-FS5W71C
Gears and 5 ifts (Cont'd)
14 Install insert retainer and 0 D synchronizer
to mainshaft
15 Install O.D. gear bushing
SMTM3
J
, 19 Mesh 2nd and reverse gears and tighten main-
SMT531
shaft lock nut
With special tool
16 Install O.D. gear assembly, steel roller and
thrust washer
Pay attention to direction of hub.
SMT003A
SMT007A
17 Install spacer, reverse counter gear and 0.D
counter gear
Main O.D. gear and counter O.D. gear should be
handled as a matched set.
18 Install countershaft rear end bearing
MT- 14
REPAIR FOR COMPONENT PARTS-FS5W71C
Gears and S 3fts (Cont'd)
Using the following chart 20 Tighten counter gear lock nut
(Length of torque wrench vs. setting or reading : 98-127N.m
torque) -
(10.0 13.0 kgm, 72 - 94 ft-lb)
2 I. Stake mainshaft lock nut and counter gear lock
7 ST22520000 c 7 nut with a punch.
Always use new lock nuts
22 Measure gear end play. For the description,
refer to Disassembly of Gears and Shafts.
I
I1 5) 1 0)
2 ( 2 5) I f f )
L Length of torque wrench
SMT004A
Without special tool
[91 1 3 7 - 1 6 7 N . m
(14.0 - 17.0 kg-m, 101 - 123ft-lb)
MT-15
REPAIR FOR COMPONENT PARTS-FS5W71C
Oil Seals Adapter Plate
FRONT COVER OIL SEAL When replacing adapter plate parts, use the
following procedures.
DOWEL PIN
Adapter plate
oowel pm 12 placer)
7 5 IO 2951
Mainshaft bearing7
1
Be careful not to damage lip of oil seal. umt mrn I!")
SMT027
ST23800000 OIL GUTTER
Install oil gutter on adapter plate and expand on
rear side.
. . .
TM356
MT-16
REPAIR FOR COMPONENT PARTS-FS5W71C
Adapter Plate (Cont'd)
BEARING RETAINER
1 Insert reverse shaft, then install bearing re-
tainer
SMTO28
2. Tighten each screw, then stake it a t two points.
MT-17
ASSEMBLY-FS5 W71C
1 Install shift rods, interlock balls and check
balls.
U SMT991
2 Apply sealant t o mating surface of transmission
case
SMT992
SMT989
3 Slide gear assembly onto adapter plate by
lightly tapping with a soft hammer.
SMT990 SMT013
MT-18
ASSEMBLY-FS5W71C
4 Apply sealant to mating surface of adapter -
plate. ' A' Thickness of shim Part number
352 371
N o t necessary
1 1386 0 14611
0
3 4 2 - 3 51
0 1 (00041 32218-VM00
(01 3 4 6 - 0 13821
3 32-341
0 2 10 0081 3221 8 - V M 0 1
1 1307 - 013431
0
-
3 22-331
0 3 I00121 32218-V5002
10 1 2 6 8 - 0 13031
-
312-321
0 4 1 0161
0 32218-VMO3
(01228 - 0 12641
-
302-311
0 5 I O 0201 32218-VMO4
(01189-01224)
-
2 92 - 3 01
0 6 (00241 32218-V5005
(0 1150 - 0 11851
5 Install rear extension
8 Install gasket and front cover.
9 Install bolts and plunger shown below
SMT993
6. Fit main drive bearing snap ring.
7 Select countershaft front bearing shim
Transrnoss~oncase
2 Counter gear front bearing
3 counrer gear
TM371
MT-19
5-SPEED TRANSMISSION [Model: BW T-5 (FS5R90A)l
5-SPEED TRANSMISSION [Model : BW T-5 (FS5R90A)]
Case. shift cover, extension housing
Tightening torque [N m 1kg-m.ff-lbll
2 Neutral witch 20 - 29 12 0 . 3 0, 14 - 221
4 Hex head bolt 8.1 - 14 7 10 83 - 1 5,6.0.10 8 1
5 Hex head shoulder bolt 8 1 - 14 7 IO 8 3 . 1 5.6 0 - 10 81
20 Control housingr r e w 15 - 27 11 5 - 2 8.11 - 201
31 Hex head flanged bolt 27 - 62 12.8.6 3,20 .461
36 Pivot pin 21 -33 12 1 -34, 15-25)
37 Bad-up lamp witch 17 - 24 11.7 .2.4.12.171
SMT846
Drain plug 20 .34(2.0.3 5, 14 - 251
1 Casecwer 17 Boot 33 Case
2 Neutralswltch 18 Boot retamer 34 Magnet
3 Wmgcbp 19 Control Iever/housng assembly 35 cllp
4 Hexheadbolt 20 Control houmg screw 36 Plvatpm
5 Hex head shoulder bolt 21 Dampersleeve 37 Back-up lamp swtch
6 h 22 Offset lever 38 W l h plug
es
7 0-nng 23 Spmg-pm 39 Plpeplug
8 Welshplug 24 Detentspmg 40 5th and reverse relay lever
9 Shfter shaft 25 Ball 41 Retammgmg
10 3-4 M t f o r k
11 s w t fork msert
12 Selector plate
26 Extennon housmg
27 Detent & guide plate
28 Bushmg
! Not sewiced
separately
42 5th and ~everse rhrft rad
43 Roller cam and pm
44 Reverse duft fork
! Not sernced
separately
Not s e ~ c e d
13 Control seiector ann 29 Cup plug 4$ Roller cam and pm separately
14 Interlock plate 30 01Iseal 46 5th gear duft fork
I5 I-Zshrft fork 31 Hex head flanged bolt 47 Insert
16 Boot retamer 32 B r e a t h 48 Spring-pin
49 sprmg
Mi-20
5SPEED TRANSMISSION [Model: BW T-5 (FS5R90A)I
Input shaft assembly
n
1 Input shaft bearmg retamer
2 Hex headbolt
3 Seal
4 Stum
5 Bearmgcup
6 Bearmgcone
7 Input shaft (mam drive gear)
MT847
◦ Jabse Service Manual Search 2024 ◦ Jabse Pravopis ◦ onTap.bg ◦ Other service manual resources online : Fixya ◦ eServiceinfo