Service Manuals, User Guides, Schematic Diagrams or docs for : . Rare and Ancient Equipment ENSONIQ ASR ASR_SERVICE_MANUAL
<< Back | HomeMost service manuals and schematics are PDF files, so You will need Adobre Acrobat Reader to view : Acrobat Download Some of the files are DjVu format. Readers and resources available here : DjVu Resources
For the compressed files, most common are zip and rar. Please, extract files with Your favorite compression software ( WinZip, WinRAR ... ) before viewing. If a document has multiple parts, You should download all, before extracting.
Good luck. Repair on Your own risk. Make sure You know what You are doing.
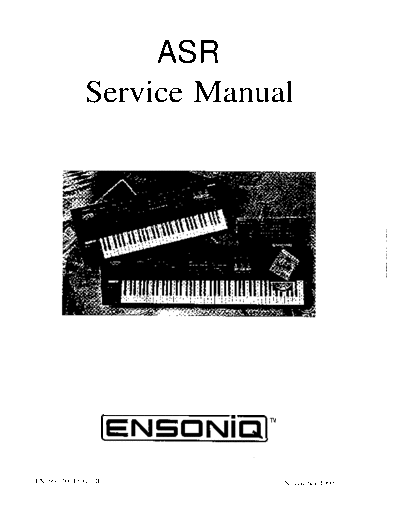
Image preview - the first page of the document
>> Download ASR_SERVICE_MANUAL documenatation <<
Text preview - extract from the document
ASR
Service Manual
EN50Ni'alm
I
P/N 9312001801 . B November 1995
Table of Contents
TABLE OF CONTENTS
IMPORTANT THINGS TO KNOW
Known Areas of Concern ................................................................................................... 1
Avoid Damage from ESD (Electrostatic Discharge) ............................................................ 1
SIMMS .................................................................................................................................. 1
What SIMMs to Use ............................................................................................................. 1
What Changed? ..................................................................................................................... 3 -
How to Tell Which Rev Board You Have ............................................................................ 3
-
THE DISK DRIVE ............................................................................................................. 3
Transporting a unit ................................................................................................................ 3
What disks to use .................................................................................................................. 3
Testing the Disk Drive.. ........................................................................................................ 3
UNIT SOUNDS DISTORTED.. ......................................................................................... 4
FUSES .................................................................................................................................. 5
The 20-pin KeyboardIKPC Simulator Ribbon Cable ........................................................... 5
Customer Thinks the Unit is Broken .................................................................................... 5
MECHANICAL ISSUES.. .................................................................................................. 6
ASR Case (Avoid Stripping Screws). ................................................................................... 6
High - retention Force Connectors (Repair Technicians Label) ........................................... 6
OEX-6sr Connector on ASR Keyboard and ASR-88 Caution! Important! .......................... 7
HOW THE ASR WORKS.. ................................................................................... .............. 7
Keyboard and Rack Similarites.. ........................................................................................... 9
Communications Path ........................................................................................................... 9
TROUBLESHOOTING
c
CHECKING THE POWER SUPPLY .............................................................................. 12
Analog Board Regulator Voltages ........................................................................................ 1 2
POWER SUPPLY VOLTAGE CHECK POINTS .......................................................... 13
Fuse Ratings .......................................................................................................................... 1 3
TESTING THE POWER SUPPLY UNLOADED ........................................................... 14
CHECKING THE DISPLAY ............................................................................................ 1 6
DISPLAY SELF-TEST MODE ......................................................................................... 1 6
Using Self-Test Mode to Diagnose the Keypad/Display Board.. .......................................... 1 6
Troubleshooting an ASR-10 With No LEDS Lit .................................................................. 1 7
Troubleshooting an ASR-10 With All LEDS Lit, No Display ............................................. 1 8
KEYBOARD AND FOOTSWITCH INPUTS ................................................................. 19
The ASR-10 Keyboard and the KPC Simulator Board.. ....................................................... 1 9
ASR-10 Footswitch and Patch Select Inputs ........................................................................ 19
ASR-88 KEYBOARD ....................................................................................... .:................ 2 0
Key Response Problems.. ...................................................................................................... 2 0
Pressure Response Problems.. ............................................................................................... 2 2
ERROR MESSAGES ......................................................................................................... 23
ASR-10188 SOFTWARE NOTES.. ........ . ........................................................................... 25
ASR TEST PROCEDURE.. ............................................................................................... 35
1. Power Up and Load in Sounds.. ........................................................................................ 35
2. Keyboard Test (ASR-10188 Keyboard Only) ................................................................... 35 i
ASR Service Manual
Table of Contents
3. Headphone Check ............................................................................................................. 35
4. MIDI Test.. ........................................................................................................................ 35
5. Anlog Page.. ...................................................................................................................... 36
6. Disk Check.. ...................................................................................................................... 37
7. Sampling Check.. .............................................................................................................. 37
8. OEX-6sr Check.. ............................................................................................................... 38
REPLACING ASR-lOh38 MODULES .............................................................................. 41
Section A - Replacing the Digital Board .............................................................................. 41
Section B - Replacing the Analog Board.. ............................................................................ 42
Section C - Replacing the Power Supply Board ................................................................... 43
Section D - Replacing the Keypad/Display Board.. .............................................................. 44
Section E- Replacing the Keyboard (ASR-10) .................................................................... 45
Section E - Replacing the Keyboard (ASR-88) .................................................................... 46
Section F - Replacing the Digital Jack Board.. ..................................................................... 47
Section G - Replacing the Analog Jack Board.. .................................................................... 47
Section H - Replacing the Disk Drive.. ................................................................................. 48
Section I - Replacing the Transformer.. ................................................................................ 48
Section J - Replacing the Line Filter.. ................................................................................... 49
Section K - Installing and Removing the SCSI Board.. ........................................................ 50
Section L - Replacing the Digital I/O Option Board ............................................................ 51
Section M - Replacing the O.S. EPROMs.. .......................................................................... 53
Section N - Replacing the Wheel Assembly.. ....................................................................... 54
REPLACING ASR RACK MODULES.. .......................................................................... 56
Section A - Replacing the Rack Digital Board ..................................................................... 56
Section B - Replacing the Rack Analog Board ..................................................................... 57
Section C - Replacing the Rack Power Supply Board.. ........................................................ 58
Section D - Replacing the Rack Keypad/Display Board ...................................................... 59
Section E - Replacing the Rack KPC Simulator Board ........................................................ 60
Section F - Replacing the Rack Digital Jack Board.. ............................................................ 60
Section G - Replacing the Rack Analog Jack Board ............................................................ 60
Section H - Replacing the Rack Disk Drive ......................................................................... 61
Section I - Replacing the Rack Transformer......................................................................... 62
Section J - Replacing the Rack Line Filter ........................................................................... 62
Section K - Replacing the Rack S C S I Board.. ...................................................................... 63
Section L - Replacing the Rack Digital I./O Option Board ................................................... 63
Section M - Replacing the Rack O.S. EPROMs ................................................................... 65
Section N - Replacing the Rack OEX-6sr Board.. ................................................................ 65
Section 0 - Replacing the P C B Mounting Bracket .............................................................. 66
IMPORTANT INFORMATION ABOUT SJMMs.. ........................................................ 67
SCSI INFORMATION.. ..................................................................................................... 74
DIGITAL I/O INFORMATION.. ...................................................................................... 76
OEX-6sr INFORMATION ................................................................................................ 77
Glossary.. ............................................................................................................ Inside back cover
Part Numbers for ASR Modules ........................................................................ Inside back cover
Contacting ENSONIQ.. ...................................................................................... Outside back cover
ASR Service Manual
Table of Contents
LIST OF FIGURES
Figure 1 - Note the single jumper above the Simm slots ...................................................... 2
Figure 2 - Note the two different jumpers above theSEvIM slots ......................................... 2
Figure 3 - Rear view of Panasonic Disk Drive ..................................................................... 3
Figure 4 - Correct Sony 420-l jumper settings.. ................................................................... 4
Figure 5 - Correct tool for removing cables.......................................................................... 6
Figure 6 - ASR Block Diagram.. ........................................................................................... 7
Figure 7 - Communications Path .......................................................................................... 1 0
Figure 8 - AC Line Voltage Check Points ............................................................................ 1 2
Figure 9 - ASR-10 Power Supply Board.. ............................................................................. 1 3
Figure 10 - Incorrect Analog Power Supply Voltages (flow chart) ...................................... 1 4
Figure 11 - Incorrect Digital Power Supply Voltages (flow chart) ....................................... 1 5
Figure 1 2 - N o LEDs Lit (flow chart) ................................................................................... 1 7
Figure 1 3 - All LEDs Lit, No Display (flow chart). .............................................................. 1 8
Figure 1 4 - ROM and disk Compatibility ............................................................................. 25
Figure 1 5 - ASR-10 Exploded View.. ................................................................................... 3 9
Figure 1 6 - ASR-88 Exploded View.. ................................................................................... 40
Figure 1 7 - ASR-10 Digital Board.. ...................................................................................... 4 2
Figure 18 - ASR-10 Analog Board ....................................................................................... 4 2
Figure 1 9 - ASR-10 Center Support Bracket Assembly.. ..................................................... 4 4
Figure 20 - ASR- 10 Keyboard Mounting Bracket.. .............................................................. 4 6
Figure 21 - ASR-88 Bracket locations.. ................................................................................ 4 6
Figure 22 - SCSI Board Mounting ........................................................................................ 5 0
Figure 23 - Installing a DI-10 Board into an ASR-10 Keyboard Unit .................................. 5 2
Figure 2 4 - ASR-1OR Exploded View.. ................................................................................ 55
Figure 25 - Top Side of the ASR-10 Rack PCB Mounting Bracket ..................................... 6 4
Figure 26 - Installing a DI-10 Board into an ASR-10 Rack Unit.. ........................................ 6 4
Figure 2 7 - SIMM Layout.. ................................................................................................... 67
Figure 2 8 - Board differences ............................................................................................... 68
Figure 2 9 - Simm Access on the new Rev Board ................................................................. 7 0
Figure 30 - THESE ARE THE ONLY CONFIGURATIONS THAT WILL WORK PROPERLY!. . .7 1
Figure 3 1 - SIMM Access on the Old Rev Board.. ............................................................... 71
Figure 32 - THESE ARE THE ONLY CONFIGURATIONS THAT WILL WORK PROPERLY!. . .72
Figure 33 - SIMM Socket Components ................................................................................ 7 2
Figure 3 4 - Removing SIMMs .............................................................................................. 7 3
Figure 3 4 - Installing SIMMs.. .............................................................................................. 7 3
Figure 3 6 - A properly Installed SIMM ................................................................................ 73
ASR Service Manual
Important
IMPORTANT THINGS TO KNOW ABOUT THE ASR-1 O/88
About this manual: The instructions in this manual are for both the ASR-10/M? Keyboard and Rack
unless otherwise noted. When you are troubleshooting an ASR Rack and the instructions say to check the
keyboard, substitute a check of the KPC simulator board. When you are troubleshooting an a ASR-88 and the
instructions say to check the keyboard, substitute a check of the keyboard adapter board.
As with every ENSONIQ product, all ASR service is handled through the ENSONIQ Module Exchange
Program. Rather than diagnose and exchange individual components, you will replace complete modules.
We feel that this is the most time and cost effective method of repair, both for you and your customers.
Known Areas of Concern
The four known problem areas of ASRs have been: 1) SIMMs; 2) the disk drive; 3) distorted sound; and 4)
fuses blowing. Those items marked with a G+= are known areas of concern, other items are important things to
know about the ASR.
* Avoid Damage from ESD (Electra Static Discharge) !!!
How can we minimize the possibility of causing ESD dama,e ? Here are some procedures you can follow
0
when working on ENSONIQ products.
l Before beginning any work you should be grounded. Discharge any static electric charge built up on the
body. This will be accomplished by using a ground strap that attaches to your wrist and ground leaving your
hands free to work.
l Always look for ESD warnings before opening any packages from ENSONIQ.
l Always avoid unnecessary physical movement, such as scuffing the feet when handling ESD sensitive
devices. That kind of movement can generate additional charges of static electricity.
l Minimize handling of ESD sensitive devices. Keep ESD sensitive devices in their static free packages
until needed. Only transport or store ESD sensitive devices in their protective packages.
l When handling ESD sensitive devices, avoid touching any connector pins, leads, or any other electrical
connections on the board. Try to handle ESD sensitive devices by the edges only.
a=SIMMs
Often a customer may think that a unit is broken, when it simply does not have the correct SIMMs installed.
It is important to thoroughly qualify the SIMMs that are installed before troubleshooting further. Read and
understand the following notes about SIMMs, and refer to the special SIMMs section at the rear of this
manual to be sure a customer is not experiencing problems due to incorrect SIMMs, or SIMMs that are not
installed properly.
What SlMMs to Use
The ASR-10 and ASR-88 mainboard has been redesigned. It changes the type of SlMMs that can be used, and
the way that you install the SIMMs. The new mainboard is used starting from the following serial numbers:
ASR-10 - 20677
ASR- 1 ORack - 014567
ASR-10 w/SCSI - 13126
ASR-88 - all units
4SR Service Manual 1
Important
Note: It is possible that your unit has a different rev board than these cutoffs suggest, due to a repair or other
circumstance. Be sure to check it against the diagrams here to confirm which rev board you have.
What Changed?
The newer board can accept 2 chip and 8 chip 4meg SIMMs. The older board can only use the 8 chip parts.
Since the 2 chip parts are becoming more common (and possibly less expensive) we redesigned the board to
allow you to use them.
How to Tell Which Rev Board You Have
The old rev board looks like this:
- Jumper is connected for
M6.4 EXP JMP
STANDARD SIMM Memory.
Move to the other pins when
using Expansion SIMM Slots.
- Two 1-MegaByte SlMMs
- Expansion slots are empty
Figure 1 - Note the single jumper above the SIMM slots.
The new rev board looks like this:
SIMM Size Jumpers (2) - Jumoer is connected for
are set to 1 M (1 MegaByte
SIMMS). Move the
DEJYPI -WN-.. M )
y- -
i EXPANSON YMRY
IEM EXF'JMP
STANDARD SIMM Memory.
Move to the other pins when
jumpers to the 4M Smndrfd SIMM Sk using expansion SIMM slots.
positions when changing
to 4 MegaByte SIMMS.
- Two 1 MegaByte SlMMs
- Expansion slots are empty
Figure 2 - Note the two different jumpers above the SIMM slots.
0 Keyboard - SIMMs may be installed by customer.
l Rack - SlMMs must be installed by Repair Stations because the lid must be removed.
0 The ASR uses 30-pin, D-RAM, 1Meg x 8 or 4Meg x 8 (Macintosh-type) non-parity SIMMs (not 1Meg x
9 or 4Meg x 9 parity SlMMs). The ASR will not accept static RAM or ROMs.
0 We do not recommend using parity SIMMs (designed for IBM PC compatibles). These SIMMs may not
operate properly, and may cause damage to the ASR.
0 We recommend using SIMMs with an access speed of 80 nanoseconds or faster.
0 When installing SIMhJs be sure to move the jumper to the Expansion position.
2
ASR Sewice Manual
Important
l If SIMMs are installed in a less than optimal configuration (see pp. 71-72), the display will read SIMMs
IN WRONG SOCKETS after booting. If this message is displayed, you should power off and check the
SIMMs configuration.
l SIMMs that have GAL (gate array logic) or PAL (programmable array logic) chips on them may be too
thick to fit into the standard sockets that are used on the ASR. Even if the SIMMs with GALS
or PALS fit, they will draw too much power and certain configurations (i.e. 2M x8 SIMMs) will not work
properly.
l See Important Information About SIMMs, p. 67.
THE DISK DRIVE
Transporting a unit
We do not, under any circumstances, recommend the insertion of an actual disk during transport. Only
transport the unit with the drive empty. Please do not ship an ASR or a replacement disk drive in a box
packed with foam peanuts. If you must use foam peanuts, wrap the entire unit in plastic first. Foam peanuts
may cause severe damage to the disk drive or keyboard.
What disks to use
It is very important to use double-sided, double-density (DD) or high density (HD) 3.5" micro-floppy disks.
The ASR writes information to every track on a disk, so it is imperative that the disk be of superior quality.
Disks that have been pre-formatted for MS DOS are not always reliable and should not be used.
Testing the Disk Drive
The best way to test the disk drive is by formatting a disk. When a disk is formatted, the ASR reads and
writes every track on that disk. If the formatting fails, the disk itself may be faulty. Try formatting another
disk before determining that the disk drive is faulty. Unlike some computer systems, the ASR does not
automatically discard bad sectors when formatting. The entire disk must be good for successful formatting.
There is an exception, a disk that has been pre-formatted for MS DOS may be able to be formatted for use in
an ASR and still not work reliably in the ASR.
e A few different disk drives were used in the ASR: two types of Panasonic drive and one Sony drive.
Make sure that when you install a new Panasonic disk drive that the switches on the rear of the drive are set as
shown in Figure 3. On some Panasonic disk drives, the Drive Select Switch has only two positions instead of
four. The drive select should always be set to zero (0). If the drive cable is too short, you may also need a
new 34 pin cable when replacing a Panasonic drive with a Sony drive.
-Make sure that this
switch is in the middle!
Figure 3 - Rear view of Panasonic Disk Drive
4SR Service Manual 3
Imoortant
e Customers may complain that their ASR will not read some of their disks. Please be aware that High
Density (I-ID) disks that have been formatted as Double Density (DD) on a DD drive in a unit such as an EPS,
EPS-16 PLUS, or a Macintosh Plus will not be recognized in machines that have an HD drive. This would
include the ASR, as well as an IBM PC or clone. Disks that have been pre-formatted for MS DOS are not
always reliable and should not be used.
e On early units, removing the disk drive causes the disk drive bezel to break.
The Sony 420-l disk drive has a jumper block. The correct jumper settings are shown in figure 4.
Figure 4 - Correct Sony 420-l jumper settings
CF In keyboard units, some plastic on both the wheel cover and end cap has to be removed. Replacement
disk drives now come with a template and instructions for cutting the plastic on the wheel cover for older
units. See the information included with the new drive.
UNIT SOUNDS DISTORTED
l If the Peak LEDs on the Input Level are always on, this usually indicates a blown fuse.
l Setting the loop end point before the loop start point can cause the unit to make funny sounds. To check
this, select the sound that this is occurring on, then select the wavesample: press Edit, underline WS, and
play a key that plays the offending sound so that the display shows a number (rather than ALL). If no
number will show up, underline layer and choose a new layer, then try again. Press Wave, press right
arrow repeatedly until the display shows LOOP START. Note the percentage number in the parenthesis.
Press right arrow again until the display shows LOOP END and note the number in the parenthesis for
loop end. The loop end number must be larger than the loop start number. No factory sounds are shipped
this way, so this is most likely to occur on sounds that the customer has created or modified.
l Make sure that the cable for each jack board is connected properly.
l ESP download failures will show up as either a "SYSTEM ERROR xxx" or as the outputs playing "dry"
without any effects, with garbled effects, or with no sound at all. If sounds set to DRY sound fine, but
sounds with effects don't, replace the digital board.
l KEYBOARD ONLY: If there is distortion on the tail of every sound, and the serial number of the unit is
between 10970 and 11700, replace the analog board.
l If a sample that the customer recorded into the ASR sounds distorted or there is a click in the beginning
and/or end of the sound, check the A/D chip on the Analog board:
a ) Make sure that NOTHlNG is plugged into either of the ASR Audio Input jacks.
b) Keyboard only: Make sure that the MIC/LINE switch is in the LINE (down) position.
C ) Make sure that the Input Level pot is turned fully down (counterclockwise when facing the back of
the ASR).
d) Press Command, then Env 1.
4
ASR Service Manual
Imnortant
e) Press the right arrow button until the display shows DC OFFSET.
fj'Press Enter*Yes. The display should show: LEFT= +/-0000x RIGHT= +/-OOOOy
g) If one or both of the values is 32,767 replace the analog board.
h) In a properly functioning unit, the reading should not be greater than 20 counts from zero (+/-
00020). If the values exceed this: RACK: Replace the analog board.
KEYBOARD: You can adjust each pot on the analog board to be as close to zero as possible:
1) You can adjust the pots (these are the only two pots on the analog board) with your fingers. You
must reach under the unit and locate the pot that needs to be adjusted. Locate this visually before
grabbing it. Slowly turn the pot clockwise (to the RIGHT) to increase the reading, or counter-
clockwise (to the LEFT) to decrease the reading.
2) If they cannot be adjusted within the allowable range of +/-00020, replace the Analog Board.
i) Press Cancel*No to stop the test. The display shows: DC OFFSET
FUSES
l A system error may be the result of blown fuses. Check the fuses first.
0 If the Peak LEDs are always on, fuses may be blown. When the sample peak LEDs are on, it is usually a
blown fuse.
. Fuse Ratings (as of October, 1995)
UL rated fuses IEC 127 rated fuses Where Used
(lOOV, 12OV,24OV) (230V units only)
Fl and F2 1.6A fast blow Tl .OA slow blow Analog
F3 and F4 4.OA fast blow F4.OA fast blow +VD Digital/Display/KbdSCSI/DI-10
F5 1.6A fast blow F1.6A fast blow Display
F6 and F7 l.OA slow blow Tl.OA slow blow AIldOg
F9 2.OA fast blow F2.OA fast blow Line Fuse
The 20-pin Keyboard/KPC Simulator Ribbon Cable
When reconnecting this cable to the digital board, make sure that the striped side is aligned with pin 1 and that
the cable is not mis-pinned. If the cable & r&-pinned or installed backward, fuses F3 and F4 on the power
supply board will blow. NOTE: If one fuse blows, the other will blow also; you must replace both.
Customer Thinks the Unit is Broken
l Version 240 KPC software, when you hold down up arrow and press down arrow, numbers would
scroll instead of going to the halfway point. A new keyboard with 2.41 fixes this problem. See Software
Notes.
0 The sampling "Level Detect" screen should be looked at as an averaging meter and not as an accurate or
realtime signal. Some customers were concerned that their units were broken because the level detect
indicator bounces all over the place or does not respond to peaks.
. Customers may complain that their ASR will not read some of their disks. Please be aware that High
Density (I-ID) disks that have been formatted as Double Density (DD) on a DD drive in a unit such as an
EPS, EPS-16 PLUS, or a Macintosh Plus will not be recognized in machines that have an HD drive. This
would include the ASR, as well as an IBM PC or clone. Disks that have been pre-formatted for DOS
are not always reliable and should not be used.
ISR Service Manual 5
Important
MECHANICAL ISSUES
Keyboard: Originally, three different types of screws were used in the ASR keyboard base pan 832s,
two 6-32s into main board heat sink, and self-tapping into the extrusion. The 6-32s were eventually
changed to 8-32s, so that there are now only two different types of screws.
Keyboard: On early units, you may break the disk drive bezel when removing the disk drive from the
unit. The wheel cover was modified on later units to prevent this.
Keyboard: If the mounting posts for the wheel brackets break, call ENSONIQ for a new wheel cover
that has the posts reinforced.
Keyboard: Early units may have buttons sticking or keys clacking. To make sure that buttons don't
stick on later units, a M4xlOmm hex head set screw was added to the extrusion rail that the
keypad/display board mounts to locate the keypad/display board properly. Don't remove this set screw.
Rack: On Rack units, use a drop of Loctite on screws that hold the circuit boards in place if nylock
screws are not used. Nylock screws have a patch of nylon on the threads for greater holding power.
Rack: On ASR Racks with serial numbers between 10000 and 10500, the rack ear screw PEMs (screw
mounting standoffs) may fall inside the unit.
W ASR Case (Avoid Stripping Screws)
Be careful when assembling or disassembling any part of the ASR. Avoid over-tightening screws when
repairing a unit! Use no more than 8 incMbs of torque when tightening any screw. The ASR case is
made of aluminum extrusions and steel. Some parts are held in place by screws that
tighten into aluminum mounting rails that are part of the case. When replacing any of these screws, it is
possible to over-tighten the screws and strip out a hole.
W High-Retention Force Connectors (Repair Technicians Label)
Inside the ASR is warning/information label just for you. We wanted to let you know that we use high
retention force connectors in the ASR. This means it is very difficult to remove a connector by just pulling.
We recommend the use of a scribe, screwdriver or similar object when disconnecting cables. Watch out for
them, and please don't pull on the wires!
We have found that some units develop further problems once a module has been changed. This may be
a result of improper handling of cables. We suggest removing all cable connectors using the angled end of a
scribe (see Figure 5).
Figure 5 - Correct tool for removing cables
Scribes can be found in the following catalogs:
l Techni-Tool catalog part number 400PR144.
l Newark catalog part number 76- 15 10.
6 ASR Service Manual
Important
GF OEX-6sr CONNECTOR ON ASR KEYBOARD AND ASR-88 CAUTION!!! IMPORTANT!!!
The OEX-6sr should never be plugged in or unplu,, with the ASR power on, as this could damage the
OOed
ASR. The 8-pin mini-DIN connector on the rear panel of the ASR should only be used to connect the
OEX-6sr Output Expander to the unit. This connector does not simply supply audio outputs and signal
ground and, therefore, cannot be used to generate separate outputs without the OEX-6sr. The ASR
generates digital signals that must be converted externally. The signals present on this connector include
digital control signals and +/- 15VDC. Improper connections to these signals could easily damage the
ASR or any external device connected.
HOW THE ASR WORKS
W This section should help you understand what each module in the ASR does. Reading this may help you
decide what module is faulty by just knowing the ASR system better.
The ASR- 10 is a powerful self-contained computer system. It offers users the ability to accomplish many
tasks, some of these are:
l Sampling audio information from external sources
l Resampling its own audio output
l Adding digital effects to samples
l Sequencing
l Digital audio track recording
l Disk storage and retrieval
The ability to accomplish these tasks makes the ASR-10 a complex system.
Figure 6 shows the ASR-10's main components as a complete system.
WHEEL ASSEMBLY
m ONLY)
9. KEYPAD/DISPLAY
BOARD
I
6. KEYBOARD 13. PATCH SELECT
(KPC BOARD ON RACK) I BmON BOARD
I
(KFfBOARO ONLY)
I
I --------s-s I
,,-----a
Figure 6 - ASR Block Diagram
ASR Service Manual 7
Important
The block diagram also represents the modular design of the ASR-10. Each one of the main components
represented in the diagram can be replaced, if necessary, without disturbing the other components in the
system. Looking at the diagram you see:
1. Disk Drive Data storage and retrieval device.
2. Power Supply Board Converts AC voltages to regulated DC and unregulated AC and DC to
be distributed throughout the system.
3. Digital Jack Board Connections to facilitate the use of the optional digital I/O board. MIDI
jacks, CV pedal jack, and footswitch jacks
4. Digital I/O Board Optional board that enables the ASR-10 to use digital audio data directly
from a digital source, such as DAT. It also allows the ASR-10 to output
digital audio data directly to a digital recorder, such as DAT.
5. Digital Board The engine of the ASR-10. It has the microprocessor, the sound
processor, operating system memory, sound memory, effects processor,
and floppy disk controller. It also has the circuitry to control all inputs
to and outputs from the system.
6. Keyboard (KPC Board on Rack) Sends performance information (note on, note off, pressure) to the ASR-
10 digital board. Also handles communications to and from the
keypad/display board.
7. Analog Jack Board Has the input pre-amp circuitry on it, all of the audio inputs and outputs
(except for OEX-6).
8. Analog Board Converts analog audio signals into digital audio signals and passes them
to the digital board. Converts digital audio signals to analog audio
signals and supplies them to the audio outputs and headphone amplifier
9. Keypad/Display Board Transmits button presses to the digital board through the keyboard, and
receives display data from the digital board through the keyboard. See
figure 7 for further details.
10. SCSI Board Allows access to SCSI devices for storage and retrieval of data, and disk
track digital recording. It is an optional board on the ASR- 10 keyboard.
ll.OEX6sr Board Optional board on the ASR-10 keyboard. Adds three additional stereo D
to A converters for six additional analog outputs.
.12. Pitch and Mod. Wheel
Assembly Transmits pitch and modulation wheel movements to the digital board. It
is not included on the ASR-10 rackmount.
8 ASR Service Manual
ImDortant
13. Patch Select Button Board Transmits patch select button presses to the digital board. It is not
included on the ASR-10 rackmount.
The ASR-10 was designed with the analog and digital sections on different boards, and the analog and digital
jack boards separate, for some specific reasons.
l Only the digital board requires a four-layer circuit board so there is a cost savings using a two-layer board
for the analog section.
l It is easier to break the connections between the analog board and the digital board to install the optional
optically isolated SCSI board. This ensures that no matter how much digital noise is induced on the digital
board due to SCSI, it won't reach the analog section.
l Having separate jack boards allows the interface points with the outside world to be placed away from
circuitry that can be damaged by Electra Static Discharge that can be introduced at these points. This
decreases the instruments susceptibility to damage from ESD.
Keyboard and Rack Similarities
The Keyboard and the Rack use the same operating system (OS.) disk. The ASR-88 uses different EPROMs.
All circuit boards except the keypad/display board are the same for both the keyboard and the rack. However,
there are physical differences that will require you to specify for which unit you are ordering parts.
Instead of a Poly-Key keyboard assembly, the Rack has a KPC simulator board. The KPC simulator board
passes information between the keypad/display board and the digital board (like the keyboard does for the
keyboard unit). In the rest of this manual, whenever you see "keyboard," substitute KPC simulator for the
Rack and keyboard adapter board for the ASR-88 (except where otherwise noted). The ASR Rack has the
OEX-6sr Output Expander and SCSI Interface (SP-3) built-in. These two expanders are options for the
Keyboard unit. Digital I/O is an option for all ASR models. The ASR-88 has 16Meg of RAM standard, and
SCSI. The ASR-88 has a keyboard adapter board instead of a KPC board.
Communications Path
It is important that you completely understand the communications path of the ASR. Please read this
carefully.
The ASR digital board, keypad/display board and keyboard are complete computer systems in themselves,
each with its own microprocessor and operating software. The modules communicate with each other using
serial communication ports. Whenever a key is played on the keyboard, for example, the keyboard assembly
microprocessor transmits this information to the microprocessor on the digital board.
The keypad/display board communicates with the digital board through the keyboard. Whenever the digital
board wants to put a message on the display, it sends the message to the keyboard which then passes it on to
the display. Whenever a button is pressed on the control panel, the keypad/display board'sends the message to
the keyboard which, in turn, passes it on to the digital board.
The communications path is shown in Figure 7. The digital board communicates with the keyboard over a
two-line asynchronous interface carried by the 20-pin keyboard ribbon cable. The keyboard communicates
with the keypad/display board over a three-line synchronous interface that is carried over to the digital board
via the 20-pin ribbon cable, then up to the keypad/display board via the 24-pin ribbon cable.
ASR Service Manual 9
Imoortant
Due to the complexity of the modules involved, it is often difficult to determine which module is at fault when
a communications problem occurs.
DATA DATA CLOCK
KEYPAD/DISPLAY BOARD
IN OUT OUT
I 24 PIN DISPLAY
1 I
/ CABLE
DATA DATA
DIGITAL BOARD
IN OUT
DATA DATA CLOCK
I ASYNCHRONOUS
PORT
Figure 7 - Communications Path
If a communication problem occurs (i.e., no display or no response to button presses or keys), it could be
something as simple as a bad cable, or it could be a problem in one of the modules. To help you identify a
faulty module, a Communication Test Board is available from ENSONIQ Customer Service*. The
Communication Test Board simulates the operation of the keyboard and can be used as a "known good"
module in place of the keyboard for troubleshooting.
*This is the same communications test board that was sent out to service centers in 1990 to troubleshoot
polypressure keyboard problems.
IMPORTANT!
When using the Communication Test Board, keep in mind that it is sensitive to static discharge. Handle the
board by the edges and store it in the anti-static shipping bag when not in use. Do not let the board short out
when testing, place an insulator (cardboard, paper, etc.) underneath it,
Attaching the Communications Test Board
If an ASR has a communications problem, turn the unit off and unplug the 20-pin keyboard ribbon cable from
the digital board at connector J7. Plug the 20-pin ribbon cable from the Communication Test Board into 57.
This will eliminate the keyboard as a variable. Turn the system on. If the communications problem persists,
you know the keyboard is not at fault. If communication is restarted, however, the keyboard is at fault.
There is one further complication. Since the communications path between the keyboard and keypad/display
board is routed through the digital board, there is a remote possibility that the printed circuit connections
10
ASR Service Manual
Important
between the two connectors are defective. If you have an ASR that has a problem communicating with its
keypad/display board, you may want to verify continuity between the connectors on the digital board.
Turn off the power and unplug the 20-pin ribbon cable from the ASR digital board at J7 and the ASR 24-pin
display cable from the digital board at Jl. Using an ohmmeter, verify continuity between the following points
on the digital board:
57 (20~Din connector) J 1 (24-Din connector)
Pin 1 to Pin 9
Pin3 to Pin 10
Pin 5 to Pin 11
TROUBLESHOOTING
Often the faulty module in an ASR can be determined through normal use. Sometimes, it is difficult to
isolate the problem. The following flowcharts can help you diagnose units that appear dead (no display).
When troubleshooting an ASR, always disconnect any expansion devices that may be present (such as the
SCSI Interface or OEX-6sr Output Expander). This will prevent a faulty expander from complicating your
troubleshooting. Remember, when you take out the SCSI board, connect the analog board to the digital
board via a 34 pin ribbon cable to J6 on the digital board and Jl on the analog board.
The following pages include troubleshooting information:
Pao,e Problem
12 AC Line Voltages
13 Power Supply Voltage Check Points
14 ASR with Incorrect Analog Power Supply Voltages (flow chart)
15 ASR with Incorrect Digital Power Supply Voltages (flow chart)
16 Display Self-test Chart
17 ASR with No LEDs Lit (flow chart)
18 ASR with All LEDs Lit, No Display (flow chart)
19 ASR Foot Switch and Patch Select Inputs
20 ASR-88 Keyboard
ASR Service Manual
Checking the Power Supply
CHECKING THE POWER SUPPLY
Some ASR-10 problems may be related to a faulty power supply, transformer or line filter. You should
check these before troubleshooting the rest of the unit. Measure continuity across all the fuses to
make sure they are not blown.
Make sure that all the cable connections are secure and correct. Plug the ASR-10 in and turn it on.
After it has warmed up for five minutes, begin to test the voltages at the points shown in Figures 8 and 9.
It is normal for Line Voltage to vary +/- 10%. If the voltages vary outside the allowable limits, follow
the procedure described under TESTING THE POWER SUPPLY UNLOADED (pp. 14-15) before
replacing it.
The voltage and part number of the chassis mount transformer are on the label on the top of the
transformer. The power supply part number is silk-screened near the center of the power supply PC
board. The chassis mount transformer part numbers for the ASR-10 are:
1OOV 1450000722 230V 1450000352
12OV 1450000342 240V 1450000932
These lugs are on the
power supply board.
v
NOTE: Wiring
is the same for
the ASR-10 Rack
green wire TR=top right lug
Tground to case) BR=bottom right lug
Filter 1 Power Switch I TL=top left lug
BL=bottom left lug
Rear of ASR-10 Keyboard Unit
Analog Board Regulator Voltages
There are seven regulators (VRl through VR7) attached to the analog board heat sink. On the keyboard
version, you can easily check to make sure that they are generatin,(J the correct voltages. The correct
voltages are silkscreened onto the analog board next to the regulator name. Place your ground (-) probe
on the tab of VR5. To measure the output, place the other probe on pin 3 of the regulator (when the
regulator legs are closest to you, pin 3 is the right leg). It is normal for the voltage to vary f 5%.
12 ASR Service Manual
Checking The Power Supply
POWER SUPPLY VOLTAGE CHECK POINTS
Below are the voltage ranges for proper operation of each fully loaded supply and the pins to read across
with the voltmeter (see Figure 9). It is normal for line voltage to vary +/- 10%.
Designation Where Used Connector Pins Allowable range Units
+,-
Digital Supply digital 54 193 18.7 to 22.8 VACrms
Analog Supply XXil0g 54 496 17.1 to 20.9 VACrms
Display Filament display 54 799 5.1 to 6.2 VACrms
Display Offset display 54 92 -25.0 to -30.6 VDC
+5D 1 digital 52 172 i4.75 to +5.25 VDC
+5D2 digital J2 3-4 +4.75 to +5.25 VDC
+VD display/digital/kbd J 1 12 +10.9 to +12.1 VDC
+VAl LUlal0g 53 193 +24.4 to +29.8 VDC
+VA2 aIMlog 53 2,3 +9.5 to +11.6 VDC
-VA1 Wtl0g 53 534 -27.6 to -33.8 VDC
-VA2 TilldOg 53 694 -10.9 to -12.1 VDC
J2 was marked Xl on some early versions of the power supply board. These voltages can also be
measured on the digital board (near the J2-power connector) with the ground (-) probe on the digital
board heat sink: +5D 1 at FB3; +5D2 at FB2; and +VD at FB 1.
On keyboard units, the 53 power supply voltages may be measured at 53 of the analog board.
li%" T5 orange
El
22OL240
t F6 1 T6 white
0 Gil T8 blue
120 `I7 red
Tl and T2 are green
transformer wires
Figure 9 -
ASR- 10 Power Supply Board
Fuse Ratings (as of October 1995)
UL rated fuses IEC 127 rated fuses
(lOOV, 12OV,24OV) (230V units only) Where Used
:l and F2 1.6A fast blow Tl .OA slow blow Analog
:3 and F4 4.OA fast blow F4.OA fast blow +VD:DigitaL/Display/bdfSCWDI-10
1.6A fast blow F 1.6A fast blow Display
., and F7 l.OA slow blow Tl.OA slow blow Analog
29 2.OA fast blow F2.OA fast blow Line Fuse
ASR Service Manual 13
Checking the Power Supply
TESTING THE POWER SUPPLY UNLOADED
If the power supply readings exceed the indicated tolerance it is possible that a defective component one
of the other boards is drawing the power supply down. In this case, you should test the power supply
unloaded before proceeding. This involves unplugging circuit boards from the power supply one at a
time to see what board might be causing the incorrect readings. The procedure for doing this is shown in
the flow charts, figures 8 and 9.
/ Incorrect analog power \
INCORRECT ANALOG POWER
SUPPLY VOLTAGES
(Analog Supply, Display Fiient,
+VAl, +VAZ, -VA& -VA2)
$1 Disconycf the OEX-6sr cable from J2
Turn the unit OFF. Disconnect the
Analog Jack board cable from J4 on the
dieital board. Turn the unit ON.
Replace the Analog Jack
NO Board (see Section G).
Figure 10 -
Incorrect Analog Power
Supply Voltages
14
ASR Service Manual
Checking The Power Supply
Incomct digital power supply voltags
INCORRECT DIGITAL
TumtheunitOFF Checkthefuscs. Vetifythetbe POWER SUPPLY VOLTAGES
pmpcr Line Voltage is present Turn the unit ON. (Digital Supply +5Dl, +5D2, +VD)
NO+=)
Simulator cable from J7 of tbe digital board. Turn the unit
Simulator (see Section E).
Turn tbc unit Off. Disconnect tbc Cpin Disk Drive power
cable From tbc keypad/display board. Turn dx unit ON. I
l
T-0+( Replace the Disk Drive
(see section IQ.
Turn tbz unit Off. Disconnect the `I-pin cable between the
power supply and the KcypxVDisplay Board. Turn the unit ON.
Turn the unit OFF. If present. disc-t tbc Digital I/O
cable fmm 19 on he didtal board. Turn the unit ON. I
Turn the unit OFF. If prescn~ disc-t tbc SCSI cables
fmm J4 and 16 on the digital board. TUTI the unit ON.
YES
v
Turn bc unit Off. Disconnect the pwa supply
cable fmm I2 on the digital board. Turn the unit ON.
Figure ll-
Incorrect Digital Power
Replace tbe Power Supply Board (WC Section C).
Supply Voltages
ASR Service Manual I.5
Checking the Display
DISPLAY SELF-TEST MODE
When the keypad/display is receiving power from the power supply but is not in proper communication
with the digital board, the keypad/display board enters self-test mode. In self-test mode, the display
remains blank until you press the buttons on the control panel. Pressing various control panel buttons
will cause the display to print characters, home the cursor, etc.*
Using Self-test Mode to Diagnose the Keypad/Display Board
1. If the unit comes in with a blank display, but is in self-test mode (i.e., the display prints
characters when buttons are pressed according to the chart below) this indicates the problem is either
the digital board or the communication link between the digital board, keyboard and the
keypad/display board. Before replacing anything, check all connections, particularly the 20-pin cable
to the keyboard.
If pressing buttons causes only the leftmost character of the display to change, this usually indicates a
defective cable connection (20-pin ribbon cable) between the digital board and keyboard or possibly
a bad keyboard.
2. If the unit is in self-test mode but the display does not respond according to the chart below,
the problem is most likely in the keypad/display board. If certain buttons do not function properly
during normal ASR-10 operation, test them while the display is in self-test mode.
If you can't isolate a problem that seems related to the display, the display can be forced into Self-test
mode using the following procedure. With the power off, face the front of the unit, then jumper the
minus (-) side of C83 (located below J5, the digital jack board connector) to pin 1 of U64 (74F74, next
to JS). On power up, the display will stay in self-test as long as the jumper is connected, allowing you to
check the keypad/display board independently. The chart below details how the control panel buttons
are mapped in self-test mode:
Press: Displav Reads: Press: Displav Reads:
LOAD 8 Down Arrow 4.
COMMAND $ Left Arrow
EDIT 1. Right Arrow ;
INSTRUMENT CANCEL*NO
SEQ*SONG 3 ENTER*YES ;Home Cursor)
SYSTEM~MIDI 9 Instrument-Track 1 Space
EFFECTS I Instrument*Track 2 &
l/ENV 1 + Instrument*Track 3
2lENV 2 0 Instrument*Track 4 ;
3fENV 3 1 Instrument*Track 5
4/PlTCH 6 Instrument*Track 6 (Home Cursor)
S/FILTER 7 Instrument*Track 7 5.
6lAMP < Instrument*Track 8 4
7fLFO = EFFECT SELECT*BYPASS 2.
8fWAVE (Home Cursor) SAMPLE >
g/LAYER (Home Cursor) RECORD 0.
O/TRACK * STOP/CONTINUE 5
up Arrow 3. PLAY 6.
16
ASR Service Man◦ Jabse Service Manual Search 2024 ◦ Jabse Pravopis ◦ onTap.bg ◦ Other service manual resources online : Fixya ◦ eServiceinfo