Service Manuals, User Guides, Schematic Diagrams or docs for : . Rare and Ancient Equipment NEA NEA_5F4019_VCA_Build_Notes_and_User_Manual
<< Back | HomeMost service manuals and schematics are PDF files, so You will need Adobre Acrobat Reader to view : Acrobat Download Some of the files are DjVu format. Readers and resources available here : DjVu Resources
For the compressed files, most common are zip and rar. Please, extract files with Your favorite compression software ( WinZip, WinRAR ... ) before viewing. If a document has multiple parts, You should download all, before extracting.
Good luck. Repair on Your own risk. Make sure You know what You are doing.
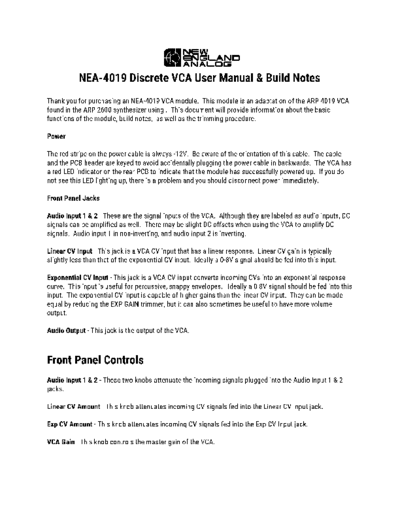
Image preview - the first page of the document
>> Download NEA_5F4019_VCA_Build_Notes_and_User_Manual documenatation <<
Text preview - extract from the document
           NEA-4019 Discrete VCA User Manual & Build Notes
Thank you for purchasing an NEA-4019 VCA module. This module is an adaptation of the ARP 4019 VCA
found in the ARP 2600 synthesizer using . This document will provide information about the basic
functions of the module, build notes, as well as the trimming procedure.

Power

The red stripe on the power cable is always -12V. Be aware of the orientation of this cable. The cable
and the PCB header are keyed to avoid accidentally plugging the power cable in backwards. The VCA has
a red LED indicator on the rear PCB to indicate that the module has successfully powered up. If you do
not see this LED lighting up, there is a problem and you should disconnect power immediately.

Front Panel Jacks

Audio Input 1 & 2 - These are the signal inputs of the VCA. Although they are labeled as audio inputs, DC
signals can be amplified as well. There may be slight DC offsets when using the VCA to amplify DC
signals. Audio input 1 in non-inverting, and audio input 2 is inverting.

Linear CV Input - This jack is a VCA CV input that has a linear response. Linear CV gain is typically
slightly less than that of the exponential CV input. Ideally a 0-8V signal should be fed into this input.

Exponential CV Input - This jack is a VCA CV input converts incoming CVs into an exponential response
curve. This input is useful for percussive, snappy envelopes. Ideally a 0-8V signal should be fed into this
input. The exponential CV input is capable of higher gains than the linear CV input. They can be made
equal by reducing the EXP GAIN trimmer, but it can also sometimes be useful to have more volume
output.

Audio Output - This jack is the output of the VCA.


Front Panel Controls
Audio Input 1 & 2 - These two knobs attenuate the incoming signals plugged into the Audio Input 1 & 2
jacks.

Linear CV Amount - This knob attenuates incoming CV signals fed into the Linear CV Input jack.

Exp CV Amount - This knob attenuates incoming CV signals fed into the Exp CV Input jack.

VCA Gain - This knob controls the master gain of the VCA.
Trimmers
The NEA-4019 has 4 trimmers on the PCB. The trimmer functions are as follows:

Exp Gain Trimmer - This trimmer sets the maximum gain of the Exp CV Input. Note that the OFFSET ADJ
trimmer also affects the Exp gain. This trimmer should be set so that there is maximum volume and
minimum thump. This trimmer is normally set between 6:00 and 11:00

Offset Adjust Trimmer - This trimmer sets the maximum gain of the whole VCA. The 4019 does have
some CV offset. This DC offset becomes greater as this trimmer is increased. Note that the OFFSET
ADJ trimmer also affects the Linear gain and Exp gain. If you hear any CV bleed, try reducing this slightly.
This trimmer is normally set between 7:00 and 12:00.

Lin Gain Trimmer - This trimmer sets the maximum gain of the Linear CV Input. Note that the OFFSET
ADJ trimmer also affects the Linear gain and Exp gain. This trimmer can be set fully counter-clockwise
unless this trimmer is causing signal bleed, in which case this trim should be reduced until bleed
inaudible.

Hi Freq Trimmer - This trimmer nullifies some of the high frequency signal bleed. It should normally be
fully counter-clockwise.


Trimming Procedure
To adjust the trimmers, it is best to feed an envelope generator into both CV inputs simultaneously while
running a square wave at 440Hz into the audio input. We find this to be easiest if done by ear.

Connect VCA Output to mixing board where you can monitor the audio signal.

1- Set Exp CV knob at 0

2- Set Lin CV knob at 0

3- Set VCA Gain at 0

4- Set the Lin Gain trim at 50% (6:00)

5- Set the Offset Adj trim at 50% (12:00)

6- Set the Hi Freq Trimmer at 50%(12:00)

7- Set the Exp Gain Trimmer at 0% (2:00)

Ideally, an envelope generator with 0-8V output should be used to plug into both the Linear CV and Exp CV
inputs.
8- Set Audio Input 1 to 100%

9- Slowly turn up the VCA Gain knob. You should hear the audio source plugged into Audio Input 1.

10- Set Audio Input 1 to 0%, then confirm that Audio Input 2 is working as well. Set VCA Gain to 0% when
finished.

11- Set Lin CV knob to 100%, then turn up Audio Input 1 & 2 to 100%.

12- With envelope generator, set attack to 0%, decay to 0%, sustain to 100%, release to 0%, now send this
envelope to the Lin CV and Exp CV input jacks. A 0-10V pulse will do if you don't have an envelope
generator.

13- You should now hear the audio signal being modulated with the Lin CV signal. Adjust Offset Trim for
maximum output volume, but stop when you hear the volume of the "thump" increase. You want to set
this trimmer for maximum volume and minimum thump. You'll need to compromise.

14- If you hear signal bleed when you turn the Lin CV knob up, try reducing the LIN GAIN trim. If you do
not hear signal bleed, you can increase the LIN GAIN trim to get more gain.

15- Set Lin CV knob to 0%

16- Set Exp CV knob to 100% and adjust the EXP GAIN trim with the 0-10V signal opening and closing the
VCA. As you increase the gain of this trimmer, you'll hear the output volume increase, as well as the
volume of the thump. Adjust this trimmer so that the volume of the VCA roughly matches that of the
Linear CV response. If there's too much thump, try reducing the Offset Adj trim. Exp Gain and Offset
trimmers interact with each other, so some experimentation will be required to achieve optimal results.
Steps 11 - 16 may need to be repeated to find the VCA's "sweet spot".

17- This VCA has a little high frequency bleedthrough in most cases. Sometimes this can be minimized
by adjusting the Hi Freq Trimmer.


Normalized Connections
The NEA-4019 PCB has a DIP switch on the rear. This switch toggles the normalized connections to the
NEA-4019 switching jacks. When nothing is plugged into a jack, the jack can be either grounded, or it can
be connected to the Normalized Connection Panel pads on the PCB. This allows for a normalized signal
path when nothing is plugged into the module, like the ARP 2600 has. The DIP switches should be set so
they are closest to the power header if you want the jacks grounded when no plug is inserted, and should
be set so they are closest to the Normalized Connection Panel if you are planning on using the
normalized connections.
Build Notes

R2 & R4 - These are the audio input resistors. Making these smaller will increase the gain of the audio
inputs, but may cause signal bleed if they are too small. They are indicated as 220K in the schematic,
but we've been using 75K in the REV E boards. These can be lowered to 56k for more signal input, or
raised to around 120k if you're getting any signal bleed from this.

R14 & D2 - These parts can be omitted if you do not want a power indicator LED.

R7 - This part is optional. R7 is a 2.2k-15K resistor that's in parallel with the Exp CV knob. Adding this
resistor will give the Exp CV knob a slightly more logarithmic taper.


R32 - Reducing R32 will increase VCA gain. Increasing will reduce overall gain. 4.7k is the value we like
best.


C7 -For stock 2600 configuration, there is a 0 Ohm resistor in this space, but if you want to add a DC
blocking capacitor (.47 film capacitor) you can place one in this pad. Be sure to use a film cap since this
is in the audio path. trr5.


Troubleshooting

No audio when using Linear or Exp CV inputs - Check Q4 & Q8

Only Linear CV works - Check Q3

Only Exp CV works - Check Q5, Q6, Q9

Excessive signal bleed - Replace Q4, repeat trimming procedure.


If you have any questions or problems, please contact us. For the fastest response, please use email at
[email protected]. Thanks!
                                      NEA-4019 VCA       Revision E   Bill of Materials
RefDes             Name               Value              Quantity     Type                Distributor   Manufacturer Part Number
C1 ,C2             CAP_1206           4.7uF              2            Tantalum            Mouser        F931E475MAA
C3, C5             CAP_1206           100pF              2            Ceramic             Mouser        12065A101JAT2A
C4                 CAP_1206           30pF               1            Ceramic             Mouser        VJ1206A300JXAAT
C6                 CAP_1206           220pF              1            Ceramic             Mouser        08051C221KAT2A
                   0 Ohm 0805
                   Resistor or Film                                                                     ERJ-6GEYJ000V (0 Ohm) or
C7                 Cap                                   1                                Mouser        LDECD3470KA5N00 (Cap)
D1                 1SS319             1SS319             1                                Mouser        1SS319
D2                 LED (optional)     SML-211UTT86       1                                Mouser        SML-211UTT86
D3, D4, D5, D6,
D7, D8, D9, D10,
D11, D12           DIODE_1206         1N914              10                               Mouser        1N914BWS
                   3.5mm Inline
                   Switching Jack
J1, J3, J4, J5, J6 plus nut                              5                                Erthenvar     3.5mm Inline Switching Jack
                   IDC2X5 Shrouded
J2                 Header                                1                                Tayda         A-2939
                   1x5_2.54mm
                   Breakaway
J7                 Connector                             1                                Tayda          A-197
Q1, Q4             DMMT3906                              2                                Mouser        DMMT3906
Q2, Q6, Q9         MMBT3906                              3                                Mouser        MMBT3906
Q3                 MMDT3946                              1                                Mouser        MMDT3946
                   BC850BW or
Q5, Q7             MMBT3904                              2                                Mouser        BC850BW or MMBT3904
Q8                 DMMT3904                              1                                Mouser        DMMT3904
R1, R3             POT_RV09           100k Aud           2                                              A-1855
R2, R4             RES_1206           *75k (see notes)   2                                Mouser        ERJ-6GEYJ224V
R5, R8, R12        POT_RV09           100k Lin           3                                Tayda         A-1848
R6, R31, R10,R34 RES_1206             100k               4                                Mouser        ERJ-6GEYJ104V
R7                 RES_1206           2.2k               1                                Mouser        ERJ-6GEYJ222V
R9, R13, R17,
R18, R23, R33      RES_1206           1k                 6                                Mouser        RK73H2ATTD1823F
R34                RES_1206           180k               1                                Mouser        RK73H2ATTD5492F
R11                RES_1206           150k               1                                Mouser        ERJ-6GEYJ154V
R14, R22, R32   RES_1206     4.7k      3   Mouser   ERJ-6GEYJ472V
R15             RES_1206     1.5M      1   Mouser   ERJ-6GEYJ155V
R16             RES_1206     220k      1   Mouser   ERJ-6GEYJ474V
R19, R26        RES_1206     220       2   Mouser   ERJ-6GEYJ221V
R20             RES_1206     3.3k      1   Mouser   ERJ-6GEYJ332V
R21             RES_1206     182k 1%   1   Mouser   RK73H2ATTD1823F
R24, R29        RES_1206     56k       2   Mouser   ERJ-6GEYJ563V
R25             RES_1206     18k       1   Mouser   ERJ-6GEYJ183V
R27             RES_1206     33k       1   Mouser   ERJ-6GEYJ333V
R28             RES_1206     470       1   Mouser   ERJ-6GEYJ471V
R30             RES_1206     47k       1   Mouser   ERJ-6GEYJ473V
                DIP_4LPST
S1              (Optional)             1   Mouser   DIP_4LPST
TRIM1, TRIM2    POT_TC33X    10k       2   Mouser   TC33X-2-103E
TRIM3           POT_TC33X    100k      1   Mouser   TC33X-2-104E
TRIM4           POT_TC33X    50k       1   Mouser   TC33X-2-503E
U1              TL071BCD               1   Mouser   TL071BCDR
◦ Jabse Service Manual Search 2024 ◦ Jabse Pravopis ◦ onTap.bg ◦ Other service manual resources online : Fixya ◦ eServiceinfo