Service Manuals, User Guides, Schematic Diagrams or docs for : MAKITA 6017D-TE
<< Back | HomeMost service manuals and schematics are PDF files, so You will need Adobre Acrobat Reader to view : Acrobat Download Some of the files are DjVu format. Readers and resources available here : DjVu Resources
For the compressed files, most common are zip and rar. Please, extract files with Your favorite compression software ( WinZip, WinRAR ... ) before viewing. If a document has multiple parts, You should download all, before extracting.
Good luck. Repair on Your own risk. Make sure You know what You are doing.
Image preview - the first page of the document
>> Download 6017D-TE documenatation <<
Text preview - extract from the document
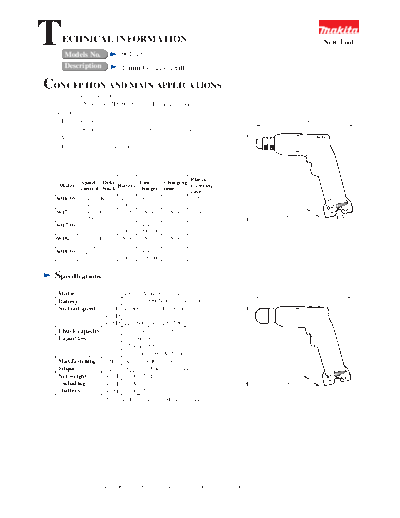
T   ECHNICAL INFORMATION
     Models No.             6017D
                                                                                                          New Tool


     Description            10mm Cordless Drills

CONCEPTION AND MAIN APPLICATIONS
  These 7.2V cordless drills are redesigned versions
  of existing Model 6012D, 6015D,6172D and their brief
  benefits are;
   *Easy operation                                                                        244(9.5/8")
      by ergonomic design for easily pushing the axis of drilling
   * Very quiet
   *Equipped with electric brake


                                                                         221(8.3/4")
                                                        Plastic
            Speed Drill           Fast         Charging
   Model                  Battery                       Carrying
            control chuck         charger      time
                                                        case
  6016DW 2 speeds Keyed Battery     DC7020        3Hr      No
         (H&L)            7000
  6017D 2 speeds Keyless N/A         N/A        N/A        No
          (H&L)                                                                         56(2-3/16")
  6017DW                 Battery   DC9700        1Hr      Yes
                          7000     orDC7100
  6018D     +     Keyless N/A        N/A        N/A        No
         variable
  6018DW speed           Battery    DC9700       1Hr      Yes
                          7000     or DC7100


  Specifications
   Motor                   DC 7.2V magnet motor                                             251(9.7/8")
   Battery                 Battery7000(Ni-Cd,7.2V,1.3Ah)
   No load speed    6016D H:600rpm      L:200rpm
                    6017D
                    6018D H:0-600rpm L:0-200rpm
   Chuck capacity          1.0-10mm(1/32-3/8")
                                                                          213(8.3/8")


   Capacities Steel        10mm(3/8")
              Wood         15.4mm(5/8")
              Wood screw   5.1mm(13/64")X35mm(1-3/8")
   Max.fastening      H    Approx.40Kgf-cm(35in-lbs)
   torque             L    Approx.120Kgf-cm(104in-lbs)
   Net weight       6016D 1.0Kg(2.2lbs)
   (including       6017D 1.0Kg(2.2lbs)                                                 56(2.3/16")
    battery)        6018D 1.1Kg(2.4lbs)
                    L: Low speed    H : High speed


 The standard equipment for the tools shown may differ from country to country.
 (1)6016D
                              2 speeds by gear change (slide-button)


                                                                Ergonomic design
                                                                 for easilly pushing axis of drilling


 Charging time : 3Hr                                                      Bit holder
  by Fast Charger DC7020 with Charging Base                                Bits can be held
                                                                           at both right and left sides.


                                                                            Chuck key holder


  Charging Base              DC7020


Very quiet
  6016D : 67dB (total noise of eight 6016D' s=noise of one 6012D)
  6012D : 76dB


 (2)6017D,6018D
                                 2 speeds by gear change (slide-button)
      Keyless chuck


                                                                    Ergonomic design
                                                                     for easilly pushing axis of drilling


   Charging time : 1Hr
    by Fast Charger DC9700 or DC7100


                                                                            Bit holder
                                                                             Bits can be held
                                                                             at both right and left sides.


Very quiet
 6017D/6018D : 67dB (total noise of eight 6017D/6018D' s=noise of one 6015D/6172D)
 6015D/6172D : 76dB
Standard equipment
                       6016DW 6017D 6017DW 6018D 6018DW
 +- Bit2-45 (2 pcs.)                  Yes
 Battery Cover           Yes    No    Yes    No    Yes
 Chuck Key               Yes              No
 Chaging Base            Yes              No
 Plastic Carrying Case       No       Yes    No    Yes


Optional accessories
Drill Bit 1.5,2,3,4,5,6
Drill Bit for wood 9,12,15
Philips Bit l-65, 2-45,2-65,2-82,2-110, 2-150,2-250,3-45,3-65,3-110
Slotted Bit 5-45,5-82,6-70,6.35-45,8-40,8-70
Foam Polishing Pad 125
Rubber Pad Assembly
Wool Bonnet 100
Fast Charger DC7100, DC9700, DC1201, DC1209
Automotive charger DC7112


Features and benefits
See the attached sheets for more information


Repair
(1) Cautions in disassembling
    To replace the gear assembly, first disassemble the drill chuck.(To disassemble only the housing, its no need to
    disassemble the chuck.)
    Use care not to miss the compression spring 4 inside the speed change lever since it can be easily jumped out
    when disassembling.


                                                                         Speed change lever


                                                                          Compression spring 4
                                                                                              Figure 1
(2) Cautions in assembling
   (a) Assembling of motor and gear assembly
        *Since the motor bracket is mounted on the gear assembly for
         repair, turn counterclockwise(viewed from motor bracket
         side) the motor bracket beforehand to disconnect it from the                                               Red mark
         gear assembly.
      1) Screw the motor bracket into the motor.                            Gear assembly              Moto
                                                                                                              r
      2) Turn clockwise(viewed from motor bracket side) the motor             Motor bracket
           assembling parts(shown in 1)to mount them on the gear
           assembly. At this time assemble in a way that the red mark
           on the motor edge is placed on the change lever side of the                      Turning direction in assembling
           gear assembly.                                                                            Figure 2

  (b) Mounting of speed change lever
     1) Mount the compression spring 4 on the speed change lever.
     2) Mount the speed change lever on the protrusion of the change lever as shown on the figure 3 while using
        care so that the compression spring 4 may not be jumped out.
                                                                           Protrusion of the change lever

                                                                                       Gear assembly
                                                     Speed        Motor
                                                     change
                             Compression spring 4                                                     Figure 3
                                                      lever

  (c) Assembling on the housing
     1) To assemble the one body of gear assembly and motor etc. on the housing L, place the speed change lever
        at the position as shown on the figure 4.
     2) Use care that the compression spring 4 may not be jumped out in assembling on the housing.


                                                                    The speed change lever should
                             Inner side of
                                                                    be positioned at either side
                              housing L


                              Figure 4


  (d) Assembling of drill chuck
     1) Fasten the chuck into the spindle and body face .
     2) Mount the hexagon rod on the chuck and use the vice to fix the hexagon rod.
     3) Set to the normal rotation and low speed. Use the full charged battery.
     4) Insert the switch and fasten the chuck while securely holding the handle.
        *Weakly holding the handle may let you turned around when motor locking.
     5) Widen the claw of chuck at maximum and fasten the pan head screw for holding the chuck.
         *The left hand thread is used for pan head screw.
Circuit   drawing


                                       Red mark
                               Red
             T+
           Terminal   Switch
             T-                         DC motor
                               Black
◦ Jabse Service Manual Search 2026 ◦ Jabse Pravopis ◦ onTap.bg ◦ Other service manual resources online : Fixya ◦ eServiceinfo