Service Manuals, User Guides, Schematic Diagrams or docs for : MAKITA 6824N-TE

<< Back | Home

Most service manuals and schematics are PDF files, so You will need Adobre Acrobat Reader to view : Acrobat Download Some of the files are DjVu format. Readers and resources available here : DjVu Resources
For the compressed files, most common are zip and rar. Please, extract files with Your favorite compression software ( WinZip, WinRAR ... ) before viewing. If a document has multiple parts, You should download all, before extracting.
Good luck. Repair on Your own risk. Make sure You know what You are doing.


Image preview - the first page of the document
6824N-TE


>> Download 6824N-TE documenatation <<

Text preview - extract from the document
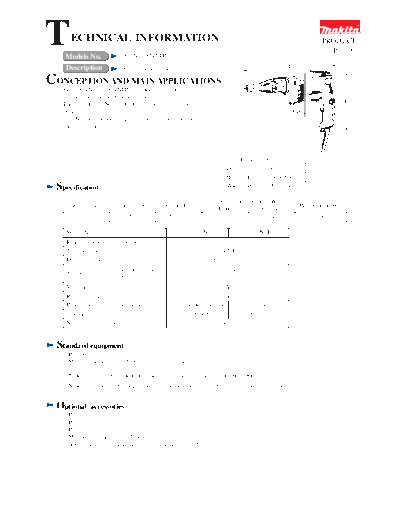
T     ECHNICAL INFORMATION
    Models No.                   6824N, 6824NTP
                                                                                                                            PRODUCT
                                                                                                                              P1/9

    Description                  Drywall Screwdrivers                                                         L

CONCEPTION AND MAIN APPLICATIONS
   Mod.6824N and 6824NTP have been developed
   as a new version of 6824 series model.
   Their feature is "Normal Clutch" which is convenient for                                                                           H
    unscrewing.                                                                                                   W
   6824NTP is equipped with 15m (50ft) three-wire cord
   with twist plug.


                                                                                             Dimensions : mm ( " )
                                                                                        Length ( L )  290 (11-3/8)
                                                                                        Height ( H )  218 (8-5/8)
 Specification                                                                          Width ( W )    70(2-3/4)

                                                                                      Continuous Rating (W)
      Voltage (V)              Current (A)               Cycle (Hz)                                                  Max. Output(W)
                                                                                     Input           Output
           120                     6.5                     50 / 60                   (710)              340                590

    Model No.                                                           6824N                    6824NTP
    Rated ampere with 120V : A                                                           6.5
    No load speed : min -1=rpm                                                      0 - 4,500
    Driving shank                                                         6.35mm (1/4") hex
                                Self drilling screw                              6 (1/4)
     Capacity : mm ( " )
                                Drywall screw                                    5 (3/16)
    Variable switch                                                                Yes
    Reverse switch                                                                 Yes
    Protection from electric shock                            by double insulation        by grounding
    Cord length : m (ft)                                                2.5 (8.2)                15 (50)
    Net weight : Kg (lbs)                                                            1.4 (3.1)


 Standard equipment
   * Philips bit 2 - 25 ....................................... 1 pc.
   * Magnetic socket bit 6.35-76 ...................... 1 pc.

   < Note 1 > The above mentioned items are installed in advance in our fabric.
   < Note 2 > The standard equipment for the tool shown may differ from country to country.


 Optional        accessories
   * Philips bit 1 - 25
   * Philips bit 2 - 25
   * Philips bit 3 - 25
   * Magnetic connect bit 6.35-60
   * Adjust sleeve complete for magnetic connect bit 6.35-76
Features   and benefits                                                                                                P2/9
                                                  6824N, 6824NTP

 * Locking sleeve can be easily adjusted          Gear housing of durable          Convenient retractable carry hook for
   with another one hand.                         aluminum die casting             temporarily hanging the machine.
 * The adjusted depth can be kept steadily
   without slipping.
                                                                                   Comfortable inline designed soft grip
                                                                                   foe better work efficiency


                                                                               Variable switch with big trigger integrating
  Long nose piece on locator                                                   reverse switch.
  to fasten screw easily.                                                      * Enable to change rotating direction with
  * Bit holder of 76mm (3") length                                               one hand.
    can be used.                                                               * Big switch trigger can be operated even
  * Easy driving by long and slim                                                with 2 fingers.
    nose piece.                                                                * Lock on button is convenient for continuous
  * Also bit holder of 60mm (2-3/8") length                                      operation with your desired speed.
    can be used by replacing adjust sleeve
    complete (optional accessory).                                           Cord with high durability is strong
                                                                             against fatigue by frequent inflection.
                                                                             6824NTP is equipped with
                   Equipped with Normal Clutch                               15m(50ft) 3 wire cord
                   for easy unscrewing                                       with twist plug.
                                                                                                              Twist plug


                                                             Air outlet is designed
                                                             to avoid that the cooling air
                                                             comes to the operator's face.
Comparison      of products

                            Model No.                            MAKITA                                           Competitor A
  Specifications                               6824N         6824NTP    6824                      6824TP            Model A
  Rated ampere with 120V : A                     6.5           6.5               6.5               6.5                 6.0
  No load speed : min -1=rpm                 0 - 4,500     0 - 4,500         0 - 4,500         0 - 4,500            0 - 4,000
  Driving shank                               6.35mm        6.35mm            6.35mm            6.35mm               6.35mm
                                             (1/4") hex    (1/4") hex        (1/4") hex        (1/4") hex           (1/4") hex
  Capacity : mm       Self drilling screw      6 (1/4)       6 (1/4)          6 (1/4)           6 (1/4)                6 (1/4)
             (")      Drywall screw            5 (3/16)      5 (3/16)         5 (3/16)          5 (3/16)               5 (3/16)
  Silent clutch                                   No            No               Yes               Yes                  No
  Variable switch                               Yes           Yes               Yes                Yes                  Yes
  Reverse switch                                Yes           Yes               Yes                Yes                  Yes
  Material of gear housing                   Aluminum      Aluminum            Aluminum         Aluminum               Plastic
  Protection from                           by double     by grounding        by double       by grounding          by double
  electric shock                            insulation                         insulation                           insulation
  Overall length : mm                           290           290                 290               290                310
                   (")                        (11-3/8)      (11-3/8)            (11-3/8)          (11-3/8)           (12-1/4)
  Net weight : Kg                                1.4           1.4                 1.4               1.4                 1.3
              (lbs)                             (3.1)         (3.1)               (3.1)             (3.1)               (2.8)
  Cord length : m                                2.5           15                  2.5                15                 2.4
               (ft)                             (8.2)         (50)                (8.2)              (50)               (7.9)
                                            * Philips bit * Philips bit     * Philips bit     * Philips bit      * Philips bit
  Standard equipments                          2-25          2-25             2-25              2-25                2-25
                                            * Magnetic * Magnetic           * Magnetic        * Magnetic         * Magnetic
                                              connect       connect           connect           connect            connect
                                              bit 76        bit 76            bit 76            bit 76             bit 76
Repair                                                                                                         P3/9
< 1 > Lubrication
     Apply MAKITA grease N. No.1 to the following portions marked with black triangle to protect
     parts and product from unusual abrasion.

      Item No.     Parts.                         The portion to be lubricated
         7     Gear housing complete             approx. 4g (0.14 oz) to the space for helical gear 43
                                                 * Cam portion where contacts helical gear's cam.
       11         Spindle                        * Surface where contacts gear housing.
        12        Compression spring 12          Its whole part
        13        Collared pin 8                 Its whole part
        14        Helical gear 43                Teeth portion

                                                                                                  Gear housing cover


                                 11              12        13
                                                                14
                             < Note > Do not apply grease in this space where
                 7                    armature's gear rotates.
< 2 > Removing armature, ball bearing 608VV and ball bearing 607LLB
    (1) Remove handle cover by unscrewing 3 pcs. of tapping screws 4x25. And then, take off carbon brushes. See Fig. 1.
    (2) Model 6824N: Remove gear section (locator, lock ring, gear housing complete and gear housing cover) from motor
                     housing by unscrewing 3 pcs. of tapping screws 4x25. Then, armature can be separated from motor
                     housing together with gear section See Fig. 2.
        Model 6824NT: Pull out gear section approx. 10mm from motor housing. Disconnect grounding lead wire's
                       terminal by unscrewing pan head screw M4x8. Remove in the same way as model 6824N.
                       See Fig. 3.
                                                                            Locator
                                           Tapping                              Lock ring
                                           screws 4x25                                 Gear housing
                                                                                        complete
                                                                                               Gear housing
                                                 Carbon                                        cover
                                                  brush

                                                                           Armature
         Carbon brush                                 Tapping
                                                      screws 4x25

                        Fig. 1
                                                                                    Fig. 2
                         Handle cover                               Locator
                                 Tapping                                Lock ring
                                 screws 4x25                              Gear housing complete
                                                                                      Pan head screw M4x8
                                                                                           Grounding lead wire's
                                                                                           terminal
                                   Gear housing cover

                                                                Armature


                                                                            Fig. 3
Repair                                                                                                               P4/9
  (3) After separating armature from gear housing cover, remove rubber ring 19.
      And then, remove ball bearing 607LLB with 1R269 "Bearing extractor", and insulation washer. See Fig. 4.
         Gear housing
         cover                                      Rubber                       1R269
                                                    ring 19                      Bearing extractor
                                                                                                             Insulation washer


                                                   Ball bearing
       Armature                                    607LLB
       Rubber ring 19


                                                            Fig. 4

  (4) Remove ball bearing 608VV and ring 8 at a time with 1R269 "Bearing extractor".
      Remove flat washer 8. See Fig. 5.


                                                                     Ring 8                  Flat washer 8


                                    Ball bearing
                                    608VV


                                                   Fig. 5


< 3 > Mounting armature, ball bearing 608VV and ball bearing 607LLB
  (1) Mount flat washer 8. And mount ball bearing 608VV with arbor press, and ring 8. See Fig. 6.
  (2) Mount insulation washer. And mount ball bearing 607LLB with arbor pres, and rubber ring 19. See Fig. 7.


           Flat washer 8                                                Insulation                      Rubber
                                          Ring 8                        washer                          ring 19


                Ball bearing
                608VV                                                                                Ball bearing
                                                                                                     607LLB

           Bearing setting
           plate


                           Fig. 6                                                              Fig. 7
Repair                                                                                                      P5/9

  (3) Mount the armature to gear housing cover. See Fig. 8.
  (4) Model 6824N: Mount the gear housing cover to gear housing. And fasten it with 3 pcs. of tapping screw 4x25.
                   See Fig. 9.
      Model 6824NTP: Fasten grounding wire's terminal to gear housing cover with pan head screw M4x8.
                      Mount the gear housing cover to gear housing. And fasten it with 3 pcs. of tapping screw 4x25.
                      See Fig.9A.
  (5) Mount carbon brushes. And then, mount handle cover. Fasten it with 3 pcs. of taping screws 4x25. See Fig. 10.
                                            Tapping
                   Gear housing             screws 4x25
                   cover
                                                 Locator
                                                     Lock ring
                                                            Gear housing
  Armature                                                                                                       Carbon
                                                             complete
                                                                                                                  brush
                                                                    Gear housing
                                                                    cover
                Fig. 8                                                             Carbon brush

                                               Armature
                       Tapping
                       screws 4x25                                                       Fig. 10
                            Locator                       Fig. 9                          Handle cover
                                Lock ring
                                               Pan head
                                                                                                   Tapping
                                               screw M4x8
                                                                                                   screws 4x25
                                                  Grounding lead
    Gear housing                                  wire's terminal
    complete
    Gear housing
    cover                Armature


                                     Fig. 9A
Repair                                                                                                           P6/9
< 4 > Removing clutch section
  (1) Remove locator and lock ring from gear housing. And remove gear housing complete by unscrewing 3 pcs.
      of tapping screws 4x25. See Fig. 11.
  (2) Separate clutch section by pushing it from locator side to motor side. And take off ring 20. See Fig. 12.
      Clutch section can be disassembled as illustrated in Fig. 12A.


   Locator          Tapping                                                         Ring 20
                    screws 4x25                                                                          Spindle
                                                                                                          Compression
                                                                                         Clutch           spring 12
                                                                                         section              Washer 824
                                                                                                              (Thick)


     Lock ring
                                                                         Gear housing
                                          Gear housing                                    Collard pin 8
                                                                         complete
                                          complete                                  Helical gear 43
                                                                                         Thrust needle
                                                                                         gauge 821
                                                                                           Washer 821
                                                                                           (Thin)
                                                 Fig. 11                         Fig. 12                  Fig. 12A


< 5 > Mounting clutch section
   (1) Mount the parts to spindle in the order of compression spring 12, collared pin 8, helical gear 43, washer 824
       (thick one), thrust needle gauge 821, and washer 821 (thin one). See Fig. 12A.
   (2) Mount ring 20 and the assembled clutch section to gear housing complete. See Fig. 13.
   (3) Mount gear housing complete to motor housing, and fasten it with tapping screws 4x24. See Fig. 14.
        And then, mount lock ring and locator to gear housing complete. Refer to Fig. 11.


                 Ring 20
                                                             Tapping
                             Clutch       Helical
                                                             screws 4x25
                             section      gear 43


       Locator
       side                            Ring 20
                                                                                Gear housing
                                                                                complete

                   Ring 20        Helical
                                  gear 43 side
             Ring 20 has to be so mounted that its
             grooved portion is faced to helical                               Fig. 14
             gear 43 side as illustrated above.

                      Fig. 13
Repair                                                                                                          P7/9
< 6 > Replacing carbon brush
     (1) Remove handle cover by unscrewing 3 pcs. of tapping screws 4x25. And then, take off carbon brushes.
         See Fig. 1 at page 3.
     (2) Make sure that brush holders have been mounted to motor housing correctly as illustrated in Fig. 15.
         If brush holders are mounted as illustrated in Fig. 15A, correct with your finger to mount properly.
                   Top view


                                       Top view of motor housing and brush holders


                      Correct                                                        Wrong

                                                 Brush holders                     Brush holders


                           Fig. 15                                                    Fig. 15A


                      Carbon brushes                                               Carbon brushes
                                                                                                        P8/9
Circuit   diagram
              Color index of lead wires                                   Brush
                                          Brush                           holder      Connect to gear housing cover.
     Black
                                          holder                Field
     White
     Orange
     Purple
     Green


                                                                                                         Terminal
                                                   2       M1                 4                          block
                                                   1            Switch        3

                                                   1   2        M2      C1   C2


                                                                         Noise
                                                                         suppressor
Wiring    diagram                                                                P9/9


                                            Fix Grounding lead wire (green)
         Put lead wire (black)              with lead holders.
         connecting switch
         and field, into lead
         holder.
                                           Put connecting lead wire (black) of
                                           field, into lead holder.

                                            Into this lead holder,
                                            put the following lead wires.
  Put brush holders lead wire                * Connecting lead wire (black) of field
  (orange), into lead holder.                * Brush holder's lead wire (purple)
                                            Into this lead holder,
                                            put the following lead wires.
     Put the slack portion of                * Connecting lead wire (black) of field
     lead wires in the spaces.               * Connecting lead wire (white) between
                                               switch and field


     Put noise suppressor in
     this space, if it is used.

                                  Put grounding lead wire (green)
                                  into lead holders.
                                  And be careful, not to put lead wire
                                  on the rib for setting terminal block.


◦ Jabse Service Manual Search 2024 ◦ Jabse PravopisonTap.bg ◦ Other service manual resources online : FixyaeServiceinfo