Most service manuals and schematics are PDF files, so You will need Adobre Acrobat Reader to view : Acrobat Download
Some of the files are DjVu format. Readers and resources available here : DjVu Resources
For the compressed files, most common are zip and rar. Please, extract files with Your favorite compression software ( WinZip, WinRAR ... ) before viewing.
If a document has multiple parts, You should download all, before extracting.
Good luck. Repair on Your own risk. Make sure You know what You are doing.
T ECHNICAL INFORMATION
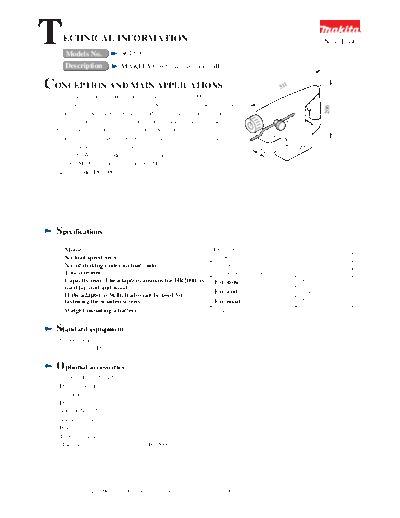
Models No. 8015D
New Tool
Description MAKITA Cordless hammer drill
CONCEPTION AND MAIN APPLICATIONS 311
This is the battery hammer drill using the battery 1000 as the
power source and the first one equipped with the non-step variable
206
switch developed throughout the world, thereby the drilling can be
easily positioned and the built-in large capacity battery enables
many holes to be drilled per charging. Also the reversing change
switch allows this machine to be used as the screw driver once the
drill chuck adapter has been mounted. 64
The 8015DW is the model without the battery and the charger.
The 8015DW consists of the 8015D, the battery and the
charger(model DC1000).
Specifications
Motor DC 10.8V
No load speed(/min.) 0-900
No. of striking under no load(/min.) 0-3100
Tool size(mm) Shank bit with groove 10
Capacity(mm) The adapter(common for HR2000) is For stone 15mm
used for steel and wood.
For steel 13mm
If the adapter is built, it also can be used for
fastening the wooden screws. For wood 15mm
Weight(including a battery) 3.5kg
Standard equipment
Stopper pole
Grease for bit, Dust cup
Optional accessories
Carbide drill(6.5-14.5)
Drill chuck adapter
Chuck key
Dust cup
Anchor(No.2-No.3)
Anchoring rod
Holder driver
Taper shank adapter
(The above shown are common for HR2000.)
The standard equipment for the tools shown may differ form country to country.
Features and benefits
1.The built in battery power provides the comfort operation without interfered with the power cord.
2.The battery 1000 enables to operate for longer time and many holes to be drilled per charging.
3.Due to the first non-step variable switch introduced in the world, drilling can be positioned smoothly in low speed
operation and even the tile can be drilled.
4.The most light weighing model 3.5 kg in the series of battery hammer.
5.Since the handle and the switch are positioned on the center line of the bit, the machine body cannot be tilted
during operation to allow the comfort operation.
6.The battery can be charged for just an hour.
7.This can be used not only for steel and wood by the aid of special accessory or the drill chuck, but also used as the
screw driver once the reversing change switch has been attached.
Repair
1.Tool required
(1)+ Screw driver
(2)- Screw driver(small one with the edge width of 4 mm around)
(3) Circle clip plyer(for shaft)
(4) Resin hammer
(5) Metal wire with dia. of about 2 mm and length of about 200 mm(see the figure 11 of 3-(3)-1.)
(6) Rod or pipe with dia. of 20 mm and length of 100 mm or more(If available, you can work easily.)
2.Lubricating points
To avoid wearing or heating damage in an earlier stage, grease the MAKITA GREASE R NO. 00 on the points
shown below.
(1) O-ring and groove on the impact bolt
(2)O-ring and groove on the striker and piston
(3)Inner portion on the cylinder liner
(4)Lip face on the oil seal 28
(5)Teeth face on each gear
3.Disassembling/assembling
(1)Chuck(Remove it before disconnecting the housing.)
Pull the change ring at full as shown on the figure 5 and
remove the cap 34 in a way peeling it in the arrow
direction. If the cap 34 has been removed, remove the
change ring, the key 4 and conical compression spring
21-29.
Cap 34
Conical compression
Key 4
Change ring spring 21-29
When assembling(for easy assembling), slightly grease
the MAKITA GREASE N NO.2 on the groove for
housing the key of the cylinder liner to protect the key 4
from falling.
MAKITA GREASE N
NO.2
(2)Protecting the grease on the housing from leaking Super three bond No. 50
The adhesive is applied on the overlapped portion around
the housing function for preventing the grease from leaking.
To assemble the housing after disassembling, securely
clean away the grease on the fit
face(portions marked by on the right figure)
between both the housing R/L before applying the super
three bond No.50 without breaks.
Note that the MAKITA grease R NO.00 of 20 g has been
already contained in mass production, use it as the
reference amount when repairing.(Do not overfill.)
(3)-1. How to remove the impact bolt and idler
Ring 13.5
a) Place the minus screw driver with the edge width of
about 4 mm in the clearance between the hole of Rubber ring Hole
cylinder liner and the ring spring 18 as shown on the Idler Cylinder liner
figure 8 and then use the resin hammer to slightly Impact bolt
hammer the driver to remove the ring spring 18 from the
groove on cylinder liner.
If hard to remove, take the above same procedures for
both holes. Ring spring 18
b)Use the driver to move the ring spring 18 to make
clearance between the ring spring 18 and the cylinder
liner.
Clearance
c)Bend the metal wire as shown on the figure 11, suspend
the hook of the edge on the ring spring 18 and then
remove it.(Figure 10)
d)If the ring spring 18 has been removed, use the driver
edge to press the impact bolt and then disconnect the
idler and ring 13.5. (Figure 10) Ring for hanging the finger
2~3
Same as the original size
100 or more
(3)2. Assembling of the impact bolt and the idler Grease Flat washer 13.5
a)Use care in assembling since the impact bolt and the flat
washer 13.5 have each directionality.
Impact bolt Idler
C-face
Protruded with overlong
Cylinder liner
(Note) Be sure to grease on the O ring of the impact bolt.
Ring spring
Cylinder liner
Brass rod
b)Once the ring spring has been detached, it can be easily
damaged and broken.
In such a case renew it.
Apply the brass rod or the minus screw driver and
slightly hit it to press as shown on the figure 13.
If it has been inserted in the deepest, use the minus screw
driver as shown on the figure 14 to securely place in the
groove.
Groove
(Note) Use the minus screw driver with especial care not Ring spring
to damage the ring spring.
Cylinder liner
*If the rod or pipe with 20 mm in dia. and 100 mm inlength or
more available,
When doing the work for (3)-2-a, place the parts on the rod as Ring spring
Rod
shown on the figure 15 and cover the cylinder liner from
above so that the parts cannot turn upside down on the way.
When doing the work for(3)-2-b, use the rod to press into the
groove after inserting the ring spring on the halfway.
(4)Caution in replacing the DC motor Rod
a)For the DC motor, the terminal with the red mark is for the
M(+) terminal.
DC motor
Red mark
b)Insert the lead wire through inside as shown on the figure 17,
bend it and then solder it.
(+) (-)
DC motor
c)After soldering, cover the cap and then bend the terminal in a
degree that the terminal is not protruded above the cap face. (M+) (M-)
Cap
(5)Mount the spring terminal with the (+)side set at the handle side
of the housing.
(-) (+)
Circuit diagram Switch(for variable speed)
Switch
DC motor (for reversing change)
Red mark Lead wire(red)
4
3 5
2
1
(M+)
(M-)
Lead wire(black)
(-)
(+)
Spring terminal