Service Manuals, User Guides, Schematic Diagrams or docs for : MAKITA 9403-TE

<< Back | Home

Most service manuals and schematics are PDF files, so You will need Adobre Acrobat Reader to view : Acrobat Download Some of the files are DjVu format. Readers and resources available here : DjVu Resources
For the compressed files, most common are zip and rar. Please, extract files with Your favorite compression software ( WinZip, WinRAR ... ) before viewing. If a document has multiple parts, You should download all, before extracting.
Good luck. Repair on Your own risk. Make sure You know what You are doing.


Image preview - the first page of the document
9403-TE


>> Download 9403-TE documenatation <<

Text preview - extract from the document
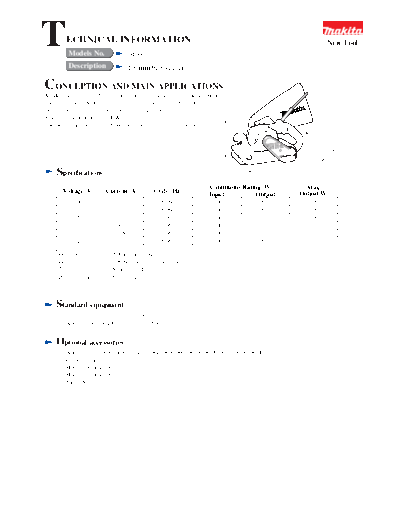
T       ECHNICAL INFORMATION
         Models No.                9403
                                                                                                                 New Tool


         Description               100mm belt sander

CONCEPTION AND MAIN APPLICATIONS
Model 9403 is a handy and convenient belt sander that inherits models
9401 and 9402. Sanding efficiency and capacity of dust collection have
been raised as well as noise and weight have been lowered.
Power consumption is 1200W,
and belt dimensions are 100mm(4") wide and 610mm(24") long.


                                                                    211 (8 3/4")


                                                                                                             )
                                                                                                          2"
                                                                                                       1/
                                                                                                             (6
                                                                                                                   4
                                                                                                                 16
                                                                                                /8")
    Specifications                                                                     353 (13 7

                                                                Continuous Rating (W)                Max.
      Voltage (V)        Current (A)       Cycle (Hz)           Input           Output             Output(W)
           100               13               50/60             1200             520                 1250
           110               11               50/60             1200             520                 1250
           120               11               50/60             1200             520                 1250
           220               5.7              50/60             1200             520                 1250
           230               5.5              50/60             1200             520                 1250
           240               5.3              50/60             1200             520                 1250
     Belt speed            500m/min (1.640 ft/min)
     Belt size             100mm (4") x 610mm (24")
     Net weight            5.9kg (13.1lbs)
     Power supply cord     5m (16.4ft)


    Standard equipment
        Dust bag ass'y ---------------- 1pc.
        Abrasive belt AA80 --------- 1set (5pcs.)


    Optional accessories
        Abrasive belt, AA and CC each of #40, #60, #80, #100, #120, #150, #180, #240
        Carbon plate,
        Hose complete 28-1.5,
        Hose complete 28-3.0,
        Joint 25
                                       Steep rise in sanding efficiency
                                                                                 Low noise

Direction of cooling air
does not blow on operator's
face nor the cut powders
will not spatter.
                                                                                             Power supply cable can be hung
                                                                                             on operator's shoulder.
Light weight as well as
improved efficiency
Large sanding efficiency
                                                                                             Dust bag can be turned 360
can be gained only with
                                                                                             degrees around so it does not
machine's own weight.
                                                                                             disturb operation, and also it can
(Data of efficiency graph
                                                                                             be connected with dust catcher
were recorded when
                                                                                             via a hose 28.
sanding had been done
with machine's own
weight only.)


                                                                                                         Round front grip fits
                                                                                                         comfortably


                                                                                             The machine has been designed
Improved dust collection efficiency                                                          to be applicable to flush sanding
reduces spattering of powdered dust.                                                         work (sanding on the wall).


                                              Labyrinth structure is provided in ball
                                              bearing section
                                              (front and rear of motor, dust catcher fan)
                                              This prevents powdered dust from entering
                                              the machine and the durability of the
                                              bearing is extended twice as long as before.

                                                                                                  Good balance in weight
                                                                                             Center of gravity is positioned
                                                                                             on the center of abrasive belt and
                                                                                             the machine's weight equally
                                                                                             applies to the belt surface so that
                                                                                             an uniform sanding finish quality
                                                                                             can be made.
Repair
(1) Replacement of armature
                                                                                                         Dust collector cover
   a) Unscrew tapping screws; two PT4x45 and one PT4x18 (one
      CT4x40 in model 9403, and one CT4x16 in model 9921). Remove
      dust collector cover and separator so that dust collector fan 80
      appears.


                                                                      Tapping
                                                                      screw PT4x18
                                                                                 Two tapping         One tapping screw
                                                                                 screws PTx45        CT4x40 for model 9403
                                                                                                     One tapping screw
                                                                                                     CT4x16 for model 9921


   b) Unscrew tapping screw CT4x16 and remove belt cover.

   c) Take off holder cap and remove carbon brush.

   d) Remove synchro-belt 9-354.


                                                                                                              One tapping
                                                                                                Belt cover    screw CT4x16


   e) Turn pulley 10-24.1 clockwise and remove it.
      (Note that the pulley 10-24.1 is fixed with a left-handed screw so
                                                                             Carbon brush
      do not turn it counterclockwise.)


                                                                           Holder cap                  Synchro-belt 9-354
                                                                                            Pulley 10-24.1
   f) Unscrew cross-slot pan-head screw M5x12 that fixes dust collector               Pan-head screw M5x12
      fan 80, and remove fan 80.

   g) Remove two tapping screws PT4x18 which fix dust collector
                                                                                                                            Tapping
      bracket so that armature can be taken off together with dust                                                          screw
      collector bracket.                                                                                                    PT4x18


                                                                                 Tapping screw        Fan 80        Dust collector
                                                                                 PT4x18                             bracket

(2) Removal of driving roller
   a) Remove belt cover and synchro-belt 9-354 with the same
      procedures as the replace of armature.
                                                                                                               Gear cover
   b) Unscrew three tapping screws CT4x16 and remove gear cover.


                                                                                      Tapping screw CT4x16


                                                                              Helical gear complete                  Driving roller
   c) Insert lock nut wrench 28 into two holes of helical gear 43
      complete, and fix the helical gear complete. Use 24mm box
      wrench to turn driving roller clockwise and the driving roller can
      be removed.


                                                                                Lock nut wrench 28             24mm box wrench


(3) Caution for replacement of edge slider complete
     When assembling edge slider complete, be sure to install it so that
     the ceramic plate side will be positioned inside as shown in the figure below.


                                      Ceramic plate (white)   Edge slider complete
Wiring   diagram
        [When terminal block is not used]
   Power supply cord     Switch

                          3        2


                                                 Noise suppressor


                                                                     Field

                          Connector


          [When terminal block is used]


   Power supply cord          Switch

                           3           2


                                                  Noise suppressor


                               1   1

                        Terminal block
                                                                     Field

          Noise suppressor is not used depending on countries.


◦ Jabse Service Manual Search 2024 ◦ Jabse PravopisonTap.bg ◦ Other service manual resources online : FixyaeServiceinfo