Service Manuals, User Guides, Schematic Diagrams or docs for : MAKITA 2012NB-TE
<< Back | HomeMost service manuals and schematics are PDF files, so You will need Adobre Acrobat Reader to view : Acrobat Download Some of the files are DjVu format. Readers and resources available here : DjVu Resources
For the compressed files, most common are zip and rar. Please, extract files with Your favorite compression software ( WinZip, WinRAR ... ) before viewing. If a document has multiple parts, You should download all, before extracting.
Good luck. Repair on Your own risk. Make sure You know what You are doing.
Image preview - the first page of the document
>> Download 2012NB-TE documenatation <<
Text preview - extract from the document
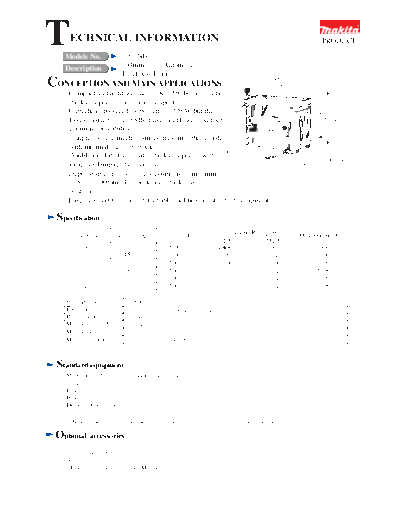
T ECHNICAL INFORMATION
Models No. 2012NB
PRODUCT
Description 304mm (12") Automatic
Thickness Planer
483mm
CONCEPTION AND MAIN APPLICATIONS (19")
* Compact and light weight (27 Kg./59 lbs) automatic
thickness planer for easier transport.
* Cutterhead powered by powerful 1,650W but the 401mm
lowest noise motor (83db) raises and lowers on four (15-13/16")
columns for stability.
* Unique feeding mechanism assures smoother finish
with minimal snipe on stock.
771mm
* Double insulated automatic thickness planer with
(30-3/8")
indicator lamp ready to operate.
* Depth stop can be set in any positions from 3 mm
(1/8") to 100mm (4") for desired thickness
of stock.
* Large support table and detachable tool box fro standard equipment.
Specification
Continuous Rating (W)
Voltage (V) Current (A) Cycle (Hz) Max. Output(W)
Input Output
100 15 50/60 1,430 960 1,900
110 15 50/60 1,650 1,140 2,100
120 15 50/60 1,650 1,140 2,100
220 8 50/60 1,650 1,140 2,100
230 7.6 50/60 1,650 1,140 2,100
240 7.3 50/60 1,650 1,140 2,100
No load speed 8,500 min-1 (rpm.)
Feed rate / min 8.5 m/min (0.14 m/s, 27.8 ft/min.)
Planer blade 306 mm (12-3/64")
Max.planing width 304 mm
Max.planing depth 0 - 3.0 mm
Material thickness 3 - 155mm (1/8" - 6-3/32")
Standard equipment
Magnetic holder (2) for replacing planer blade
Socket wrench 9
Hex wrench
Blade guage
Detachable tool box
< Note > The standard equipment for the tools shown may differ from country to country.
Optional accessories
Planer stand
Planer blade 306
Key
Hood set for connecting with Mod.410
Benefits and features
Smoother finish minimizing Planer blade is same as
Fixed base providing easy work
snipe even without head lock, existing Model 2012.
without changing your feeding
by uniquely designed feeding
position in spite of various thickness
mechanism
of work piece.
Safety double insulation
Competitors' products have to be Fold-away depth control handle
grounded. for easier transport and storage
Carrying handle for easier
transport
Indicator lamp ready to
operate
Dust hood (optional acc.)
can be mounted to rear of
the machine to be connected
Large support table
to dust collector.
Depth stop can be set in any positions
Considerable low noise, from 3mm (1/8") to 100mm (4") for
only 83dB (no load operation) desired thickness.
Manufacturer Model No. Noise level(dB) Remark
MAKITA 2012NB 83
Competiror A A 87 Equivalent to 2.5 units of 2012NB.
Competiror B B 88 Equivalent to 3 units of 2012NB.
Competiror C C 88 Equivalent to 3 units of 2012NB.
Comparison of products
Manufacturer MAKITA A B C
Model No. 2012NB 2012 A B C
Rated Current (A)
15 12 15 15 14
under 120V
Continuous Rating 1,350
Input (W) 1,650 1,330 (in Japan)
Equipped Motor 94-60 94-60 94-55 100-55 94-55
No Load Speed (min-1= rpm.) 8,500 8,000 10,000 8,000 8,500
Width (mm) 304 (12") 304 (12") 318 (12-1/2") 318 (12-1/2") 313 (12-3/8")
Max.Planig
Depth (mm) 3.0 (1/8") 2.5 (3/32") 3.0 (1/8") 3.0 (1/8") 2.5 (3/32")
Material's Max.Thickness (mm) 155 (6-3/32") 155 (6-3/32") 152 (6") 152 (6") 5-153 (3/16"- 6")
Protection from by Double Insulation
Electric Shock by Grounding
Fixed Base
Weight (Kg) 27 (59.5 lbs) 24 (53 lbs) 34 (75 lbs) 29.5 (65 lbs) 28.5 (62.8 lbs)
*Gauge for
replacing blade
Standard *Socket Wrench
*Magnetic Holder *Magnetic Holder *Gauge for *Transfer Tool for
Equipment *Hex Wrench
for replacing blade for replacing blade replacing blade replacing blade
*Socket Wrench *Socket Wrench *Socket Wrench *Hex Wrench (3mm and 5mm)
*Hex Wrench *Hex Wrench *Hex Wrench *Double Ended
*Blade Gauge *Wrench *Wrench Wrench *Lock Pin
*Handle *Screwdriver
* Dust cover
Capacity
1. Max.planing width : 304 mm
2. Max.planing depth for various width of work piece
Width of work piece Max.planing depth
smaller than 150mm (5-7/8") 3.0mm (1/8")
150mm - 240mm (5-7/8" - 9-2/1") 1.5mm (1/16")
240mm - 304mm (9-1/2" - 12") 1.0mm (3/64")
3. Minimizing snipe
Snipe Snipe
Work piece
Snipe always arises on the work piece when planing, because the position of the planer blade and
the table of machine is in any case changed when work piece is fed. See the following schema.
Roller 1 Drum Roller 2
Main frame is raised when the
work piece touches the roller 1.
Main frame
Work piece
Roller 1 Drum Roller 2
Snipe The work piece is planed
deeper than the requested depth.
Main frame
And the first snipe arises.
Work piece
Roller 1 Drum Roller 2
Snipe Snipe The another snipe arises, when
roller 1 detaches itself from the
Main frame work piece.
Work piece
MAKITA has solved the above problem by minimizing the play for depth adjusting installation
and by reinforcing the machine body.
Please refer to the next page in detail.
Smoother finish minimizing snipe thanks to the following installations.
Fig. A
Depth adjustment Play is needed for smooth moving of threaded part,
screw for instance, screw, nut etc. However, snipe always
arises because of the above play which changes
Main frame the position of planer blade and table of the
machine.
For minimizing play for threaded part, compression
spring is mounted between main frame and nut
which is fixed in main frame.
Nut
Compression spring
Fig. B Depth adjustment
screw
For minimizing wobble up and down, depth
adjustment screw can be lifted by inserted flat
washers. However, friction arises between the flat
washers and the screw.
In case of Model 2012NB, steel ball and pin are
Pin installed in the bottom end of depth adjustment
screw for minimizing wobble and friction.
Steel ball
Fig. C
Deflection of the machine body can be cause
of snipe.
For minimizing the deflection, diagonal beam
is mounted.
Diagonal side beam
Comparison of snipe
Infeed snipe Outfeed snipe
Work piece
Feeding direction
Testing conditions
1. Work piece : Spruce 2x6 1m in length
2. Planing depth : 1mm
< Note >
The numbers in the diagram mentioned below can differ depending on the condition of
work piece.
Snipe
(mm)
0.12
0.1
0.08
0.06
0.04
0.02
0
MAKITA Competitor A Competitor B Competitor C
Model No. 2012NB A B C
Working Normal Head lock Normal Head lock
mode
Infeed
0.05 0.11 0.05 0.11 0.03 0.07
snipe
Outfeed
snipe 0.04 0.04 0.03 0.08 0.02 0.03
Repair
Contents
1. Repairing tool to be used
2. Lubrication
3. Removing chain
4. Mounting tensioner
5. Removing motor section
6. Adjusting play of steel ball mounted in the bottom end of depth adjustment screw
7. Adjusting nut M14 and M14L mounted for minimizing play on depth adjustment screw
8. Depth adjustment of planer blade unit
1. Repairing tool to be used
(1R258) V Block 25mm
125mm 37mm
44mm
69mm Fig.1
63mm
2. Lubrication
Parts to be lubricated Lubricating material Volume to be applied
Reduction gears
(Gear complete 8-50 and 8-46 MAKITA Grease N No.2 Applox. 30 g
Helical gear 46)
Gears for depth adjustment
MAKITA Grease N No.2 Applox. 10 g
(4 pcs.of straight bevel gear 15)
Depth adjustment screw MAKITA Grease N No.2 Applox. 10 g
Surface of columns Machine oil
3. Removing chain
(1) Loosen all of 3 hex socket head bolts on sprockets.
(2) Remove torsion spring 9 (chain tensioner) and take off chain together with sprockets.
4. Mounting tensioner
(1) Mount chain.
(2) Fasten torsion spring 9 with screw provisionally, hitching its short side of torsion spring to rib.
(See Fig.2.)
(3) Hitch long side of torsion spring 9 to chain, gripping it with nippers. (See FIG.2.)
(4) Tighten torsion spring 9 with screw.
(5) Fasten 3 sprockets with hex socket head bolts firmly.
Hex socket
head bolt
Long side of
Torsion spring 9
Short side of
Torsion spring 9
Rib
Fig.2
Hex socket
head bolt
5. Removing motor section
(1) Lift main frame to the highest point by turning depth control handle
(2) Take off side cover, chain, and poly V-belt.
(3) Motor section is fastened with 4 tapping screws from the bottom side of main frame. They are
Tapping screw 5 x 30 for plastic : 2 pcs. on V-pulley side
Tapping screw CT 4 x 25 for aluminum : 2 pcs. on switch box side
Take off the above screws with screwdriver of short size.
< Note > Pay attention to drive them in the correct place, when assembling.
(4) Down main frame to the lowest point by turning depth control handle, and
take off motor section.
(5) Loosen tapping screws, and take off switch box cover and switch box.
Tapping screw 4 x 18 for plastic : 2 pcs. for switch box cover
Tapping screw bind CT 4 x 12 for aluminum : 2 pc. for switch box
< Note > Pay attention to drive them into the correct place, when assembling.
Tapping screw 4 x 18
for plastic : 2 pcs.
Tapping screw bind CT 4 x 12
for aluminum : 2 pc. Switch box
Motor housing
Switch box side V-pulley side
Switch box cover
Main frame
Tapping Tapping
screw CT 4x25 screw 5x30
Fig.3
(6) Motor unit (consisting of motor housing, gear housing, and gear housing cover) have to be mounted
so that its bottom surface is parallel to the surface of main frame.
(7) Do not forget to mount flat washer 14 to inner part of gear housing cover, for accepting drive shaft.
(See Fig.4)
Gear housing cover Gear housing Motor housing
Flat washer 14
Drive shaft
Surface of frame
Fig.4
6. Adjusting play of steel ball mounted in the bottom end of depth adjustment screw
(1) Remove gear cover which is mounted under table. (See Fig.5A.)
(2) Tighten hex socket head bolt M8x16 with hex wrench. (See Fig.5B.)
(3) Loosen the above hex socket head bolt again, and adjust it to the position where the wobble of
steel ball does not arise. (See Fig.5B.)
< Note > Be careful not to tighten too strong for smooth lift.
(4) Fix the hex socket head bolt M8x16 with hex nut M8.
Bottom view of Gear section for depth adjustment
Hex wrench
Wrench 13
Table
Nut M8
Gear cover
Hex socket head bolt
M8x16
Fig.5A Fig.5B
7. Adjusting nut M14 and M14L mounted for minimizing play on depth adjustment screw
Depth adjustment screw
Main frame
Compression
spring 15
Groove for lock
of Nut M14 and
Nut M14 M14L
4mm
Pan head
screw M5x12
Fig.6
Drive nut M14 and M14L protruding approx. 4mm from the edge of main frame. (See Fig.6)
And after facing the groove for lock to the screw hole on main frame, tighten
pan head screw M5x12.
8. Depth adjustment of planer blade unit
(1) Upset the machine.
(2) Turn drum after taking off side cover of pulley side and face the round section of drum to table.
(See FIG.7)
Table
Round section
of drum
Drum
(1R258) V Block
Pulley side Depth control
handle side
Fig.7
(3) Insert V block between table and round section of drum and check the distance of drum's round section
and table on left and right side. (See FIig.7)
(4) Remove gear cover on depth control handle side. (See Fig.8A.)
(5) Loosen screw on shaft retainer and take off bevel gears' engagement. (See Fig.8B.)
(6) Adjust the distance between table and round section of drum by turning depth control handle.
Movement by one tooth is equivalent to 0.13mm up and down. (See Fig.8B and Fig.9)
Gear cover
Take off engagement.
Pulley side Depth control
handle side
Shaft retainer
Shaft retainer Gear to be turned
by depth control handle
Fig.8A Fig.8B
One tooth One tooth
0.13mm
0.13mm
Fig.9
Circuit diagram
Power supply cord
Field
Terminal block
Indicator Noise
3 2
lamp Switch suppressor
< Note > Noise suppressor is not used
in some countries.
Wiring diagram
(1) Power supply cord has to be set as illustrated in Fig.10.
Fig.10
Top cover
Cord clamp
20
Grommet
200 0 mm
Switch box
Power supply cord
(2) Terminal 1 and 2 has to be connected to switch as illustrated in Fig.11.
Fig.11
(3) Leas wire to field has to be set so careful that they would not be pinched by ribs
as illustrated in Fig.12.
Set lead wire without slacking
Set lead wire deep in lead holder.
Set noise suppressor in the position illustrated in Fig.12.
Lead wires
to Field
Lead holder
Terminal block
Rib
Indicator lamp Switch
Fig.12
◦ Jabse Service Manual Search 2026 ◦ Jabse Pravopis ◦ onTap.bg ◦ Other service manual resources online : Fixya ◦ eServiceinfo