Service Manuals, User Guides, Schematic Diagrams or docs for : MAKITA BFH090-TE

<< Back | Home

Most service manuals and schematics are PDF files, so You will need Adobre Acrobat Reader to view : Acrobat Download Some of the files are DjVu format. Readers and resources available here : DjVu Resources
For the compressed files, most common are zip and rar. Please, extract files with Your favorite compression software ( WinZip, WinRAR ... ) before viewing. If a document has multiple parts, You should download all, before extracting.
Good luck. Repair on Your own risk. Make sure You know what You are doing.


Image preview - the first page of the document
BFH090-TE


>> Download BFH090-TE documenatation <<

Text preview - extract from the document
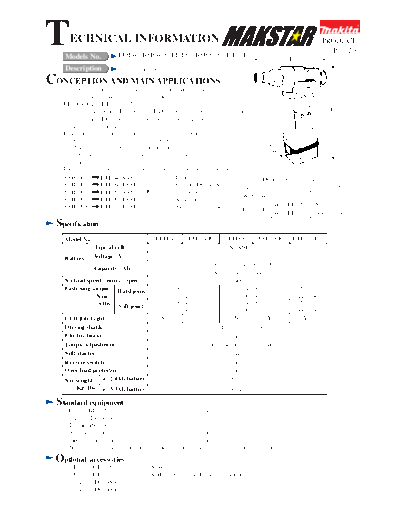
T    ECHNICAL INFORMATION
   Models No.           BFH040, BFH040F, BFH090, BFH090F, BFH120F
                                                                                                  L
                                                                                                                   PRODUCT
                                                                                                                     P 1 / 20

    Description         12V Cordless Screwdrivers

CONCEPTION AND MAIN APPLICATIONS
   The above cordless screwdriver series enable you to work
   also in the hazardous location which is defined by
   UL1604, Class I, Division 2.
   The conformation to UL1604, Class I, Division 2 has been achieved by using                             H
     1. Brush-less DC motor for spark-free armature rotation.
     2. Battery inter lock system
   In addition to the above features, they have the following features.
     * Soft start for suppressing starting shock
     * Delayed restarter for avoiding unintentional over fastening
                                                                                    W
     * Indication lamp, informing operator of the result of
       fastening
   They come to market wit the following model name and the specification.
   BFH040           BFH040SAE                    * Battery 1220 x 2pcs.          Dimensions (mm [inch])
   BFH040F          BFH040FSAE                   * Charger DC14SA        Length (L)                190 [7-1/2]
   BFH090           BFH090SAE            with    * Torque adjsut grip
   BFH090F          BFH090FSAE                   * Accessory case        Width (W)                   71 [2-13/16]
   BFH120F          BFH120FSAE                   * Steel carrying case              With BH1220 266 [10-1/2]
                                                                         Height (H)
                                                                                    With BH1233 289 [11-3/8]
 Specification
   Model No.                           BFH040       BFH040F           BFH090         BFH090F      BFH120F
               Type of cell                                             Ni-MH
   Battery     Voltage : V                                                 12
                                                              2.0 Ah with battery BH1220
               Capacity : Ah
                                                              3.3 Ah with battery BH1233
   No load speed : min-1 = rpm                                            400
   Fastening torque Hard joint                0.8 - 4.5                      3.4 - 9.0                  5 - 12
             : N.m                             (7 - 40)                      (30 - 80)                (44 - 106)
              (in.lbs) Soft joint             0.8 - 4.5                      3.4 - 9.0                  5 - 12
                                               (7 - 40)                      (30 - 80)                (44 - 106)
   LED Job Light                         No               Yes             No            Yes              Yes
   Driving shank                                                    Hex 6.35mm (1/4")
   Electric brake                                                         Yes
   Torque adjustment                                             Yes (Adjust grip is required.)
   Soft starter                                                           Yes
   Reverse switch                                                         Yes
   Over load protector                                                    Yes
   Net weight w/ 2.0Ah battery                                         1.5 (3.3)
      : Kg (lbs) w/ 3.3Ah battery                                      1.8 (4.0)

 Standard equipment
   * Battery BH1220 ...................................................... 2 pcs.
   * Charger DC14SA .................................................... 1 pc.
   * Torque adjust tool ................................................. 1 pc.
   * Accessory case ........................................................ 1 pc.
   * Steel carrying case .................................................... 1 pc.
   < Note > The standard equipment for the tool shown may differ from country to country.

 Optional    accessories
     * Battery BH1220               * Adjust grip
     * Battery BH1233               * ADP 03 Automatic Refreshing Adapter
     * Charger DC14SA
     * Charger DC24SA
Features     and benefits                                                                                         P 2 / 20

                         BFH040, BFH040F, BFH090, BFH090F, BFH120F

 Hazardous Location Tool
 Conforming to UL1604, Class I, Division 2 , Group A- D                  Brush-less DC motor
 (See "The hazardous location tools in UL1604" below.)                   provides spark-free rotation


  High torque accuracy
    7%Cm < 1.67
                                                                                                    Indication
 Bit sleeve, covered with rubber
                                                                                                    lamp
 to protect workpiece from
 accidental scratches                                                                    Refer to "List of the Electronic
                                                                                         Functions and Reminders" on
 LED Job light exclusively for                                                           page 2 and 3.
 BHF120F, BHF090F and BHF040F
                                                                                 Push button type
  The spark comes out of the terminals,                                          reverse switch
  if battery is removed while switch
                                                                                                 ON-OFF switch with
  trigger is pulled.
                                                                                                 soft start feature for
  Battery inter lock system has solved                                                           suppressing starting
  this trouble.                                                                                  shock.
  Because of this system, it is impossible
  to remove battery without releasing
  switch trigger.


                                                                                         Hand strap of parachute 550 type
    Battery inter lock                                                                   can be attached.
    lever
                                                  12 V Ni-MH battery with
                                                  new charging system            Anti-slip dimpled grip


The hazardous location tools in UL1604

                The standards for the electric tools and utensils which are ranked in;
                 * Class I, Division 2
  UL1604
                 * Class II, Division 2
                 * Class III,
                * Class I : The division in which ignitable gases, vapors or liquids                  BFH series models are
                            are to exist.                                                             ranked in this Class I.
  Class
                * Class II : The division in which ignitable dust is to exist.
                * Class III : The division in which ignitable fibrous dust is to exist.
                * Division 1 : where ignitable concentrations of flammable gases, vapors or
                               liquids are likely to exist constantly or temporally, under normal
                               operating conditions.
  Division
                * Division I1 : where ignitable concentrations of flammable gases, vapors or          BFH series models are
                               liquids are not likely to exist under normal operating conditions,     ranked in this Division
                               but likely to exist under abnormal conditions.                         II.

                  The ignitable gas or materials which are ranked in Class I
                Group A : atmospheres such as "acetylene", gases or vapors of equivalent hazard       BFH series models can
  Group         Group B : atmospheres such as "hydrogen", gases or vapors of equivalent hazard        be used under the
                Group C : atmospheres such as "ethylene", gases or vapors of equivalent hazard        condition of Group
                Group D : atmospheres such as "propane", gases or vapors of equivalent hazard         A- D.
Features      and benefits                                                                                         P 3 / 20

List of the electronic function and reminders
1. In case of no trouble on the result of work and on the machine itself, the lamp and beeper inform
   of the following matters.

   Lamp              Beeper          Auto stop         What the lamp, beeper and auto stop system inform of.
  Turns on in the    A series of                         Under testing the function of indication
  order of green,    short beeps                         lamp and beeper, when installing battery.
  red and white.
                                                        Finish of single fastening process with reaching
                                                        the pre-set fastening torque.
  Turns on                                              At this time, clutch works and delayed restarter
                     No beep           ON
  in green.                                             keeps the motor still for one second after finishing
                                                        sufficient fastening process, to avoid the unintentional
                                                        over-tightening which will occur by mis-operation
                                                        of switch trigger.


 2. In case of trouble on the result of work, or on the machine itself, the lamp and buzzer inform of the following matters.

                                                    What the lamp, beeper and
   Lamp             Beeper         Auto stop        auto stop system inform of.               Action to be taken
                                                     Insufficiently finished single     Try again to fasten the screw
                                                     fastening process, without         or bolt.
  Turns on          A long
                                                     reaching the pre-set fastening     It is important to pull the switch
  in red.           beep
                                                     torque.                            trigger on, till the clutch works.

                                                     Remaining battery                 Motor rotates on, however, it is
                    A series                         power is little.                  recommended to replace with
  Blinks in red     of long                                                            the fully charged battery in the
  slowly.           beeps                                                              appropriate time.


                                                     Impossible to fasten screws         Immediately replace the
                    A long
                                                     or bolts with the pre-set           old battery with the fully
  Turns on          beep             ON
                                                     fastening torque any more.          charged battery.
  in red.


  Blinks in         A series                         Warning of abnormal drop in         Motor does not rotate in spite of
  red and green     of long                          battery voltage for some            pulling switch trigger.
                                     ON
  alternately.      beeps                            reason.                             The warning by lamp and beeper
                                                                                         stops with removing battery.

                    A series                         Warning of over heat on             Motor does not rotate in spite of
  Blinks                                             controller or motor.                pulling switch trigger.
                    of short         ON
  in red                                                                                  Remove the battery immediately
                    beeps
  quickly.                                                                               and cool the machine down.

  Blinks            A series                         Operation error in removing         Release the switch trigger and
  in green          of long                          battery                             lower the battery interlock lever.
  slowly.           beeps
  Blinks in         A series                         Reminding the abnormal              Ask Makita service centers.
  red and green     of long          ON              condition of motor.
  alternately.      beeps
  Blinks in         A series                         This indicates abnormality of
  red and green                      ON              battery interlock lever, when       Ask Makita service centers.
                    of short
  alternately.      beeps                            the battery has been inserted.
Comparison              of products                                                                            P 4 / 20

  Model No.                           BFH040       BFH040F      BFH090         BFH090F           BFH120F
                     Type of cell                                  Ni-MH
                     Voltage : V                                     12
  Battery                                               2.0 with battery BH1220
                     Capacity : Ah
                                                        3.3 with battery BH1233
                     Energy : Wh                        24.0 with battery BH1220
                                                        39.6 with battery BH1233
            Charging time with                     Approx. 30 min. for battery BH1220
            DC14SA                                 Approx. 50 min. for battery BH1233
  No load speed : min-1 = rpm                                        400
  Motor type                                                         DC brush less
  Fastening torque Hard joint                0.8 - 4.5                     3.4 - 9.0                5 - 12
            : N.m                             (7 - 40)                     (30 - 80)              (44 - 106)
             (in.lbs) Soft joint             0.8 - 4.5                     3.4 - 9.0                5 - 12
                                              (7 - 40)                     (30 - 80)              (44 - 106)
  LED Job Light                        No                Yes            No           Yes             Yes
  Beeper                               No                Yes             No           Yes            Yes
  Indication lamp                      Yes               Yes             Yes           Yes            Yes
  Driving shank                                                    Hex 6.35mm (1/4")
  Electric brake                                                         Yes
  Torque adjustment                                             Yes (Torque adjust tool is required.)
  Soft starter                                                           Yes
  Reverse switch                                                         Yes
  Over load protector                                                    Yes
                Length (L) : mm                                         190
                             ["]                                      [7-1/2]
  Dimensions


                Width (W) : mm                                           71
                             ["]                                     [2-13/16]
                                                                                     266
                                                               with battery BH1220
               Height (H) : mm                                                     [10-1/2]
                            ["]                                                      289
                                                               with battery BH1233
                                                                                   [11-3/8]
  Net weight w/ 2.0Ah battery                                           1.5 (3.3)
    : Kg (lbs) w/ 3.3Ah battery                                       1.8 (4.0)
Repair                                                                                                             P 5 / 20
< 1 > Lubrication
     Apply MAKITA grease N. No.2 to the following portions designated by black triangle to protect
     parts and product from unusual abrasion. See Fig. 1.


              Ball bearing   Gear case
      44      6805LLB                     47   48      49           50     Lock washer                      54


                                                                    Motor bracket
                                                       Fig. 1


      Position                                                  Portion                                           Amount : g
      No.         Parts item                                    to be lubricated                                          ( oz )
                 Carrier
        44                             Shaft portion which accept 47: spur gear 18.
                 complete B
        47        Spur gear 18         Teeth portion

        48        Spur gear 9          Shaft portion which accept 49: spur gear 19.                               Approx. 2
                  complete             Teeth portion of spur gear 9                                                        (0.08)
                                                                                                                  in total
        49        Spur gear 19         Teeth portion

         50       Internal gear 47     Teeth portion where 47: spur gear 18 and 49: spur gear 19 roll.

         54       Rotor                Teeth portion


< 2 > Disassembling bit holder section
   ( 1 ) Remove ring spring 10. Then, flat washer 11, compression spring 13, sleeve and 2 pcs of steel 3 can be removed
        from spindle. See Fig. 2.
                                     1R291
     Ring spring 10                  Retaining Ring S and R Pliers
                                                                               Flat washer 11
                                                                                   Compression spring 13

                                                                                      Sleeve
                                                     Spindle                                 Steel ball 3

                                                                                            Head of clutch case


                                                                         Steel ball 3
                                                    Fig. 2

< 3 > Assembling bit holder section
   ( 1 ) Mount 2 pcs. of steel ball 3.
   ( 2 ) Mount sleeve.
   ( 3 ) Mount compression spring 13.                                                   See Fig. 2.
   ( 4 ) Mount flat washer 11.
   ( 5 ) Secure the above parts with ring spring 10 to spindle.
Repair                                                                                                                  P 6 / 20
< 4 > Disassembling spindle (as a bit holder) and clutch case
   ( 1 ) After removing bit holder section, remove ring 38 by unscrewing pan head screw M4x4, and clutch case cover
         by unscrewing pan head screw M4x8. And then, remove compression spring 2 and switch lever. See Fig. 3.
   ( 2 ) Remove clutch case by unscrewing 4 pcs. of pan head screw M4x22. See Fig. 4.
        < Note > Compression spring 5 can easily fall off clutch section. Be careful, not to lose compression spring 5
                  in this step.
   ( 3 ) Remove retaining ring R-21 from clutch case. And then, knock the edge of clutch case with plastic hammer.
         So, spindle (as a bit holder) can be removed from clutch case. See Fig. 5.
   ( 4 ) Remove ring spring 11 from spindle. And then remove ball bearing 6801LLB on the ring spring 11 side.
         See Fig. 6.
   ( 5 ) After removing ring 12, remove the another ball bearing 6801lLB. See Fig. 7.


                                  Pan head screw M4x8                          Pan head
              Ring 38                                                          screw M4x22
                                  (black)
                                        Clutch case cover                                     Clutch case
                                                  Compression
                                                  spring 2                                             Clutch section
                                                    Switch lever


     Pan head
     screw M4x4 (silver)                                                    Compression
                                                                            spring 5
                         Clutch case


                             Fig. 3
                                                                                          Fig. 4


                                       No.1R311                      1R004
                                       Retaining Ring Pliers         Retaining ring S plier        Ball bearing 6801lLB
   Retaining ring R-21                 with Long Bent Nails


                                                                     Ring spring 11
                                                                                                           1R269
                                                                                              Fig. 6      Bearing Extractor
                             Spindle                  Ball bearing
                             Ring 12                  6801LLB
                                                                                                   Ball bearing 6801lLB
                              Fig. 5                                           Ring 12


                                                                           Spindle


                                                                                              Fig. 7
Repair                                                                                                                P 7 / 20
< 6 > Assembling spindle (as a bit holder) and clutch case
    ( 1 ) Set ball bearing 6801LLB on 1R035 "Bearing setting plate". Mount spindle to ball bearing 6801LLB by pressing
          with arbor press. See Fig. 8
    ( 2 ) Mount ring 12 to spindle. See Fig. 9.
   ( 3 ) Set another ball bearing 6801LLB on 1R035 "Bearing setting plate". Mount spindle to the ball bearing 6801LLB
         by pressing with arbor press. See Fig. 10.
   ( 4 ) Secure 2 pcs. of ball bearing 6801LLB and ring 12 with ring spring 11. See Fig. 11.
          < Note > Do not use the used ring spring 11. It has to be always replaced with the fresh one.


             Ball bearing                                          Ball bearing
             6801LLB                                               6801LLB
                                       Spindle                                                        1R004
                                                                                                      Retaining ring S plier


         1R035                                     Ring 12
         Bearing setting plate                                                                        Ring spring 11
                                                                                Fig. 10
                          Fig. 8                       Fig. 9
                                                                                                                Fig. 11

        ( 5 ) Mount the spindle section to clutch case as illustrated in Fig. 12.
        ( 6 ) Secure the spindle section in the clutch case with retaining ring R-21. See Fig. 13.


                                                        Retaining ring R-21

        1R237
        Round bar for arbor
                                                                           No.1R311
               Clutch case                                                 Retaining Ring Pliers
                                                                           with Long Bent Nails

                                                                            Fig. 13


                                                                                    Pan head
       1R036                                                                        screw M4x22
       Bearing setting plate        Fig. 12
                                                                                             Clutch case

        ( 7 ) Mount clutch section to motor housing. Mount                                           Clutch section
              compression spring 5 to the clutch section. Fasten
              the clutch case to the motor housing with 4 pcs.of
              pan head screw M4x22 See Fig. 13.

                                                                              Compression
                                                                              spring 5


                                                                                           Fig. 14
Repair                                                                                                          P 8 / 20
    ( 8 ) Mount compression spring 2 and switch lever. And secure clutch case cover
          with pan head screw M4x8 (black).    See Fig. 15.
    ( 9 ) Secure ring 38 to clutch case with pan head screw M4x4 (silver). See Fig. 16.


                                  Pan head
                                  screw M4x8 (black)
                                      Clutch case cover                                     Ring 38
                                           Compression spring 2
                                                  Switch lever


    Clutch case

                                                                       Pan head
                                                                       screw M4x4 (silver)


                        Fig. 15                                                           Fig. 16


< 6 > Disassembling clutch section
    ( 1 ) Remove ring 38 and clutch case cover referring to "< 4 > Disassembling spindle (as a bit holder) and clutch case".
    ( 2 ) Remove clutch section from motor housing. See Fig. 17.
    ( 3 ) Insert torque adjust tool into the hole of adjust ring complete.
         Turn torque adjust tool anti-clockwise, until adjust ring complete
         is free from the compression spring 19. See Fig. 18.
         Then, lock nut M12 can be separated from adjust ring complete Compression
         by turning clockwise with your hand. See Fig. 19.                  spring 5
    ( 4 ) Remove adjust ring complete, flat washer 18 and
          compression spring 19 from spindle. See Fig.20.
                                                                                  Clutch section


   Torque adjust tool
   (Standard equipment)                   Compression                                 Fig. 17
                                          spring 19


                                                                   Adjust ring
         Lock nut M12                                              complete           Flat washer 18
          Adjust ring
          complete                      Fig. 18                                               Compression
                                                                                              spring 19

                                                                                                      Spindle


    Lock nut M12
              Fig. 19                                                                 Fig. 20
Repair                                                                                                                 P 9 / 20

     (5) Insert hex wrench into the hole of spindle and hold the hex wrench with vise. Insert torx wrench T25 into
         the hole of torx counter sunk head screw M5x10. And turn torx wrench T25 anti-clockwise. See Fig. 21.


                  Use the hex wrench with the
                                                             Hex wrench
                  following size.                                                                             Torx wrench T25


                           6mm                                                                  Torx counter sunk
                                                                                                head screw M5x10.


                                                                           Fig. 21


     (6) After removing torx counter sunk head screw M5x10, the clutch section can be disassembled in the order of
        flat washer 7, steel balls 3.0, cam A and steel balls 4. See Fig. 22.
        Remove steel balls 5. Then, cam B can be removed from spindle. See Fig. 23.


               Cam D        Cam A             Torx counter sunk                                               Cam B
                                              head screw M5x10.


                                                                                                    Spindle
                                                 Flat washer 7
                              Steel balls 3.0
           Steel ball 4       (13 pcs.)                                              Steel ball 5
           (3 pcs.)                                                                  (3 pcs.)
                                    Fig. 22                                                         Fig. 23


                                                    Pay attention, not to lose steel
                                                    balls, when disassembling.

< 7 > Assembling clutch section
     (1) Before mounting, take the following steps. See Fig. 24.
           1. Apply MAKITA grease N. No.2 to 3 pcs. of steel ball 5 and 3 pcs. of steel ball 4.
           2. For effective adhesion, clean the screw hole of spindle and torx counter head sunk screw M5x10 with petrol.


                                                  Screw hole for
                                                  torx counter sunk head
                          Spindle                 screw M5x10                    Torx counter sunk
                                                                                 head screw M5x10
                                                            Fig. 24
Repair                                                                                                            P 10 / 20

   (2) Mount steel balls and cam B and cam A in the order of Fig. 25, Fig. 26, Fig. 27 and Fig.28.

            Fig. 25                           Fig. 26                  Fig. 27                         Fig. 28


              Steel balls 5               Cam B                       Steel balls 4
              (3 pcs.)                                                (3 pcs.)              Cam A
         Mount steel balls 5    Mount cam D to spindle
         to spindle.            with aligning its 3 grooves      Mount steel balls 4           Mount cam A.
                                with steel balls 5.              to cam B.

   (3) Before mounting, apply MAKITA grease N. No.2 to 13 pcs. of steel balls 3.0.
       Assemble steel balls 3.0, flat washer 7 and torx counter sunk head screw M5x10 as illustrated in Fig. 29, Fig.30
       and Fig. 31.

                      Fig. 29                               Fig. 30                              Fig. 31
                 Steel balls 3.0                                                                   Torx counter sunk
                 (13 pcs.)                      Flat washer 7                                      head screw M5x10
                 Pay attention, not to spot                                                       Apply here the
                 the screw hole of spindle                                                        adhesive by 0.1CC,
                 with the grease, when                                                            before screwing.
                 assembling steel balls.


     Mount steel balls 3.0                              Mount flat washer 7              After applying 0.1cc (3 drops) of
     to cam A.                                          to cam A.                        adhesive, "Lock tight 603" in the
                                                                                         screw hole, fasten flat washer 7
                                                                                         with torx counter sunk head
                                                                                         screw M5x10.
                                                                                        The fastening torque for the
                                                                                        screw is 8 - 10 N.m.

   (4) Before mounting, apply MAKITA grease N. No.2 to threaded portion of spindle.
       Assemble compression spring 19, flat washer 18 and adjust ring complete and lock nut 12
       in the order of Fig. 31 and Fig. 32.


             Fig. 31                                                          Fig. 32
                                                 Lock nut 12
  Adjust ring           Compression
  complete Flat         spring 19
              washer 18


                                                            While pressing lock nut 12 strongly, turn torque adjust tool
                                                            clockwise. Then, lock nut M12 turns anti-clockwise
                                                            and fastened to spindle.
Repair                                                                                                            P 11 / 20
< 8 > Disassembling motor section and gear section
     ( 1 ) Remove ring 38, and clutch cover from housing referring to "< 4 > Disassembling spindle (as a bit holder)
          and clutch case".
    ( 2 ) After removing clutch section, separate housing L from housing R by unscrewing 8 pcs.
          of pan head screw M3x20. See Fig. 33.


                     Compression spring 5                                                                Plate
                                                                     Housing L                          Housing R


               Clutch
               section
                                                                                                              Lens


                                                           Pan head
                                                           screws M3x20


                                                         Fig. 33


    ( 3 ) Remove gear section with motor section from housing R . See Fig. 34.
    ( 4 ) Turn motor bracket anti-clockwise. So gear section can be separated from motor section. See Fig. 35.

                                                                                                  Motor bracket


             Gear section
                Motor section


                                        Fig. 34                                           Fig. 35

    ( 5 ) Pull off rotor from motor control unit and remove motor bracket. See Fig. 36.


                                    Motor bracket

                                    Motor control unit
                                                                                    Rotor
                         Be careful, not to be pinched your finger
                         between motor control unit and rotor.
                         Because, rotor is pulled toward motor
                         control unit by the strong magnetic force.

                                                                   Fig. 36
Repair                                                                                                                 P 12 / 20
    ( 6 ) Turn lock washer, and pull off it. See Fig. 37.
    ( 7 ) Then, gear section can be disassembled as illustrated in Fig. 38 and Fig. 39.

                                                                                                                     Carrier
               Fig. 37                                      Fig. 38                       Fig. 39                    complete B
     Lock washer

                                                                  Spur gear 9                       Ball bearing
                                                                  complete                          6805LLB


                                                                                                           Spur gear 18 x 3 pcs.


                                                                                    Gear case
                                                      Spur gear 19 x 3 pcs.                                    Internal gear 47


< 9 > Assembling motor section and gear section
   ( 1 ) Referring to "< 1 > Lubrication", apply MAKITA grease N No.2 to the gears and shaft portions of spur gear 9
        and carrier complete B.
   ( 2 ) Mount ball bearing 6805LLB and carrier complete B to gear case. See Fig. 40
   ( 3 ) Mount internal gear 47 to the gear case. See Fig. 41.
   ( 4 ) Engaging internal gear 47, mount 3 pcs. of spur gear 18 to the shaft portion of carrier complete B. See Fig. 42.
   ( 5 ) Engaging spur gears 18, mount spur gear 9 complete. See Fig. 43.
   ( 6 ) Engaging internal gear 47, mount 3 pcs. of spur gears 19 to the shaft portion of spur gear 9 complete.
         See Fig. 44.
   ( 7 ) Mount lock washer to the gear case by turning. See Fig. 45.
   ( 8 ) Mount motor bracket to the gear case by turning clockwise. The assembling of gear section has been completed
        in this step. See Fig. 46.

                               Carrier                                          Spur gear 18                 Spur gear 9
                               complete B
                                                                                                             complete
                                 Ball bearing
                                 6805LLB

                                                Gear case

                                                  Internal
                                                  gear 47
                                  Gear case
                     Fig. 40                                Fig. 41                     Fig. 42                    Fig. 43


                     Spur gear 19                                                                    Motor bracket
                                                  Lock washer


                           Fig. 44                                    Fig. 45                              Fig. 46
Repair                                                                                                              P 13 / 20
  ( 9) Insert armature into motor control unit. See Fig. 47. The assembling of motor section has been completed
       in this step.
  (10) Join the motor section to the gear section. See Fig. 48.


                   Motor control unit


                                                          Rotor
    Be careful, not to be pinched                                             Gear section
    your finger between motor control
    unit and rotor.
    Because, rotor is pulled toward
    motor control unit by the strong
    magnetic force.
                    Fig. 47                                                                   Fig. 48


   (11) Facing switch unit to the plate installing side, mount the motor and gear section to housing R.
        and mount trigger switch section, LED circuit to housing R. See Fig. 49.
        As for buzzer circuit, lever guide, switch lever B and interlock switch, mount as illustrated in Fig. 49A
        and Fig. 49B.
   (12) Mount plate and lens. And secure housing L with 8 pcs. of pan head screw M3x20. See Fig. 50.

                      Switch unit                                          Fig. 49A
                                 Plate installing side
                                                                            Press switch lever B toward lever guide
                                                                            through housing R. Then hooks of switch
 LED circuit                                                                lever B are interlocked in the assembling
 (for BFH...F series)                                                       hole of lever guide.

  Trigger switch                               Switch
  section                                      lever B
                                                   Interlock
  Buzzer                                           switch
  circuit
  (for BFH...F series)
       Lever guide
                                             Spacer                     Lever guide
                                            Terminal                                  Hooks of Switch lever B
              Fig. 49

                                                                                                                  Plate
                              Fig. 49B                                                                            Housing R
                                                                          Housing L

                                            Housing R

                                            Buzzer circuit
                                                                                                                        Lens
                                             Interlock
                                             switch unit

                                        Boss for protecting
                                        interlock switch unit    Pan head
                                                                 screws M3x20

                                                                                                        Fig. 50
      Lever guide
                          Bosses on Housing R
                                                                                                            P 14 / 20

<10> Disassembling Switch Section
  (1) Remove Clutch case section and Housing L from Housing R.
  (2) Remove Switch unit of trigger section by carefully extending hooks. See Fig. 51
  (3) And then, by removing Tapping bind screw PT3x16 and Cover, you can disassemble Switch section as illustrated
      in Fig. 52;


                                                                                      Hook
                                                           Switch unit of
                                                           trigger section


                                                                  Fig. 51


                                                              Tapping bind screw PT3x16

                                                              Cover


                          Leaf spring
                                                              Change lever
             Switch lever A


                                                              Switch unit for rotational direction change


          Compression spring 4                                Switch base


              Fig. 52                                         Switch unit of trigger section

<11> Assembling:
  (1) Set Leaf spring in place on Change lever, and install Compression spring 4 on Switch lever A.
      And then, set the following parts in place on Switch base;
       Switch unit for rotational direction change
       Switch unit of trigger section

  (2) While pushing Change lever with Cover, assemble the parts in Fig. 52 with PT3x16 Tapping bind screw. (Fig. 53)
      Take care not to allow Compression spring 4 and protruding portion of Change lever to get out of place.


                                     Protruding portion of Change lever

                                             Switch lever A


                                                     Install the protruding portion of the Change lever
                                                     in the Switch lever A.


                                   Fig. 53
                                                                                                            P 15 / 20

<12> Disassembling Interlock Section
   Switch lever B and Lever guide can be removed by carefully expanding hooks of Switch lever B in Interlock section
   with slotted driver, etc. (Fig. 54)


                                                          Fig. 54                          Slotted driver


                              Switch
                              lever B


  Lever guide

                                                        Lever guide                  Hooks of Switch lever B


<13> Caution fort handling rotor
   Keep the following minimum distances, when put or store the plural rotors. Failure to keep the minimum distances
   will be cause of breakage. See Fig. 55.


                                       10.0 mm (3/8")


                                           15.0 mm
                                           (9/16")


                                           20.0 mm
                                           (13/16")

                                           Fig. 55
Circuit   diagram                                                                                                 P 16 / 20
                                  Color index of lead wires' sheath
                            Black                      Orange
                            White                       Blue
                            Red                        Purple
                            Yellow                      Gray


                                        Switch Section
                         ON/OFF switch                      Reverse switch


          Connector


                                                                                                          Stator of
                                                   Controller                                            DC brushless
                                                                                                           motor

 Terminal
                                                                                     Motor control unit


   Switch unit
                                                                                                                  LED
   (interlock)
                                                                                                                  circuit


                                         Buzzer           Switch unit
                                         circuit          (clutch)

Wiring     diagram
  When connecting Connectors, be sure to connect together two Connectors that have lead wires of the same colors.
  (1) Wiring in the rotor fan side of housing
     Set Motor section in place on Housing R, and then as illustrated in Fig. A, route the lead wires which connects
     Motor section and Controller section.
   Fig. A
                                                                         Motor section of
                                                                         Motor control unit
    Controller section of
    Motor control unit
                                                                                       Housing R


                                                                                   Lead wire (blue)
                                                                                   Lead wire (white)
                                                                                   Lead wire (orange)

                                                                (1) First, route the three lead wires:
                                                                    blue, white and orange.
                                                                (2) And then put the other wires
                                                                    under the three lead wires.
Wiring       diagram                                                                                                         P 17 / 20
 (2) Wiring near the LED circuit and clutch switch unit
    Put Controller section in place on Housing R, and install LED circuit on Housing R. And then as illustrated in
    Fig. B, pull the following parts out of Housing R: Lead wires and Connectors from LED circuit, Clutch switch unit.
  Fig. B
            These parts must be
            placed out of Housing R.
                                                              Controller section of
            1                                      6      7   Motor control unit


                                                                                       1. Clutch switch unit
                                                                                       2. Lead wire to Motor control unit (yellow)
                                                                                       3. Lead wire to Motor control unit (purple)
        2                                                                              4. Lead wire from LED circuit (gray)
             3                                                                         5. Lead wire from LED circuit (blue)
                 4                                                                     6. Lead wire to Motor control unit (gray)
                      5                                                                7. Lead wire to Motor control unit (blue)
                                     LED circuit                       Housing R


 (3) Wiring near the trigger switch section
    Place Switch section in place on Housing R. See Fig. C for the wiring.
    The lead wires to Switch unit of Trigger section must be placed between Pin 1 and Pin 2.
    Also do not fail to place the lead wire to Switch unit for rotational direction change between Pin 2 and Pin 3.

  Fig. C
                                                                                                 Lead wire to Switch unit for
                                                                                                 rotational direction change
    Switch unit of trigger section                                                               (yellow)

    Lead wire to switch unit of                                                                  Lead wire to Switch unit for
    trigger section (white)                                                                      rotational direction change
                                                                                                 (blue)
    Lead wire to switch unit of
    trigger section (yellow)                                                                     Pin1
    Lead wire to Switch unit for                                                                 Pin2
    rotational direction change
    (yellow)                                                                                     Pin3

    Lead wire to Switch unit for
    rotational direction change                        Lead wire from                 Lead wire from
    (blue)                                             Motor control unit (yellow)    Motor control unit (blue)
                                                                                                               P 18 / 20

(4) Wiring near the buzzer circuit and interlock switch
    Place the lead wires from Buzzer between the boss and the wall of Housing R as illustrated in Fig. D.
    And then fix Interlock switch unit to Housing R by fitting the through holes of the Switch unit to the bosses
    on Housing R as illustrated in Fig. E.
   Fig. D

                                                      Boss of Housing R for holding Buzzer


                                                      Wall of Housing R


            Buzzer                                    Lead wire from Buzzer (white)

                                                      Lead wire from Buzzer (red)


   Fig. E


                                                       Housing R


                                                       Interlock switch unit


                                                       Boss for protecting Interlock switch unit


                                                       Lead wire from Interlock switch unit (red)


                                                       Lead wire from Interlock switch unit (yellow)
                      Bosses on Housing R


(5) Wiring near the terminal
    1. Connect Terminal to Motor control unit as follows.
       There is a flag receptacle on each of the two lead wires (black one and red one) from Motor
       control unit.
       Connect these receptacles with Terminal as illustrated in Fig. F.
       Be sure to connect the flag receptacle on the red lead wire to the (+) terminal, and connect
       the other one on the black lead wire to the (-) terminal.
    Fig. F

                 Flag receptacle on                                       Flag receptacle
                 black lead wire                                          on red lead wire


                     Terminal
                                                                                                               P 19 / 20

   2. After connecting flag receptacles, set Terminal in place on Housing R, and put the lead wires
      (black one and red one), which connect Terminal to Motor control unit, on the lead wires from
      Interlock switch unit illustrated in Fig. G.
      And then apply gentle pressure to lead wires (black one and red one) in order to hold down the lead wires which
      is laid under them.
Fig. G

                                                   < Note >
                                                   Make sure that spacer has been mounted
                                                   to housing R, before setting terminal.
                                                   Refer to Fig. 49 in page 13.


                                                    Red lead wire which connects Terminal
                                                    to Motor control unit
                                                    And black one


                              Terminal


(5) Wiring around clutch case
   Put the lead wire of clutch switch unit as illustrated in Fig. H


                        Fig. H


         Top view of clutch switch unit
                        Clutch switch unit            Lead holder


                                                                                Contain the slack portion
                                 Pin
                                                                                of lead wires and connectors
                                                                                into this pace.
                                 Clutch case

                                          Pass the lead wires, covered by shrink tube,
                                          through the pin.
                                          And hold them with lead holders at clutch case.
Wiring    diagram                                                                                              P 20 / 20
 (7) Handling connectors
    You can disconnect the connectors which connects up the 6 units/circuits listed below by pulling the connectors to
    the directions designated by the arrows as illustrated in Figs. H, I and J:
        Buzzer circuit, Interlock switch unit, Switch unit of Trigger section,
       Switch unit for rotational direction change, Clutch switch unit, LED circuit
    Note: Never hold the wires when separating the connectors, because they are very thin and fragile.
           Therefore, always hold the connectors when disconnecting the connectors.

 Fig. H                                 Fig. I                                       Fig. J
                                          Switch unit for rotational                   Clutch switch unit
                                          direction change


   Buzzer circuit     Interlock                  Switch unit of Trigger section                             LED circuit
                      switch unit


◦ Jabse Service Manual Search 2024 ◦ Jabse PravopisonTap.bg ◦ Other service manual resources online : FixyaeServiceinfo