Service Manuals, User Guides, Schematic Diagrams or docs for : MAKITA BTW072-TE

<< Back | Home

Most service manuals and schematics are PDF files, so You will need Adobre Acrobat Reader to view : Acrobat Download Some of the files are DjVu format. Readers and resources available here : DjVu Resources
For the compressed files, most common are zip and rar. Please, extract files with Your favorite compression software ( WinZip, WinRAR ... ) before viewing. If a document has multiple parts, You should download all, before extracting.
Good luck. Repair on Your own risk. Make sure You know what You are doing.


Image preview - the first page of the document
BTW072-TE


>> Download BTW072-TE documenatation <<

Text preview - extract from the document
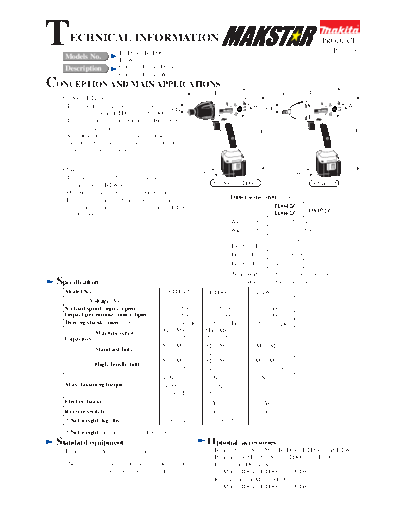
T     ECHNICAL INFORMATION
    Models No.
                            BTD042, BTD062,
                            BTW072
                                                                                                                 PRODUCT
                                                                                                                   P 1 / 10

    Description             Cordless Impact Drivers,
                            Cordless Impact Wrench
CONCEPTION AND MAIN APPLICATIONS                                                                             L
                                                                     L
   BTD042, BTD062
    These models are the advanced type of                                            W1 CH                              W1
                                            CH
    the existing model BTD040 and BTD060.
    They are equipped with Automatic Blow-Stop
    System, with which you can prevent an over-tightening.
                                                                                        H                                 H
    And the indication lamp featuring these
    models shows you the complete or incomplete
    fastening of bolts or screws.


   BTW072                                                       W2                                      W2
    This model is the 9.5mm(3/8") version of the
    existing model BTW062.                                           BTD042, BTD062                          BTW072
    Of course, it is equipped with Automatic
                                                                            Dimensions : mm ( " )
    Blow-Stop System and indication lamp showing
    complete and incomplete fastening like as BTD042                                         TD042Z
                                                                                             TD062Z     TW072Z
    and BTD062.
                                                                            Width 1 (W1)         55 (2-3/16)
                                                                            Width 2 (W2)         66 (2-5/8)
                                                                            Center
                                                                                                   25 (1)
                                                                            Height (CH)
                                                                            Height (H)          236 (9-5/16)
                                                                            Length (L)   164 (6-7/16) 166 (6-1/2)
                                                                             Note: Width 1 = Width of motor section
  Specification                                                                    Width 2 = Width of battery
    Model No.                                   BTD042            BTD062              BTW072
             Voltage (V)                         9.6                9.6                  9.6
    No load speed (min-1=rpm)                   0 - 2,500         0 - 2,500           0 - 2,500
    Impact per minute (min-1=bpm)               0 - 3,500         0 - 3,000           0 - 3,000
    Driving shank : mm ( " )                  6.35 (1/4) Hex    6.35 (1/4) Hex       9.5 (3/8) square
                 Machine screw                M4 - M8           M4 - M8
    Capacities                                (5/32" - 5/16")   (5/32" - 5/16")
                                              M5 - M10          M5 - M12              M5 - M12
                 Standard bolt
                                              (3/16" - 3/8")    (3/16" - 1/2")        (3/16" - 1/2")
                                              M5 - M8           M5 - M10              M5 - M10
                 High Tensile bolt
                                              (3/16" - 5/16")   (3/16" - 3/8")        (3/16" - 3/8")
                                              40N.m              65N.m                65N.m
    Max. fastening torque                     (408Kgf.cm)        (663Kgf.cm)          (663Kgf.cm)
                                              ( 354in.lbs)       (575in.lbs)          (575in.lbs)
    Electric brake                              Yes                  Yes                 Yes
    Reverse switch                              Yes                  Yes                 Yes
    * Net weight: kg (lbs)                    1.06 (2.4)             1.09 (2.5)       1.09 (2.5)
    * Net weight : including battery B9017A
 Standard equipment                                              Optional         accessories
    Battery B9017A .................. 1 pc.                      * Battery B9017A for Mod.BTD042, BTD062 and BTW072
                                                                 * Protector for Mod.BTD042, BTD062 and BTW072
    < Note > The standard equipment for the tool shown           * Fast charger DC14SA
             may differ from country to country.                   for Mod.BTD042, BTD062 and BTW072
                                                                 * Refresh adaptor Model ADP02
                                                                   for Mod.BTD042, BTD062 and BTW072
Features    and benefits                                                                                                 P 2 / 10
  BTD042 , BTD062

                                                                                      Light and compact body
                                                                                 Model No. Overall length Net weight
   Automatic Blow-Stop System for prevention
                                                                                 BTD042                     1.06 Kg
   of over tightening                                                                          164mm
                                                                                 BTD062                     1.09 Kg
   The machine is to be stopped automatically
   in accordance with the pre-set blowing
   time.
                                                                              Newly developed D-28 type motor
    The required fastening torque (N.m) can not be                                  making a feature of
    set with this system.                                                           * Externally accessible carbon brush
                                                                                    * Replaceable armature
Magnesium alloyed hammer case                                                       * High efficiency in cooling
* BTD042Z/ black,                                                                   * Yoke unit (field) made of rare earth
* BTD062Z BTW072Z/ silver)

                                                                                    Indication lamp shows you the complete
                                                                                    or incomplete fastening of bolts or screws.
                                                                                      * Green lamp : complete fastening
                                                                                      * Red lamp : incomplete fastening
                                                 Push button type
                                                 reverse switch
 Bit sleeve is covered with
                                                                                    Slim shaped grip makes it
 rubber to protect work piece
                                                                                    easy to grip even with gloved
 from accidental scratches
                                                                                    hand, and small bosses are
                                                                                    molded on it for nonslip
                                                                                    operation
           Easily operatable
           variable speed control                       Assembled with machine
           switch                                       screws for easy removing
                                                        and repairing.

   Rubber protector (optional accessory)                    Battery power warning lamp on B90117A
   can be installed for protecting work piece               This lamp informs of the battery power remaining
   from the accidental scratch.                             as per the diagram mentioned below.
                                                            And the machine is to be stopped automatically,
                                                            when the power remainder decreases to 20%.
                                                            Thus, the incomplete fastening is avoided.
                                                                                    The auto stop system functions.

                   (Rubber protector)
                                                           Voltage


                                                                                     The condition of
                                                                                     power display lamp


                                                                     100       80           60         40           20          0

                                                                     Mod. ADP02 Refresh Adaptor
                                                                     Because of the auto stop system, approx. 20%
                                                                     of battery power always remains in battery cells,
                                                                     which can be cause of battery's inactivity.
                                                                     In order to avoid such trouble, the battery has
                                                                     to be refreshed with refresh adaptor ADP02
                                                                     every week.
Features   and benefits                                                                                              P 3 / 10

 BTD072
                                                                         Light and compact body
  Automatic Blow-Stop System for prevention                         Model No. Overall length Net weight
  of over tightening                                                                                  1.09 Kg
                                                                    BTD072          162mm
  The machine is to be stopped automatically
  in accordance with the pre-set blowing
  time.
                                                                            Newly developed D-28 type motor
   The required fastening torque (N.m) can not be                                 making a feature of
   set with this system.                                                          * Externally accessible carbon brush
                                                                                  * Replaceable armature
                                                                                  * High efficiency in cooling
                                                                                  * Yoke unit (field) made of rare earth
   Magnesium alloyed hammer case


                                                                          Indication lamp shows you the complete
                                                                          or incomplete fastening of bolts or screws.
                                                                            * Green lamp : complete fastening
                                                                            * Red lamp : incomplete fastening

                                                        Push button type
                                                        reverse switch
                                                                                   Slim shaped grip makes it
                                                                                   easy to grip even with gloved
                                                                                   hand, and small bosses are
                                                                                   molded on it for nonslip
                                                                                   operation
               Easily operatable
               variable speed control
               switch
                                                                      Assembled with machine
                                                                      screws for easy removing
                                                                      and repairing.


                                                     Battery power warning lamp on B90117A
 Rubber protector (optional accessory)               This lamp informs of the battery power remaining
 can be installed for protecting work piece          as per the diagram mentioned below.
 from the accidental scratch.                        And the machine is to be stopped automatically,
                                                     when the power remainder decreases to 20%.
                                                     Thus, the incomplete fastening is avoided.
                                                                              The auto stop system functions.


                 (Rubber protector)
                                                    Voltage


                                                                              The condition of
                                                                              power display lamp


                                                              100        80          60          40             20          0

                                                               Mod. ADP02 Refresh Adaptor
                                                               Because of the auto stop system, approx. 20%
                                                               of battery power always remains in battery cells,
                                                               which can be cause of battery's inactivity.
                                                               In order to avoid such trouble, the battery has
                                                               to be refreshed with refresh adaptor ADP02
                                                               every week.
                                                                                                                      P 4 / 10
   Automatic Blow-Stop System and How to Pre-set the Number of Blows
(1) What Is the Automatic Blow-Stop System
    These three models have a new function that protects screws or bolts from over-tightening.
    This practical function is the automatic blow stop system:
    You can pre-set the number of blows to the optimum one for your application before starting operation.
    And, immediately after the number of blows has reached to the pre-set one, the blow action can be
    automatically and instantly stopped, preventing you from over-tightening a screw or a bolt.

(2) How to Pre-set the Number of Hammer-blows
    Follow the steps 1 to 8 listed below to pre-set the number of hammer-blows.
    There is an LED on the back of the machine, and its two lights (green and red) can help you to confirm completion of
    each step.

                                                                                                                        See
Step                           What to do                                                State of the LED
                                                                                                                        Fig.
       While pulling the switch trigger to the full, install the battery
       on the machine.                                                      After the lights blink ten times, they
  1    Note:                                                                                                           Fig.1
                                                                            come to be on continuously.
       You must keep on pulling the switch trigger to the full until the
       2nd step is completed.

  2    Softly hit the foot of the machine only once with a driver. etc.     The lights turn off.                       Fig.2

                                                                            After the lights come to be on for         Fig.3
  3    Release the switch trigger.
                                                                            0.5sec., they turn off.
       While pulling the switch trigger to the full, set the second digit
       of desired number of blows by hitting the machine
       as many times as the number of the second digit. (Do not hit the     On hitting the machine, the green light
  4                                                                                                                    Fig.2
       machine if the second digit is zero.)                                turns on.
       eg: If you set the number of blows to 12, hit the
           machine once.

  5    Release the switch trigger.                                          The lights turn off.                       Fig.3

       While pulling the switch trigger to the full, set the first digit
       of desired number of blows by hitting the machine
       as many times as the number of the first digit. (Do not hit the      On hitting the machine, the red light
  6                                                                                                                    Fig.2
       machine if the second digit is zero.)                                turns on.
       eg: If you set the number of blows to 12, hit the
           machine twice.

  7    Release the switch trigger.                                          The lights turn on.                        Fig.3

       Remove the battery from the machine, and pre-setting is success-
  8                                                                     The lights turn off.
       fully completed.


  Fig.1                                      Fig.2                                     Fig.3
                                                                                                                                 P 5 / 10


(3) How to Check the Pre-set Number of Blows
    Release the switch trigger, install the battery on the machine, and then check how many times the green or the red
    light of the LED blinks.
    As mentioned in page I-3, the green light blinking indicates the second digit of the pre-set number of blows,
    and the red light blinking indicates the first digit.
    Therefore, when the pre-set number of blows is 12, you can see the following states on the LED:
       First, the green light blinks once.
       Second, the red light blinks twice.
       Third, the lights turn off.


(4) Relation Between Pre-set Number of Blows and its function
      Forward or
         Reverse
                                                     On Forward Rotation                                On Reverse Rotation
Pre-set number
of blows
                                          Automatic Blow-Stop System does not              Automatic Blow-Stop System does not
                           00
                                          work.                                            work.

                                           When you keep on pulling the trigger until      Automatic Blow-Stop System does not
                                           the blow action finish the pre-set number of    work.
                                           blows, the green light turns on to notify you
                         01 to 99          that the bolt has been completely tightened.
                                           When you release the trigger before
                                           the blow action finish the pre-set number of
                                           blows, the red light turns on to notify you
                                           that the bolt has been poorly tightened.


(5) Relation Between Preset Number of Blows and Time Required to Finish the Blows
    The equation for this relation is:
    Time required = ( Preset number of hammer blows X *2 ) X **20ms

                            Note* : "X2" means two blows per spindle rotation.
                                    Consequently, when the preset number of hammer-blows is 10, the hammer actually blows 20 times.
                            Note**: ms = micro second

             The following graph shows this relation.

                           4
                         3.5
  Time required (sec.)


                           3
                         2.5
                           2
                         1.5
                           1
                         0.5
                           0
                               0     10         20      30      40     50     60      70           80        90     100
                                                         Preset number of hammer-blows
Features                           and benefits                                                                                                                      P 6 / 10

                        The Relation Between Fastening Torque and Fastening Time
                             When Fastening Standard Bolt M6                                                              When Fastening High Tensile Bolt M6
                        15                                                      [133]                                25                                                     [221]


                                                                                             Torque (N.m [in.lbs])
Torque (N.m [in.lbs])


                                   BTD062 / BTW072                                                                   20          BTD062 /B TW072                            [177]
                        10                                                      [89]
                                                                                                                     15                                                     [133]

                                                                                                                     10                                                     [89]
                         5                                 BTD042               [44]                                                                      BTD042
                                                                                                                      5                                                     [44]

                         0                                                                                            0
                             0     0.2    0.4      0.6          0.8         1                                             0       0.5       1              1.5          2
                                          Time (sec.)                                                                                   Time (sec.)


                             When Fastening Standard Bolt M8                                                              When Fastening High Tensile Bolt M8
                        25                                                           [221]                           60                                                          [531]
                                 BTD062 / BTW072                                                                     50       BTD062 / BTW072
                        20                                                           [177]                                                                                       [443]


                                                                                             Torque (N.m [in.lbs])
Torque (N.m [in.lbs])


                                                         BTD042                                                      40                                                          [354]
                        15                                                           [133]
                                                                                                                     30                                                          [266]
                        10                                                           [89]                                                                 BTD042
                                                                                                                     20                                                          [177]
                         5                                                           [44]                            10                                                          [89]
                        0                                                                                             0
                             0     0.5     1       1.5      2         2.5        3                                        0      1       2            3          4           5
                                          Time (sec.)                                                                                   Time (sec.)

                             When Fastening Standard Bolt M10                                                             When Fastening High Tensile Bolt M10
                        60                                                      [531]                                80                                                     [708]
                                 BTD062 / BTW072                                [443]                                         BTD062 / BTW072
                        50
                                                                                             Torque (N.m [in.lbs])
Torque (N.m [in.lbs])


                                                                                                                     60                                                     [531]
                        40                                                      [354]
                        30                                                      [266]                                40                                                     [354]
                        20                                 BTD042               [177]                                                                     BTD042
                                                                                                                     20                                                     [177]
                        10                                                      [89]

                         0                                                                                            0
                             0      1      2        3           4           5                                             0      1       2       3           4          5
                                          Time (sec.)                                                                                   Time (sec.)
Comparison     of products                                                                                             P 7 / 10

                   Model No.                  Impact driver                                            Impact wrench
                                                                       MAKITA
  Specifications                     BTD042                             BTD062                            BTW072
           Voltage ( V )                                                  9.6
           Capacity ( Ah )                                                1.7
 Battery
           Energy ( Wh )                                                 16.3
           Kind of cell                                                  Ni-MH
 Charging time with DC14SA                                             30 minutes
 No load speed (min-1=rpm)                                              0 - 2,500
 Impact per minute (min-1=bpm)        0 - 3,500                                           0 - 3,000
                                      40N.m                                                65N.m
 Max. fastening torque                (408Kgf.cm)                                          (663Kgf.cm)
                                      ( 354in.lbs)                                         (575in.lbs)
                   Length                               164 (6-7/16)                                    162 (6-3/8)
 Dimensions      Width                                   66 (2-5/8)                                       66 (2-5/8)
        : mm (")
                 Height                                 236 (9-5/16)                                    236 (9-5/16)
 Net weight including
                                      1.06 (2.4)                                          1.09 (2.5)
 battery B9017A: kg (lbs)


Repair
  <1> Disassembling housing R and L
      Remove hammer case from housing by taking off
      4 pan head screws M4x20, and disassemble
      housing R and L as illustrated in Fig. 1.
                                        Pan head screws
                                        M4x20

                                                                  Hammer case

                                                                                Housing


                                                                                          Fig. 1
  <2> Disassembling bit holder section (anvil section)
      Take off ring spring 10 from the groove on anvil.           Steel ball 3
      Then flat washer 11, compression spring 13 and sleeve
      can be removed from anvil by pulling them in the
      direction of the arrow in Fig.2.
      Anvil can be separated from hammer case after
      disassembling sleeve section.                                            Sleeve
                                                                                       Anvil
                                                   Ring spring 10
                                                                         Compression spring 13
                                                        Flat washer 11
                                                        Pull out in this direction        Fig. 2

  <3> Apply 0.5g of MAKITA grease N No.2 on the
      cylindric part of anvil, when inserting it into        Anvil
      hammer case.


                                          Apply MAKITA grease N No.2
                                                                                          Fig. 3
Repair                                                                                                               P 8 / 10


 < 4 > Removing hammer
        (1) Press down hammer with 1R045: Large gear extractor
           by turning the handle.

         (2) Adjust the opening for steel ball inserting to the cam groove top of spindle.
         (3A) Take 2 off steel balls 5.6 from spindle. (Mod.BTD062, BTW072)                                Spindle
         (3B) Take 2 off steel balls 4.8 from spindle. (Mod.BTD042)    Cam groove top
                                                                       of spindle
         < Note > 29 pcs. of steel balls 3 are installed in hammer.
                  Check the quantity when assembling.

                                      Steel ball 4.8 x 2pcs. (BTD042)
                                      Steel ball 5.6 x 2pcs. (BTD062, BTW072)
    1R045 Large gear extractor
                                                                                                                      Hammer
                                                                Opening for steel
                                                                ball inserting


                                                     Steel ball 3 x 29 pcs.
                                            L
                                                                  (4) Spur gear 16
       L= 85mm
       L=105mm
       L=130mm

                                           W
                     W: The maximum opening width
                       is 170mm.


                                                            Fig. 4


         (4) Apply MAKITA grease N No.2 to the position No. 1, 2,
            3 and 4, when assembling.
                                                                                             (1) Spindle
                         (3A) Steel ball 5.6 x 2 (BTD062, BTW072)
                         (3B) Steel ball 4.8 x 2 (BTD042)
                                                                                                   Hammer
                                   (2) Steel ball 3 x 29 pcs.
               (1) Spindle : 0.5g
               (2) Steel ball 3 : 0.5g
               (3A) Steel ball 5.6 (BTD062, BTW072) : 0.5g
               (3B) Steel ball 4.8 (BTD042) : 0.5g
               (4) Spur gear 16 : 2.0g

                                                                                              (4) Spur gear 16

                                                            Fig. 5
Repair                                                                                                     P 9 / 10
 < 5 > Removing ball bearing 6801LLB

                                         Internal gear case


                                                                                        Ball bearing 6801LLB


         Give a shock by knocking internal gear case               Ball bearing 6801LLB can be removed
         on the table.                                             from internal gear case by the shock.


                                                          Fig. 6

 < 6 > Fastening FET spacer with tapping screw ST 3x8
      When assembling FET spacer, the fastening torque of tapping screw ST 3x8 is approx. 1.1 Nm - 1.5 Nm
      (11Kgf.cm - 15 Kgf.cm).
                                       FET spacer


                             Tapping screw ST 3x8
                             (The fastening torque
                             is approx. 1.1Nm -
                             1.5Nm.)


                                                          Fig. 7


 < 7 > Hammer case has to be fastened diagonally as illustrated in in Fig.8.


                                                                                Hammer case


                                                          Fig.8
Circuit   diagram                 Color index of lead wires
                                                                                                               P 10 / 10
                                Black
                                Red
                                White
                                Yellow


Terminal                                                                  M1

                      Vinyl
                      tube                               Switch           M2                     M        DC Motor

                                                                          M2


                                                                                                       FET
                                                              Shrink these tubes by heat.


                                                                                      LED
                       Controller

Wiring    diagram
                                                                                  Fixing LED lead wires with lead
                                                                                  holder, pass them between pin and
                                                                                  endbell holding rib.

                                              Pass lead wires between pin and
                                                                                         Endbell
                                              endbell holding rib.
                        Ribs                                                             holding rib           LED
                                  Endbell complete                                Ribs


                                                 Pin
                                         Pass FET lead wires (3 pcs)                                          Lead holder
                                         between endbell lead wires                                     Pin
                                         (red and black).
                       Switch               Fixing lead wires (red, black,
                                            white) with lead holder, pass
 Pass endbell lead                          them on the left side of boss.
 wire (red) between
 ribs.                                     Lead holder
                                                       Pass LED lead wires               Controller
                                            Boss       along the groove under
 Controller                                            switch.


◦ Jabse Service Manual Search 2024 ◦ Jabse PravopisonTap.bg ◦ Other service manual resources online : FixyaeServiceinfo