Service Manuals, User Guides, Schematic Diagrams or docs for : MAKITA HR5000K-TE
<< Back | HomeMost service manuals and schematics are PDF files, so You will need Adobre Acrobat Reader to view : Acrobat Download Some of the files are DjVu format. Readers and resources available here : DjVu Resources
For the compressed files, most common are zip and rar. Please, extract files with Your favorite compression software ( WinZip, WinRAR ... ) before viewing. If a document has multiple parts, You should download all, before extracting.
Good luck. Repair on Your own risk. Make sure You know what You are doing.
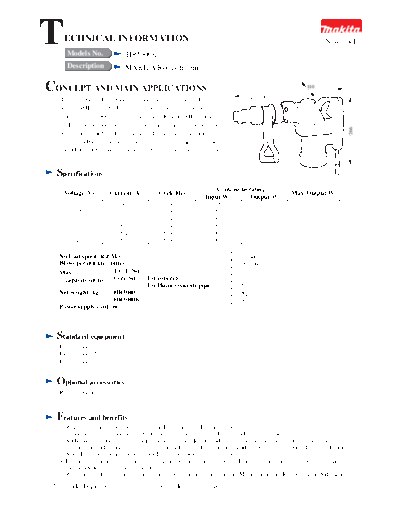
Image preview - the first page of the document

>> Download HR5000K-TE documenatation <<
Text preview - extract from the document
T    ECHNICAL INFORMATION
      Models No.             HR5000K
                                                                                                            New Tool


      Description            MAKITA Rotary hammer

CONCEPT AND MAIN APPLICATIONS                                                HR5000...476
                                                                                                     110

   The purpose of developing this machine is that it should be as            HR5000K...489
   light as #HR3850. And with the same capacity to bore and
   chisel as that of #8050. You can change [Rotation+Hammering]
   to [Hammering Only] easily by operating the lever. Grease Pack


                                                                                                                      266
   System is applied for lubrication. The shank of attaching
   tools for #HR5000 is in common with Bosch Spline Shaft type,
   and #HR5000K is in common with Kungo hexagonal shaft type
   respectively.

  Specifications
                                                                 Continuous rating
     Voltage (V)       Current (A)        Cycle(Hz)                                            Max. Output(W)
                                                             Input(W)       Output(W)
        100               14.0              50/60              1320             730                  1400
        115               11.0              50/60              1200             600                  1400
        200               6.3               50/60              1200             600                  1400
        220               5.7               50/60              1200             600                  1400
        230               5.4               50/60              1200             600                  1400
        240               5.2               50/60              1200             600                  1400

   No load speed (R.P.M.)                                               260/min
   Blows per minute (/min.)                                             2100/min
   Max.                T.C.T. bit                                       50mm
     capacity (mm)     Core bit       for concrete                      150mm
                                      for Hume concrete pipe            255mm
   Net weight (kg)    HR5000                                            9.6kg
                      HR5000K                                           9.7kg
   Power supply cord (m)                                                5m


  Standard equipment
   Hex. spanner 4
   Hex. spanner 5
   Hex. spanner 6


  Optional accessories
   Reffer to General catalogue


  Features and benefits
   1. With the strong power motor, you can drill a big hole(Diameter:50mm) efficiently.
   2. Owing to the light weight design, it is easy to operate both sideways and upward.(9.6kgs)
   3. Additionaly the Grip is the standard accessory besides D-handle, you can use suitable handle for each operation
      of chiseling and boring. (Cut/shave boring sideways,: D-shape side handle; Cut/shave ,boring downward; Grip).
      Also, D-shape handle can be changed the attachment angle by fly nut.
   4. During operation of chiseling, the rotation of Cylinder liner is stopped and prevent transmission loss by fixing
      the change lever "Only Hammering".
   5. We considered the counter plan for vibration by using Plate spring in Main handle and Rubber grip in Side handle.
 The standard equipment for the tools shown may differ form country to country.
 REPAIR
1. Principal tools to be prepared
    (1) Vice fixed on the work table
    (2) Pipe wrench( 60cm or more, the longer it may be, the easier for operation).
    (3) Backplate a) Copper plate, 2pcs (Used when put Clunk Housing between Vices)
                      b) Iron plates, 2pcs of the dimensions in the illustration(Used when
                          put Cylinderliner between vices)

               20mm


   (4) Bullpoint
2. Disassembly
    A) How to remove Tool Holder(left screw) and Barrel
         As you see the right illustration, put a backplate
                                                                               Copper plate
         (copper plate) on the side of Clunk Housing
         (for protection of Clunk Housing), fix it by Vice,
         and put two Sides of Bullpoint inserted into
         Tool Holder by pipe wrench ,
         then turn it to right


                                                                                             Put a piece of wood to
                                                                                             assist the Vise pertormance.
   B) How to remove Cylinder liner(right screw) and Hexagonal nut
      As you see the right illustration, put a backplate on    Becomes loose by left turn
      two sides of Cylinder liner, fix it by Vice, hold two
      sides of Hexagonal nut by pipe wrench, and turn it to               Backplase
      left.

      Note 1) If the screws did not loosen in disassembling
            of A)and B), heat the screw part over the
            gas stove about five minutes to 200- 250 C.
            Then, it will be loose because the adhesive
            effect becomes weak.

   C) How to remove Clunk Shaft
      Make the Clunk Cap side of Clunk Housing
      downward, press the end face of Clunk Shaft by rbor
      Press, and it will come out.


                                                                                Ballbearing       Apply Primer and Locktibht
 3. Assembly
    A) How to fasten Cylinder Liner and Hexagonal Nut                     Flat Washer
      1 ) Remove grease from Screw part, and apply Primer T747 (Note2) .
      2 ) Insert Flat Washer and Ballbearing
      3 ) When the surface applied Primer gets dry(in about 3-5 minutes),
          apply Locktight 648 , three lines (Note 3)

      4 ) Fasten Hexagonal Nut (Width between two faces:41mm)by 2000-2500kgf.cm(with 60-cm pipe wrench,
          approx. 33kgf. Strength)
           Note2) Primer T747 is hardening promotion agent to shorten the time forhardening Locktight
                   648(adhesive).                                                            Adhesive
           Note3) Three lines mean to apply the adhesive
                   three times in the shaft direction.


                                                                           At 10cm, strenght of approx. 25kg.f
   B) How to fasten Tool Retainer and Hexagonal Nut
      1 ) Remove grease in Screw part
      2 ) Apply Locktight 648 two lines(times).
      3 ) Fasten Hexagonal Nut (Width between two
         faces:13mm)with 250-300kgf.cm
                                                                                       JIS spanner 13

   C) How to fasten Tool Holder and Barrel
     1 ) Remove grease in Screw part
     2 ) Apply Screw Lock Super1342 two times.
     3 ) Fasten with 3000-3500kgf.cm. ( Approx. 50kgf strenght by 60-cm pipe wrench)

   D) In Oil Seal, Y Ring and O Ring, etc., apply grease on Lip parts and attach carefully so that it may not be
      damaged.
   E) After assembling, enclose MAKITA GREASE R No.00, 75-80 g(the vakue when there is no grease in
      Housing) from Clunk Cap part.

4. The assembly and disassembly except the above are almost the same as those of #HR3850.
◦ Jabse Service Manual Search 2024 ◦ Jabse Pravopis ◦ onTap.bg ◦ Other service manual resources online : Fixya ◦ eServiceinfo