Service Manuals, User Guides, Schematic Diagrams or docs for : MAKITA JR3030-TE
<< Back | HomeMost service manuals and schematics are PDF files, so You will need Adobre Acrobat Reader to view : Acrobat Download Some of the files are DjVu format. Readers and resources available here : DjVu Resources
For the compressed files, most common are zip and rar. Please, extract files with Your favorite compression software ( WinZip, WinRAR ... ) before viewing. If a document has multiple parts, You should download all, before extracting.
Good luck. Repair on Your own risk. Make sure You know what You are doing.
Image preview - the first page of the document
>> Download JR3030-TE documenatation <<
Text preview - extract from the document
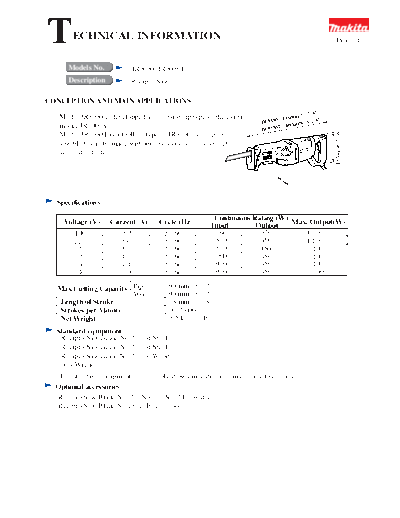
T ECHNICAL INFORMATION Product
Models No. JR3030, JR3030T
Description Recipro Saw
CONCEPTION AND MAIN APPLICATIONS
7-1/4")
Model JR3030 is developped as a version up type of the existig 8mm(1
JR3 030 : 43 (18-1/8
")
model JR3000V. 460mm
JR3 030T :
157mm(6-3/16")
Model JR3030T is a toolless type of JR3030,( change of
saw blade can be made without any tools, such as wrench,
screwdriver, etc.)
96mm(3-25/32")
Specifications
Voltage (V) Current (A) Cycle (Hz) Continuous Rating (W) Max. Output(W)
Input Output
100 8.0 50/60 760 320 1,100
110 8.0 50/60 870 450 1,100
120 8.0 50/60 870 450 1,100
220 4.3 50/60 900 450 1,100
230 4.1 50/60 900 450 1,100
240 4.0 50/60 900 450 1,100
Max.Cutting Capacity Pipe 90 mm (3-1/2")
Wood 90 mm (3-1/2")
Length of Stroke 28 mm (1-1/8")
Strokes per Minute 0 - 2,600
Net Weight 3.5 kg (7.7 lbs)
Standard equipment
Recipro Saw Blade No.21 (for Steel)
Recipro Saw Blade No.22 (for Steel)
Recipro Saw Blade No.23 (for Wood)
Hex Wrench
The standard equipment for the tools shown may differ form country to country
Optional accessories
Recipro Saw Blade No. 21, No. 22, No. 24 (for steel),
Recipro Saw Blade No.23, 23B (for wood)
Features and benefits
1.No tools are required for blade replacement. (only JR3030T)
No tools are required for shoe adjustment.
2.Changeable carbon brushes without dismounting handle cover.
3.Big D-form handle for comfortable gripping.
4.Trigger type variable speed control switch with lock on button for continuous operation with
your favourite speed.
5.Faster cutting speed than Mod.JR3000V and hte competitors' products.
6.Dust and water proof gear housing with rubber packing and jet for blowing away of dust.
Comfortable Rubber Cover Lock on button for continuous
Changeable carbon brush
(Barrel) operation with favourite speed Speed
without dismounting
selected by you.
the handle caover
>
Large easy-to-Operate
Trigger Switch
(Variable Speed)
No tools are required for blade
replacement (only JR3030).
No tools are required for
Shoe adjustment.
Big D-form handle
for easy and comfortable
gripping
Comparison chart
Spec. Makita Competitors
Model No.JR3030/JR3030T JR3000V
Power Input (W) **900 590 --- 650
Rated Current under 120V 8.0 A 6.0 A 6.5 A ---
Stroke per min. (Spm.) 0 - 2,600 0 - 2,300 0 - 2,800 800 - 2,500
Length of stroke (mm) 28 (1-1/8") 30 (1-3/16") 25 (1") 30 (1-3/16")
by Switch trigger Yes Yes Yes Yes
Speed control
by Control dial No No Yes Yes
Toolless system Blade replacement No / Yes No Yes No
Shoe adjustment Yes No No No
Cahnge of carbon brush
Yes No Yes Yes
without dismounting body
with Shoe 438 / 460
Overall length (17-1/4")/(18-1/8") 413 (16-1/4") 448 (17-5/8") 422 (16-5/8")
(mm)
without Shoe ---
410 (16-1/8") 390 (15-3/8") 410 (16-1/8")
Weight (Kg) 3.5 (7.7 lbs) 2.9 (6.4 lbs) 3.3 (7.25 lbs) 3.2 (7.1 lbs)
Hex Wrench Hex Wrench Hex Wrench Hex Wrench
Standard Equipments for Mod.JR3030 Set of Saw Blade Set of Saw Blade Set of Saw Blade
Set of Saw Blade Steel Case
Plastic Case
**In Great Britain ; 870W **In Japan ; 760W
Comparison in cutting speed
Testing Ocnditions
1.The cutting speed of Mod.JR3000V is endexed for 100.
2.Work pieces for test : Spruce 2 x 10 and Steel pipe with diameter of 25.4mm (1")
Spruce of 2x 10 Steel Pipe with diametre : 25.4mm (1")
100 100
Slow < > Fast Slow < > Fast
Mod.JR3030(T) 120 (7.0 sec.) 120 (22.5 sec.)
Mod.JR3000V 100 100
Competitor (A) 100 110
Competitor (B) 120 100
Repair
Dismounting of Blade Clamp (JR3030T)
Hex Socket Head Bold
Push Button Blade Clamp
Press the push button, however, not too strong, and then hex socket head bolt can be dismounted.
However, be so carefull that the hex socket head bolt does not spring out.
Mounting of Blade Clamp (JR3030T) Steel Ball
Paste Makita Grease No.1 on the Steel Ball Grease
Grease Pin Push Button
and Pin, and then install them into Blade Clamp.
Mount the Push Button on the above Blade Clamp.
>
Blade Clamp
At the mounting of clamp and push button on the slider, keep the distance 2 - 3mm between clamp and push button.
so, they can be installed on the slider soothly.
Push Button
Slider
> < 2mm - 3mm
Clamp
Dismounting of Slider
Dismount the Pan Hd.Screw from the back side of the Lever 60 for shoe adjustment.
And then, dismount the Lever 60.
Dismount the Hex Bolt fastening the Shoe, and the Shoe. (Pay attention not to lose the Hex Nut in this process.)
Hex Bold
Shoe
Pan Hd.Screw M4 x 10
Lever 60 for Shoe Adjustment
Looes 4 pcs.of Pan H.Screw M5x30. and dismount the Gear Housing Cover after taken off the Insulation Cover.
At dismounting of the Insulation Cover , pay attention to on the Insulation Cover illustrated below.
for prevention that the Insulation Cover
slips off form the machine.
for prevention that the Insulation Cover
slips off form the machine.
for prevention that the Insulation Cover
slips off form the machine.
for prevention that the Insulation Cover
slips off form the machine.
Take off the Pan Hd.Screw fastening the Plane Bearings, and dismount the Plane Bearing on the Motor Housing side
from the Slider. After pushing the Slider in the direction of the Motor Housing, pull out the Slider in the
direction as per the
following illustration. Pan Hd. Screw M5x16
<
<
Plate
X Ring
Plane Bearing 19 (on the motor housing side)
Pull out the Slider
Plane Bearing 19
in this direcyion.
Slider
Gear Housing Cover Slide Plate
Saw Blade Side side Motor Housing Side
Mounting of Slider
Take off the Tapping Screws mounted on the front of Gear Housing Cover, and X Ring etc.
Dunk the Plate (Felt) and Slide Plate in the machine oil, and put them on the Gear Housing Cover.
Install the Slider on which the Plane Bearings are instlled in advance, on the Gear Housing Cover, and
Fasten it with Pan Hd.Screws together with Plate.
Install the Flat Washer 14 (thickness:0.5mm) on the front of Gear Housing Cover, and press X Ring together
with Flat Washer 14 (thickness:1.0mm) into Gear Housing Cover.
Install the Felt Ring and Felt Retainer which are dunked in the machine oil in advance, on the front of
Gear Housing, and then fasten them with Tapping Screw CT15x12.
Adhesive is pasted on the Pan Hd.Srew M5x16 in advance for prevention against loosening. Use the new
one with adhesive, or paste the adhesive on it, if you do not replace with the new Pan Hd.Screw M5x16.
Inside of X Ring has to be greased in advance.
Curved part of Slide Plate has to be in the direction of Motor Housing side as per the following illustratoin.
The sliding part of the Slider has to be greased with 12g of grease N No.1.
Pan Hd. Screw M5x16
Plate Tapping Screw CT5x12
Motor Housing Side
Felt Retainer
<
<
Felt Ring
Flat Washer 14
Inside has to be X Ring 14
Plane Bearing Plane Bearing greased.
Flat Washer 16
Slide Plate Curved Part on
Gear Housing Cover the Slide Plate
>
Plate
(Felt) Gear Housing Cover
<
<
Motor Housing Side
Dismounting of Armature
Dismount Carbon Brushes.
Separate the Motor Housing from the Gear Housing by loosening the Tapping Screw 5x30 (2pcs.) and 5x45 (2 pcs.).
Take off Pan Hd.Screw M5x8 (3pcs.). So, Armature can be dismaounted from the machine.
Not lose Compression Spring 4 installed between Switch and Switch Lever, at dismounting of
Handle section.
Switch Lever Brush Holder Cap
Switch Tapping Screw 5x30 (2 pcs.)
Pan Hd.Screw M5x8 (3 pcs.)
Pan Hd.Screw
M5x8 (3 pcs.)
Tapping Screw 5x45 (2 pcs.)
Compressoin Spring 4 Gear Housing
Dismounting of Bevel Gear 44
Take off Plate (C) by loosening Hex Socket Hd.Bolt M5 x 12. And then dismount the Gear Complete from Gear Housing
by loosening 3 pcs.of Pan Hd.Screw M5 x 8 which are installed on the bottom side of Gear Housing.
Hex Socket hd.Bolt M5x12 Pan Hd.Screw M5x8
Hex Socket hd.Bolt M10x18
Bottom view of
Gear Housing
Gear Complete Plate C Pan Hd.Screw M5x8 Pan Hd.Screw M5x8
Hex Socket hd.Bolt M5x12
Hold the flat secstion on the Gear Shaft end, and loosen Hex Socket Hd.Bolt M10 x 18.
And then, Bevel Gear 44 can be separated from Gear Shaft.
Mounting of Armature and Bevel Gear 44
Bevel Gear and Armature can be installed by taking reverse steps.
Adhesive is pasted on the following parts in advance for prevention against loosening.
*Hex Socket Hd.Bold M10x18 for Bevel Gear 44
*Pan Hd.Screw M5x8 (3 pcs.) for fastening Armature section
Use the new ones with adhesive, or paste the adhesive on them, if you do not replace with the new.screws
or bolts.
The Gear section has to be greased with 15g of grease N No.1.
Mounting of Insulation Cover
Insulation Cover can be mounted on the Gear Housing smoothly, if the inside of it is wetted with water.
Circuit Diagram
The lead wires have to be connected as follows.
Switch
M2 M1
1 C2 2 C1
Power Supply
Cord
Lead Wire covered Condenser
Lead Wire covered with transparent
with transparent material
material
Insulated Connecter
◦ Jabse Service Manual Search 2026 ◦ Jabse Pravopis ◦ onTap.bg ◦ Other service manual resources online : Fixya ◦ eServiceinfo