Service Manuals, User Guides, Schematic Diagrams or docs for : MAKITA ML122-TE

<< Back | Home

Most service manuals and schematics are PDF files, so You will need Adobre Acrobat Reader to view : Acrobat Download Some of the files are DjVu format. Readers and resources available here : DjVu Resources
For the compressed files, most common are zip and rar. Please, extract files with Your favorite compression software ( WinZip, WinRAR ... ) before viewing. If a document has multiple parts, You should download all, before extracting.
Good luck. Repair on Your own risk. Make sure You know what You are doing.


Image preview - the first page of the document
ML122-TE


>> Download ML122-TE documenatation <<

Text preview - extract from the document
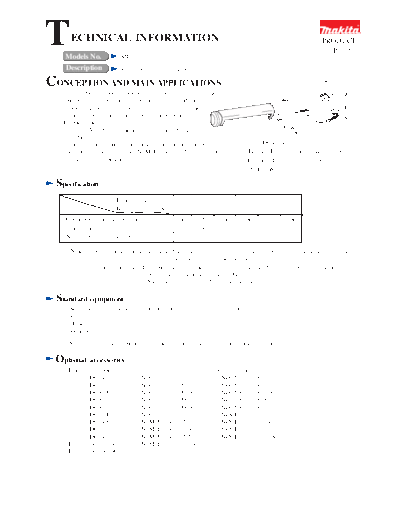
T     ECHNICAL INFORMATION
    Models No.                       ML122
                                                                                                                                                PRODUCT
                                                                                                                                                  P1/5

    Description                      Rechargeable Job Site Light

CONCEPTION AND MAIN APPLICATIONS                                                                                             L
   This product has been developed for workshop,
   automotive service center where the pinpoint irradiation
   is often required, when repairing of narrow and complex                                                                                               H
   section, for example, engine room of automobile, etc.
   Its brief benefits and features are,
   * Both 9.6V and 12V batteries can be attached to this                                                                            W
     product.
   * The continuous illumination time is 230 minutes (almost                                                             Dimensions : mm ( " )
     4 hours), if the full charged Ni-MH battery 1235, 12V / 3.0Ah is                                               Length ( L ) w/o battery 347 (13-5/8)
     attached to this product.                                                                                      Height ( H )              94 (3-11/16)
                                                                                                                     Width ( W )              97 (3-13/16)

 Specification
                                  Battery voltage ( V )                               12                                   9.6
                                  Battery capacity (Ah)                 3.0           2.0           1.3            3.0     2.0     1.3
   *Continuous illumination time: approx.min. 230                                    150             90            230     150      80
  **Illumination (lx)                                                                380                                   330
    Net weight w/o battery :Kg (lbs )                                                             0.35 (0.77)

    < Note > * Continuous illumination time: The figures shown in the above list can differ from condition to condition
                                                of batteries or room temperature.
             **Illumination (lx) : The figures shown in the above list were measured on the following conditions.
                                   * With attaching reflector to the product
                                   * Measured at the point of 50 cm distant from light source

 Standard equipment
   * Set plate for the batteries without push button .............................                         1 pc.
   * Strap .............................................................................................   1 pc.
   * Hook .............................................................................................    1 pc.
   * Reflector set..................................................................................       1 pc.
   < Note > The standard equipment for the tool shown may differ from country to country.

 Optional         accessories
   * Fluorescent tube                          12 V batteries                                   9.6 V batteries
   * Charger DC1411                            * Ni-Cd battery 1222                             * Ni-Cd battery 9122
   * Charger DC1801                            * Ni-Cd battery 1202                             * Ni-Cd battery 9102
   * Charger DC9700                            * Ni-Cd battery 1202A                            * Ni-Cd battery 9102A
   * Charger DC9710                            * Ni-Cd battery 1200                             * Ni-Cd battery 9100
   * Charger DC9711                            * Ni-Cd battery 1200A                            * Ni-Cd battery 9120
   * Charger DC1290                            * Ni-Cd battery 1220                             * Ni-MH battery 9133
   * Charger DC1470                            * Ni-MH battery 1233                             * Ni-MH battery 9134
   * Charger DC1201                            * Ni-MH battery 1234                             * Ni-MH battery 9135
   * Charger DC1422                            * Ni-MH battery 1235                             * Ni-MH battery 9135A
   * Fast charger DC1439                       * Ni-MH battery 1235A
   * Fast charger DC1809
Features    and benefits                                                                                          P2/5


  Removable reflector set
  By turning this reflector set around
  the lamp, your desired position can be irradiated.
                                                             Supports for stabilizing
                                                             when it is put on something

  Absorber
  To protect the body
  from shock


                                                                             Both 12V and 9.6V battery can be
    Transparent lamp cover                                                   attached.
    being able to irradiate wide                                             With set plate (standard equipment),
                                                                             all of our cluster type 9.6 V and 12 V batteries
                                                                             can be used.

                                                                                Removable hook and strap


Comparison          of products
                                                        MAKITA                                        MAKITA
                               Model No.
   Specifications                                         ML122                                         ML701
   Voltage ( V )                                         9.6 / 12                                        7.2
  *Continuous illumination 12V/ 2.0Ah                     150                                           120
   time: approx.min.       9.6V/ 2.0Ah                     150                             with battery 7.2V 1.3Ah
                                   12V                     380
  **Illumination (lx)
                                 9.6V                   330
                              Type of tube       Compact fluorescent tube 13W x 2          Fluorescent tube 4W x 1
   Fluorescent tube           Service life : h             2,600                                         1,000
                              Starter                       No                                            No
   Removable strap                                          Yes                                           Yes
   Dimensions : mm ( " )      Length                   347 (13-5/8)                                 210 (8-1/4)
   w/o battery                Width                     97 (3-13/16)                                 44 (1-3/4)
                            Height                       94 (3-11/16)                                91 (3-5/8)
   Net weight w/o battery :Kg (lbs )                   0.35 (0.77)                                  0.23 (0.51)
   Weight w/ battery 1222 :Kg (lbs )                   1.0 (2.2)
   Weight w/ battery 9122 :Kg (lbs )                   0.9 (1.98)                           0.57 (1.26) w/ battery 7000
 < Note > * Continuous illumination time: The figures shown in the above list can differ from condition to condition
                                             of batteries or room temperature.
          **Illumination (lx) : The figures shown in the above list were measured on the following conditions.
                                * With attaching reflector to the product
                                * Measured at the point of 50 cm distant from light source
 Repair                                                                                                            P3/5
< 1 > Replacing battery holder, switch and circuit complete
    (1) Connecting lead wires
       The lead wires have to be connected as illustrated in Fig. 1. And then, solder them.


                      Correct connection                    Wrong connection

                         Fig. 1                                    Fig. 1A


                  Fluorescent                                                  Battery holder
                  tube holder                   Circuit complete


                                               (B)     (C)                         (A)
    (A) Connecting circuit complete's lead wire with battery holder
        Lead wire (black) covered with
        yellow tube
           Yellow tube                                          Solder here.


                                                           Lead wire (red) covered with
                                                           yellow tube

    (B) (C) Connecting circuit complete's lead wire with switch


                                                                                         Lead wire (black) covered with
                                              Circuit complete side
                                                                                         yellow tube
                                                                                          Yellow tube


                                                              Switch


                       Yellow tube


                                               Lead wire (black) covered with
                                               yellow tube
Repair                                                                                                              P4/5
 (D-1)Removing circuit complete's lead wire from fluorescent tube holder
      Insert small screwdriver deep into rib 1 and 2 and pull out the lead wires pressing
      with the screwdriver in the direction of the arrow as illustrated in Fig. 2A.
  Lead wires (red)                    Tube installing side


                                      Fig. 2

                                 Fluorescent tube holder


                         View from tube installing side
                                                                      Rib 1


                                                                     Rib 2


                                               Fluorescent tube holder

                                                                         Fig. 2A

 (D-2)Connecting circuit complete's lead wire with fluorescent tube holder
      Insert receptacles into the holes of fluorescent tube holder with facing the receptacles' spikes to the outside
      as illustrated in Fig. 3.
                                                                              Fluorescent tube holder
                                     Lead wire (black) covered
                                     with yellow tube


                                                                                          The receptacles' spikes have to be
              Circuit complete                                                            faced to out side.


                                                                Lead wire (red) covered
                                                                with yellow tube
                                                       Fig. 3


      < Note > The spikes of pulled (used) receptacles are deformed as illustrated in Fig. 3A.
               The used ones have to be corrected as illustrated in Fig. 3B.

                             Deformed spike                         Corrected spike


                                  Fig. 3A                                     Fig. 3B
Circuit    diagram                                                                              P5/5


                                                                                  A
  Terminal +
                                        Switch
                                                            Circuit
 Battery holder                                                                       Fluorescent tube
                                                            complete

  Terminal                                                                        B


Wiring     diagram


              Place lead wire, so that it can not be pinched
              by housing, circuit complete and battery holder.

                                                                 Battery holder


          Fluorescent
          tube holder               Circuit complete


     Place lead wire, so that it can not be pinched
     by housing, circuit complete and fluorescent tube holder.


◦ Jabse Service Manual Search 2024 ◦ Jabse PravopisonTap.bg ◦ Other service manual resources online : FixyaeServiceinfo