Service Manuals, User Guides, Schematic Diagrams or docs for : MAKITA PV7000C-TE

<< Back | Home

Most service manuals and schematics are PDF files, so You will need Adobre Acrobat Reader to view : Acrobat Download Some of the files are DjVu format. Readers and resources available here : DjVu Resources
For the compressed files, most common are zip and rar. Please, extract files with Your favorite compression software ( WinZip, WinRAR ... ) before viewing. If a document has multiple parts, You should download all, before extracting.
Good luck. Repair on Your own risk. Make sure You know what You are doing.


Image preview - the first page of the document
PV7000C-TE


>> Download PV7000C-TE documenatation <<

Text preview - extract from the document
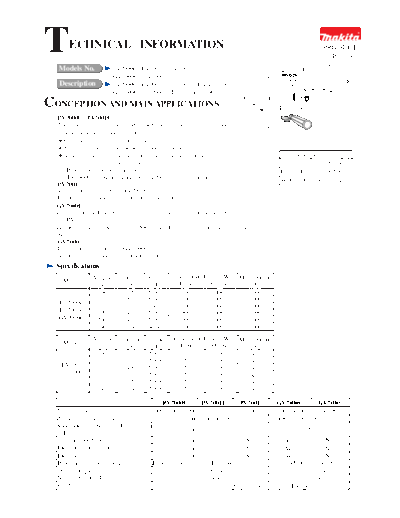
T      ECHNICAL INFORMATION                                                                                    PRODUCT
                                                                                                                 P 1 / 16
  Models No.               PV7000C, PV7001C, PV7001                                                   L
                           GV7000C, GV7000
   Description             PV7000C, PV7001C, PV7001 : Polisher 180mm
                           GV7000C, GV7000 : Disc Sander 180mm
                                                                             W         H
CONCEPTION AND MAIN APPLICATIONS
   PV7000C, PV7001C
  These polishers have been developed for the most controlled operation in
  various polishing works, featuring ;
     Compact and light-weighted body
     Electronic control for the least speed reduction
     Variable speed change dial and speed selecting button (low/high) for a                      Dimensions : mm ( " )
     wide range of polishing works                                                           Length (L) 210 (8-1/4)
     *Protection from electric shock                                                         Height (H) 220 (8-5/8)
      PV7000C : double insulation, PV7001C : by grounding                                    Width (W)   82 (3-1/4)
   PV7001
  The economy version of PV7001C ;
  Features single speed without electronic control.
  GV7000C
  Easy-to-control Disc Sander has been developed on the same concepts as
  the PV line-up.
  Features variable speed from 2,500 to 4,700 rpm. (without speed selecting
  button)
   GV7000
  The economy version of GV7000C ;
  Features single speed without electronic control.
  Specifications
                Voltage      Current   Cycle     Continuous Rating (W)      Max. Output
    Model
                 (V)          (A)       (Hz)       Input       Output          (W)
                 100          9.5      50/60        900         400           1,000
                 110          8.6      50/60        900         400           1,000
  PV7000C        120          7.9                               400           1,000
                                       50/60        900
  PV7001C        220          4.3      50/60        900         400           1,000
  GV7000C        230          4.1      50/60        900         400           1,000
                 240          3.9      50/60        900         400           1,000
                 Voltage     Current   Cycle     Continuous Rating (W)      Max. Output
    Model                                          Input       Output
                  (V)         (A)       (Hz)                                   (W)
                  100         5.8      50/60        550         300            450
                  110         5.3      50/60        550         300            450
   PV7001         120         4.8      50/60        550         300            450
   GV7000         220         2.6      50/60        550         300            450
                  230         2.5      50/60        550         300            450
                  240         2.4      50/60        550         300            450

                                            PV7000C          PV7001C          PV7001         GV7000C          GV7000
  No load speed : min-1=rpm              600 / 600 - 2,000 (Changeable)        1,700       2,500 - 4,700         4,700
  Polishing/sanding capacity : mm (")                   Wool bonnet 180 (7)                  Abrasive disc 180 (7)
  Speed electing button for Low (single)
                                                        Yes                     No                       No
  or High (variable)
  Variable speed control dial                           Yes                     No               Yes              No
  Electronic speed control                              Yes                     No               Yes              No
  Electronic soft start                                  Yes                    No               Yes              No
  Protection from electric shock         Double insulation       By grounding                      Double insulation
  Overall length : mm (")                                  210 (8-1/4)                                210 (8-1/4)
  Net weight : kg (lbs)                                     2.0 (4.4)                                  2.0 (4.4)
  Cord length : m (ft)                                                2.5 (8.2)      4.0 (13.1) for Europe
                                                                                                            P 2 / 16
  Standard equipment
  PV7000C, PV7001C, PV7001 :
  Wrench 17, Side Grip, Pad 165 (Hook and Loop type)
 GV7000C, GV7000 :
 Wrench 17, Side Grip, Lock Nut Wrench 28, Sanding Lock Nut,
 Abrasive Disc 180 (#80), Rubber Pad 170 (Conventional type)
 Note : The standard equipment for the machine may differ from country to country.
 Optional accessories
  PV7000C, PV7001C, PV7001 :
  Sanding Lock Nut, Lock Nut Wrench 28, Sponge Pad 190, Wool Pad 180 (Hook & Loop type),
  Abrasive Disc 180 (for sanding metal surface ; #16, #20, #24, #30, #50,#80, #100, #120) Wool Bonnet 180,
  Rubber Pad 170 (Conventional type),
  GV7000C, GV7000 :
  Abrasive Disc 180 (for sanding metal surface) ; #16, #20, #24, #30, #50, #80, #100, #120

  Features and benefits

  PV7000C, PV7001C, GV7000C                               More Compact in Size, Lighter in Weight
        Variable Speed Control Dial                       for the Most Controlled Polishing/Sanding
       Optimum speed can be selected                     Compared with Makita's existing Model 9218PB(L) ;
       for a wide range as follows.                       Lower in total height by 13mm (1/2")
       PV7000C, PV7001C : 600 - 2,000 min-1               Lighter in weight by 0.9kg (2.0lbs)
       GV7000C : 2,500 - 4,700 min-1
                  PV7000C, PV7001C
      Dial rpm.            Purpose
       1    600     Spreading polishing materials
       2    800
       3 1,300       General polishing work                                          Cord Guard Improved More
       4 1,800                                                                       in Durability and Flexibility
       5 2,000       High speed polishing work                                           Protects power supply cord from
                                                                                         disconnection.
         GV7000C
      Dial rpm.
       1    2,500
       2    2,800
       3    3,500
       4     4,200                                                                   PV7000C, PV7001C, GV7000C
       5     4,700                                                                   Electronic Speed Control
                                                                                     Even when the machine is loaded,
 Ideally Balanced Design for                                                         assures the least speed reduction
 Steady Polishing / Sanding                                                          for effective operation.

Because of the shortened interval between
the backing pad and the gear housing,
lower center of gravities is given to the               PV7000C, PV7001C
machine for steadier polishing/sanding.                 Speed Selecting Button for Low/600rpm (Single)
                                                        and High/600-2,000rpm (Variable)

PV7000C, PV7001C, PV7001                                Simply push the button to select the optimum speed
                                                        for your work.
"Hook & Loop" Backing Pad
                                                        Perfect function for a series of car polishing works from
For quick replacement of polishing accessories          spreading polish compounds with no splash to polishing
*Note;                                                  paint coated surfaces for a beautiful finish.
These polishers also accept the conventional
rubber pad. GV7000C and GV7000 are
equipped with the conventional rubber pads.
                                                                                                                 P 3 / 16
Comparison of products
 Polishers
                                                    Makita                                 Competitor A          Competitor B
Model                        PV7000C /
                                          PV7001           9218PB       9218PBL           A-1              A-2        B-1
                             PV7001C
Continuous rating input (W)     900          550              570             860        950               550       530
                               600 /                                                  650 / 2,000
No load speed : min-1=rpm 600 - 2,000       1,700           2,000           1,400                 700 - 1,200       1,500
                                                                                      2 speed
                            (Changeable)
Pad diameter : mm (")                180 (7)                        180 (7)                      180 (7)            180 (7)
            Speed control       Yes          No                      No                   No                         No
Electronic
            Constant speed      Yes          No                      No                   Yes        Feed back        No
Material of motor housing               Resin                       Resin                Resin                    Aluminum
                                   By grounding :
Protection from electric          PV7001C, PV7001                                      Double           By
                                                            Double insulation                                    By grounding
shock                             Double insulation :                                 insulation     grounding
                                     PV7000C
Overall length : mm (")               210 (8-1/4)                223 (8-3/4)          235 (9-1/4)                216 (8-1/2)
Net weight : kg (lbs)                  2.0 (4.4)               2.9 (6.4)                2.4 (5.3)                  3.8 (8.4)
                                         Pad                  Rubber Pad                     Side Grip               Pad
Standard equipment                    Side Grip               Wool Bonnet                     Wrench             Wool Bonnet
                                       Wrench                  Side Grip                                          Side Grip
                                                                Wrench                                             Wrench
                                                            Lock Nut Wrench


 Sanders
                                                        Makita                            Competitor A           Competitor B
 Model
                                    GV7000C             GV7000              9218SB                 A-3               B-2
 Continuous rating input (W)         900                  550                 570                  550               530
 No load speed : min-1=rpm       2,500 - 4,700           4,700              4,000            2,700 - 4,500          4,000
 Abrasive disc diameter : mm (")            180 (7)                         180 (7)             150(6)             150 (6)
 Electronic speed control              Yes             No                     No                  No                 No
 Material of motor housing                     Resin                         Resin              Aluminum          Aluminum
 Protection from electric shock           Double insulation          Double insulation   By grounding            By grounding
 Overall length : mm (")                    210 (8-1/4)                223 (8-3/4)       216 (8-1/2)                   -
 Net weight : kg (lbs)                       2.0 (4.4)                   2.7 (6.0)         2.1 (4.6)               3.2 (7.1)
                                            Rubber Pad                 Rubber Pad         Rubber Pad              Rubber Pad
                                           Abrasive Disc              Abrasive Disc     Abrasive Disc            Abrasive Disc
 Standard equipment                          Side Grip                  Side Grip          Wrench
                                              Wrench                     Wrench        Lock Nut Wrench
                                         Lock Nut Wrench             Lock Nut Wrench
Repair                                                                                                    P 4 / 16
<1> Disassembling gear and ball bearing
  (1) Disassembling gear housing by unscrewing 4 pcs. of tapping screws 5x40. See Fig.1.

                         Tapping screws 5x40


                                       Gear housing

                                          Gear housing cover
                                                      Motor housing


                                                            Fig.1


  (2) Unscrew bearing retainer clockwise with No.1R043 "wrench for bearing retainer".
       See Fig.2.
       The bearing retainer can not be separated from gear housing completely in this process, because
              spindle blocks bearing retainer.


         1R043 Wrench for Bearing retainer
                                                                    Bearing retainer
                   Turn clockwise.


                                                           Fig.2

  (3) Place gear housing onto No.1R165 "ring spring setting tool B", and press 1R284 "round bar for arbor"
      which has been placed onto spindle, with arbor press. So spindle can be disassembled from gear
      housing together with bearing retainer and ball bearing 6201DDW. See Fig.3.
                                                                             Press with arbor press.


                                1R284 Round bar for arbor

                                     Helical gear


                               1R165 Ring Spring Setting
                                    Tool B                                             Ball bearing 6201DDW

                                                                                       Bearing retainer

                                                                                       Spindle
                            Unscrewed bearing retainer
                                                               Fig.3
Repair                                                                                                               P 5 / 16
<2> Assembling gear and ball bearing
  (1) Assemble oil seal to bearing retainer. And then, assemble spindle to the bearing retainer
      as illustrated in Fig.4.
  (2) Assemble spindle to ball bearing 6201DDW by pressing it as illustrated in Fig.5.

                                                                                                Press the spindle.

     The cut portion has to be
     faced to pad / disc installing side.                              Bearing retainer
                                                                       with oil seal
                                                          Bearing retainer
            Apply some grease to the
            inside of lip portion.                        Oil seal
                                                                         Ball bearing
                                                                         6201DDW
                                            Fig.4                                                         Fig.5


  (3) Insert the spindle into gear housing as illustrated in Fig.6. And then, screw bearing retainer anti-clockwise
      into gear housing as illustrated in fig. 7.

           Bearing retainer                                   1R043
                                                Spindle
           with oil seal                                      Wrench for Bearing retainer

           Ball bearing
           6201DDW


                                                                              Turn anti-clockwise.

                                   Fig.6                                                Fig.7


   (4) Place the gear housing on No.1R036 "bearing setting plate" And then, assemble sleeve 12 and helical gear
       to spindle as illustrated in Fig. 8.


                       No.1R036 Bearing Setting Plate                 Press
                               A : 17.2mm

                                                                                    Helical gear
                                            A
                                                                                   Sleeve 12
                                                                                           Spindle


                               1R036 Bearing Setting
                                     Plate


                                                                        Fig.8
Repair                                                                                                    P 6 / 16
<3> Disassembling armature
  (1) Take off accessories (rubber pad, abrasive disc. etc.) from the machine, and remove carbon brush.

  (2) Disassemble gear housing from motor housing by unscrewing 4 pcs. of tapping screws 5x40. See Fig.9.
      In case of Mod.PV7001 and PV7001C, disconnect the grounding lead wire from gear housing cover
      by unscrewing pan head screw. See Fig. 9A.
                                         Tapping screw 5x40.


                                                          Gear housing cover
        Gear housing
                                                                  Motor housing


                                                                          Grounding lead wire

                Carbon brush                                                         Pan head screw


         Brush holder cap


                                 Fig.9                                               Fig. 9A


  (3) Disassemble gear housing cover from motor housing and take out armature from motor housing.
      See Fig.10.
                             Armature
                                                   Baffle plate


           Gear housing cover                         Motor housing
                                          Fig.10

Caution
  The caution is carved on the side grip for Model PV7000C as illustrated in Fig. 11.
  For efficiently prevention of static electricity accumulation, the above side grip is conductive in comparing with
  other side grips. Therefore, you would not be protected from electric shock, when you would hit the live wire
  with the other machine equipped with this side grip, for example, drill, hammer drill or angle grinder, etc.


                                                FOR POLISHERS ONLY


                                          Fig.11


  Do not install this side grip on other than PV7000C.
Circuit   diagram                                                                                   P 7 / 16

 PV7001 (grounding type) equipped with 2 terminal switch, without controller
                                 Grounding
                                 (to be connected to gear housing)


 Color index of lead wires
 Black
 Green


                                                                          2
                             Field                                   Switch
                                                                                            Power supply
                                                                                            cord


                                                                          3
Wiring    diagram                                                             Terminal block


                                                                                       Pass lead wires between
                                                                                       pin and wall.


                                                                                   Pass lead wires so that they
                              The space                                            do not overlap each other,
                   Switch


                              for controller                                       and press them into lead
      Lead                                     Switch                              holder.
      holder
                                                                               Insulated terminal

    The lead wire coming out from motor housing
    has to be passed along the motor housing, and                             Place the lead wires
    press it into the lead holder after placing its                           under the grounding terminal.
    slack portion into the space for controller.

                                                                                  Terminal block
                              Grounding terminal
Circuitdiagram                                                                                             P 8 / 16
 PV7001 (grounding type) equipped with 4 terminal switch, without controller
                                          Grounding
                                          (to be connected to gear housing)
Color index of lead wires
Black
Green


                                                                                   5
                                                                                   2
                                  Field                                       Switch
                                                                                                      Power supply


                                                                                   6
                                                                                                      cord


                                                                                   3
Wiring      diagram                                                                          Terminal block


                                                                                             Pass lead wires between
                                                                                             pin and wall.


                                                                                        Pass lead wires so that they
                              The space                                                 do not overlap each other,
                    Switch


                              for controller                                            and press them into lead
      Lead                                                                              holder.
      holder


    The lead wire coming out from motor housing
    has to be passed along the motor housing, and                                  Place the lead wires
    press it into the lead holder after placing its                                under the grounding terminal.
    slack portion into the space for controller.


                             Grounding terminal
Circuitdiagram                                                                                                     P 9 / 16
 PV7000C equipped with controller, 4 terminal switch, noise suppressor
                                             (for the market where the noise suppressor is required)
  Color index of lead wires
  Black                                                                                                         Noise
  White                                        Grounding                                                        suppressor
  Red                                          (to be connected to field)
  Orange
  Transparent


                                                       Choke coil


                                                                                             25
                                 Field                                  Controller     Switch
                                                                                                             Power supply


                                                                                             6
                                                                                                             cord


                                                                                              3
                                                    Pick-up
                                                     coil
                                                                              White or blue (The other lead wires are
                                                                                            as per the color index
                                                                                            listed above.)
Wiring     diagram

  Insulated terminal
                                                                                                       Press lead wires into
                                                                                                       lead holder.


                         Pick -up coil

                                                                                              Pass lead wires between
          Pick -up coil                                                                       pin and wall.
                                                                                              (Grounding lead wire of
                                                                                              noise suppressor is not
                                                                                              used in some countries.)

            Controller

                                            Controller

                          Lead holder                                                       Pass lead wires so that they
                                                                                            do not overlap each other,
          Pass the lead wire of                                                             and press them into lead
          pick -up coil as per this                                                         holder.
          illustration, and press them
          into lead holder of controller.
                                                Switch

                                   Noise suppressor
Circuitdiagram                                                                                               P 10 / 16
 PV7001C (grounding type) equipped with controller and 2 terminal switch
                                           (The noise suppressor is not used in some countries.)
   Color index of lead wires
   Black                                   Grounding                             Noise suppressor
   White                                   (to be connected to gear housing)
   Red
   Orange
   Green


                                                                                             2
                                   Field                               Controller     Switch
                                                                                                        Power supply
                                                                                                        cord


                                                                                             3
                                                     Pick-up
                                                      coil
                                                                             White or blue
                                                                   The other lead wires are
                                                                   a per the color index
                                                                   listed above.

                                                                                               Terminal block
Wiring     diagram
Insulated terminal
                                                                                               Press lead wires into
                                                                                               lead holder.


                       Pick -up coil

                                                                                         Pass lead wires between
          Pick-up coil                                                                   pin and wall.


          Controller

                                        Controller                                     Pass lead wires so that they
                                                                                       do not overlap each other.
                         Lead holder                                                   And press them into lead
      Pass the lead wire of                                                            holder putting grounding lead
                                           Switch                                      wire on the other 2 lead
      pick -up coil as per this
      illustration, and press them                                                     wires.
      into lead holder of controller.
                                                                                                         Lead holder
                               Insulated terminal
                               Terminal block                                                      grounding lead wire
                                                                                                   on the other 2 lead
                                                                                                   wires.
                                Terminal for
                                grounding                                  Noise suppressor
Circuitdiagram                                                                                                 P 11 / 16
 PV7001C (grounding type) equipped with controller and 4 terminal switch
  Color index of lead wires                 (for the market where the noise suppressor is not required)
  Black                                                  Grounding (to be connected to gear housing. This lead wire is not
  White                                                  used in some countries.)
  Red
  Orange
  Transparent


                                                                                               5
                                                                                                          Power supply


                                                                                               2
                                  Field                                 Controller      Switch            cord


                                                                                              63
                                                    Pick-up
                                                     coil
                                                                              White or blue
                                                                    The other lead wires are
                                                                    a per the color index
                                                                    listed above.
                                                                                                 Terminal block
Wiring    diagram
   Insulated terminal
                                                                                                   Press lead wires into
                                                                                                   lead holder.


                         Pick -up coil

                                                                                              Pass lead wires between
          Pick -up coil                                                                       pin and wall.


            Controller

                                            Controller

                          Lead holder                                                       Pass lead wires so that they
                                                                                            do not overlap each other,
          Pass the lead wire of                                                             and press them into lead
          pick -up coil as per this                                                         holder.
          illustration, and press them
          into lead holder of controller.
                                               Switch


                                Terminal block
                                                                                     P 12 / 16
Circuit   diagram
GV7000 equipped with 2 terminal switch, without controller


 Color index of lead wires
 Black


                                                            2
                                                       Switch
                                                                            Power supply
                                                                            cord


                                                            3
Wiring     diagram


                                                                     Pass lead wires between
                                                                     pin and wall.


                                                                Pass lead wires so that they
                              The space                         do not overlap each other,
                     Switch


                              for controller                    and press them into lead
        Lead                                                    holder.
        holder


     The lead wire coming out from motor housing
     has to be passed along the motor housing, and
     press it into the lead holder after placing its
     slack portion into the space for controller.
Circuit
      diagram                                                                  P 13 / 16
 GV7000 equipped with 4 terminal switch and noise suppressor, without controller
                                        (The noise suppressor is not used in some countries.)
  Color index of lead wires                                                                           Noise
  Black                               Grounding                                                       suppressor
  Transparent                         (to be connected to field)


                                                                         5
                   Field


                                                                         2
                                                                   Switch
                                                                                                  Power supply


                                                                        6
                                                                                                  cord


                                                                         3
Wiring    diagram


                                                                                                Pass lead wires between
                                                                                                pin and wall.


                                                                                       Pass lead wires so that they
                                 The space                                             do not overlap each other,
                        Switch


                                 for controller                                        and press them into lead
          Lead                                                                         holder.
          holder


        The lead wire coming out from motor housing
        has to be passed along the motor housing, and
        press it into the lead holder after placing its
        slack portion into the space for controller.


  Noise suppressor is not used in some countries.
                                                                                                            P 14 / 16
Circuit
      diagram
 GV7000C equipped with controller and 2 terminal switch,
                                             (Noise suppressor is not used in some countries.)
  Color index of lead wires
  Black                                                                                               Noise
  White                                                                                               suppressor
  Red
  Orange


                                                     Pick-up
                                                     coil


                                                                                      2
                               Field                              Controller    Switch
                                                                                                      Power supply
                                                                                                      cord


                                                                                      3
                                                                           White or blue
                                                                           The other lead wires are
                                                                           a per the color index
                                                                           listed above.

Wiring    diagram
                                                                                    Press the lead wires
                                                                                    into the lead holder.
 Insulated terminal

                                                                               Pass the lead wires
                                                                               between pin and wall.

     Pick -up coil                                                             Pick -up coil
                                                                               Controller
                                                                               Press the lead wires
                                                                               into the lead holder of
       Controller
                                                                               controller.


                                                                          Pass lead wires so that they
                      Lead holder                                         do not overlap each other,
    Pass the lead wire of                                                 and press them into lead
    pick -up coil as per this                                             holder.
    illustration, and press them
    into lead holder of controller.

                                    Switch
                      Insulated terminal


                 Noise suppressor
                (Noise suppressor is
                not used in some countries.)
Circuit   diagram                                                                                               P 15 / 16
 GV7000C equipped with controller, 4 terminal switch
                                            (for the market where the noise suppressor is not required)
  Color index of lead wires
  Black
  White
  Red
  Orange


                                                                                             5
                                                                                             2
                                 Field                                 Controller     Switch
                                                                                                          Power supply


                                                                                            6
                                                                                                          cord


                                                                                             3
                                                         Pick-up               White or blue
                                                          coil
                                                                               The other lead wires are
                                                                               a per the color index
Wiring     diagram                                                             listed above.

                                                                                                 Press the lead wires
                                                                                                 into the lead holder.
            Insulated terminal
                    Pick -up coil
                                                                                           Pass the lead wires
                                                                                           between pin and wall.

                                                                                        Controller

                                                                                         Press the lead wires
                                                                                         into the lead holder of
                                                                                         controller.


                                                                                     Pass lead wires so that they
                          Lead holder                                                do not overlap each other,
          Pass the lead wire of                                                      and press them into lead
          pick -up coil as per this                                                  holder.
          illustration, and press them
          into lead holder of controller.


                        Switch
Circuit   diagram                                                                                              P 16 / 16
GV7000C equipped with controller, 4 terminal switch, noise suppressor
                                          (for the market where the noise suppressor is required)
 Color index of lead wires
 Black                                                                             Noise
 White                                    Terminal for grounding                   suppressor
 Red                                      to be connected to field.
 Orange
 Transparent


                                                    Choke coil


                                                                                          25
                                 Field                                Controller    Switch
                                                                                                      Power supply


                                                                                          6
                                                                                                      cord


                                                                                           3
                                                  Pick-up
                                                   coil
                                                                              White or blue
                                                                              The other lead wires are
                                                                              a per the color index
                                                                              listed above.

Wiring    diagram                                                                          Press the lead wires
                                                                                           into the lead holder.
        Insulated terminal
                 Pick -up coil
                                                                                      Pass the lead wires
                                                                                      between pin and wall.
       Pick -up coil
                                                                                   Controller

                                                                                    Press the lead wires
                                                                                    into the lead holder of
          Controller
                                                                                    controller.


                                                                                Pass lead wires so that they
                         Lead holder                                            do not overlap each other,
      Pass the lead wire of                                                     and press them into lead
      pick -up coil as per this                                                 holder.
      illustration, and press them
      into lead holder of controller.


                       Switch


                       Noise suppressor


◦ Jabse Service Manual Search 2024 ◦ Jabse PravopisonTap.bg ◦ Other service manual resources online : FixyaeServiceinfo