Service Manuals, User Guides, Schematic Diagrams or docs for : Agilent 06200-90001 6200B Operating and Service Jul66
<< Back | HomeMost service manuals and schematics are PDF files, so You will need Adobre Acrobat Reader to view : Acrobat Download Some of the files are DjVu format. Readers and resources available here : DjVu Resources
For the compressed files, most common are zip and rar. Please, extract files with Your favorite compression software ( WinZip, WinRAR ... ) before viewing. If a document has multiple parts, You should download all, before extracting.
Good luck. Repair on Your own risk. Make sure You know what You are doing.
Image preview - the first page of the document
>> Download 06200-90001 6200B Operating and Service Jul66 documenatation <<
Text preview - extract from the document
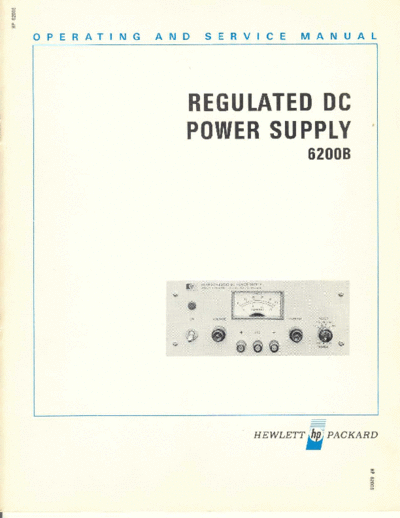
REGULATED DC
POWER SUPPLY
6200B
HEWLETT bhp; PACKARD
CERTIFICATION
The Hewlett-Packard Company certifies that this instrument was
thoroughly tested and inspected and found to meet its published
specifications when it was shipped from the factory. The Hewlett-
Packard Company further certifies that its calibration measurements
are traceable to the U.S. National Bureau of Standards to the extent
allowed by the Bureau's calibration facility.
WARRANTY AND ASSISTANCE
All Hewlett-Packard products are warranted against defects in mate-
rials and workmanship. This warranty applies for one year from date
of delivery, or in the case of certain major components listed in the oper-
ating manual, for the specified period. We will repair or replace products
which prove to be defective during the warranty period provided they
are returned to Hewlett-Packard . No other warranty is expressed or im-
plied. We are not liable for consequential damages.
For any assistance contact your nearest Hewlett-Packard Sales and
Service Office. Addresses are provided at the back of this manual .
DC POWER SUPPLY
LAB SERIES, MODEL 6200B
SERIAL NUMBER PREFIX 6A
Printed : July, 1966
Cr Stock Number : 06200-90001
TABLE OF CONTENTS
Section Page No . Section Page No .
I GENERAL INFORMATION IV PRINCIPLES OF OPERATION
1-1 . Description 1-1 4-6. Series Regulator 4-3
1-7 . Instrument Identification 1-.1 4-8 . Constant Voltage Input Circuit 4-3
1-10 . Ordering Additional Manuals 1-1 4-12 . Constant Current Input Circuit 4-4
4-17 . Voltage Clamp Circuit 4-5
I I INSTALLATION 4-20 . Mixer and Error Amplifiers 4-5
2-1 . Initial Inspection 2-1 4-23 . Reference Circuit 4-6
2-3. Mechanical Check 2-1 4-26 . Meter Circuit 4-6
2-5 . Electrical Check 2-1 4-32 . Operation of Regulating
2-7 . Installation Data 2-1 Feedback Loop 4-7
2-9. Location 2-1
2-11 . Rack Mounting 2-1 V MAINTENANCE
2-15 . Input Power Requirements 2-2 5-1. Introduction 5-1
2-17 . Connections for 230 Volt 5-3. General Measurement
Operation 2-2 Techniques 5-1
2-19 . Power Cable 2-3 5-8 . Test Equipment Required 5-1
2-22 . Repackaging for Shipment 2-3 5-10 . Performance Test 5-3
5-12 . Constant Voltage Tests 5-4
III OPERATING INSTRUCTIONS 5-20 . Output Impedance 5-6
3-1 . Operating Controls and 5-22 . Output Inductance 5-6
Indicators 3-1 5-24 . Constant Current Tests 5-6
3-3. Operating Modes 3-1 5-28 . Troubleshooting 5-7
3-5 . Normal Operating Mode 3-1 5-30 . Trouble Analysis 5-7
3-7 . Constant Voltage 3-1 5-38 . Repair and Replacement 5-10
3-9. Constant Current 3-1 5-40 . Adjustment and Calibration 5-13
3-11 . Connecting Load 3-2 5-42 . Meter Zero 5-13
3-.14. Optional Operating Modes 3-2 5-44 . Voltmeter Tracking 5-13
3-15 . Remote Programming, Constant 5-46 . Ammeter Tracking 5-13
Voltage 3- 2 5-48 . Constant Voltage Programming
3-22 . Remote Programming, Constant Current 5-13
Current 3-3 5-51 . Constant Current Programming
3-28 . Remote Sensing 3-3 Current 5-14
3-33 . Series Operation 3-4 5-54 . Reference Circuit Adjustments 5-14
3-37 . Parallel Operation 3-5 5-58 . Constant Voltage Transient
3-40 . Auto-tracking Operation 3-6 Response 5-15
3-43 . Special Operating
Considerations 3-6 VI REPLACEABLE PARTS
3-6 6-1 . Introduction 6-1
3-44 . Pulse Loading
3-46 . Output Capacitance 3-7 6-4 . Ordering Information 6-1
3-49 . Reverse Voltage Loading 3-7 Reference Designators
3-51 . Reverse Current Loading 3-7 Abbreviations
Manufacturers
6-8 . Code List of Manufacturers 6-2
IV PRINCIPLES OF OPERATION
4-1 . Overall Block Diagram Parts List Table
Discussion 4-1
4-4 . Simplified Schematic 4-2
TABLE OF CONTENTS (CONTINUED)
LIST OF TABLES
Table Page No. Table Page No .
1-1 Specifications 1-2 5-6 Selected Semiconductor
5-1 Test Equipment Required 5-2 Characteristics 5-10
5-2 Reference Circuit Troubleshooting 5-8 5-7 Checks and Adjustments After Replace-
5-3 High Output Voltage Troubleshooting 5-8 ment of Semiconductor Devices 5-12
5-4 Low Output Voltage Troubleshooting 5-9 5-8 Calibration Adjustment Summary 5-13
5-5 Common Troubles 5-9
LIST OF ILLUSTRATIONS
Figure Page No. Figure Page No .
2-1 Rack Mounting, Two Units 2-1 4-5 Voltage Clamp Circuit 4-5
2-2 Rack Mounting, One Unit 2-2 4-6 Mixer and Error Amplifiers,
2-3 Primary Connections 2-2 Simplified Schematic 4-5
3-1 Front Panel Controls and Indicators 3-1 4-7 Meter Circuit, Simplified Schematic 4-6
3-2 Normal Strapping Pattern 3-1 4-8 Voltmeter Connections,
3-3 Remote Resistance Programming Simplified Schematic 4-7
(Constant Voltage) 3-2 4-9 Ammeter Connections,
3-4 Remote Voltage Programming Simplified Schematic 4-7
(Constant Voltage) 3-2 5-1 Front Panel Terminal Connections 5-1
3-5 Remote Resistance Programming 5-2 Output Current Measurement
(Constant Current) 3-3 Technique 5-1
3-6 Remote Voltage Programming 5-3 Differential Voltmeter Substitute,
(Constant Current) 3-3 Test Setup 5-3
3-7 Remote Sensing 3-3 5-4 Output Current, Test Setup 5-4
3-8 Normal Series 3-4 5-5 Load Regulation, Constant Voltage 5-4
3-9 AUTO-Series, Two and Three Units 3-4 5-6 Ripple and Noise, Constant Voltage 5-5
3-10 Normal Parallel 3-5 5-7 Transient Response, Test Setup 5-5
3-11 Auto-Parallel, Two and Three Units 3-5 5-8 Transient Response, Waveforms 5-5
3-12 Auto-Tracking, Two and Three Units 3-6 5-9 Output Impedance, Test Setup 5-6
4-1 Overall Block Diagram 4-1 5-10 Load Regulation, Constant Current 5-6
4-2 Simplified Schematic 4-2 5-11 Ripple and Noise, Constant Current 5-7
4-3 Constant Voltage Input Circuit, 5-12 Servicing Printed Wiring Boards 5-11
Simplified Schematic 4-3
4-4 Constant Current Input Circuit,
Simplified Schematic 4-4
1-1 DC Power Supply, Model 62OOB
Figure .
SECTION I
GENERAL INFORMATION
1-1 DESCRIPTION voltage mode of operation or when greater voltage
compliance is required in the constant current mode
1-2 This power supply, Figure 1-1, is completely of operation. Auto-Series operation permits one
transistorized and suitable for either bench or relay knob control of the total output voltage from a
rack operation. It is a dual range, compact, well- "master" supply .
regulated, Constant Voltage/Constant Current,
supply . The unit can furnish either a 0-20 volt, d. Parallel and Auto-Parallel Operation
1 . 5 ampere, output or a 0-40 volt, 0. 75 ampere,
output . The operating mode is selected by means The power supply may be operated in
of the front panel RANGE switch . The output can be parallel with a similar unit when greater output cur-
continuously adjusted for both voltage and current rent capability is required . Auto-Parallel operation
throughout either output range. The front panel permits one knob control of the total output current
CURRENT controls can be used to establish the out- from a "master" supply .
output current limit (overload or short circuit) when
the supply is used as a constant voltage source e. Auto-Tracking
and the VOLTAGE controls can be used to establish
the voltage limit (ceiling) when the supply is used The power supply may be used as a
as a constant current source . "master" supply, having control over one (or more)
"slave" supplies that furnish various voltages for
1-3 The power supply has both front and rear a system .
terminals . Either the positive or negative output
terminal may be grounded or the power supply can 1-6 Detailed Specifications for the power supply
be operated floating at up to a maximum of 300 are given in Table 1-1 .
volts off ground .
1-7 INSTRUMENT IDENTIFICATION
1-4 A single meter is used to measure either out-
put voltage or output current in one of two ranges 1-8 Hewlett-Packard power supplies are identified
for each operating mode . The voltage or current by a three-part serial number tag. The first part is
range is selected by a METER switch on the front the power supply model number . The second part is
panel. the serial number prefix, which consists of a num-
ber-letter combination that denotes the date of a
1-5 The programming terminals located at the rear significant design change . The number designates
of the unit allow ease in adapting to the many oper- the year, and the letter A through L designates the
ational capabilities of the power supply . A brief month, January through December respectively .
description of these capabilities is given below :
1-9 If the serial number prefix on your power sup-
a. Remote Programming ply does not agree with the prefix on the title page
of this manual, change sheets are included to up-
The power supply may be programmed date the manual . Where applicable, backdating
from a remote location by means of an external information is given in an appendix at the rear of
voltage source or resistance . the manual .
b. Remote Sensing 1-10 ORDERING ADDITIONAL MANUALS
The degradation in regulation which 1-11 One manual is shipped with each power sup-
would occur at the load because of the voltage drop ply. Additional manuals may be purchased from
which takes place in the load leads can be reduced your local Hewlett-Packard field office (see list at
by using the power supply in the remote sensing rear of this manual for addresses) . Specify the
mode of operation. model number, serial number prefix, and (r stock
number provided on the title page .
c. Series and Auto-Series Operation
Power supplies may be used in series
when a higher output voltage is required in the
Table 1-1 . Specifications
INPUT: cluding a direct short placed across the terminals
105-125/210-250VAC, single phase 50-400 cps. in constant voltage operation. The constant
voltage circuit limits the output voltage in the
OUTPUT : constant current mode of operation.
0-40 volts @ 0.75 amp or 0-20 volts @ 1 .5 amps .
METER:
LOAD REGULATION : The front panel meter can be used as either a
Constant Voltage -- Less than 0 .01% plus 4 my 0-50 V or 0-5 V voltmeter or as a 0-1 .8 amp or
for a full load to no load change in output current. 0-0 .18 amp ammeter.
Constant Current -- Less than 0 .03% plus 2504a
for a zero to maximum change in output voltage . OUTPUT CONTROLS :
Range switch selects desired operating mode .
LINE REGULATION : Coarse and fine voltage controls and coarse and
Constant Voltage -- Less than 0 .01% plus 4mv fine current controls .
for any line voltage change within the input rating .
Constant Current -- Less than 0 .01% plus 250[ .a OUTPUT TERMINALS :
for any line voltage change within the input rating . Three "five-way" output posts are provided on
the front panel and an output terminal strip is
RIPPLE AND NOISE : located on the rear of the chassis . All power sup-
Constant Voltage -- Less than 200wv rms . ply output terminals are isolated from the chassis
Consta nt Current -- Less than 500~La rms . and either the positive or negative terminal may be
connected to the chassis through a separate ground
TEMPERATURE RANGES : terminal located on the output terminal strip.
Operating: 0-500C . Storage : -40 to +850C .
ERROR SENSING:
Error sensing is normally accomplished at the
TEMPERATURE COEFFICIENT:
Constant Voltage -- Less than 0.02% plus 1 my front terminals if the load is attached to the front
per degree Centigrade . or at the rear terminals if the load is attached to
Constant Current -- Less than 0 .02% plus the rear terminals. Also, provision is included on
0 . 5 ma per degree Centigrade in the 40 V range the rear terminal strip for remote sensing .
and less than 0.02% plus i ma per degree Centi-
grade in the 20 V range . REMOTE PROGRAMMING
Remote programming of the supply output at
STABILITY: approximately 200 ohms per volt in constant
Constant Voltage -- Less than 0.10% plus 5 my voltage is made available at the rear terminals .
total drift for 8 hours after an initial warm-up time In constant current mode of operation, the current
of 30 minutes at constant ambient, constant line can be remotely programmed at approximately
voltage, and constant load . 1000 ohms per ampere in the 40Vmode or at 500
Constant Current -- Less than 0.10% plus ohms per ampere in the 20 V mode .
2 .5 ma (40 V range) or 5 ma (20 V range) total drift
for 8 hours after an initial warm-up time of 30 COOLING:
minutes at constant ambient, constant line voltage, Convection cooling is employed . The supply
and constant load . has no moving parts .
INTERNAL IMPEDANCE AS A CONSTANT VOLTAGE SIZE :
SOURCE : 3-1/2" H x 12-5/8" D x 8-1/2" W. Two of the
Less than 0.02 ohms from DC to 1 Kc . units can be mounted side by side in a standard
Less than 0.5 ohms from 1 Kc to 100 Kc . 19" relay rack .
Less than 3.0 ohms from 100 Kc to 1 Mc .
WEIGHT :
TRANSIENT RECOVERY TIME : 14 lbs . net, 19 lbs. shipping .
Less than 501,sec for output recovery to within
10 mv following a full load current change in the FINISH :
output . Light gray front panel with dark gray case .
OVERLOAD PROTECTION : POWER CORD :
A continuously acting constant current circuit A three-wire, five-foot power cord is provided
protects the power supply for all overloads in- with each unit .
SECT10N II
INSTALLATION
2-1 INITIAL INSPECTION strument to a source of power and it is ready for
operation.
2-2 Before shipment, this instrument was inspected
and found to be free of mechanical and electrical 2-9 LOCATION
defects . As soon as the instrument is unpacked, in-
spect for any damage that may have occurred in 2-10 This instrument is air cooled . Sufficient space
transit . Save all packing materials until the inspec- should be allotted so that a free flow of cooling air
tion is completed. If damage is found., proceed as can reach the sides and rear of the instrument when
described in the Claim for Damage in Shipment sec- it is in operation. It should be used in an area where
tion of the warranty page at the rear of this manual . the ambient temperature does not exceed 50oC .
2-~ MECHANICAL CHECK 2-11 RACK MOUNTING
2-4 This check should confirm that there are no 2-12 This instrument may be rack mounted in a
broken knobs or connectors, that the cabinet and standard 19 inch rack panel either alongside a sim-
panel surfaces are free of dents and scratches, and ilar unit or by itself . Figures 2-1 and 2-2 show how
that the meter is not scratched or cracked. both types of installations are accomplished .
2-5 ELECTRICAL CHECK
2-13 To mount two units side-by-side, proceed as
2-6 The instrument should be checked against its follows :
electrical specifications . SectionV includes an "in- a. Remove the four screws from the front
cabinet" performance check to verity proper instrument panels of both units .
operation . b. Slide rack mounting ears between the
front panel and case of each unit .
2-7 INSTALLATION DATA c. Slide combining strip between the front
2-8 The instrument is shipped ready for bench panels and cases of the two units .
operation. It is necessary only to connect the in- d. After fastening rear portions of units to-
gether using the bolt, nut, and spacer, replace pan-
el . screws .
Figure 2- 1 . Rack Mounting, Two Units
o--,
HARRISON DC POWER SUPPLY
HEWLETT PACKARD
B i ~ 71
METER CURRENT -VOLTAGE-
VOLTS AMPS COARSE FINE
OFF
9
U 1-Y
Figure 2-2 . Rack Mounting, One Unit
2-14 To mount a single unit in the rack panel,
proceed as follows:
a . Bolt rack mounting ears, combining
straps, and angle brackets to each side of center
spacing panels . Angle brackets are placed behind
combining straps as shown in Figure 2-2.
b. Remove four screws from front panel of
unit.
c . Slide combining strips between front
panel and case of unit .
d. Bolt angle brackets to front sides of case fi
and replace front panel screws . TRANSFORMER PRIMARY
CONNECTED FOR
115 VOLT OPERATION
2-15 INPUT POWER REQUIREMENTS
2-16 This power supply may be operated from
either a nominal 115 volt or 230 volt 50-500 cycle
power source . The unit, as shipped from the fac
tory, is wired for 115 volt operation. The input NOTE : CONNECTIONS RETWEEN
power required when operated from a 115 volt 60 50 & 51 . 54 & 55, ARE MADE WITH
cycle power source at full load is 70 watts and
COPPER ON THE PRINTED CIRCUIT
BOARD . THESE CONNECTIONS
0. 85 amperes . MUST BE REMOVED FOR 230V
OPERATION . THE CONNECTIONS
ON THE PRINTED CIRCUIT BOARD
2-17 CONNECTIONS FOR 230 VOLT OPERATION MUST BE BROKEN AND A SEPARATE
EXTERNAL CONNECTION MADE
(Figure 2-3) BETWEEN POINTS 50 & 55 .
2-18 Normally, the two primary windings of the
input transformer are connected in parallel for oper
ation from 115 volt source . To convert the power
TRANSFORMER PRIMARY
CONNECTED FOR
supply to operation from a 230 volt source, the 230 VOLT OPERATION
power transformer windings are connected in series
as follows : Figure 2-3 . Primary Connections
a. Unplug the line cord and remove the unit
from case .
b. Break the copper between 54 and 55 and c . Add strap between 50 and 55 .
also between 50 and 51 on the printed circuit board, d . Replace existing fuse with 1 ampere,
These are shown in Figure 2-3, and are labeled on 230 volt fuse . Return unit to case and operate
copper side of printed circuit board. normally .
2-2
2-19 POWER CABLE 2-22 REPACKAGING FOR SHIPMENT
2-20 To protect operating personnel, the National 2-23 To insure safe shipment of the instrument, it
Electrical Manufacturers Association (NEMA) recom- is recommended that the package designed for the
mends that the instrument panel and cabinet be instrument be used . The original packaging material
grounded . This instrument is equipped with a three is reusable . If it is not available, contact your
conductor power cable . The third conductor is the local Hewlett-Packard field office to obtain the
ground conductor and when the cable is plugged into materials . This office will also furnish the ad-
an appropriate receptacle, the instrument is dress of the nearest service office to which the
grounded . The offset pin on the power cable three- instrument can be shipped. Be sure to attach a
prong connector is the ground connection . tag to the instrument which specifies the owner,
model number, full serial number, and service re-
2-21 To preserve the protection feature when oper- quired, or a brief description of the trouble.
ating the instrument from a two-contact outlet, use
a three-prong to two-prong adapter and connect the
green lead on the adapter to ground .
SECTION III
OPERATING INSTRUCTIONS
local programming, single unit mode of operation .
3-1 OP ERATING CONTROLS AND INDICATORS
This strapping pattern is illustrated in Figure 3-2 .
The operator selects either a constant voltage or a
3-2 The front panel controls and indicators,
are constant current output using the front pane 1 controls
together with the normal turn-on sequence, (local programming, no strapping changes are nec-
shown in Figure 3-1 .
essary) .
A3 A4 A5 A6 AT AS AS -S - BNO + +$ AYO
Al A2
rolIt' - No I
I
,YY
r= `I Yii
r
R
L
MONITORING
POINTS
TURN-ON SEQUENCE
Figure 3-2 . Normal Strapping Patterns
1. SET AC POWER SWITCH TO ON.
2. OBSERVE THAT PILOT LIGHT GOES ON .
3. SET RANGE SWITCH TO DESIRED OPERATING MODE AND METER
SWITCH TO DESIRED VOLTAGE RANGE. 3-7 CONSTANT VOLTAGE
4. ADJUST COARSE AND FINE VOLTAGE CONTROLS UNTIL DESIRED
OUTPUT VOLTAGE IS INDICATED ON METER.
5. SHORT CIRCUIT OUTPUT TERMINALS. SET METER SWITCH TO
3-B To select a constant voltage output, proceed
DESIRED CURRENT RANGE ANA ADJUST CURRENT CONTROLS
FOR DESIRED OUTPUT CURRENT. as follows :
S. REMOVE SHORT AND CONNECT LOAD TO OUTPUT TERMINALS
{FRONT OR REAR}.
a . Turn-on power supply and adjust VOLTAGE
controls for desired output voltage (output terminals
Figure 3-1 . Front Panel Controls and Indicators
open) .
b . Short output terminals and adjust CURRENT
controls for maximum output current allowable (cur
3-3 OPERATING MODES
rent limit), as determined by load conditions . If a
load change causes the current limit to be exceeded .
3--4 The power supply is designed so that its mode
the power supply will automatically crossover to
of operation can be selected by making strapping
constant current output at the preset current limit
connections between particular terminals on the
and the output voltage will drop proportionately . In
terminal strip at the rear of the power supply . The
setting the current limit, allowance must be made
terminal designatigns are stenciled in white on the
for high peak currents which can cause unwanted
power supply above their respective terminals .
crossover . (Refer to Paragraph 3-44) .
Although the strapping patterns illustrated in this
section show the positive terminal grounded, the
3-9 CONSTANT CURRENT
operator can ground either terminal or operate the
power supply up to 300 VDC off ground (floating) . proceed
3-10 To select a constant current output,
The following paragraphs describe -the procedures
as follows :
for utilizing the various operational capabilities of
the supply . A more theoretical description concern-
a . Short output terminals and adjust CURRENT
ing these operational features is contained in a
controls for desired output current .
power supply Application Manual and in various
b . Open output terminals and adjust VOLTAGE
Tech Letters published by the Harrison Division . (volt
controls for maximum output voltage allowable
Copies of these'can be obtained from your. local
age limit), as determined by load conditions . If a
Hewlett-Packard field office .
load change causes the voltage limit to be exceeded,
NORMA L OPERATING MODE the power supply will automatically crossover to
3-5
constant voltage out put at the preset voltage limit
The power supply is normally shipped with its and the output current will drop proportionately . In
3-6
setting the voltage limit, allowance must be made
rear terminal strapping connections arranged for
Constant Voltage/Constant Current, local sensing, for high peak voltages which can cause unwanted
crossover . (Refer to Paragraph 3-44) .
b. Open output terminals and adjust AI A2 A3 A4 A5 A6 A7 AS A9 -S - GND + +9 A10
VOLTAGE controls for maximum output voltage
allowable (voltage limit), as determined by load
conditions . If a load change causes the voltage
e ., . IC,] . ,C,iC,7, .'I y, I ~,
II I T I
x
ll
limit to be exceeded, the power supply-will auto-
matically crossover to constant voltage output at
the preset voltage limit and the output current will
drop proportionately. In setting the voltage limit,
allowance must be made for high peak voltages
which can cause unwanted crossover. (Refer to
Paragraph 3-44) . PROGRAMMING
RESISTOR
3-li CONNECTING LOAD
Figure 3-3 . Remote Resistance Programming
3-12 Each load should be connected to the power (Constant Voltage)
supply output terminals using separate pairs of con-
necting wires . This will minimize mutual coupling
effects between loads and will retain full advantage a zero ohm voltage closer than this is required, it
of the low output impedance of the power supply. may be achieved by changing resistor R6 or R8 as
Each OAir of connecting wires should be as short as described in Paragraph 5-49 .
possible and twisted or shielded to reduce noise
pickup . (If shield is used, connect one end to 3-19 To maintain the stability and temperature
power supply ground terminal and leave the other coefficient of the power supply, use programming
end unconnected.) resistors that have stable, low noise, and low
temperature (less than 30ppm per degree Centigrade)
3-13 If load considerations require that the output characteristics . A switch can be used in conjunc-
power distribution terminals be remotely located tion with various resistance values in order to ob-
from the power supply, then the power supply out- tain discrete output voltages . The switch should
put terminals should be connected to the remote have make-before-break contacts to avoid momen-
distribution terminals via a pair of twisted or tarily opening the programming terminals during the
shielded wires and each load separately connected switching interval .
to the remote distribution terminals. For this case,
remote sensing should be used (Paragraph 3-28) . 3-20 Voltage Programming (Figure 3-4) . Employ
the strapping pattern shown on Figure 3-4 for volt-
3-14 OPTIONAL OPERATING MODES age programming. In this mode, the output voltage
will vary in a 1 to 1 ratio with the programming
3-15 REMOTE PROGRAMMING, CONSTANT VOLTAGE voltage (reference voltage) and the load on the pro-
gramming voltage source will not exceed 25 micro-
3-16 The constant voltage output of the power sup- amperes .
ply can be programmed (controlled) from a remote
location if required . Either a resistance of voltage
source can be used for the programming device . AI A2 A3 A4 A5 A6 A7 AS A9 -S - OND + +S AIO
The wires connecting the programming terminals of ~AIA
the supply to the remote programming device should ee .~IC.7I s~IC~IC.~I ..l
100 i e .IC
` .
be twisted or shielded to reduce noise pick-up.
The VOLTAGE controls on the front panel are
disabled according to the following procedures .
3-17 Resistance Programming (Figure 3-3) . In this
mode, the output voltage will vary at a rate deter-
= REFERE CE
mined by the programming coefficient -- 200 ohms VOLTAG
per volt (i . e. the output voltage will increase
1 volt for each 200 ohms added in series with pro-
gramming terminals) . The programming coefficient Figure 3-4 . Remote Voltage Programming
is determined by the programming current. This (Constant Voltage)
current is adjusted to within 2% of 5ma at the fac-
tory . If greater programming accuracy is required,
it may be achieved by changing resistor R13. 3-21 The impedance (RX) looking into the external
programming voltage source should be approximate-
3-18 The output voltage of the power supply ly 1000 ohms if the temperature and stability speci-
should be zero volts ◦ Jabse Service Manual Search 2026 ◦ Jabse Pravopis ◦ onTap.bg ◦ Other service manual resources online : Fixya ◦ eServiceinfo