Service Manuals, User Guides, Schematic Diagrams or docs for : CANON Copiers GP 605 ServBull ServBullGP405 gen-620
<< Back | HomeMost service manuals and schematics are PDF files, so You will need Adobre Acrobat Reader to view : Acrobat Download Some of the files are DjVu format. Readers and resources available here : DjVu Resources
For the compressed files, most common are zip and rar. Please, extract files with Your favorite compression software ( WinZip, WinRAR ... ) before viewing. If a document has multiple parts, You should download all, before extracting.
Good luck. Repair on Your own risk. Make sure You know what You are doing.
Image preview - the first page of the document
>> Download gen-620 documenatation <<
Text preview - extract from the document
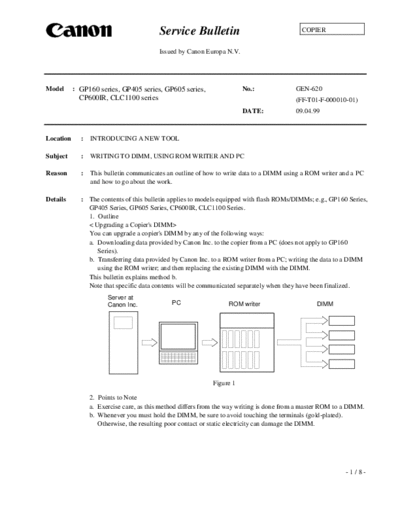
                                         Service Bulletin                                   COPIER


                                          Issued by Canon Europa N.V.


Model      : GP160 series, GP405 series, GP605 series,                  No.:              GEN-620
             CP600IR, CLC1100 series                                                      (FF-T01-F-000010-01)
                                                                        DATE:             09.04.99


Location     :   INTRODUCING A NEW TOOL

Subject      :   WRITING TO DIMM, USING ROM WRITER AND PC

Reason       :   This bulletin communicates an outline of how to write data to a DIMM using a ROM writer and a PC
                 and how to go about the work.

Details      : The contents of this bulletin applies to models equipped with flash ROMs/DIMMs; e.g., GP160 Series,
               GP405 Series, GP605 Series, CP600IR, CLC1100 Series.
               1. Outline
               < Upgrading a Copier's DIMM>
               You can upgrade a copier's DIMM by any of the following ways:
               a. Downloading data provided by Canon Inc. to the copier from a PC (does not apply to GP160
                  Series).
               b. Transferring data provided by Canon Inc. to a ROM writer from a PC; writing the data to a DIMM
                  using the ROM writer; and then replacing the existing DIMM with the DIMM.
               This bulletin explains method b.
               Note that specific data contents will be communicated separately when they have been finalized.
                       Server at
                       Canon Inc.             PC                  ROM writer                      DIMM


                                                             Figure 1

                 2. Points to Note
                 a. Exercise care, as this method differs from the way writing is done from a master ROM to a DIMM.
                 b. Whenever you must hold the DIMM, be sure to avoid touching the terminals (gold-plated).
                    Otherwise, the resulting poor contact or static electricity can damage the DIMM.


                                                                                                            -1/8-
                                                                                                GEN-620


3. Writing to a DIMM Using a ROM Writer
3-1. Outline
You can use a ROM writer (MODEL 1930 from Minato) to write ROM data to a 1-MB, 2-MB, or 4-
MB DIMM.
A DIMM is equipped with two flash ROM chips. Since they will require separate writing, you will be
repeating the same work.
a. Registering the Flash ROM to the ROM Writer
   The ROM writer can deal with different types of ROMs. When the power is turned on, it is for the
   previous writing operation, requiring you to reset it so that it will be able to recognize the type of
   the flash ROM mounted on the DIMM you will be writing to.
b. Transferring ROM Data from a PC to the ROM Writer
   ROM data is transferred from a PC to the ROM writer using a parallel port (printer port). To do
   so, you must select the appropriate format of the data file.
   The ROM data files are binary files consisting only of the data written to the ROM. Select "NO
   FORMAT" as the format setting.
   The ROM writer is equipped with both parallel and serial interfaces. Select the appropriate
   interface, and start transfer.
   Data may be transferred from a PC either by opening the DOS window and using the Copy
   command (binary mode) or by using the GP/PDL downloader that comes with the printer board.
   Here, we will discuss the use of the GP/PDL downloader, which can be operated more easily and
   provides a higher data speed than the DOS Copy command.
   When you double-click the file (GPDL105.exe or PDLd1115.exe), which has been distributed
   previously, installation will start automatically and the appropriate icon will be stored as part of
   the Startup programs.
c. Writing to the DIMM Flash ROM
   The ROM data file is in the form of 16-bit data for DIMMs. The DIMM data bus operates on a
   16-bit basis, and addresses are in units of bytes.
   A 16-bit data item is given an even-numbered address (most significant) or an odd-numbered
   address (least significant bytes).
   The DIMM is equipped with two flash ROMs whose data bus operates on an 8-bit basis: one of
   the flash ROMs is given even-numbered addresses, while the other flash ROM is given odd-
   numbered addresses.
   Here, you will make settings to enable writing by dividing the ROM data units stored in the ROM
   writer into ones in even-numbered bytes and ones in odd-numbered bytes.
   You will be writing to the flash ROMs in units of chips, requiring you to perform deleting and
   writing operations twice to complete the two flash ROMs on the DIMM.
                 ROM data file
                                                  DIMM                        DIMM
                                           (odd-numbered socket)      (even-numbered socket)

              Most significant bytes
                (even-numbered                     Flash ROM                 Flash ROM
                    address)                          (even-                    (even-
                                                   numbered                  numbered
                                                    address)                  address)


                                                   Flash ROM                 Flash ROM
                                                      (odd-                     (odd-
             Least significant bytes                                         numbered
                (odd-numbered                      numbered
                                                    address)                  address)
                    address)


                                               Figure 2
                                                                                                 -2/8-
                                                                                          GEN-620


3-2. Getting Ready
a. PC
   Be sure to store the data to write to the DIMM.
   Since you will be using the GP/PDL downloader when transferring ROM data from the PC to the
   ROM writer, be sure to install the downloader to the PC in advance.
b. Bi-Centronics Cable
   Obtain a cable with the indication "IEE1284-compliant." Choose the shortest cable you can work
   with without a problem.

3-3. Starting Up the PC
   1) Connect the PC and the ROM writer with the Centronics cable.
   2) Start the PC.
   3) Start the GP/PDL downloader using Windows' Startup Menu program.

3-4. Registering the Flash ROM to the ROM Writer
a. Turning On the ROM Writer
   1) Turn on the power switch found on the back of the ROM writer.
   2) Wait until self diagnosis ends.

b. Mounting the DIMM Adapter
     Mount the DIMM adapter to the socket in the ROM writer.
     Match the DIMM adapter against the front of the socket.


                            DIMM adapter             ROM writer socket
                                              Figure 3

c. Setting the DIM Adapter Switch
   Be sure to set the switch of the DIMM adapter as shown in the following figure.
    Caution:
  Keep in mind that the switch settings differ between the DIMM adapter to be mounted
  to the even-numbered socket and the DIMM adapter to be mounted to the odd-
  numbered socket.
  If you have made a mistake, although an error will not occur during writing operation,
  the copier will not work normally after you have installed the completed DIMM to
  it.aution:

                                                                                           -3/8-
                                                                             GEN-620

 1-MB and 4-MB DIMM Switch Settings (does not apply to GP160 Series).


          Switch settings for the                  Switch settings for the
          odd-numbered socket                      even-numbered socket


                                        Figure 4


                                                                              -4/8-
                                                                              GEN-620

 2-MB DIMM Switch Settings (only applicable to GP160 Series).


          Switch settings for the                   Switch settings for the
          odd-numbered socket                       even-numbered socket


                                         Figure 5


                                                                               -5/8-
                                                                                          GEN-620


d. Registering the Flash ROM
   1) Attach one DIMM you want to the adapter of socket No. 1.
      (The DIMM may contain any data. This step is performed simply to have the ROM writer
      recognize the type of the flash ROM.)
   2) Press the DEVICE button.
   3) Press the ENT button.
   4) Press the RESET button.
   5) Check to make sure that the following is indicated in the display of the ROM writer:
       i) if 1-MB DIMM, "MB29F040"
       ii) if 2-MB DIMM, "MB29F080"
       iii) if 4-MB DIMM, "MB29F016"
   6) Press the RESET button.

3-5. Transferring Data from the PC to the ROM Writer
a. Selecting the Format
   1) Hold down the MODE button until "CONFIG. I/F" appears.
   2) Hold down the
◦ Jabse Service Manual Search 2026 ◦ Jabse Pravopis ◦ onTap.bg ◦ Other service manual resources online : Fixya ◦ eServiceinfo