Service Manuals, User Guides, Schematic Diagrams or docs for : DENON CD Player CD Player Denon - DCD-485 & 685 Схема DCD-485 & 685
<< Back | HomeMost service manuals and schematics are PDF files, so You will need Adobre Acrobat Reader to view : Acrobat Download Some of the files are DjVu format. Readers and resources available here : DjVu Resources
For the compressed files, most common are zip and rar. Please, extract files with Your favorite compression software ( WinZip, WinRAR ... ) before viewing. If a document has multiple parts, You should download all, before extracting.
Good luck. Repair on Your own risk. Make sure You know what You are doing.
Image preview - the first page of the document
>> Download Схема DCD-485 & 685 documenatation <<
Text preview - extract from the document
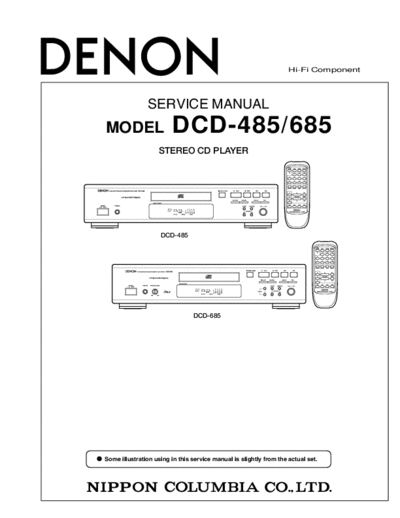
B                                                                   Hi-Fi Component


                SERVICE MANUAL
MODEL                   DCD-485/685
                    STEREO CD PLAYER


                    DCD-485


                                DCD-685


Some illustration using in this service manual is slightly from the actual set.
    SAFETY PRECAUTIONS


      SAFETY PRECAUTIONS
      The following check should be performed for the continued prtection of the customer and service
      technician.
      LEAKAGE CURRENT CHECK
      Before reterning the unit to the customer,make sure you make either (1) a
      leakage current check or (2) a line to chassis resistance check. If the leakage current exceeds 0.5
      miliamps, or if hte resistance from chassis to either side of the power cord is less than 460 kohms,
      the unit is detective.


    SPECIFICATIONS


     SPECIFICATIONS
                                       DCD-485                           DCD-685
      AUDIO
      Number of Channels:             2 channels
      Freqency Responese:             2 to 20 kHz
      Dynamic Range:                  98 dB                             100 dB
      Signal to Noise ratio:          105 dB                            110 dB
      Harmonic distortion:            0.003 % (1 kHz)
      Separation:                     102 dB (1 kHz)                    103 dB (1 kHz)
      Wow and Flutter:                Below measurable limit:
                                      ( 0.001 % W. peak)
      Output Voltage:                 0.2 to 2.0 V
      DISCS                           Compact Disc format
      GENERAL CHARACTERISTICS
      Power Supply:                   AC 230 V, 50 Hz
      Power consumption:              11 W                              12 W
      Dimensions:                     434 (W) x 100 (H) x 285 (D) mm
      Mass:                           3.4 kg                            3.6 kg
      FUNCTIONS AND DISPLAY
      Functions:                      Automatic searchi, programmed playback, repeat playback, manual search, auto space,
                                      time mode, auto edit, dimmer, random playback, pitch control (DCD-685 only)
      Display:                        Track number, time, music calendar and engaged modes
      Others:                         Headphones jack
      REMOTE CONTROL UNIT             RC-266
      Remote Control System:          Infrared pulse system
      Power Supply:                   3V DC; two R6P (standard size AA) dry cell batteries
      External Dimensions:            54.5 (W) x 140 (H) x 24.8 (D) mm
      Mass:                           85 g including batteries


             Specifications and design are subject to change without notice for purpose of improvement.


2
  DISASSENBLY
(Followthe procedure below in reverse order when reassembling
 Follow the procedure below in reverse order when reassembling)

1. Top Cover
   1. Remove 4 screws 1 on both sides.
   2. Remove 2 screws 2 on the Rear Panel.
   3. Detach the Top Cover as shown in the fig.


2. Front Panel
   1. Remove 1 screw 3 on the Rear Panel and
      1 screw 4 fixing Support Bracket (b).
       (only DCD-485)
   2. Take off the Mecha Cover after removing                     Support Bracket
      2 screws 5 .
      Open the Tray by turning the Gear (a) clockwise,
      then detach the Loader Panel.
   3. Remove 3 screws 6 on the bottom edge of the
      Front Panel.
   4. Remove 2 screws 7 , at L/R ends of the Front
      Panel and 1 screw 8 fixing Phone P.W.B.


                                                                                    3
3. CD Mecha. Unit
    1. Remove 4 screws 9 fixing the CD Mecha.
    2. Unplug Connectors (b), (c) and FFC from each
       socket.
    3. Release the FFC from the Clamper.


4. Main P.W.B.
    1. Remove 5 screws 10 , 5 screws 11 on the Rear
       Panel and detach it.
    2. Remove 3 screws 12 fixing the Main P.W.B.
    3. Unfasten 1 P.W.B. Holder to detach the Main
       P.W.B.
    4. Remove 1 screw     and 2 screw     fixing the
       Power P.W.B.
    5. Unfasten 1 P.W.B. Holder to detach the Power
       P.W.B.


4
CD TEST MODE

      Setting of the test mode
  How to start the test mode: Turn on the power in the condition that CLOSE (Pin No. 3 )
  and OPEN (Pin No. 4 ) of CX053 are being shorted. ( "01" is indicated on the DISPLAY)
  To exit from the test mode, turn off the power. (Refer to Fig. 1 "Test Point Layout")


                                        Fig. 1 "Test Point" Layout
         * Laser light of the pickup is always emitted regardless of DISC loading in the test mode.
           You may lose your eyesight if you look into the laser directly.
           So be careful enough when operating in the test mode.


      Used DISC: A-BEX TCD784


      Explanation of each button
         * Use only the buttons described below for operations while in the test mode,
         and don't push any other buttons.
     Names of buttons       Operation
     OPEN / CLOSE              * Loads or unloads DISC
     PLAY                      * Emits laser light
                               * Repeats search operation (No DISC condition: While it's
                                pressed)
                               * Actuates focus servo (In case of DISC loaded)
                               * Actuates tracking servo
     STOP                      * Stops operation
     PAUSE                     * Performs auto adjustment
     MANUAL SEARCH             * Moves pickup
     FORWARD / REVERSE


                                                                                                      5
         How to check the test mode
    ( 1 ) DISC discrimination, adjustment
    * Insert DISC, and press the PAUSE button.
    * "06 Adj" is displayed, and discrimination of DISC size 8 cm/12 cm, discrimination of
         DISC reflectance (CD, CD-R/CD-RW), adjustment of focus, tracking offset,
         and EF balance will be performed. (Adjusted values are not displayed: Refer to Fig. 2, 3)


    FEO
                                                       TEO
    TEO

    HF                                                 TB

    DRF
                                                       SLD


             Fig. 2 DISC discrimination, adjustment            Fig. 3
             (Case of CD-RW)                                   Adjustment of EF balance
    * After completing the discrimination and adjustment, it becomes stop condition.
    * Once discrimination of DISC has been carried out in the "06 Adj" mode, discrimination of
      size and reflectance is no longer made, and only adjustment will be performed.


    ( 2 ) Checking of servo state
    * Press the PLAY button after performing above (1) "DISC discrimination, adjustment".
    * "02 L on" is displayed, and the laser will start to light. (The pickup may vibrate with a rattling
      noise if DISC has been loaded, but this is not abnormal.)
    * Press the PLAY button again.
    * "03 F on"is displayed. DISC starts turning,and focus servo will be actuated. (Refer to Fig. 4, 5)


    FEO                                                TEO


    TEO                                                HF


6
      Fig. 4   In "03 F on"                              Fig. 5 In "03 F on"
* Press the PLAY button again.
* "04 t on" is displayed. Tracking, CLV, and slide servo will be actuated.
* Monitor HF signal using the test terminals, HF of CX053 (Pin No. 1 ) and
  VC of CX063 (Pin No. 5 : 2.5V ref. signal). Check that the signal's amplitude
  is 1.5V 0.3Vp-p. (Refer to Fig. 6)


HF
                                          A ( A = 1.5
◦ Jabse Service Manual Search 2026 ◦ Jabse Pravopis ◦ onTap.bg ◦ Other service manual resources online : Fixya ◦ eServiceinfo