Service Manuals, User Guides, Schematic Diagrams or docs for : DENON LP Turntable LP Turntable Denon - DP-29F Схема DP-29F

<< Back | Home

Most service manuals and schematics are PDF files, so You will need Adobre Acrobat Reader to view : Acrobat Download Some of the files are DjVu format. Readers and resources available here : DjVu Resources
For the compressed files, most common are zip and rar. Please, extract files with Your favorite compression software ( WinZip, WinRAR ... ) before viewing. If a document has multiple parts, You should download all, before extracting.
Good luck. Repair on Your own risk. Make sure You know what You are doing.


Image preview - the first page of the document
Схема DP-29F


>> Download Схема DP-29F documenatation <<

Text preview - extract from the document
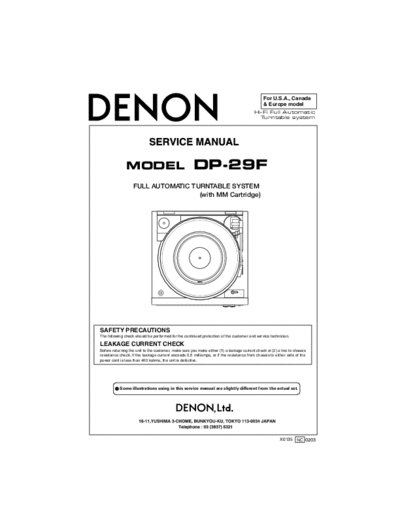
                                                                                                    For U.S.A., Canada
                                                                                                    & Europe model
                                                                                                 Hi-Fi Full Automatic
                                                                                                   Turntable system


               MODEL                                  DP-29F
                   FULL AUTOMATIC TURNTABLE SYSTEM
                                    (with MM Cartridge)


                                   SPEED


                                                                                     30

                                                                                          SIZE


                                   45      33
                                                                                17


SAFETY PRECAUTIONS
The following check should be performed for the continued protection of the customer and service technician.

LEAKAGE CURRENT CHECK
Before returning the unit to the customer, make sure you make either (1) a leakage current check or (2) a line to chassis
resistance check. If the leakage current exceeds 0.5 milliamps, or if the resistance from chassis to either side of the
power cord is less than 460 kohms, the unit is defective.


           Some illustrations using in this service manual are slightly different from the actual set.


                                                                                                          X0135    NC 0203
ASSEMBLY
1. Remove the main unit with the packing from
   the box and take off the packing.
2. Set the 45-rpm adaptor on the main unit as                                                                                                    Turntable sheet
   shown in the diagram.
3. Insert the turntable onto the center spindle.
4. Set the belt on the driving pulley. (The belt is                                                                                             Turntable
   wound on the turntable.)                                                                                                                     Equalizer Amplifier switch
5. Set the turntable sheet on the turntable.
                                                             45-rpm adaptor
6. Remove the tie securing the tonearm.                                                                                                         Tonearm fixing tie

  NOTE:                                                      Center spindle
  The turntable will not function if this tie is not
  removed.

7.
8.    Equalizer Amplifier switch
9.    This unit has built-in RIAA           When the unit is connected                                                          When the unit is connected
10.    equalizer amplifier,so it can        to the PHONO(MM) jacks:                                                             to the AUX jacks, etc:
11.    be connected to an amplifier
12.   without PHONO(turntable)                                                                                                                                       L
                                                                                    L
13.   input jack. According to the
14.   amplifier, set the EQUALIZER
                                                                                    R                                                                                R
15.                                                                       PHONO                                                                               AUX
      AMPLIFIER SWITCH.                    ON      OFF                                                                  ON                      OFF
16.


       Setting the belt
                                                                                                                                Tape
      Grasp both sides of the tape and set the belt on the
      motor pulley. Once the belt is set properly, remove                                                                                 Driving roller
      the tape.
      Set the belt on the motor pulley properly as shown                                                                                              Belt
      in the diagram.
                                                                                                                                Turntable


 CONNECTIONS
1. Connect the left (white) and right (red) output cords respectively to your amplifier's PHONO jacks
   etc .
2. Connect the ground wire to the amplifier's signal ground terminal.
3. Plug the power cord into a wall outlet. (Or if the amplifier has power outlets, plug it in there, but
   before doing so, read the amplifier's manual and check that the capacity is sufficient.)
                                                                                INPUTS                   PB
                                                                               CD DVD/AUX AUX-2   TAPE         MD
                                                                                                                    1       2     SYSTEM
                                                                          L                                                       CONNECTOR


                                                                SIGNAL    R                                             L
                                                                    GND
                                                                              TUNER PHONO         TAPE         MD

                                                                          L

                                                                                                                        R
                                                                          R
                                                                                                         REC                 SPEAKER SYSTEM
                                                                                                                            SPEAKER IMPEDANCE
                                                                                                                                       4 16


                                                Ground wire                      Red                           White
                             Output cord


                                                         2
PART NAMES AND FUNCTIONS


                               1   2   3       4


                               14 13       12 11 10 9     8 7         6 5


1   Dust cover                                     10 Tone arm rest
                                                      Holds the tone arm.
2   45 rpm adaptor and holder
                                                   11 Platter
3   Dust cover hinge
                                                   12 Spindle
4   Equalizer amplifier switch
                                                   13 Rubber mat
5   Finger lever
                                                      Place on the turntable.
6   Size Select Lever
                                                   14 SPEED Select Button
    Set according to the size of the record.
                                                      Set according to the record speed.
7   STOP Button                                       For 33 1/3 rpm: 


◦ Jabse Service Manual Search 2024 ◦ Jabse PravopisonTap.bg ◦ Other service manual resources online : FixyaeServiceinfo