Service Manuals, User Guides, Schematic Diagrams or docs for : DENON Personal Audio System Personal Audio System Denon - D-AJ03 Схема D-AJ03 Ver.1

<< Back | Home

Most service manuals and schematics are PDF files, so You will need Adobre Acrobat Reader to view : Acrobat Download Some of the files are DjVu format. Readers and resources available here : DjVu Resources
For the compressed files, most common are zip and rar. Please, extract files with Your favorite compression software ( WinZip, WinRAR ... ) before viewing. If a document has multiple parts, You should download all, before extracting.
Good luck. Repair on Your own risk. Make sure You know what You are doing.


Image preview - the first page of the document
Схема D-AJ03 Ver.1


>> Download Схема D-AJ03 Ver.1 documenatation <<

Text preview - extract from the document
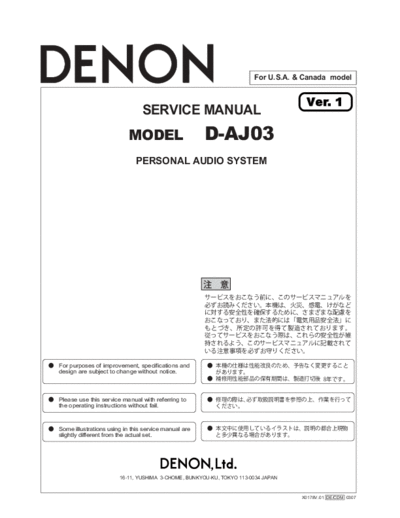
                                                                      For U.S.A. & Canada model


                                                                                       Ver. 1
                                SERVICE MANUAL
                           MODEL                      D-AJ03
                             PERSONAL AUDIO SYSTEM


For purposes of improvement, specifications and
design are subject to change without notice.


Please use this service manual with referring to                                  ,
the operating instructions without fail.


Some illustrations using in this service manual are
slightly different from the actual set.


                       16-11, YUSHIMA 3-CHOME, BUNKYOU-KU, TOKYO 113-0034 JAPAN


                                                                                      X0178V.01 DE/CDM 0307
                                              D-AJ03   2

SAFETY PRECAUTIONS

LEAKAGE CURRENT CHECK


LASER RADIATION


                                  500V


                                         1M


(1)


(2)


                            (1)

                            (2)


                        2
                                                                                                        D-AJ03                 3


DISASSEMBLY
(Follow the procedure below in reverse order when reassembling)

1. Rear Cover & Front Panel
1) Remove 14 rear screws 1 and 4 (E3: 2) bottom screws
    2 on the Rear Cover.
2) Disconnect connectors and wire 3 ~ 7 on the Front Panel.                                                            1
   The Rear Cover and Front Panel can be detached
   respectively.


                                                                                                                               1


                                                                                              2

                                                                                                        1


             4
      5P Connector                                                6 11P Connector

                                                                      7 1P Earth Lug


                               5
                          8P Connector

                                        12P Connector

                                                                                          8
2. Main P.W.B.                                                                                              8
1) Remove 5 screws 8 .                                                              FFC
                                                                   Connectors
2) Disconnect 2 FFCs, 8 connectors on the Main P.W.B.
                                                                                                                3P Connector


                                                  Main P.W.B.


                                                                                                  FFC


                                                              Connectors


                                                              3
                                                                                           D-AJ03    4

3. CD Mecha. Chassis
1) Remove 4 each screws 10 and 11 i from the front side to
                          i       i
   detach the CD Door Lens and CD Door Bracket.
2) Remove 6 screws 12  and take off the Main Chassis.
                    i


                                                                          12 
                                                                          i


                                                                                Main Chassis


                                            11 i
                                            i
                        CD Door Bracket


                           CD Door Lens

                                               i
                                               10                  11 i
                                                                   i

                                                             i
                                                             10
4. CD Mecha.
1) Remove 4 screws 13 fixing the Bracket.
                   i
2) Detach the CD Mecha. upward as shown to the arrow                                            i
                                                                                                13
   direction.


                                                                  i
                                                                  13


                              Rubber
                              (Green)              Collar
                                                   (White)


                                              Rubber
                                              (Green)

      Rubber
      (Blue)


                                                             4
                                                               D-AJ03            5


                               Speaker
5. Speaker Box (L & R)         Box (L)
1) Remove 4 screws 14 .
                    i
2) Disconnect 2 connectors.


                                                                             Speaker
                                                                             Box (R)


                                   i
                                   14


                                                         i
                                                         14

6. Tuner P.W.B.
1) Remove 2 screws   i
                     15   .


                                                              Tuner P.W.B.


                                                               i
                                                               15


7. Power P.W.B.
1) Remove 6 screws 16 .
                    i
2) Disconnect 1 connector.


                              Power P.W.B.


                              i
                              16


                                        i
                                        16   Connector


                                        5
                                                                                                                                                                 D-AJ03                      6


ADJUSTMENT
     TUNER SECTION
     Connections and adjustment point
                                                                              Modulation frequency: 400Hz
                                                              AM SG           Modulation factor: 30%


                                                                        Modulation frequency: 1kHz
                                          Test loop antenna             L+R: 90% (67.5kHz Dev.)
                                                                        Pilot: 10% (7.5kHz Dev.)
                                                                        75kHz Dev.: 100%
                             60cm

                                                                         FM stereo modulator

                                                                                                    75 ohms
                                          Loop antenna                                              Coaxial Cable
                                                                                   FM SG


                                                                                                                            Rear Panel Side

                                                                    Antenna Terminal        AM          G           FM


                                                      To TP


                                        Digital Voltmeter                      TUNER PWB                     TC401
                                                                                                     R425

                           To Output Terminal                                                T403                    T402

                                                                                                         R419
                                                                                            T401

                                         Distortion Meter
                                                                                            T404
                           To Output Terminal


                                       Separation Meter or
                                       Electronic Voltmeter


FM ALIGNMENT (BAND BUTTON: FM, AUTO)
                                                                            Input                                                  Output
       Alignment     Tune-in Point
Step                                    Measuring                                                                        Measuring                    Align Part     Set Value         Remarks
          Item     (Channel Setting)                   Frequency           Level       Modulation       Connect to                      Connect to
                                        Equipment                                                                        Equipment
        FM DC                                                                            1 kHz            FM Ant           Digital     Both Leads                                   Align with Mono
 1                     98 MHz             FM SG         98 MHz            60 dB                                                                         T404            20mV
        Balance                                                                        75 kHz dev        Terminal        Voltmeter        of R425                                  Modulation Signal


AM ALIGNMENT (BAND BUTTON: AM)
                                                                              Input                                                 Output
       Alignment     Tune-in Point
Step                                      Measuring                                                                         Measuring                   Align Part     Set Value        Remarks
          Item     (channel Setting)                        Frequency         Level        Modulation       Connect to                   Connect to
                                          Equipment                                                                         Equipment
                      E3:520 kHz                                                                                                                          T403       E3: 1.0


◦ Jabse Service Manual Search 2024 ◦ Jabse PravopisonTap.bg ◦ Other service manual resources online : FixyaeServiceinfo