Service Manuals, User Guides, Schematic Diagrams or docs for : Daewoo Сhassis CM CM-650 CM-650
<< Back | HomeMost service manuals and schematics are PDF files, so You will need Adobre Acrobat Reader to view : Acrobat Download Some of the files are DjVu format. Readers and resources available here : DjVu Resources
For the compressed files, most common are zip and rar. Please, extract files with Your favorite compression software ( WinZip, WinRAR ... ) before viewing. If a document has multiple parts, You should download all, before extracting.
Good luck. Repair on Your own risk. Make sure You know what You are doing.
Image preview - the first page of the document
>> Download CM-650 documenatation <<
Text preview - extract from the document
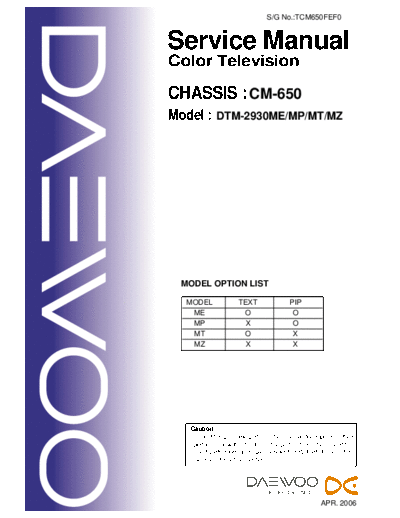
S/G No.:TCM650FEF0
Service Manual
Color Television
CHASSIS : CM-650
Model : DTM-2930ME/MP/MT/MZ
MODEL OPTION LIST
MODEL TEXT PIP
ME O O
MP X O
MT O X
MZ X X
Caution
: In this Manual, some parts can be changed for improving. their
performance without notice in the parts list. So, if you need the
latest parts information, please refer to PPL(Parts Price List)in
Service Information Center.
APR. 2006
TABLE OF CONTENTS
1. SPECIFICATIONS 2
2. SAFETY INSTRUCTION 3
3. CIRCUIT BLOCK DIAGRAM 4
4. ALIGNMENT INSTRUCTIONS 5
5. CM-650TYPICAL SERVICE DATA 15
6. ELECTRICAL PARTS LIST 16
7. SCHEMATIC DIAGRAM 23
8. PRINTED CIRCUIT BOARD 24
9. MECHANICAL EXPLODED VIEW AND PARTS LIST 26
APPENDIX(Appendix is provide only by internet[http://svc.dwe.co.kr])
10. IC DESCRIPTION 27
11. TROUBLE SHOOTING GUIDE 57
-1-
1. SPECIFICATIONS
Items Model DTM-2930ME/MP/MT/MZ
TV Standard Color system PAL/SECAM, NTSC-4.43(AV)
Sound system B/G, D/K, I, H
Rated Voltage AC 110-250V, 50/60Hz
Power consumption 110W
Sound Output Power 7W+7W (FLAT:7.5W + 7.5W at EQUILIZER CENTER)
Channel Conerage VHF BAND I : CH 02 ~ CH04(48.25MHz ~ 62.25MHz)
BAND II : CH05 ~ CH12(175.25MHz ~ 224.25MHz)
CABLE BAND : S01 ~ S03, (69.25MHz ~ 83.25MHz)
S01 ~ S20, (105,25MHz ~ 294.25MHz)
HYPER BAND : S21~S41(303.25 ~ 463.25MHz)
UHF BAND IV, V : CH21 ~ CH69(471.25MHz ~ 855.25MHz)
Tuning System FS Tuning System
Program No. Indication ON-Screen Display
Program Selection 200 Programs
Aux. Terminal AV1 input
AV2 input
DVD1, DVD2
OUTPUT
Remote Control Unit R-49C07
Screen size 67.6Cm
-2-
2 SAFETY INSTRUCTION
2 SAFETY INSTRUCTION
NOTE : BEFORE SERVICING THIS CHASSIS READ THE "X-RAY RADIATION PRECAUTIONS",
"SAFETY PRECAUTIONS" AND "PRODUCT SAFETY NOTICE" BELOW.
X-RAY RADIATION PRECAUTION
1. Excessive high voltage can produce potentially hazardous X-RAY RADIATION. To avoid
such hazards, the high voltage must not exceed the specified limit. The nominal value of the
high voltage of this receiver is 25.6KV [Normal Type](27.9KV [Flat Type]) at max beam
current. The high voltage must not, under any circumstances, exceed 28.6KV [Normal Type]
(30.9KV [Flat Type]). Each time a receiver requires servicing, the high voltage should be
checked. It is important to use an accurate and reliable high voltage meter.
2. The only source of X-RAY Radiation in this TV receiver is the picture tube. For continued X-
RAY RADIATION protection, the replacement tube must be exactly the same type tube as
specified in the parts list.
SAFETY PRECAUTION
1. Potentials of high voltage are present when this receiver is operating. Operation of the
receiver outside the cabinet or with the back cover removed involves a shock hazard from
the receiver.
1) Servicing should not be attempted by anyone who is not thoroughly familiar with the
precautions necessary when working on high voltage equipment.
2) Always discharge the picture tube to avoid the shock harzard before removing the anode
cap.
3) Discharge the high potential of the picture tube before handling the tube. The picture tube is
highly evacuated and if broken, glass fragments will be violently expelled.
2. If any Fuse in this TV receiver is blown, replace it with the FUSE specified in the
Replacement Parts List.
3. When replacing a high wattage resistor (metal oxide film resistor) in the circuit board, keep
the resistor 10 mm away from circuit board.
4. Keep wires away from high voltage or high temperature components.
5. This receiver must operate between AC 110-250 volts, 50/60Hz. NEVER connect to DC
supply or any other power or frequency.
PRODUCT SAFETY NOTICE
Many electrical and mechanical parts in this equipment have special safety-related
characteristics. These characteristics are often passed unnoticed by a visual inspection and the
X-RAY RADIATION protection afforded by them cannot necessarily be obtained by using
replacement components rated for higher voltage, wattage, etc. Replacement parts which have
these special safety characteristics are identified in this manual and its supplements, electrical
components having such features are identified by designated symbol ` 1 ' on the parts list.
Before replacing any of these components, read the parts list in this manual carefully. The use
of substitutes replacement parts which do not have the same safety characteristics as specified
in the parts list may create X-RAY Radiation.
-3-
3.CIRCUIT BLOCK DIAGRAM
-4-
4. ALIGNMENT INSTRUCTIONS
DOCUMENT HISTORY
VERSION DATE COMMENTS
V0.00 26/10/04 Document imported from project Cp520(Author J.D.Santos)
V1.00 12/11/04 Major revision after visit in Gunpo RND
V1.01 25/11/04 Tuner option revision(Byte1, bite2,1,0)
V1.02 29/11/04 Curtain beep option added(Byte3, bits1)
Curtain ON/OFF bit setting corrected
V1.03 02/12/04 Local key option bit changed.
Digital eye levels added
V1.04 17/12/04 Local keyboard option 01 changed
V1.05 20/01/05 AV stereo and Koran options added
V1.06 16/02/05 Default setting in case of virgin EEPROM changed
V1.08 8/09/05 Option Byte 4 added
Tuner option changed. Philips LNA tuner is not supported any more
V1.09 25/10/05 Alps option removed, LG option added.
LNA supported for LG and Samsung.
V1.10 21/03/06 Koran direct key enable/disable option added.
-5-
ALIGNMENT INSTRUCTIONS
4.1MICROCONTROLLER CONFIGURATION : SERVICE MODE
To switch the TV set into service mode please see instruction below.
1 - Select PR. number 91
2 - Adjust sharpness to minimum and exit all menus.
3 - Within 2 seconds press the key sequence : RED - GREEN - menu
The software version is displayed beside the word Service, e.g. "SERVICE V1.00".
To exit SERVICE menu press menu key or Stand By key.
4.2 SERVICE MODE NAVIGATION
Pr Up/Down remote keys : cycle through the service items available.
Vol -/+ remote keys : Dec./Increment the values within range - Cycle trough option bits.
OK key : Toggle bits in option byte
Order Item Default setting
1 HOR CEN
2 RED GAIN
3 GRN GAIN
4 BLUE GAIN
5 RED BIAS
6 GRN BIAS
7 AGC LEVEL
8 G2 - SCREEN
9 OPTION1
10 OPTION2
11 OPTION3
12 OPTION4
13 V. LINEAR
14 V. SLOPE
15 S. CORRECT
16 VERT CENT
17 VERT SIZE
18 BRIGHINESS
19 SHIPPING
-6-
ALIGNMENT INSTRUCTIONS
1 CONTROL BITS
There are two option bytes available (16 bits in all). These option bits are available from
FACTORY and SERVICE mode. First find the OPTION1, OPTION2 or OPTION3 control, and
then use the UP/DOWN and PLUS/MINUS keys on the relevant remote keypad to control the
bits.
The table below shows the three option bytes available.
Default setting in case of virgin EEPROM are shown in light grey.
4.3.1 OPTION1
B7 B6 B5 B4 B3 B2 B1 B0
TOP FASTEXT TUBE Teletext Dolby
1 Teletext (FLOF) 4:3 ON Virtual
OFF OFF OFF TUNER OPTIONS
TOP FASTEXT Dolby (see table below)
0 Teletext (FLOF) TUBE Teletext
Virtual
ON ON 16:9 OFF
ON
4.3.2 OPTION2
B7 B6 B5 B4 B3 B2 B1 B0
NEC AV out: Koran Digital PARS
1 remote monitor functions eye logo
Fixed to control enabled Local key option disabled OFF
`0' Daewoo (see table below) Digital
AV out: Koran
0 Remote functions eye ON
control Tuner enabled
enabled
4.3.3 OPTION3
B7 B6 B5 B4 B3 B2 B1 B0
Chassis Beep at
1 Curtain with E/W PIP curtain Full
OFF correction OFF opening: stereo
circuit OFF
Teletext language table Chassis Beep at AV
Curtain with out PIP curtain
0 E/W Stereo
On ON opening: only
correction ON
circuit
4.3.4 OPTION4
B7 B6 B5 B4 B3 B2 B1 B0
Koran
Not used, must be set to 1 future direct AV3 QSS DVD2
1 compatibility key enabled enabled enabled
enabled
Koran Intercar DVD2 enabled
direct AV3 rier (DVD1 comes
0 key Disabled enabled AV3)
enabled
-7-
ALIGNMENT INSTRUCTIONS
4.4 USER GUIDE
4.4.1 ENTERING FACTORY MODE
To switch the TV set into FACTORY mode, use the factory remote control, and press on "SVC".
The factory menu will appear on the screen, showing "FACTORY Vx,xx"(where x.xx is the
software version).
4.4.2 ENTERING OPTION BITS MENU
To find the option bits, push the button "OPT" once. To find OPTION2 press the button "OPT" a
second time.
4.4.3 SELECTING OPTION BITS
From left to right, bits 7 to 0 are shown. Navigation is done from the with FACTORY remocon
with the VOL MIN and VOL MAX buttons(otherwise known as EAST, WEST). The selected bit is
highlighted.
4.4.4 TOGGLING OPTION BITS
This is done by using the PR UP and PR DOWN button (otherwise known as NORTH,
SOUTH).
4.4.5 EXTING OPTION BITS MENU
Push the button "OPT" a third time. The full sequence enter to exit is;
FACTORY -> OPTION1 -> OPTION2 -> OPTION3 -> FACTORY
4.4.6 AFTER SETTING OPTION BITS
Before pushing on the shipping key, "BRI.", it is necessary to push the "NORMAL" key to obtain
NORMAL I. This will reset all the sound and brightness settings to a factory defined level, as
well as some other settings such as sound PRESET and WAKE TIME/PROG.
Then, on pushing the shipping key, thess levels are memorised in the television, ready for
packing and delivery.
4.4.7 VERIFICATION
On pushing the shipping "BRI." key, a four digit hexadecimal number is displayed in addition to
"SHIPPING". This number is there to verify the option bits setting that has been entered. For
example the binary code 1001 1111(OPTION3) 0000 0111(OPTION2) 1100 0010(OPTION1)
will give 9F 07 C2 hex. The order of display is therefore OPTION3, OPTION2 then OPTION1
when reading from left to right.
-8-
ALIGNMENT INSTRUCTIONS
4.5 CONTROL DESCRIPTION
4.5.1 OPTION 1 BITS
- TOP Teletext(Bit 7)
Enables/disables the TV from displaying TOP row 24 link titles, and the dedicated TOP menu
table. A FLOF (if available) or SIMPLE / PAGETRACE presentation will be used.
- FLOF/Fastext (Bit 6)
Enables/disables the TV from displaying FLOF row 24 link titles. A TOP(if available) or
SIMPLE/PAGETRACE presentation will be used.
- Tube(Bit 5)
Define as 4:3 or16:9 tube. This will permit the ZOOM function to understand the formats that
should be available.
- Teletext ON/OFF(Bit 4)
Enables/disables the Teletext on TV. If Teletext is disabled, user can not select clock prog and
zoom selection in features menu. WSS is also disabled.
- Dolby Virtual(Bit 3)
Allows Doby Virtual (trademark) 3D effect to be available from the user control(button "3D").
Note : Dolby Virtual is only available with some UOC reference.
- Tuner(Bits 2,1 & 0)
Configures the software to communicate with the tuner via i2c bus. Incorrect configuration may
not be immediately obvious, but will result in loss of functionality (e.g. unable to tune UHF
channels, unable to tune some hyperband channels).
Bit2 Bit1 Bit0 LAN Tuner
0 0 0 No Philips (external AGC)
0 0 1 No Philips (internal AGC)
0 1 0 No LG
0 1 1 No Partsnic / Samsung
1 0 0 - Should not be used
1 0 1 - Should not be used
1 1 0 Yes LG
1 1 1 Yes Partanic/Samsung
See also NVM mapping to configure parameters for automatic AGC adjustment when external
AGC is used. When internal AGC is used, the TOP is stored in NVM.
-9-
ALIGNMENT INSTRUCTIONS
4.5.2 OPTION 2 BITS
- Remote control(Bit 7)
This is not intended to be changed by use of the FACTORY remote control.
- NEC/Daewoo Remocon(Bit 6)
User remote control configuration, the choise being between the following;
- NEC remocon(`1')
- Daewoo R-46G22(`0')
The R-30SVC7 "FACTORY" remote control will never be affected by this setting.
- AV out option(Bit 5)
This allow you to select the desired signal at output pin 46. When set to 1 the output is monitor
out otherwise the output is the CVBS signal demodulated from the tuner IF. Sound output is
also swiched(#37 and #38).
- Local keyboard option (Bit 3 & 2)
11 10 01 00
0 mV ~ 220 mV Not used Menu Menu
220 mV ~ 620 mV (TV/AV) Menu TV/AV Prog. Up
620 mV ~ 1.06 V Vol. Up Vol. Dwn Prog. Dwn Not used
1.06 V ~ 1.48 V Vol. Dwn Vol. Up Vol. Up
1.48 V ~ 1.79 V Prog.Up Prog. Dwn Vol. Dwn
1.79 V ~ 2.07 V Prog.Dwn Prog. Up TV/AV
- Digital eye ON/OFF(Bit 1)
Enables/disables the digital eye function.
When enabled and selected, the microcontroller measures DC level on IC pin 15, and adjusts
picture setting according to the table below.
Brightness Contast Colour Sharpness
0 mV ~ 450 mV 18 30 26 27
450 mV ~ 900 mV 28 46 28 29
900 mV ~ 1.35 V 30 50 29 30
1.35 V ~ 1.80 V 32 55 30 31
1.80 V ~ 2.25 V 34 60 31 32
2.25 V ~ 2.70 V 36 63 32 33
- PARS Logo ON/OFF(Bit 0)
Enables/disables the display of PARS logo at power on.
4.5.3 OPTION 3 BITS
- Curtain function at power ON(Bit 7)
Enables/disables the curtain function at power ON. The frequency and volume of associated
beep sound is controlled by NVM data.
-10-
ALIGNMENT INSTRUCTIONS
- Teletext language option(Bit 6, 5&4)
Bit6, 5&4
Latin West 000
Latin East 001
Russia 010
Persia 011
Arabic 100
Not used 101
..
Not used 111
Teletext National Option table for each language option:
Teletext table C12 C13 C14 Basic Char.Set Twist Char.Set NOT EW
Latin West 0 0 0 Latin Latin English West
0 0 1 Latin Latin German West
0 1 0 Latin Latin Swedish/Fin West
0 1 1 Latin Latin Italian West
1 0 0 Latin Latin French West
1 0 0 Latin Latin Spanish/Portuguese West
1 1 0 Latin Latin Turkish West
1 1 1 Latin Latin English West
Latin East 0 0 0 Latin Latin Polish East
0 0 1 Latin Latin German East
0 1 0 Latin Latin Estontan East
0 1 1 Latin Latin German East
1 0 0 Latin Latin German East
1 0 1 Latin Latin Slovenian East
1 1 0 Latin Latin Czech/Slovak East
1 1 1 Latin Latin Rumanian East
Russian 0 0 0 Latin Latin English West
0 0 1 Latin Latin German West
0 1 0 Latin Latin Estonian East
0 1 1 Latin Latin German East
1 0 0 Cyrillic Latin Russia East
1 0 1 Cyrillic Latin Ukrainian East
1 1 0 Latin Latin Czech/Slovak East
1 1 1 Latin Latin Rumanian East
Arabic/ 0 0 0 Latin Latin English West
Persian 0 0 1 Latin Latin German West
0 1 0 Latin Latin Swedish/Fin West
0 1 1 Latin Latin Italian West
1 0 0 Latin Latin French West
1 0 1 Latin Latin Spanish/Portuguese West
1 1 0 Latin Latin Turkish West
1 1 1 Arabic Latin Arabic West
- East/West correction (Bit 3)
You must enable this bit for large screen CRT which need EAST WEST correction circuitry.
- PIP(Bit 2)
Enable disable PIP function. Make sure PIP board is inserted in the main board.
- Beep at curtain opening(Bit 1)
Enable/disable beep sound at power ON.
- East/West correction (Bit 3)
You must enable this bit for large screen CRT which need EAST WEST correction circuitry.
- PIP(Bit 2)
Enable disable PIP function. Make sure PIP board is inserted in the main board.
- Beep at curtain opening(Bit 1)
Enable/disable beep sound at power ON.
- Koran direct key option (Bit 3)
When set to 1, pressing yellow key makes the pray menu com on screen. When ste 0, the function is
disabled. If OSD language is not Persian, this option bit is ignored.
-11-
ALIGNMENT INSTRUCTIONS
4.5.4 TV SET ALIGNMENT
(1) G2 ALIGNMENT
- Tune a colour bar pattern.
- Fine the "G2-SCREEN" item in service mode.
- Adjust screen volume(on FBT) to make the horizontal line just before disappeared.
(2) WHITE BALANCE
- Select a dark picture and adjust RED BIAS and GRN BIAS to the desired colour temperature.
- Select a bright picture and adjust RED, GRN and BLUE GAIN to the desired colour temperature.
(3) FOCUS
Adjust the Focus volume ( on FBT ) to have the best resolution on screen.
(4) VERTICAL GEOMETRY
Adjust V. LINEAR (linearity), S CORRECT (S. Correction), VERT SIZE (Vertical amplitude), VERT CENT (vertical
centring) to compensate for vertical distortion.
(5) HORIZONTAL PICTURE CENTRING
Adjust HOR CEN (Horizontal centre) to have the picture in the centre of the screen.
(6) EAST / WEST CORRECTION
Adjust the PARABOLA, HOR WIDTH, CORNER, HOR PARAL, EW TRAPEZ, to compensate for geometrical
distortion.
HOR PARAL
-12-
ALIGNMENT INSTRUCTIONS
HOR WIDTH
adjust for 90% overscan.
PARABOLA
CORNER B & CORNER T
EW TRAPEZ
3.7.7 AGC
- Make sure option bits are correct for the tuner fitted on the chassis (See above how to change option bits).
- Adjust the antenna signal level at 62 dB V ◦ Jabse Service Manual Search 2026 ◦ Jabse Pravopis ◦ onTap.bg ◦ Other service manual resources online : Fixya ◦ eServiceinfo