Service Manuals, User Guides, Schematic Diagrams or docs for : Fujifilm Cameras FUJIFILM_FinePix_A201
<< Back | HomeMost service manuals and schematics are PDF files, so You will need Adobre Acrobat Reader to view : Acrobat Download Some of the files are DjVu format. Readers and resources available here : DjVu Resources
For the compressed files, most common are zip and rar. Please, extract files with Your favorite compression software ( WinZip, WinRAR ... ) before viewing. If a document has multiple parts, You should download all, before extracting.
Good luck. Repair on Your own risk. Make sure You know what You are doing.
Image preview - the first page of the document
>> Download FUJIFILM_FinePix_A201 documenatation <<
Text preview - extract from the document
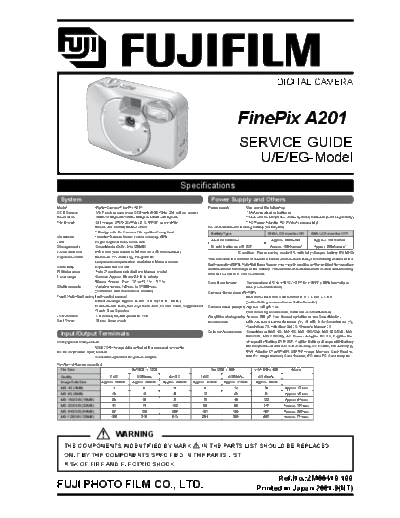
DIGITAL CAMERA
FinePix A201
SERVICE GUIDE
U/E/EG-Model
Specifications
System Power Supply and Others
Model Digital Camera FinePix A201 Power supply Use one of the following:
CCD Sensor 1/2.7-inch square pixel CCD with RGB Filter (2.0 million pixels) * 2AA-size alkaline batteries
Resolution 1600x1200 pixels/1280 x 960 pixels/640 x 480 pixels * 2AA-size Ni-MH (nickel metal hydride) batteries (sold separately)
File format Still image: JPEG (Exif Ver.2.1), DPOF-compatible * AC Power Adapter AC-3V (sold separately)
Movie: AVI format, Motion JPEG No. of available shots using battery (battery life)
* Design rule for Camera File system Compliant Battety Type With LCD monitor ON With LCD monitor OFF
Viewfinder Inverted Galiean finder; Frame coverag: 80%
Alkaline batteries Approx. 80 frames Approx. 150 frames
Lens Fujinon optical fixed-focus lens
Storage media SmartMedia (3.3V, 2 to 128MB) Ni-MH batteries HR-3UF Approx. 150 frames* Approx. 250 frames*
Focus distance f=5.5 mm (equivalent to 36 mm on a 35 mm camera) (Condition: Power saving mode ON, with fully charged battery (Ni-MH))
Exposure control 64 zones TTL metering, Program AE
This indicates the number of available frames shot consecutively at room temperature with a
(exposure compensation available in Manual mode)
flash use rate of 50%. Note that these figures may vary depending on the ambient temperature
Sensitivity Equivalent to ISO 100
and the amount of charge in the battery. The number of available shots or available shooting
White balance Auto (7 positions selectable in Manual mode)
time will be lower in cold conditions.
Focal range Normal: Approx. 80 cm/2.6 ft. to infinity
Macro: Approx. 8 cm - 13 cm/3.1 in. - 5.1 in. Conditions for use Temperature: 0oC to +40oC (+32oF to +104oF); 80% humidity or
Shutter speeds Variable-speed, 1/2 sec. to 1/1000 sec. less (no condensation)
(combined with mechanical shutter) Camera dimensions (W/H/D)
Flash (Auto flash using flash control sensor) 98.5 mm x 64.5 mm x 40.5 mm/3.9 in. x 2.5 in. x 1.6in.
Effective range: Approx. 0.8 m - 3.0 m (2.6 ft. - 9.8 ft.) (not including accessories and attachments)
Flash modes: Auto, Red-Eye Reduction, Forced Flash, Suppressed Camera mass (weight) Approx. 145 g/5.1 oz.
Flash, Slow Synchro (not including accessories, batteries or SmartMedia)
LCD monitor 1.6-inches, 55,000-pixels D-TFD Weight for photography Approx. 200 g/7.1 oz. (including batteries and SmartMedia)
Self-Timer 10 sec. timer clock Accessories LR6 AA-size alkaline Batteries (2), 16 MB, 3.3V SmartMedia (1),
Hand strap (1), Interface Set (1), Owner's Manual (1)
Optional Accessories SmartMedia (MG-4S, MG-8S, MG-16S/SW, MG-32S/SW, MG-
Input/Output Termimals 64S/SW, MG-128SW), AC Power Adapter AC-3V, Fujifilm Re-
USB (Special USB) socket chargeable Battery 2HR-3UF, Fujifilm Battery charger with Battery
USB (1) for image data output with a personal computer BK-NH (Not Available in U.S.A./Canada), SC-FXA01, FD-A2 Floppy
DC IN 3V (Power input) socket Disk Adapter (FlashPath), SM-R2 Image Memory Card Reader,
Socket for specified AC power adapter DM-R1 Image Memory Card Reader, PC-AD3 PC Card Adapter
Number of frames recorded
File Size 3M 1600 x 1200 1M 1280 x 960 VGA 640 x 480 Movie
Quality FINE NORMAL BASIC FINE NORMAL NORMAL -
Image Data Size Approx. 760KB Approx. 390KB Approx. 200KB Approx. 610KB Approx. 310KB Approx. 90KB -
MG-4S (4MB) 4 9 19 6 12 30 Approx. 23 sec.
MG-8S (8MB) 10 19 39 12 25 61 Approx. 47 sec.
MG-16S/SW (16MB) 20 39 75 25 49 122 Approx. 94 sec.
MG-32S/SW (32MB) 41 79 152 50 99 247 Approx. 191 sec.
MG-64S/SW (64MB) 82 159 306 101 198 497 Approx. 385 sec.
MG-128SW (128MB) 166 319 613 204 398 997 Approx. 774 sec.
WARNING
THE COMPONENTS INDENTIFIED BY MARK IN THE PARTS LIST SHOULD BE REPLACED
ONLT BY THE COMPONENTS SPECIFIED IN THE PARTS LIST.
RISK OF FIRE AND ELECTRIC SHOCK.
Ref.No.:ZM00410-100
FUJI PHOTO FILM CO., LTD. Printed in Japan 2001.9(NT)
FinePix A201 (U/E/EG) SREVICE GUIDE
SAFETY CHECK-OUT
After correcting the original problem, perform the following
safety check before return the product to the costomer.
1. Check the area of your repair for unsoldered or 5. Caution:
poorly soldered connections. Check the entire For continued protection against
board surface for solder splasher and bridges. fire hazard, replace only with same
RISK OF FIRE-
2.5A 125/250V
REPLACE FUSE type 2.5 amperes 125/250 volts
2. Check the interboard wiring to ensure that no 2.5A 125/250V AS MARKED fuse.
wires are "pinched" or contact high-wattage Attention:
resistors. Afin d'assurer une protection
permanente contre les risques
3. Look for unauthorized replacement parts, particu- d'incendie, remplacer uniquement
larly transistors, that were installed during a par un fusible de meme, type 2.5
previous repair. Point them out to the customer amperes, 125/250 volts.
and recommend their replacement.
6. Warning:
4. Look for parts which, though functioning, show To reduce the electric shock, be
obvious signs of deterioration. Point them out to WARNING! careful to touch the parts.
HIGH VOLTAGE
the customer and recommend their replacement.
2
FinePix A201 (U/E/EG) SERVICE GUIDE TABLE OF CONTENTS
TABLE OF CONTENTS
Page
1. Names of Components
1-1.Names of External Components ............................................................................................................. 5
1-2.Names of Internal Components .............................................................................................................. 6
2. Disassembly
2-1.Removing Cabinet R ASSY ..................................................................................................................... 7
2-2.Removing LCD / LCD FRAME ................................................................................................................ 8
2-3.Removing MAIN CONST ......................................................................................................................... 9
2-4.Removing Battery holder ASSY ........................................................................................................... 10
2-5.Removing Battery cover ....................................................................................................................... 11
2-6.Removing SUB PWB ASSY / Strap parts ........................................................................................... 11
2-7.Removing LENS CONST ...................................................................................................................... 12
2-8.Removing Contact PSP ........................................................................................................................ 13
3. Adjustment
3-1.Important Point of Adjustments when Replacing Major Parts ......................................................... 14
3-2.Preparation for Adjustments ................................................................................................................ 14
3-2-1.Measuring Equipments .................................................................................................................. 14
3-2-2.Jigs and Charts ............................................................................................................................... 15
3-2-3.Connection ...................................................................................................................................... 15
3-2-4.Subject ............................................................................................................................................. 16
3-2-5.Environmental setting for Flash Adjustment ............................................................................... 16
3-3.About the Adjustment PC Soft ............................................................................................................. 17
3-3-1.Attention at DSC jig driver ............................................................................................................. 17
3-3-2.Attention at PC adjustment soft .................................................................................................... 18
3-3-3.Attention at Firmware ..................................................................................................................... 19
3-3-4.Contents of Adjustment Software ................................................................................................. 20
3-3-5.Starting the Adjustment Software ................................................................................................. 20
3-3-6.Customizing of Adjustment Software ........................................................................................... 21
3-3-7.Use of each command ................................................................................................................... 23
3-4. Adjustment
3-4-1.Procedures of the Camera Jig Mode ........................................................................................... 24
3-4-2.Using the Adjustment Program ..................................................................................................... 24
3-4-3.Battery Adjustment ......................................................................................................................... 25
3-4-4.LCD Adjustment ............................................................................................................................. 25
3-4-5.CCD defect data input ................................................................................................................... 26
3-4-6.CAM Adjustment ............................................................................................................................. 27
3-4-7.Flash Adjustment ............................................................................................................................ 28
3-4-8.End Setting ...................................................................................................................................... 28
3-5. Inspection .............................................................................................................................................. 29
4. Appendix ............................................................................................................. 30
3
Specification Components
1. Names of FinePix A201 (U/E/EG) SERVICE GUIDE
Camera Features
Superb high-quality images from the 2.0-megapixel CCD with RGB Filter and high-resolution Fujinon lens.
Maximum recording resolution of 1600 x 1200 pixels (1.92 million pixels)
Compact and lightweight body
Wide range of photography applications (includes Macro function)
Automatic scene recognition, auto white balance and AE functions built in
Automatic high-precision flash built in with extensive flash control functionality
2.5x digital zoom photography and up to 5x zoom playback functions
Easy operation using the Mode switch and 4-way " " button
Shoots movies (320 x 240 pixels without sound)
USB connection for quick and easy image file downloading (using the enclosed Interface Set)
Built-in PC Camera function
Runs on 2 ordinary AA batteries
Conforms to the new standard for digital camera file system*
* Design rule for Camera File system.
Explanation of Terms
DPOF: Digital Print Order Format
DPOF is a format used for recording information on a storage media (image
memory card, etc.) that allows you to specify which of the frames shot using a
digital camera are printed and how many prints are made of each image.
EV: A number that denotes exposure. The EV is determined by the brightness of the
subject and sensitivity (speed) of the film or CCD. The number is larger for bright
subjects and smaller for dark subjects. As the brightness of the subject changes,
a digital camera maintains the amount of light hitting the CCD at a constant level
by adjusting the aperture and shutter speed. When the amount of light striking the
CCD doubles, the EV increases by 1. Likewise, when the light is halved, the EV
decreases by 1.
JPEG: Joint Photographics Experts Group
A file format used for compressing and saving color images. The compression ratio
can be selected, but the higher the compression ratio, the poorer the quality of the
expanded image.
Motion JPEG: A type of AVI (Audio Video Interleave) file format that handles images and sound
as a single file. Images in the file are recorded in JPEG format. Motion JPEG can
be played back by QuickTime 3.0 or later.
PC Card: A generic term for cards that meet the PC Card Standard.
PC Card Standard: A standard for PC cards determined by the PCMCIA.
PCMCIA: Personal Computer Memory Card International Association (US).
White Balance: Whatever the kind of the light, the human eye adapts to it so that a white object
still looks white. On the other hand, devices such as digital cameras see a white
subject as white by first adjusting the color balance to suit the color of the ambient
light around the subject. This adjustment is called matching the white balance. A
function that automatically matches the white balance is called an Automatic
White Balance function.
4
FinePix A201 (U/E/EG) SERVICE GUIDE 1. Names of Components
1. Names of Components
1-1. Names of External Components
Mode switch
Still image mode
Playback mode
Movie mode POWER switch
Flash
Shutter button
Viewfinder window
Lens/Lens cover
Flash control sensor
Self-timer lamp (Special USB) socket
DC IN 3V (Power input)
Macro selector button socket
Viewfinder lamp
Viewfinder
button
LCD monitor DISP button
MENU / OK button
Strap mount
Tripod mount
BACK button
Battery cover SmartMedia slot
Battery compartment
5
1. Names of Components FinePix A201 (U/E/EG) SERVICE GUIDE
1-2. Names of Internal Components
R CABI ASSY
LCD
LCD FRAME
MAIN PWB ASSY
LENS HOLDER ASSY
SUB PWB ASSY
LENS CONST
F CABI ASSY
6
FinePix A201 (U/E/EG) SERVICE GUIDE 2. Disassembly
2. Disassembly
2-1. Removing Cabinet R ASSY
[Procedure]
Remove in the order indicated by circled numbers.
1. Screw x5
2. Battery cover
3. Cabi R
4. Discharge the main capacitor.
1
3
1
2
1
3
A
7
2. Disassembly FinePix A201 (U/E/EG) SERVICE GUIDE
2-2. Removing LCD / LCD FRAME
[Procedure]
Remove in the order indicated by circled numbers.
1. Screw
2. Open the LCD / LCD FRAME
3. Wire Harness & FFC
[Notes on Reassembly]
Take care to the LCD wire harness and FFC position during reassembly.
1
2
3
8
FinePix A201 (U/E/EG) SERVICE GUIDE 2. Disassembly
2-3. Removing MAIN CONST
[Procedure]
Remove in the order indicated by circled numbers.
1. Shield sheet
2. FFC
3. Screw x2, x1
4. MAIN CONST
[Notes on Reassembly]
Take care to the Shield sheet, Macro slection button and Lens lever position during reassembly.
3
1
3
3
2
A 4
"A"
" "
9
2. Disassembly FinePix A201 (U/E/EG) SERVICE GUIDE
2-4. Removing Battery holder ASSY
[Procedure]
Remove in the order indicated by circled numbers.
1. Screw x2
2. Tripod Screw
3. Battery holder ASSY
1
1
2
3
10
FinePix A201 (U/E/EG) SERVICE GUIDE 2. Disassembly
2-5. Removing Battery cover
[Procedure]
1. Shaft
2. Battery cover
1
2
2-6. Removing SUB PWB ASSY / Strap parts
[Procedure]
Remove in the order indicated by circled numbers.
1. SUB PWB ASSY
2. Strap parts
1
2
11
2. Disassembly FinePix A201 (U/E/EG) SERVICE GUIDE
2-7. Removing LENS CONST
[Procedure]
Remove in the order indicated by circled numbers.
1. Solder is removed.
2. Screw x2
3. Wire harness
4. LENS CONST
[Notes on Reassembly]
Take care to the wire harness during reassembly.
4
2
1
3
12
FinePix A201 (U/E/EG) SERVICE GUIDE 2. Disassembly
2-8. Removing Contact PSP
[Procedure]
Remove in the order indicated by circled numbers.
1. Solder is removed.
2. Contact PSP
[Notes on Reassembly]
Take care to the contact PSP angle during reassembly.
2
1
CONTACT PSP
90
SOLDER MAIN PWB
13
3. Adjustment FinePix A201 (U/E/EG) SERVICE GUIDE
3.Adjustment
3-1.Important Point of Adjustments when Replacing Major Parts
After the replacement of the LENS CONST, MAIN PWB ASSY and LCD make adjustments
that are marked 'O' in Table 1.
Battery Adj. LCD Adj. CCD data input Cam Adj. Flash Adj. End setting
LENS CONST O O O*1 O
MAIN PWB ASSY O O O*2 O O*1 O
LCD O O
Table 1
*1:Please do the Flash adjustment after completing the CAM adjustment.
*2:When MAIN PWB ASSY is exchanged, the CCD's defective data will be lost. Therefore, you have to
remove Flash_ROM IC(IC212) from defective MAIN PWB ASSY. And then, you have to exchange
Flash_ROM IC(IC212) of new MAIN PWB ASSY to a Flash_ROM IC you removed before you replace
MAIN PWB ASSY.
3-2.Preparation for Adjustments
3-2-1.Measuring Equipments
Names Remarks
Stabilized Power Supply
Pattern Box Comparable to the PTB450 or equivalent
Waveform Monitor For inspecions
Digital Voltmeter
Personal Computer DOS-V (PC-AT) / OS:Windows98
Brightness meter LS-110 (Made by Minolta) or equivalent
Color meter COLOR METER 3F (Made by Minolta) or equivalent
14
FinePix A201 (U/E/EG) SERVICE GUIDE 3. Adjustment
3-2-2.Jigs and Charts
Product / Model Parts No. Usage Remarks
Filter LB140 (HOYA) ZJ00006-100 Adjustment Common with DX--9,DX-7,DS-7
LCD Adjustment Card (SSFDC) ZJ00433-100 Adjustment Common with FinePix2300 (Note1,2)
Power Cable Jig ZJ00214-100 Adjustment Common with DX-10
Gray Chart ZJ00254-100 Adjustment Common with MX-700
DSC jig driver ZJ00476-100 Adjustment Common with FinePix4900 (Note2)
FinePix A201 PC adjustment software ZJ00510-100 Adjustment Custom software (Note2)
AC Adaptor (AC-3V) ----------------- Adjustment Accessories
USB Cable ----------------- Adjustment Accessories
CD-ROM ----------------- Inspection Accessories (CD-ROM)
(Note1) : The image contents included on the standard card are as shown below.
(Note2) : Please download them from the web server (http://fujifilm-di.intranets.com/).
File Name Image Contents
DSC00001.jpg 75% Color Bar
DSC00002.jpg Monoscope
DSC00003.jpg Full White
DSC00004.jpg Full Black
DSC00005.jpg Brightness Adjustment Chart
DSC00006.jpg Natural Picture
3-2-3.Connection
USB CABLE
DC IN BATTERY JIG
FinePix A201
PC
DC 3V
Regurated power supply
Connection
15
3. Adjustment FinePix A201 (U/E/EG) SERVICE GUIDE
3-2-4.Subject
Set up the camera and the pattern box inthe positions shown in the figure below.
Where the adjustment setting for the subject is "Not required",the adjustment will have no effect regard-
less of what is photographed.
For adjustments where an all-white pattern or coior bar chart is specified as the lens assembly and the
subject,adjust the distance between the camera and the subject as shown beiow.
Remove the chart from the pattern box and adjust the distance between the camera and the pattern box
so that the entire screen in white.
1. Brightness:160+-5cd/m2
Pattern box center with no chart and filter LB140
Minolta LS-110 Luminance Meter
2. Color temperature:6100+-50oK
Pattern box center with no chart and filter LB140
Minolta COLOR METER 3F
45+-5mm
LB140 FILTER
PATTERN
BOX
FinePix A201
Subject
3-2-5.Environmental setting for Flash Adjustment
1. When adjusting the flash, it is easy to be influenced by external light, so be sure to perform the adjust-
ment in an environment that satisfies the following conditions.
2. In order to eliminate the influence of external light, make the area around the gray chart as dark as
possible.
3. The distance between the gray chart used during the flash adjustment and the camera should be 100cm.
100cm
FinePix A201 Gray Chart
Focus
16
FinePix A201 (U/E/EG) SERVICE GUIDE 3. Adjustment
3-3.About the Adjustment PC Soft
3-3-1.Attention at DSC jig driver
FinePix A201 uses the USB cable to communicate with the personal computer.
When FinePix A201 adjusted, the installation of the DSC jig driver is necessary.
The download, decompression and installation procedure is recorded as follows.
[Download and decompression]
1) Download the compressed DSC jig driver from Web server (http://fujifilm-di.intranets.com/).
2) Defrost the downloaded compression file.
(Note)
The DSC jig driver in this server is compression file of ZIP form.
Therefore, after downloading this compression file from the Web server, the decompression of the file is necessary.
In the decompression software, if the decompression of the ZIP form can be done, any software is OK.
Please prepare each one for the decompression software.
[Installation]
1) The unzipped DSC jig driver (ZJ00476-100) folder is opened.
2) Please double-click the "Setup.exe", start the installation of "FUJI FILM DSC jig driver".
3) "FUJI FILM DSC jig driver" is installed according to the instruction of the screen .
Note: If the FUJI FILM digital camera (example FinePix4900zoom) has already been repaired, the installation of
the DSC jig driver is not necessary.
check a install folder
click
click
1st step (start the installation) 2nd step (install folder)
click click
3rd step (install) 4th step (Finish)
17
3. Adjustment FinePix A201 (U/E/EG) SERVICE GUIDE
3-3-2.Attention at PC adjustment soft
This adjustment software can perform adjustments to each block using the user program ( Fx_A101.ff) in the base
program (FFW.exe). A basic program is FinePix A101 exclusive use.
The download, decompression and installation procedure is recorded as follows.
[Download and decompression]
1) Download the compressed PC adjustment software from Web server (http://fujifilm-di.intranets.com/).
2) Defrost the downloaded compression file.
(Note)
The PC adjustment software in this server is compression file of ZIP form.
Therefore, after downloading this compression file from the Web server, the decompression of the file is necessary.
In the decompression software, if the decompression of the ZIP form can be done, any software is OK.
Please prepare each one for the decompression software.
The decompression and the preservation method of the PC adjustment software are described as an example of
FinePix2300.
As the PC adjustment software is different in each model, the compression file name is also different.
Specify the preservation drive for C drive if it is decompression software which can specify the preservation drive.
Similarly, defrost without making a new folder if it is decompression software that can be defrosted without making
a new folder.
Defrost simply if the decompression software which you cannot specify the drive specification and the folder mak-
ing.
[Install]
1) When the decompression is only done, the folder named ZJ00481-100 is automatically made.
2) Copy the folder named FinePix2300UE in this folder in C drive, installation is finished.
The folder of ZJ00481-100 becomes unnecessary at the end , and delete this folder.
My Computer My Computer
31/2 Floppy [A:] 3 1/2 Floppy [A:]
[C:] [C:]
ZJ00481_100 ZJ00481_100
FinePix2300U E FinePix2300U E
1st step (Decompression) 2nd step (Finish)
(Caution)[Important]
*: PC adjustment software can not start when there is folder of FinePix2300UE in folder
named ZJ00481-100 (Fig.3-5).
*: Please preserve the folder of FinePix2300UE right under C drive (Fig.3-6).
*: Please do not change the folder named FinePix2300UE.
*: PC adjustment software can not start when folder name is changed.
18
FinePix A201 (U/E/EG) SERVICE GUIDE 3. Adjustment
3-3-3.Attention at Firmware
The firmware is not needing downloaded as long as there is usually no instruction.
[Download and decompression]
1) Download the compressed firmware from Web server (http://fujifilm-di.intranets.com/).
2) Defrost the downloaded compression software.
3) The folder named ZJ00482-100*1 can be made by simply defrosting .
4) The imfidx10 folder is included in the folder (ZJ00482-100).
5) The imfidx10 folder is copied onto Smart Media (more than 4MB, 3.3V).
(Note)
*1: The decompression and the preservation method of the firmware are described as an example of FinePix2300.
Firmware in this server is compression file of ZIP form.
Therefore, after downloading this compression file from the Web server, the decompression of the file is necessary.
In the decompression software, if the decompression of the ZIP form can be done, any software is OK.
Please prepare each one for the decompression software
As the Firmware is different in each model, the compression file name is also different.
My Computer
3 1/2 Floppy [A:]
[C:]
ZJ00482_100 5)
imfidx10
(Caution)[Important]
*: Download should use Smart Media.
*: Please format Smart Media with the camera.
*: When the folder named imfidx10 is changed, the firmware cannot be downloaded.
19
3. Adjustment FinePix A201 (U/E/EG) SERVICE GUIDE
3-3-4.Contents of Adjustment Software
This adjustment software consists of 6 adjustment programs.
[F1] Battery adjustment
[F2] LCD adjustment
[F3] CCD data input
[F4] CAM adjustment (U/E-Model)
(Shutter,CCD sensitivity,Movie offset,White balance,6dB up, and AE)
[F5] CAM adjustment (EG-Model)
(Shutter,CCD sensitivity,Movie offset,White balance,6dB up, and AE)
[F6] Flash adjustment
[F8] END setting
3-3-5. Starting the Adjustment Software
Procedure
1) Double click on `FFW.exe'. The "User Program Selection" dialog box will be displayed.
2) Select the user program `Fx_A201.ff'.
3) If the user program is selected, the "Error" dialog box is displayed, but click on "Yes."
4) The "FFW.exe(0)" dialog box will be displayed.
5) Please refer to the next paragraph for customizing software for the adjustment.
FinePix_A201
File Edit View Go Favorites Tools Help
Fx_201.ff
SU290WB.dat
SU291WB.dat
Yes No
11 object[s] selected My Computer
FFW.exe Error
Fx_A201.ff
FinePix A201 PC adjustment software
Procedures of the camera jig mode.
1) Please set the mode dial to [CAM] mode.
2) Please set the lens position to [INF].
Look in: FinePix_A201
3) Please input 3V from DC-IN Jack.
Fx_A201.ff 4) Please connect the USB cable.
5) Please open the battery cover.
Please put in LCD adjustment card (SSFDC)
when you adjust LCD adjustment.
6) Please holding down the [Release] button,
them trun on the camera.
Fx_A101.ff Open 7) When a green lamp on the side of the finder lights,
File name:
please press the [Enter] key!
File of type: Cancel
Open as read-only
User Program Selection FFW.exe(0)
20
FinePix A201 (U/E/EG) SERVICE GUIDE 3. Adjustment
3-3-6.Customizing of Adjustment Software
Customizing for the adjustment software is
explained below.
3)
1.Compiles
Procedure
1) Click on Mode Setting from the basic software
program's menu bar. The "Customize" dialog box
will be displayed.
2) From the "Customize" dialog box, select "Compile."
3) Click the Select User Program button, then select
the file `Fx_A101.ff'.
4) Click the Select Editor button, then select 4)
`Write.exe.'
Compile
2.EVR
2)
Procedure
1) Select "EVR" from the "Customize" dialog box.
2) Conditions
etc(-V2) Check
LANC page check Check
EVR
3.Hardware
2)
Procedure
1) Select "Hardware" from the "Customize" dialog
box.
2) Conditions
Etc 7 Segment (-7)
Debug Mode Ignore Focus I/O
Hardware
21
3. Adjustment FinePix A201 (U/E/EG) SERVICE GUIDE
4.Other
2)
Procedure
1) Select "Other" from the "Customize" dialog box.
2) Select the "Other Conditions" setting.
3) Conditions
Auto measurement count 0
Don't show OK/NG Check
5.Save
Other
Procedure
*: If all the settings have been completed, be sure to click on the "Apply" button and save the settings.
*
Save
Cautions when making adjustments
*: When all customizing ends, "FFW.exe" is ended once. Please restart "FFW.exe".
*: After adjustments are completed, turn the camera's power switch Off and finish with the
adjustments.
*: If the "NG" message appears and you stop the program during the PC adjustments, turn
the camera's power switch OFF one time, then carry out the adjustment again.
22
FinePix A201 (U/E/EG) SERVICE GUIDE 3. Adjustment
3-3-7.Use of each command
An explanation and the use of each command when it changes the user's program.
Fx_A201.ff
Menu Command Content
Operation Start General operation command (starts the user program).
Stop General operation command (ends the user program).
Halt General operation command (Halts the user program temporarily).
Step 0 Do not use this command.
Exit General operation command (Closes the user program).
Program Re load Reloads the user program (*.ff).
(Be sure to reload the user program after editing.)
Select Selects the user program (*.ff).
(Selects `sj8.ff' when selecting the user program.)
Edit Edits the user program (*.ff).
(Use this when it is necessary to edit the user program.)
Data ad[] Do not use this command.
rd[] Do not use this command.
SW Do not use this command.
fsw Do not use this command.
EVR Do not use this command.
Mode File Recording Do not use this command.
NGSTOP Stops the program if an adjustment is NG.
STEP Do not use this command.
LINE Do not use this command.
AUTO Do not use this command.
Setting OKNG clearr Do not use this command.
Customize Performs setting of each mode.
Auto Adjustment Performs `Auto Adjust' settings in the user program.
Help Help This command cannot be used.
Help (FF) This command cannot be used.
FOCAS This command cannot be used.
Version Version information on the basic software.
It is possible to edit the user program, but it is possible that trouble could occur after changes are
made. So, please do not edit program unless instructed to do so.
23
3. Adjustment FinePix A201 (U/E/EG) SERVICE GUIDE
3-4.Adjustment
3-4-1.Procedures of the Camera Jig Mode
Procedure
1) Please set the mode dial to [CAM] mode.
2) Please set the lens position to [INF].
3) Please input 3V from DC-IN Jack.
4) Please connect the USB cable.
5) Please open the battery cover.
(Please put in LCD adjustment card (SSFDC) when you adjust the LCD adjustment.)
6) Please holding down the [Release] button, them trun on the camera.
7) When a green lamp on the side of the finder lights, completely camera jig mode.
Important Notes
* When connected to a personal computer while in the camera jig mode, the camera is not
recognized as a removable disk.
* The camera's power switch does not work while in the camera jig mode. If a problem
occurs during adjustment, switch off the power by disconnecting the DC jack. To switch
on, reconnect the DC jack, then switch on the power to the camera.
* To quit the camera jig mode, use [End Settings] in the adjustment program.
3-4-2.Using the Adjustment Program
Procedure
1) Once the initial settings of the adjustment software have been completed, end "FFW.exe" and start
"FFW.exe" once again.
2) Follow the instructions on the screen to set the camera to jig mode.
3) Press the [Enter] key and follow the instructions to make each of the adjustments using the menu
screen.
Fx_A201.ff Fx_A201.ff
Firmware Ver.= 206
FinePix A201 PC adjustment software FinePix A201 PC adjustment software
Procedures of the camera jig mode.
[F1] Battery adjustment
1) Please set the mode dial to [CAM] mode. [F2] LCD adjustment
2) Please set the lens position to [INF]. [F3] CCD data input
3) Please input 3V from DC-IN Jack. [F4] CAM adjustment
[F5] Flash adjustment
4) Please connect the USB cable. [F8] End setting
5) Please open the battery cover.
Please put in LCD adjustment card (SSFDC) [Q] Quit
when you adjust LCD adjustment.
6) Please holding down the [Release] button,
them trun on the camera.
7) When a green lamp on the side of the finder lights,
please press the [Enter] key!
Program start screen Menu screen
24
FinePix A201 (U/E/EG) SERVICE GUIDE 3. Adjustment
3-4-3. Battery Adjustment
Procedure
1) From the adjustment item menu, press [F1] and
Fx_A201.ff
select Battery adjustment.
Battery adjustment
2) The voltage does a remote sense and notes
that it does not cause the voltage descent.
3) Inputs each voltage from the DC-IN Jack and
battery jig according to the instruction of the
adjustment software.
Page Address Data
Please input 2.05+-0.01V from DC-IN Jack.
5 03h (BATT_PREEND) 5Eh - 7Eh
Press the [Enter] key, start to the adjustment.
04h (BATT_END) 57h - 77h
Battery adjustment
3-4-4. LCD Adjustment
Procedure
1) From the adjustment item menu, press [F2] and
select LCD adjustment.
2) The image for the LCD adjustment is displayed
according to the instruction of the adjustment
software.
3) The brightness of a right and left gray bar is
adjusted according to the instruction of the
adjustment software.
Gray ber
Fx_A201.ff Fx_A201.ff
LCD adjustment
1) The LCD brightness adjustment image is selected.
Forward image : Right key (Arrow)
Reverse image : Left key (Arrow)
2) To display the step in the right and left gray bar,
the LCD brightness is adjusted.
LCD brightness to bright : UP key (Arrow)
LCD brightness to dark : DOWN key (Arrow)
Ajastment data = 7E
Complete the LCD brightness, press [Enter] key. LCD adjustment end.
Press the [Enter] key, return to the menu screen.
LCD adjustment Complete of LCD adjustment screen
25
3. Adjustment FinePix A201 (U/E/EG) SERVICE GUIDE
3-4-5.CCD defect data input
* This adjustment is "CCD defect data input" according to the data of "CCD defect data FD".
Procedure
1) From the adjustment item menu, press [F3] and select CCD defect data input.
2) Insert the "CCD defect data FD" included with LENS CONST into the disk drive.
3) Once the preparations have been completed, press the [Enter] key on the PC.
4) Once the file selection dialog box appears, select the damaged data with "********.dat" and click
[Open].
5) CCD defect data input is performed.
Fx_A201.ff
Select file
Look in: 3 1 / 2 Floppy [A:]
N00000697506F1.DAT
Please insert CCD defect data disk in drive.
Press the [Enter] key when it is possible to prepare.
File name: N00000697506F1.DAT Open
File of type: All Files [*.*] Cancel
Open as read-only
Insert the CCD defect data disk screen File selection dialog screen
Fx_A201.ff Fx_A201.ff
Number of defect data (still) (hex) = 33
Number of defect data (movie) (hex) = 0B
Press the [Enter] key. CCD defect data input end.
Press the [Enter] key, return to the menu screen.
CCD defect data input screen Complete of adjustment screen
26
FinePix A201 (U/E/EG) SERVICE GUIDE 3. Adjustment
3-4-6.CAM Adjustment
Cautions during adjustments.
1.Set the camera and light BOX. Refer to "3-2-4.Subject".
2.When it adjusts camera system, it is necessary to finish CCD defect data input.
Procedure
1) From the adjustment item menu, press the [F4] or [F5] (*1) key and perform CAM adjustment.
2) The adjustment begins according to the instruction of the screen when setting necessary for the cam-
era system's adjusting it ends.
(*1) The method of distinguishing each model.
The lens is confirmed, and each model is distinguished.
The [F4] key is pushed and the cam adjustment is started for the U/E-model.
The [F5] key is pushed and the cam adjustment is started for the EG-model.
U/E-model
EG-model
Fx_A201.ff Fx_A201.ff
CAM adjustment of the U/E-Model begins.
The model is confirmed by the shape of the lens.
Is the model correct ?
[Y] ---> Yes
[N] ---> No
CAM adjustment end.
Press the [Enter] key, return to the menu screen.
CAM adjustment screen (U/E-Model) Complete of CAM adjustment screen
27
3. Adjustment FinePix A201 (U/E/EG) SERVICE GUIDE
3-4-7. Flash Adjustment
Cautions during adjustments.
1.Set the camera and gray chart. Refer to 3-2-6, Environment Settings for Flash Adjustment
2.In the flash adjustment, carry out the adjustments by making the surrounding area dark
so that there will be no influence from external light sources.
Procedure
1) From the adjustment item menu, press the [F6] key and perform Flash adjustment.
2) The adjustment begins according to the instruction of the screen when setting necessary for adjusting
flash ends.
Fx_A201.ff Fx_A201.ff
Flash adjustment Flash adjustment
Please set lens position to [INF].
Please set gray chart 100cm from Lens. Charge - luminescence (1st time) = 23
Press the key when it is possible to prepare. Charge - luminescence (2nd times) = 24
Charge - luminescence (3rd times) = 24
Average value(hex) = 24
Correction value = 3
Press the [Enter] key.
Flash adjustment screen Complete of Flash adjustment screen
3-4-8.End Setting
Note: After end settings, the system is not in the camera jig mode.
To perform further adjustment, first enter the camera jig mode again.
Procedure
1) When all adjustments have been made, press the [F8] key and perform End setting.
2) Follow the on-screen instructions on the PC and select the [Model ID] and [Repair Base ID].
Fx_A201.ff Fx_A201.ff
USB ID
The model is selected from an undermentioned list.
FinePix A101 U-model
FinePix A101 E-model
FinePix A101 EG-model
Please remove DC-IN Jack.
Press the [Enter] key, ALL adjustment end.
Model ID input screen End of adjustment screen
28
FinePix A201 (U/E/EG) SERVICE GUIDE 3. Adjustment
3-5.Inspection
*: Using the PC, verify that the FinePix A201 is recognized as a removable disk.
*: Carry out general operation in accordance with the instructions in the user's manual,
confirming that there are no problems.
29
4. Appendix FinePix A201 (U/E/EG) SERVICE GUIDE
4. List of Related Technical Updates Issued
To ensure that after-sales srevice is performed accuratety, keep a record here of the technical updates
issued that cover this device.
Technical Update No. Date Title Details/Other
30
FUJI PHOTO FILM CO., LTD.
26-30, Nishiazabu 2-chome, Minato-ku, Tokyo 106-8620, Japan.
◦ Jabse Service Manual Search 2026 ◦ Jabse Pravopis ◦ onTap.bg ◦ Other service manual resources online : Fixya ◦ eServiceinfo