Service Manuals, User Guides, Schematic Diagrams or docs for : HP printer HP LaserJet 1 1D II IID III IIID IIP IIP Plus IIIP 2000
<< Back | HomeMost service manuals and schematics are PDF files, so You will need Adobre Acrobat Reader to view : Acrobat Download Some of the files are DjVu format. Readers and resources available here : DjVu Resources
For the compressed files, most common are zip and rar. Please, extract files with Your favorite compression software ( WinZip, WinRAR ... ) before viewing. If a document has multiple parts, You should download all, before extracting.
Good luck. Repair on Your own risk. Make sure You know what You are doing.
Image preview - the first page of the document
>> Download HP LaserJet 1 1D II IID III IIID IIP IIP Plus IIIP 2000 documenatation <<
Text preview - extract from the document
,...,..,.
.
Back to Welcome
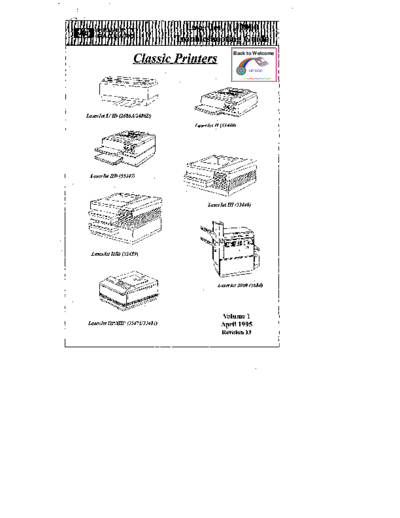
Classic Printers
HP DOC
La.er.kt II (33440)
LaserJet ILD (3344~
LaserJd III (33449)
LaserJ@ IIID (33459)
LaserJ& 2000 (2684)
Volume 1
La.wrJet
IIMUIP (33471/33481) April 1995
Revision 13
Notice
Tbisdoeument SmIercedes allmeviousrevisions of the LaserJet/JumboJet
`fkoubleshoothw Guide.
The information contained in this document is subject to change without any
notice.
Nopsrtofthisdocumentmay bephotocopied,reproduced, ortramdatedtithout
the prior written consent of Hewlett-PackardCompany.
Editor
-
Bob Edwards, UK Response Centre
iipti 1995
Revision 13
TheClassicLaserJetTroubleshootin~ Manual
Contents Pa~e-Section 1
Contents
Introduction
Othemsejidbooti, videos,etc
LaserJetProductHistory
Gmnom%sg"necross-r@rencemabix
PCLlevels
PaperRelatedPmblems /PaperTroubleshooting
Paper''Pounds(lbs)toOrams equivalencetable
PaperSkew&Registration Specifications.
TonerCartridgeTroubleshootingProcess.
TonerCarhidgeProdnctnumber& Weight
TonerCurtridgelije
TonerCbrti"dgeLijeeqectamyinpages
Toner(lmtridgeshel
fife
TonerCar&idgelotcodeordatecodedecoding
EnginetestwithFormatterPCA de-installed
Ha&e&testpowerdompmcedure
I/OCableMonnation
SerialCables connectedtoPCsor3000/9000hosfi
HP9000RJ45114Kx cablescon@wation.
Cor@qningHPLaserJetson HP3000
HP3000Tenn-T~e information
DataTfansfer Rates(Serial&Parallel)
NovellNetworks- 23I/ONotReadyTroubleshootig
XOJetDirect''StatusPage"
Jet'Iest-TheCELaserJetConfidemceTestTool --
1-1
The Classic LaserJet TroubIeshootinp Manual
Contents Pave - Section 2
2-1
The Classic LaserJet Troubleshooting Manual
Contents - Section 3
Booklet Organisation
Service Notes;
SXEngine Re~rbishment Kits;
Service Test Tool;
Power Supply /Error 12 Troubleshooting Flow Diagram.
Faults with Error Nnmbers.
Miscellaneous Problems.
Print Quality Problems.
Paper Path Problem.
PostScript Problems.
Manual Paper Feed Problems.
LJIIIIIID Powered Envelope Feeder Problems.
!
3-1
The Classic Laser.Tet Troubleshooting Manual
Contents Page - Section 4
4-3 Booklet Organisation & Service Notes
4-5 Faults with Error Numbers
4-7 Miscellaneous Problems
4-11 Print Quality Problems
: 4-17 Paper Path Problems
,,
,,,
,: 4-18 Optional Paper Tray Problems
" :'4-19 PostScript Problems
4-1
5-1
W mauurd is designed to help CE'Sand Cd @ersrntbeir gosl ofproviding data
to help quic~resolve LaserJet or JuruboJetproblems. Most oftheproblems cfied are tidts
that have actually occured in the field and many ofthese may not be included m any service
Lusnusl.
This book (Volume 1) ticludes all the classic old LaserJets and the LJ2000. These are
Iistedbelow
2686A LaserJetI
2686D LaserJetLV
33440 LaserJetII
33447 LaserJetILD
33449 LaserJetIII
33459A LaserJetIID
33471 LaserJetIIP
33481 LaserJetflLP
2684~D LJ2000
LaserJets manufactured and introduced afierthose above will appear m latervolumes.
Volume 2willrnclude LJ4, LJ4plu~ LJ131S~4S~ LJ4L, LJ4P, LJ4V, ColorLJ and the C30
printers. This shodd be available by May 95.
Other UsefulBooks/Etcto Usein~oubIeshooting Process:
* HP herJet Reference Guide (Green Book).
* HP LurerJetFamily Quick R#erence Service Guide (5961-071 6; Pocket Book)
* HP 2686A/2686D Combined Service Manwl (02686-90920) [1]
* HP 33440& 33449 Combined Service Manual (33449-90906) fl]
* HP 33447&33459 Combined Service Manual (33459-90906) 11]
* HP 33471&33481 Combined Service Manual (33481-90951) Ill
* HP 2684A/P/D Sewice Manual (02684-90903) II j
* Paper Specl~cation Guide (5002-1801)
* Paper Specification Video (PAL 5961-0712) @TSC 5961-071 1)
[1] Note: ~ese mti maybe out ofproduction
1-3
Product Histom
p ,y:$- ) ?2<. y:.?~i+$j?
t
%*y: ,,,,,,,,.!+,,,,, *
~%%&i:. ,,,,.,LI "vi'
r. EB*< %is~:wik: . .... . .....! :$*&k %i!iil%:$w;
,,.!
2686A (LJI) 1984 Sprout 8 3 IOK
2686A+ (LJI+) 1985 Sprout + 8 4 10K
2686D ~) 1986 Sprout-D 8 4 15K
33440 (m) 1987 BUD 8 4 12K
2684A/P/D (LJ2000) 1987 JumboJet 20 4 lOOK
33447 (LJllD) 1988 BUD-D 8 4 16K
33471 (LJIIP) 1989 Spud 4 4 6K
33449 (LJ131) 1990 Galaxy 8 5 16K
33459 (L.nllD) 1990 @w-D 8 5 20K
33481 (LJB3P) 1991 Challis 4 5 8K
C2007A(LJIIP+) 1992 Suabearn 4 4 8K
Cannon En@nes
m+ C2007A mP-M
m 33481A LBP-LX
IaD 33459A LBP-RX
m 33449A LBP-SX
m 33471A LBP-LX
IID 33447A DP-RX
E 33440A mP-sx
ID(500+) 2686D LBP-CX
1+ 2686A+ LBP-CX
I 2686A mP-cx
2000 26S4AtPfD LBP-20
1-4
PCL Levels
AllHPLaserJetsuseHewlett-PacdcardsPrinterCommandLanguage(PCL). Wbringsall
tkeseprintersuuder a common and consiient control Stru-e whichti ensure compatibtity
tiomonepriuterto snother.
mere are 5 PCL levels that exi~ at the time of assembling this book. Each higher level
supercedesthe previous leveL Iffor instance aLJI were sent kigherlevel PCL commands, such
astkoseused with a LJ4, tiese wotidbe ingnoredbytke LJI. Seetablebelow forPCL strutie:
I
Simple print& Space HP wet
HP@etJet
Plus a vari~ of fore, HP2932/34 dot matrix
paper sizes &Margin HP 256x impact printers
controL
Plus proportional spacing, HP DeWet fkmily
bolt italics &merged HP2235ARuggedwriter
text and ~apkics. hserJetI
Plus additional pornt HP LaserJetI+ /ID
sizes & ~efice~ down- HPLaserJetII
Ioadable sofi-fonts, HP LaserJet 2000
electronic forma &
~ading.
Plus scalable typetices, HPLaserJetIIIfami~
enhanced page formatting, HP DeskJet 1200C
~-GL/2 forfkstvector
grapkics printing.
Plus support for 600dpi LaserJet 4family
\ ptiters, enhanced vector
graphics improved data
compression.
I
I
1-5
LaserJets & Paper Related Problems
Paper related problems are probably the most common fault that HP cuwomer
n@-s hiwe to resolve. Most customers never really consider how important paper is to
nsure LaserJet printers perform we~ free of paper jams and print quality problems.
This section provides guide lines for the CE to follow ifpaper is suspected to be to be
le customers problem
-
Note This is apaper relatedpbm such as Paperjams, creasing,
aper t~n"ng, feeding where media quality could be an
, Define
ath Pbm? issue. Does Paper meet Paper Spec 'sGuide?
` Problem
Y
Note: Although HP does not recommend a specl~c
eti WhhXero paper, Xerox 80 (Europe Only) has been found to
80grm Premier operate very well with HP LaserJet Printers.
% r
TY Note: Inform customer there w well be a p~er quality
p~oblem still, ask them to ~seXerox 80 ~pbrn -
returns, z~ OK advise the use of high qualiy Laser
paper to resolveproblem.
OK? y
+ N
~otc Doespaperconform to paper spec guide(5002-
1801) ? It is the customers responsibili~ to ensure
paper confoms topaper spec's. It is also their
responsibility testpaper thoroughly b~ore
purchasing in quanti~.
Note Escalation may be appropriate depending oz
the situation. If theproblems arepaper
related dismss isme with your local DM &
RCE. Remember z~thepbms are causel
Etite bypoor quali~paper the ONLY
course of action isfor the customer to
use high quali~ laserpaper to resolve their
problems.
Pneither warrants or recommends the use a particular paper. Media properties are subject to
snge by tie msnticturer & HP has no control over this. me customer assumes all responsi-
ties for the quality &performance of media. me customer should ensure the paper meets
cc'sin paper spec guide and then test m quantity to satisfy themsehes the media operated
>11 the LJ.
m
1-6
CE `sActions if Paper Problems are Suspected:
1. Ensure a High Quality Laser paper is taken on site (Xerox 80 grm Premier); do NOT leave
m car ovemi@t.
2. Take a copy of the paper spec guide (5002-1801) to @e to customer. Ensure your local
office has a quan~ to use for this purpose. Does Paper meet Paper Spec's Guide? Does
media come under the heading of "Papers likely to cause problems or papers to avoid"?
3, Ifpaper ia suspected use "HOWDiagram" to help isolate problem,
4. Keep customer involved at all times, explarn how important paper is for correct operation
of their printer.
5. Use HP LaserJW Reference Ouide (Knowu as Oreen Book) paper section for fiuther media
information. There is a paper suppliers list in this section that customer maywisb to try.
6. Show Paper Video to customer, inappropriate, this will help them better appreciate the
importance of paper when used in ~ LaserJet printers. (596 1-0712 PAL formst) or
(5961-071 1 NTSCformat)
Factors that Contribute to paDerPath & Print C)ualitvProbIems:
* Does the media meet the Paper Spec's outlined m Paper Spec Gnide(5002- 1801)?
*Is the customers media m good contilon, damage~ bent, skew, wriukled or "Dog Eared"?
* Are media haadling practices beiag observed (loading paper, removing Paper Jams)?
* Has the media customer is having problem ever worked?
* Is media berng conditioned before use? Media WST stabliae m a normal office
enviroammt for a minimum of 24hr.
* Check the follotig m the printer operating entionment
- Temperature (best between 20 to 24C)
- Humi@ (Beat between 45% to 55%)
- SunJightExposure.
- Clearriness
Media Likelv to tive Paner Related Drob]ems:
HP cannot stop customers using any partiti paper, but certain paper will give more
frequent paper jam or paper path problems. Some of these are:
*Paper too thin or too thick (see caliper inpaper spec `s)
*Extremely Shiney or Glossy media.
* Recycledpaper that has not be spec `edfor LaserJetpn"nters.
*Multi-patifom.
*Media tkat is damaged, curled, wrinkled, ot of an irregrdar shape.
*Papers that do not conform to A4, Letter, etc sues md may be loose or too tight in
paper trays.
*Interleaving dl~ment types of media.
*Paper withpevorations
* Some coatedpapers.
1-7
* Colouredpapers
*Papers too smooth or too rough (See She@eld in paper spec `s)
*Papers too dry or too moist
*Paper with embossed headers
* Two-sided or Duplex printing on a Non-Duplexpn"nter.
*Paper that ha been refed into paper tray, could befrom aphoto-copier.
* Prepn"ntedPapers using low temperature inks or inti thatproduce hazardous
emissions.
*Labels, transparencies or envelopes that do not meet paper spec `s.
* tiels MUST cover entire backing sheet with NO gaps which expose adhesives to M.
*Envelopes with openjlaps with adhesive exposed.
*Envelopes with clasps, snaps, tie strings, windows or~nthetic maten"als
*Envelopes with baggy construction orfolds that are not sha~.
Pounds to Grams EauivalenceTable
161bs = 60grtisquare meter
201bs = 75gmma/squsre meter
241bs = 90gratisquare meter
281bs = 105grams/square meter
361bs = 135@square meter
1-8
Paper Skew &Registration Specifications
The skew and registration specifications for some of the models in the HP LaserJet
Family are@enbelow. Pleasenotethatthe LJ2000 regiater(A4 &Letter) paperfiomthelong
edge, all other W LaserJets are from the short edge. ~esefi~res assume a sheet of paper
with 4 right-angle corners.
J
4Y
I
Skew (v- z)
The skew tolerance for all HP LaserJets is Printable
1.5mm (0.06m) along the (lefi-hand) len@, Area
~e. over a distance of 260mm (10.25rn)
2
/~
lb
PaDer RWstration Suetilcations
Re@strationconcemsthepostilon oftext ontiepaper.
I I
LeadingEdgeofpaper Lefiedgeofthepaperto
to first horiz. dot row the firstverticaldot row
I 8.Omm+/- 2.Omm (x)[l] ?? ??
II 5.0mm+/-2.5mm (X) 4.Omm+/-2mm(y) 4.7mm+/-2mm(y)
IID 4.2mm+ /- 2.5mm (X) 4.2mm+/-2mm~) 4.2mm+/-2nnn(y)
III 5.Omm+/-2.5mm (X) 6.Omm+/-2mm(y) 6.4rmn+l - 2rmn (y)
IIID 4.2mm + / - 2.5mm (X) 6.Omm+/-2mm(y) 6.4mm+/- 2mm (y)
IIPflIP+/IIIP 3.omm+/- l.omm (x) 5.Omm+/-2mm@) 6.Omm+/- 2mm (y)
2000 6.0mm+ /- 2.5mm (X) 4.25rnm+ /- 2mm(y) 4.25mm+ /- 2mm(y)
[1] This is measured using a Self-Test page.
Note: The LaserJet ItP / IIP+ / IIIP and the 2000have a setice adjustment for the top
-gin (leafig edge of paper to fiat hotiontal dot row.) These can only be accessed by
service personnel and ahotid only need adjustmmt when the DC Controller PCA is replaced.
1-9
Toner Cartridge TroubIeshootin~ Process
When Troubleshooting problema such as Print Qu~, Paper Jams or Gear Noise
complaints, it is well worth considering the Toner Cartridge. In partidar ifnon-HP Toner
Cartridges are use~ tkese are kuown to give a greater frequency of problems and can easily
lead to c~omer dissatisfaction.
Please note thatHP does not recommend the use of non-HP Toner Cartridges. The
reasons are cited rnthe HP policy statement wkich can be found in the HP LaserJet Reference
Guide (Green Book) section 5.
Wken Troubleakooting please use the flow diagram below to help decide ifthe Toner
Cartridge is the cause of the problem This can be especiallyuse~ to Call Qualifiers.
No*. In some circmnatauces customers may believe the
Get briefdescription toner cartridges are HP. Also in a very fw case~there are
ofproblem. Deter- non-HP cartridge boxes designed to look like HP Toner
mine if HP or non- Cartridges and deceive. ENSU~, wherepossible, customer
HP Toner Cartridges or CE useHP Toner cartridges to diagnosepoten~"onal
are used. toner cartridgeproblems.
Determine exact
Probkrms fiat Toner Cartn"dgescanpotentionally cause are:
nature of problem
* Paper Jams
* Print Quality
- Repetitive marks acrosspage
- LineslBmds downpage
- Compression &Elongation ofcharacters.
-FaintPnnt
- Ghosting images
- Background
* Gears Noises?
* Error4 1/51
* Error 41.5( LJ3/4Si)
* Toner Dumping or leaking
* Toner runs out quickly (Toner Low)
* Short Toner Cartridge life
*Main Motor Errors (e.g. Error 57 LJ3/4Si)
Note: If problem is sbnilar to above, before embarking on
replaa"ng major LJ assemblies, try replacing tie Toner Car-
tridge. It is quick and ea~ to replace.
Y Note Did you itdtkdly dia~ose natnre of problem
incorrectly? Revisit, determine exact problem again.
1-1o
Toner Cartright Product Numbers& Weiyht
11/m) /m/lJJD 92295A EP-S 1375-1325gm l140-lo90gm
48.4- 46.60z 40.1- 38.40z
W/m+/m 92275A EP-L looo-950gm 825-775gro
35.2- 33.40z 29- 27.30z
I/lD 92285A EP-c 1550gm 1320grn
54.30Z 46.20z
2000 [1] [2] 92282A na na na
Note [1] Box contains WO 0.5 Kilogram bags
[2] ThisEP Drnmhas a P/N = R44-0230-OOOCN
Toner Cartridge Life
Tke useti expectan~ of toner cartridge Me depends on print den~ setting / Toner
coverage (toner usage) imd print pages (mechanical wear). Toner coverage per page is
approximately 570, for more detail please refm to the HP LaserJet Refwence Guide (Green
Book) section 5.
Life Expectancy for each type ofToner Cartridge is:
HP LaserJet II / IID / III / IID -4000 pages (92295A)
HP LaserJet 11P/ IIP+/ 111P -3500 pages (92275A)
HP LaserJet I / ID -3000 pages (92285A)
SheIf Life
Thiss,if unopened,
i approximately 2.5 years of storage; tie maximum skelfMe of an
opened cartridge is approximately 6 montks. T'kesefigures are condotiond on tke following
* Store awayfrom direct surdight or other strong lights.
*Store as specl~d on the shipping box or horizontally fla~ l~out of box.
*Store in normal ofice environment (i.e. a location with regulated temperature
and humidi~.
* Use the carti"dge before the expiry date (stamped on toner cartn"dgebox)
The LaserJet 2000 EP Drum has a storage Me of typically 2 year, provided the dnun is
stored at an enviromnentd speci.tication of O-35 deg.C, 35-85% RH 460-760 mrnHg.
Decodintr Date Code or Lot Code of Toner Cartrid~es
Example lot code: 3D12S2
3 = year, 1993 in this case
D = montk ofmantiacture, A=J~ B=Feb, C=Mar, D=Apfi etc
12= day of montk
S1 or S2 = different production lines
1-11
I Engine Test with Formatter De-installed I
Itsnot commonly known tkat impossibleto ruu the "print engine test" with the Formatter
PCAremoved. S@lygain accesstothe Formatterboar~ disconnect it and remove. Locatethe
print enginetestbutton, power on printer audpress~button. Tke only case whereDiviskms
advise this wiMnot work is the C3100A Coburprinter.
Of course there will be no display but the "Trsrrdines"print of the engine test shodd be
ptited. This can be usefi in the following circumstances
1, Thin vertical black line downpage, appurs in sameplace. The FormatterPCA is known
to cause thisproblem. Noteposition of line, remove Formatter, run engine test, has line
disappear?
2, Formatter Errors that do not allowprinting to occur.
3, Formatter; memo~SIMWs; titpulldown DCpowersupplies. Note, DCpowersupplies
on later pn"nterscan "crowbar"and remain down for 10 to 15 minutes.
Location of Print Engine Test button
UYID LHS (as viewed fiomthe front) very near rear ofprinter, halfway up.
UIPID/IIIMIID RHS, halfway along, in lower base pan, look for plate witk testprint on it.
~IPIDIIP At rear ofprinter, lower rear cover door, look for access hole at top lefi.
LJ2000 onOperators ~lay Panel @ly press button. Please note there is also
a "Video Test Button" on the DC Controller PC~ top LHS.
Half Self-Test Procedure
In some casesit isveryuseflto Iookto see ifthe image appears on the EPDrum To do
this simply
I. Initiate ase~-test
2. ~en thepaper is approximately ka~past the EP Drum power thepn"ntw down.
3. Remove Toner Cmtndge.
4. Is expected image se~-test image on EPDrum?
How can tbishelp dis~ose a problem WeE it splits the ptit quality problem in two. It
tellsthe CEthattheproblemis eithera ChsrgeCorons/roller LaserproblemoraTrder tirona/
rollerproblem Tskethe example of "BlankPages". Ifthe "kalfself-test"is implemented andtke
image aPPears on the EP Drum but not the paper, this diagoses as a transfer problem
The "HalfSelf Test" caa help m the following instances
* Blankpages.
*Fain tPtit
*Bands down page
*Lines down page
*Bands across page (Note: timing of the power down is crucial lo see image on drum)
*Pam of image missing.
I I
1-12
I/O Cable Information
PC Sefial Cable Product Information
922S4A Parallel 25 pin-~ 36pm-M 78 (2.13m) for moat IBM & Compatible PCs [1]
C2912B Parallel 25 piu-~ 36 pm-M 9.9fi (3.Om) for most IBM & Compatible PCs [1]
24542D ParMel 25 pin-M/ 36 pin-M 6.6R (2.Om) for moat IBM & Compatible PCs [1]
17255D Serial 25 pin F/ 25 pin-M 3.9fi(l.2m) [1]
92219J Serial 9pm F/25 pin-M 16.7R (5.Om) [1]
24W2G Serial 9 pin F/25 pin-M 9.9fi (3.Om) for most D3M & Compatible PCs [1]
92215S S@ DINS 6.6fi (2.Om)for Apple Mac [2]
92215N Phone NET or LocalTa~ Macnetwork kit [2]
Note: [1] SuitableforLJH/~ /131/~ /~/ ILP+/llIP
2] Suitable forLJIID/lll/~ /lIP/lTP+/133P
Note Generally all cables connected to PCs, pins are crossed (i.e. pin 2 to pin 3
pin 3 topin2)
~
In general allserialcables connected toHP3000~stems havepin-to-pins connection
(i.e.pin2 topin2 andpin3 topin3).
ADCC25pird25pin: For 25pm connectors Male-to-Male cable is required to with 2,3&
7 wired prn-to-piu and shielded earth to pin l(connect only one end)
Some ready-made cables are available and they are 92219G or
13242N.
ATP3pid25pin: Use cables 40242X or 13242X
ATP5pin/25pin: Use cables 40242P or 13242P
9000 MUX RJ45 Cables
For connection from a Mukiplexor on a 9000 host with RJ45 me connection to the serial
rnput of tie LaserJet shotid be wired pin to pm as follows
Hoat Printer Host Printer
~45 >~>>~>>>Y25 piO RJ45 >>>>>>>>>9 pm
ml 2 RDl 2
TD 3 3 TD 3 3
CTS 4 CTS 4
RTS5 RTS5
Grd 6 7 Grd 6 5
1-13
ConfigurinpHP LaserJets on HP3000
When
configuring the Laserjets on the 3000 use TerrnType 22@CL22 or TermType 26/
PCL26. The2686, 2684 and33440have Statusfeedbackfb.uction@ andcanbecotdigared
dire~. The LaserJets mantiactured fiertkeseproducts require an Optional J/O bosrdto
be inst~ed. More dti for spectic Laserjets is listed below
LaserJet I/ID (26860)
This can be connected directly to the HP3000 as the serial I/O has status feedback.
Configuration is acheived via a bank of switches which are accessed by removing the rear
u
panel (4 scrws). Switch setting are:
~$,*. ,!$.> > :~,f,*;:*<;:,,
,,.,, ,.:; ,*$ -,.*, .? :V$#$~ .>
,
*# ,: ;y. x$ ,?
1 -OFF(Serial) ?~ &
,"$/j,,,, ,~;, ~~~.,.*,. ,., ,;; 7:;~
, <:*@$~$j
2 -X Baud rate selection
3 -X Baud rate selection 300 Om OFF OFF
4 -X Baud rate selection 600 OFF OFF ON
6 -ON (L3i+ ordy, enables 1200 OFF ON OFF
ROBUSTXon) 2400 OFF ON ON
8 -ON(DTRpolarityset Hi) 4800 ON OFF OFF
9600 ON OFF ON
19200 ON ON OW .
Note: Thestandard2686A First modelproduce~ has on@a sm"alI/O. ~e 2686A+
and the 2686D was ntanuf~tired with both Serial and Parallel I/Os.
Note: See Cabling at the end of this 3000 con$~ation section.
LaserJet II (33440\
Thisptiter ~ has status feedback built into the the I/O and can be directly connected to
the HP3000. This configuration settings is acheivedtia the operators front psneL Typical
settings are
SYMBOL SET = Roman-8
J/o = s=
BAUDRA~ =9600 (Defati)
ROBUSTXon = ON
DTRPO~ `m
Note see Cabling at the end of this 3000 con~guration section.
LaserJet III (33449): IID (3344n: DID {33459)
These LaserJetshasno statnsfeedbac~therefore cannot beconnectedtothe HP3000,
exceptvia dummy TenuT~e 18.To connecttotheHP3000 an optional I/Oboard (260 13A)
is required to be installed iu the optional I/O port at the rear of the priuter. This board is no
longer available, but ESJ/ExcelJink may ofir an alternative (see HP tierJet Ref@ence
Guide (Green book), page section 7).
Set, via front pane~ I/Oto OPTIONAL.
1-14
aserJetILP (33471), ~+(C2007), IIIP(33481)
These ptiters do not return status and do not have an optional I/O slot. ~ese laserJet,
rerntended to be cotmected to PCs ordy.
,aserJet2000 (2684A/P/D)
Contignration ofthia printer is acheivedvia 2 banks of rocker *ches on the Formattf
~srd. ~ese are accessed throu~ a fip-down panel on the RHS of the upper section of th
rinter@omttersetion).
WITCH 12- all rockers set to OPEN
WITCH 14 1 -OPEN Baud Rate Selection
2 -X Baud rate seletion
3 -X Baud rate selection 600 001
4 -X Baud rate selecdon 1200 010
5 -OPEN 2400 011
6 -OPEN 4800 100
7 -OPEN 9600 101
8 -CLOSED(SelectDTRpolarity) 19200 110
9 -CLOSED(DTRhandahake enabled)
10 -OPEN
11 -CLOSED
12 -CLOSED(Xotioffenabled)
`oteto Remember:
*HP TerrnTypesfor HP ~stems will send an ESC"E" at the be~"nning of sprint job
to reset theprinterto defardt values.
*Robust Xon MUST be enabled on all HP LaserJetprinters.
*AllHP LaserJets run with 8 data bits, no pan"@.
IPE Classic&XL Matrix
[2] PhgsintoresrqrtionslVOslotsetI/Oto "OP170NAL''onFrontPanzPJN=26013-60001
[3]~CL26isnot~potied .n~CC;wecable92219G [email protected]&7, Shieldpin 1 connct
atone end on@.
[4] TTPCL26 ispreferred ssstatuscheckingsdoneatthebeginning
i &endofspoofie, TI'PCL22 oes d
thissttheendofevery Iirre,therefare
isslower. secable 40242Xor 13242 (3pin), use cable 40242P or
U
13242P (5pin).
[5]LJItP/IR+/IIIPareNOTsuppartedontheHP3000
~stems
[6]TheLJ2OOOserislVOboardheeon-bosrdsts@oheckiugPfi=
02684-60010
[7]NoIonge.ravaiiable.
1-15
Data Transfer Rates
SERIALTransfer Rate
Transfer rate (Kbytes/see)
= Bad Rate
8192
CENTRONICS Parallel~ansfer Rate
Note: The matium length of cable for Centronics nardel is 3 meters ( lM).
1( 3 10
m 10 15
IIF 8 10
IIP+ 30 72
m 10 14
IDD 11 16
m 26 57
~(16Mz) 24 45
AppleTalk 20-30
1-16
Novell Networks -23 I/O Not Readv
Coniiguratin TroubLeshootin~ Pi'ocedure
One of tie most common problems the CE will encounter when ~ LaserJets are
mnnected to Novell n-orks is" 23 1/0 NOTREADY". On most occasions tiproblem~
NOT A H~WARE FAULT and the NetworkA~ator shotidbe able to correct.
Notiythisisa co-ationprobl~ thatistheJe~ect card(Installedrn Optional
I/O slot) is not reco~ed by the network. Note it is tie responsii~ of the N*ork
Administrator to configure JetDirect boards into network. The foJlowing steps should be
adopted to check ifthe Novell n~ork reco@es the JetDirect card
Note: Then~orkA_ator nmst have overall responsibii
and must be present dtig this procedure.
Obtain COPY Of No@ Press button on JetDirect car~ this is located on this
Status Page cards face-plate. See Status page on oposite page.
Note Look for I/O NOT READY(xx) on Status page. Sub error
(x) shotidbe crosreferenced. ThiswillgivereasonforUO
Not Ready (i.e. 16= Not Configured). Tkis information
N can be found m tke HP JetJ)irect Network ~ con.figuration
guide. See Statuspage opposite.
Note Off Status page take a note oftke Mode Address (Hard-
Jet13ir-Hard- ware address)wkich is sirnilarto this 080009171812.
ware address ~is Mode Address is unique to emh JetDirmt. See
Statuspage opposite.
B~g up Note With NetworkAdministrator bring up HP Untility JetAdmir
JetAdmin Go into "con6guration "menu. Bring up screen which shov
utility alIJetDirect cards connected en the network.
Note: JfHardware address does appear get Network a~atol
to contignre on to network using JetAdmin. If not:
1. Try LaserJet on another part ofnetwork.
2. Check network cabling.
3. Lastly replace JetDirect board.
\ /
/
1-17
XIO Status Pape
1-18
JetTest
The LaserJet Confidence Test Tool
Whatis JetTest
JetTest is a confidence test tool tie CE can use to quickly detetie communications
betweenthe PC andtheLaserJet. It also teststhe fimctionalityofthethe LaserJet. ~stest comes
on a bootable floppy disk and is very easy to use.
Whv Use JetTest
*It negates the customers application/sof~are as it is a bootable disk.
* It checks communications between PC andthe LaserJet or L2000. [1]
*It checks tie functionality of the LaserJet (i.e. Duplex, I/P source selection, etc)
*It quickly helps CE determine if fault reported is a LaserJetproblem.
*It reduces" Over-Delivery" of HP support services.
*It will help to reduce the NFT rate of Formatter PCA'S.
*JetTestwill (Virusprotection)
not run if disk is NOT Write Protected.
* Has CRC checking when disk is booting. (Virusprotection)
* It is very easy to use.
Note [1] It ve.y important to ensure a high qualiy I/F cable are used and thq are
is
correctly wired Use HP cable lfpossible.
Matarethe Standard Tests
* RippleTest (Portrait& Landscape)
* GraphicsTest
* Dotioads a Soft-Font
* DuplexTesting
*1/ P Bin Source Selection
* PCL/PostScript Switching
*PostScript Graphics t=t
* Serial/ Parallel protocols (use high quality HP I/F cables impossible)
Please note fiturevertions ofJetZ'estwill contain many more tests, but tie aboveti always be
tie "corestandard" testa.
Which Printers can this Version ofJetTest to run on?
* LJI / ID (Note only ripple test has be tested)
* LJII / IID / III / IIID
* LJIIP / 111P
* LJ4
* LJIIISi / 4Si
* LJ4L
*LJ2000
1-19
How to RUNJtiTest
1. Install the Bootable disk inA: Drive of PCA
2. Power off fie PC, then on again or CTrl, Shift &DEL Keys together
3 .Takeapprox 1 minute to BOOT-up.
4.The J~EST screen will appear,then simpIy follow to menu driven screens and
choose test you wish to run, number of copies, etc.
I Note: The mouse will ody work ifthe PC has serial mouse, ifnot use TAB and/or arrow keys.
How to Obtain a Covv ofJetTmt
I
JetTestwasproduced by Steve Oakes(UJSMauchester) and Bob Edwards (UKRC) and
has been widely diatriiuted tioughout the UK and also to mmry countries worldwide. Ifyou
need a copy please send a 3 1/2 inch HD floppy disk to Bob Edwards in the UK Birmingham
office (ext 59369) with return address and I wilI be ~d to -d you a copy.
mat oftheFuture ofJ&Test
At this time (March 95)we arerntheprocess ofupdatingJetTestto includenewLaserJet
products. We alsorntendtorevampJetTestto allowittobe ea~updatedandto rncludeatider
choice of tests. This will probably be available by the Autumn (Fall) of this year. We will of
course update the field of prowess m this area.
1-20
Classic Printers
LaserJetI / LaserJetID
I
2686A /2686D
BooMet Or~anisation - Please Read
This 2686fl section has been divided into 4 parts, which areas follows:
1) Faults with Error Numbers
2) Miscellaneous Problems
3) Print Quality Problems
4) Paper Path Problems
Service Notes UD to SCDt 86
2686A-I Print Skew.
2686A-2 Replacement of Lasers (DC Controller Compatibility)
2686A-3 Di;fictity Clearing Error 50.
2686A-4 Service Mannal changes since publication.
2686A-5 Change to Level 840606 Firmware.
2686A-6 LaserJet Plus (Options 200 & 220)
2686A-7A Vertical Smear.
2686A-8 LaserJet I/F PCA Failures.
2686A-9 Correcting Errors 20,21, 22& 40.
2686A-10 Correct Value for R117 on Connector J107
2686ABIAU-1 Voltage Configuration (220/240v, 50Hz).
2686BIAU-2 Print Skew.
2686ABIAU-3 Replacement of Lasers (DC Controller Compatibility)
2686ABIAU-4 Difficulty Clearing Error 50.
2686ABIAU-5 Service Manual changes since publication.
2686ABIAU-6
2686~lAU-7 LaserJet Plus (Options 200 & 220)
2686AB/AU-8A V@ical Smear. -
2686AJ3/AU-9 LaserJetW PCA Failures.
2686AB/AU-10 Correcting Errors20, 21,22& 40.
2686AB/AU-l 1 Correct Value for RI 17 on Connector JI07.
2-2
~q86wD -FAULTS *H.EtiOfiWMBERS,
Please note that all Paper Jams or Error 13 problems, refer to the Paper Path part
of this section of this manual.
1. Check Laser Power level (45mw).
PERMANENT "02" 2. Faulty Solid State Laser.
(Long waiting) 3. Faulty Scanner unti
4. Check fuses on DC PS~ain Motor PCA.
5. Replace DC PS/Main Motor PCA.
6. Replace W PCA.
PERMANENT "05" 1. Faulty ~ PCA.
(Self-Test)
ERROR 11 1. Caused by bad Paper cusette micro-switch
(item 36, Fig-8-17).
ERROR 11, When Manual In this case the 2686A Plus was mistaken for a 2686A
Mode is Selected. Std, at some time in the past the W had replaced for (
69004 instead of a 69005. At some time later the
customer began to use Manual Mode md this fault
appeared.
"LC 11" Lower cassette Faulty Lower Paper Stie Switch. Replace this assy.
Permanently "OUT OF
PAPER" (2686D)
PERMANENT I. Faul~ DC Controller.
"ERROR 12" 2. When lid closes not ati"vating switch in ~ Power
Interlock assy.
3. Print engine transformer.
4. Misskrg DC Voltage, replace DC Power
Supply~otor Driver PCA.
2686D ERROR 12 The latch (FA2-5678-OOOCN)which holds down the
Intermittently upper main body on the LHS had a small crack in it.
It was difficult to see the crack and printer appearsto
(Updated) function correctly. On applying power it would
(Andy Cassels - Aberdeen) intermittently give E~OR 12 or the printer would
not power up at all. This was caused by the motor
starting up and causing upper chassis to flex. Due to
this movement (1 to 2mm), this was enough to trigger
the interlock. When the interlock had operated, power
is cut, motors stpped, frame returns to its correct posi
tion, then power is reapplied. This scenario can thus
repeat. Replace latck FA2-5678-OOOCN.
2-3
2686A/D - FAULTS WITH ERROR NUMBERS (Con't)
2686D ERROR 12, paper Traced to bad "Lid Switch" ie "DOOR OPEN".
not feeding correctly from (Loss of +24v).
both I/P trays, it "Judders",
then Error 12 occurs. Also
a BLANK page is emitted
from the printer.
ERROR's 20,21, 22& 40 Error 20 (memory overflow) and Error 21 (print
ovemm) Usually caused by software due to the
following
CPU~ost sent to much Data to 2686. To clear press
continue.
Error 21...The formatter cannot catch-up with print
the print engine.
Error 22 (Buffer Overflow) and Error 40 (line error).,
Usually caused by system configuration problems i.e.
Baud rate, parity, 7[8 bits, Xofioff/DTR,
Normal settings: Baud rate -9600
Parity - None
Bits -8 bits
H'stie - XotiXoff
IN GENERAL, REPLACING IIF WILL NOT
CORJU?CTERROR `S 20.21, 22& 40.
See Servke Note 2686A-9
ERROR 50 Hard Fault Normally caused by the following in order of
(S= note on below) preference:
L The 470hm resistor on Fuser Safe@ PCA blown.
(obtain 1/4 watt local~) or HP PIN is
FF1-3872-OOOCN.(See Sfl 2686A-10).
2. Fuser Saf@ PCA.
3. AC Controller PCA.(new @pe has -040CN suffm).
4. Vibration in @anspo&g the 2686 causes Fuser
Bulb to rotate glass protrusion on fuser bulb to
point towards thermistor.
5. Fuser Bulb, should read 9/10 ohms. (known to
blow at 11 ohms).
6. Faulty or Dirty Thermistor.
Z Bad connections on the Fuser Saf@ or AC
Controller PCA `s.
8. Repbce The in Power Module assy.
9. Faul@ DC Power SuppfyMain Motor PCA.
10. If faultpersists replace Fuser Safety, AC
ControUer and Trtic together.
11. Check z~2686 is conjiguredfor 240volts?
N'otc Due to error messages being retained in memory for some time afte
power down it can fool the Service CE into believing the assy just
replaced did not resolve the problem. Either do one of two things:
(Continued nextpage)
2-4
26~6AM
-. --.--- - FAIJ1 ,TS WITH
------- . ----- F.RROR -.. NITMRW,RS
-. =.- .w. __=.- (Pnn$tl
.. ,_w-.
1) Leave 2686 powered down for at least 10 minutes.
2) Alternatively, gain access to the DC Controller PCA whilst
powered down and put a short across R250, near C235.
Also see Service Note~
2686N/AU-4 or 2686A-3 and 2686~/AU-11 or 2686A-10
INTERMITTENT ERROR 50 Possible causes-
1. Nohey AC Mains Power Supply. The 2686A's are
more susceptabfe to AC mains disturbances than
perhaps other equipment ConnectAC Mains
Monitor. Check quality of mains supply.
2. InstallAC Controller who's Pm ends in -040CN
Suffa
3. Replace QI Triac.
4. Check for AC Voltages as per below:
PS/W Motor PCA @om Transformer.
These are:- 33, 12, 21volts on J501 connetir.
5, Check z~2686 is conjiguredfor 240v.
6. Noisv AC mains, instaU mains monitor.
Z See 2686A-10 Service Note.
8. Replace DC PS~ain Motir PCA.
9. Replace DC Controller PCA.
ERROR 52? Replace ~ PCA
ERROR 53? Replace Laser unit
E~OR 60 & 61. Both these errors can be wused by faulty W PCA `s.
ERRORS 63, 65& 67 Normally caused by LT PCA.
ERROR 67 Cm be caused by very cold environmentsi.e
temperatures in office maybe falling very low over
night. May give this problem only first thing in the
morning, there on after will be OK all day.
ERROR 60, 65& 67 Can be caused by atteinptkag to put to many fonts
on one page
MISCELLANEOUS Especially Error's 60,63 and 67 may be caused by
ERROR's 6X. loose ubfing. If the cable are not securely fixed
down the printer may exhibit these problems.
2-5
2686A/D MISCELL~EOtiS'PROBLEMS
-, ~~
ARC~G? Check all earthing assoicated with Transfer Corona,
ensure all earth connection and all wires associated
with Varistor PCA have good continuity, check 16Mej
ohm(R9) by Transfer Corona is OK.
No FRONT PANEL 1. Probably the I/F power supply that lies at the botton
DISPLAY? of the 2686A. Check the 5 volts coming from this
PCA.
2. Faulty W PCA.
3. Check wires under VF Power Supply have not been
punctured, especially after reassembly. If are has
not been taken to route lower cables carefuUy, this
cause unit to Smoke and hmage L!FPCA.
VERY LONG "WAITING See "PERMANENT 02" in 2686WD "Fatits with
FOR DATA" 02 on Display ErrorNumbers" at the beginning on this section of
Front Panel. manual.
Will not recognise NEW Reference Servtie Note 2686A-5.
CHARACTER FONTS
92286J, 92286G & 92286H.
Laserjet 2686 plus outputs at Reference Service Note 2686A-6.
50% of expected rate with
some applications when using Note Throughput OK when using internal default font.
operational fast font cartridge.
TONER CARTRIDGE 1. Customer not shaking ca~"dge.
problem's 2. End stops fallen out (see Video). Problem only sea
in the early introduction phase of this pm"nter.
3. Drum Shutter damage (L @ R fade).
4. TONER Cartridge in red zone
5. DFS Cartridge
6. See "LASER PRINTER PRINT QUALITT"
book (UK only)
Customer changes horn the Try adjusting thephysicalpositin of the scanning
2686A to 2686D LJ. When unit, be aware you may increase the amount print
using PREP~ED paper skews on page (See S/N 2686A-1). Note there is a
that was previously used on the difference between the first printed line on 2686A
2686A it was found the text hat' when compared to a 2686D. The aetualphysicalpape,
displaced by approximately path length between the printers is slightly dz~eren~
1.58mm in relationship to the therefore a resolution may NOT be available The
preprinted lines or boxes. customer may need to compensate by either changing
the position of the preprinted images of repositioning
laser printer images.
2-7
""".. = - . . -------- . . --- .,- . ----------
MULTDLE ~ PCA'S were 1. ENSU~ the customer AL WAYS switches ON
being replaced ? LJ lmt and switches OFFfirst
2. If several hosts share LJ via a data switch turn off
aZZpowerto LJ before switching data switch.
See S/N 2686A-8
3. Has the lower section of theprinter been removed
from the base seti"on recent~? ~so check that tie
two brown & blue ~ 5Vsupply m"reshave not been
punctured, these lie in tie base seti"on.
ENSURE all wires are returned to their correct
position at reassemb~.
MULTIPLE POWER See input above (Mutiple W's being replaced) item
SUPPLIES REPLACED? number 3.
After lower section of printer
was disassembled.
AC Controller PCA are Replace PT1 AC Mains transformer.
failing?
Print "CRACKING" when Toner comprises of pigmented plastic material and
paper is folded. White lines iron oxide. WIIcn subjected to high temperatures
may be seen rnnning tbrougb these individual plastic particles become part of a
ch-cters where page has been larger plastic image on the page. When the page is
folded. folded the plastic must give in some way. If the printed
image is well fused into the paper , the resulting break
in the plastic will NOT be very apparent. However,
if the toner has NOT been able to penetrate the
paper fibres, the "Crack" in the plastic image will
be amp~led. A white line will be seen through
image.
To Minimise:
1. Ensure paper meets ALL Paper Specs, see guide
5002-180L In patiularpay attention to the
smoothness (100-250 Sheffield) andor "W&
Pick" ~11 Dennison)
2. A lighter Density seti"ng WD ensure less tiner is
used, thus minbnisingproblem.
3. A lighter character stroke may ako he~
Pm S~W~G & Paper R@wence Service Note 2686AB/A U-2. AcceDtab~e
REGISTRATIONprobiems. Skew is 1.58mm over 260mm feedfiom Cassette tray
L Replace Registration assy, check that white nylon
rollers turn freely.
2. Is media within spec's for this printer?
3. RepCacePaper cassette tray
4. Laser/scanner Unit misaligned? See Service Note
2686AB1A U-2.
2-8
-"""mu - ,T.l"uuuum, ,Uu "" . ..WJDMML.1" ,G"M .L
~~G EDGES OF Adjust spring tension on Fuser Pressure rollers, Mis
ENVELOPES "Wrinkled" may help. Note, envelopes areproblematr"c due to
as it passes through fuser tha-r construction. Contact RCE for further informs
assy. tion
Customer printing BOTH This model of bserJet is a SIMPLEX printer and is
SIDES of tke Page or not designed for Duplex printing.Although this printer
DUPLEX printing? ~S can print on both sides, thisprti"ce is not supported
WY cause paper jams, paper by HP. For the general HP statement on "Duplex
feeding or print quality printing v Simplex" please referenceHP Reference
problems. Guide (Green Book) section 3.
Customer RE~ED~G paper, As above ref= to HP general statement on "Duplex
not two sided printing? printing v Simplex" in HP Reference Guide (Green
Book) seetion 3.
PAPER JAMS/MISFEEDS/ Interleaving, where a variety ofpaper is placed in the
SKEWING caused by paper tray, is not recommended by HP. ~ practice k
customers practice of likely to lead to Paper jams& Misfeeds. For the general
~ERLEAVING ~ermt HP statement on `interleaving Paper" please reference
types ofpaper m paper trays? HP Reference Guide (Green Book) section 3.
2-9
2686A/D -PR~ T QUfiITY PROBLEMS
MARKS PAPER AT
ON If marks repeat at re~ar intervals, measure distance
REGULAR INTERVALS between marks to determine where tie problem lies:-
Marks %375" apart - Drum Related
8.0" apart - Drum gear Related
2.5" apart - Fusm Roller Related
Prints in only a sma~ portion
of the page with "Print Test" Paper tray size microswitck problem. Check
and only a small portion of operation of these switches, alternatively paper size
"Self Test". See below: switch cables may be defective. There are 3 micro-
switches to the left of the paper tray, which sense type
of paper tray (A4, 1lx 8.5, etc) installed.
ELONGATION OF PRINT 1. Replace DC PS,ain Motor Pa
in the direction of paper 2. Check drive mechanism, gear train& motor
movement. 3. Replace main motir
4. Is the use of Non-HP Toner Cart's causing this
pbm?
BACKGROUND ] 1. AdjustPriittDensi@ dial
2. Ground Spring in centre of drum dn"vegear, is it
damaged or missing?
3. Check Laser Power adjustment
4. Replace HVPS.
5. Replace DC Controller PCA
6. Replace DC Power Supp& ~ain Motor Dvr PCA.
VERTICAL SMEAR problem. Reference Service Note 2686A-7.
Thin grey band in approx L Pay special attention to the quality of media used
middle of paper. Band in the 2. Supply customer with 2686A Paper Spec's Guidfi
direction of paper movement. 3. Replace Feed Guide Assy (RGI-1039-OOOCN)
This band is Approx 6 to 12m 4. Dirty Primary Corona.
wide. This problem is also 5. Tiy replacing Toner Cartridge.
known as "VERTICAL 6. Clean interior ofprinter.
FOGGED STRIPES".
WAW PRINT 1. Repbce Scanner unit
2. Rplace DC Controller PCA.
2-11
2686A/D - PRINT OUALITY PRO.BLEMS (Con't)
MARK ON PAPER in line 1. Separation belt installed upside down.
with SEPWTION BELT. 2. Dirty Separation Belt
3. Dirty Separatin RoUer.
4. Replace Toner Cartridge.
GHOST CHARACTER on the Ov@lling t?tepaper tray can thepick-up rollers to
43rd line? drag on the paper, causing motor to slow down,
causing EP Cartridge to stall slightly. Causing inprope
transfer of printed data born drum to paper.
LIGHT WGES? 1. Adust Print Densiq Dial
2. Try Laser QuaZi@Paper.
3. Replace Transfm Corona.
4. Check Laser Power. (Laser Checker Too~
5. Replace HWS.
6. Replace DC Controller PCA.
Z Check Drum Sensitivity switches.
RANDOM LIGHT Clean centre of large brass drum drive gear.
PATCHES over the page BEWARE, do not darnageor lose spring in the
or GRADIENT from left to centre of this brass gear.
right?
LIGHT PRINT ON RHS 1. Due to a missing or loose earth conneti"on on
side of paper in the diection of 2686A situated nmr the RHS hinge as viewed
paper movement. @om the front of theprinter.
2. Missing Doctor bladepin in EP Ca~"dge, replace
EP tirtridge. Have not seen this problem for a ion,
time
3. Replace Varistor PCA, there maybe dz~ferences of
outpub ie narrow bands of darkprint at the far
RHS, whereas a missing doctor blade pin wdl not
LIGHT AREA bottom RHS Replace Feeder Guide Assy andpossibly the
md irre@ar. Transfer Corona.
LIGHT PRINT in same Clean Optics Exit mirror to Drum.
position down page? Always
in dirmtion of paper movement.
Image very light in in this area.
BLANK PAGES? L Empty toner cartridge?
2. Has seal been removed in toner ca~"dge?
3. Replace Trmsfer corona, wire broken?
4. Replace HWS.
5. Replace DC Controller.PCA.
BLACK PAGES? 1. Replace EP Toner cartn"dge
2. Replace HVPS.
2-12
2686A/D - PRINT C)UALITY PROBLEMS_(_Conlt)
Sharp THIN LINES 1. Replace Scanning Assy
Horizontal Lines across 2. Replace Laser Unit, check laser power.
Page 3. Replace DC POwer Supply~ain Motor Dvr PCA.
RANDOM GAPS between Faulty brass dram drive gear, the centre collar was
connective lines across page? protruding wtich prevented the silver pin locking in th
end of the EP cartridge.~is resulted in the b
stopping intermittently.
THIN VERTICAL "BLACK" 1. Is Fuser Cleaning Pad dirty? Replace if necessary..
LINES/STWES down page? 2. Scotig on fuser roller? replace z~necessary.
3. Scoring on EP Ca~"dge, try another cartridge
THIN VERTICAL "~ITE" 1. Replace Totier Cartn"dg&
L~S/STRIPES down page? 2. Dirty Fuser Cleaning Pao!
3. Dirty Transfer Corona wire.
4. Ckeck for obstacles or OP mirror contamination
in laser beam path. Laser Shutter?
5. Reptice stunning assy.
BANDS Down page ? Fuser Scoring i ◦ Jabse Service Manual Search 2026 ◦ Jabse Pravopis ◦ onTap.bg ◦ Other service manual resources online : Fixya ◦ eServiceinfo