Service Manuals, User Guides, Schematic Diagrams or docs for : Harman Kardon AVR AVR-75 & 85 AVR-75 & 85
<< Back | HomeMost service manuals and schematics are PDF files, so You will need Adobre Acrobat Reader to view : Acrobat Download Some of the files are DjVu format. Readers and resources available here : DjVu Resources
For the compressed files, most common are zip and rar. Please, extract files with Your favorite compression software ( WinZip, WinRAR ... ) before viewing. If a document has multiple parts, You should download all, before extracting.
Good luck. Repair on Your own risk. Make sure You know what You are doing.
Image preview - the first page of the document
>> Download AVR-75 & 85 documenatation <<
Text preview - extract from the document
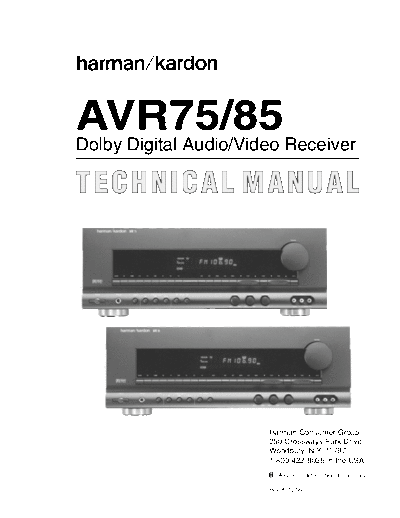
AVR75/85
Dolby Digital Audio/Video Receiver
TECHNICAL MANUAL
Harman Consumer Group
250 Crossways Park Drive
Woodbury, N.Y. 11797
1-800 422-8026 in the USA
A Harman International Company
Rev A 12/99
Harman Kardon AVR75/85
Dolby Digital Audio/Video Receiver
TABLE OF CONTENTS
ELECTROSTATICALLY SENSITIVE (ES) DEVISES ....4 AVR78 & AVR85 PACKING EXPLODED VIEW...........52
LEAKAGE TEST ............................................................4 VOLTAGE AMP PCB - P714.........................................53
AVR75 & AVR85 FRONT PANEL CONTROLS.............5 AC3/DAC PCB - P604 ...................................................54
AVR75 & AVR85 FRONT PANEL DISPLAY MAIN PCB -P704 ...........................................................55
INFORMATION ..........................................................7
AUDIO FUNCTION PCB - PS04,
AVR75 & AVR85 REMOTE CONTROL INFO ...............9 AUDIO/VIDEO PCB - PS54,
ELECTRONIC VOLUME CONTROL PCB - PE04,
AVR75 & AVR85 REAR PANEL CONNECTIONS .......12 AC-3 CROSSOVER PCB - PC04..................................56
Service Bulletin #9705 for AVR85 .................................14 SPEAKER TERMINAL PCB - P754,
VIDEO SELECTOR PCB - PL04,
SERVICE AND ADJUSTMENT .....................................16 CONNECT PCB - PY04.................................................57
ALIGNMENT AND TEST POINTS.................................20 S-VIDEO PCB - PL54, 120V
TUNER PCB - P104, 120V
AVR75/85 BLOCK DIAGRAM........................................22 STANDBY PCB - PB04, 120V
SURROUND AMP PCB - PP04, 120V..........................58
SPECIFICATIONS..........................................................23
S-VIDEO PCB - PL54, 230V
AVR75 MECHANICAL EXPLODED VIEW TUNER PCB - P104, 230V
(120V AND 230V).....................................................32 STANDBY PCB - PB04, 230
SURROUND AMP PCB - PP04, 230V..........................59
AVR75 MECHANICAL PARTS LIST (120V & 230V) ...33
FRONT PCB - PU04,
AVR85 MECHANICAL EXPLODED VIEW S-VIDEO PCB - PL54, AVR85 ONLY
(120V AND 230V).....................................................35 MASTER VOLUME PCB - PU54,
SPEAKER PROTECT PCB - PN54,
AVR85 MECHANICAL PARTS LIST (120V & 230V) ...36 TONE CONTROL PCB - PF04,
AUX IN PCB - PL94,
AVR75/85 ELECTRICAL PARTS LISTS .......................38 POWER SWITCH PCB - PU94,
GENERAL MISCELLANEOUS .................................38 HEADPHONE PCB - PW04...........................................60
PCB - PB04, Standby...............................................38
PCB - PC04, AC-3 Crossover..................................38 INTEGRATED CIRCUIT DIAGRAMS ........................61-71
PCB - PW04, Headphone ........................................39
PCB PU04, Front......................................................39 AVR75/85 WIRING DIAGRAM (120V & 230V).............72
PCB - PL94, Aux In..................................................40
PCB -PU54, Master Volume ....................................40 AVR75 (120V) SCHEMATIC DIAGRAM 1 of 8
PCB - P724 ............................................................40 (FRONT PCB PU04,
PCB - P734 ............................................................41 MASTER VOLUME PCB PU54,
PCB - P744 ...........................................................41 AUX IN PL94) ................................................................73
PCB - P714, Voltage Amp .......................................41
PCB - PP04, Surround Amp ....................................42 AVR75 (120V) SCHEMATIC DIAGRAM 2 of 8
PCB - PN54, Speaker Protect..................................42 (TUNER PCB P104) ......................................................74
PCB - P604 AC-3/DAC ............................................43
PCB - PU94, Power Switch......................................44 AVR75 (120V) SCHEMATIC DIAGRAM 3 of 8
PCB - P704, Main.....................................................44 (AUDIO SELECTOR PCB PS04,
PCB - PS04, Audio Funtion .....................................46 AUDIO/VIDEO PCB PS54) ............................................75
PCB - P754, Speaker Terminal................................46
PCB - PS54, Audio Video ........................................46 AVR75 (120V) SCHEMATIC DIAGRAM 4 of 8
PCB - PY04, Connect ..............................................47 (AC-3 CROSSOVER PCB PC04,
PCB - PF04, Tone Control .......................................48 TONE CONTROL PCB PF04,
PCB - P104, Tuner ...................................................48 VIDEO SELECTOR PCB PL04,
PCB - P104 Tuner (230v) Discrepency List ............49 S-VIDEO PCB PL54) .....................................................76
PCB - PE04, Electronic Volume Control..................50
PCB - PL54, S-Video ...............................................51 AVR75 (120V) SCHEMATIC DIAGRAM 5 of 8
PCB - PL04, Video Selector.....................................51 (CONNECT PCB PY04).................................................77
2
Harman Kardon AVR75/85
Dolby Digital Audio/Video Receiver
AVR75 (120V) SCHEMATIC DIAGRAM 6 of 8 TONE CONTROL PCB - PF04,
(VOLTAGE AMP PCB - P714, VIDEO SELECTOR PCB - PL04,
MAIN PCB - P704, S-VIDEO PCB - PL54)...................................................91
SURROUND AMP PCB - PP04,
SPEAKER TERMINAL PCB - P754, AVR85 (120V) SCHEMATIC DIAGRAM 5 of 8
HEADPHONE PCB - PW04, (CONNECT PCB - PY04) ..............................................92
SPEAKER PROTECT PCB - PN54,
STANDBY PCB - PB04, AVR85 (120V) SCHEMATIC DIAGRAM 6 of 8 (VOLTAGE
POWER SWITCH PCB - PU94)....................................78 AMP PCB - P714, MAIN PCB - P704, SURROUND AMP
PCB - PP04, SPEAKER TERMINAL - P754,
AVR75 (120V) SCHEMATIC DIAGRAM 7 of 8 HEADPHONE PCB - PW04, SPEAKER PROTECT PCB
(ELECTRONIC VOLUME PCB - PE04) ........................79 - PN54, STANDBY PCB - PB04, POWER SWITCH PCB
- PU94) ..........................................................................93
AVR75 (120V/230V) SCHEMATIC DIAGRAM 8 of 8
(AC-3/DSP PCB - P604)................................................80 AVR85 (120V) SCHEMATIC DIAGRAM 7 of 8
(ELECTRONIC VOLUME PCB - PE04) ........................94
AVR75 (230V) SCHEMATIC DIAGRAM 1 of 7
(FRONT PCB - PU04, AVR85 (120V & 230v) SCHEMATIC DIAGRAM 8 of 8
MASTER VOLUME PCB - PU54, (AVR85 DSP BOARD - P604).......................................95
AUX IN - PL94) .............................................................81
AVR85 (230V) SCHEMATIC DIAGRAM 1 of 8 (FRONT
AVR75 (230V) SCHEMATIC DIAGRAM 2 of 7 PCB - PU04, MASTER VOLUME PCB - PU54, AUX IN -
(TUNER PCB - P104) ....................................................82 PL94) ..............................................................................96
AVR75 (230V) SCHEMATIC DIAGRAM 3 of 7 AVR85 (230V) SCHEMATIC DIAGRAM 2 of 8
(AUDIO SELECTOR PCB - PS04, (TUNER PCB - P104) ....................................................97
AUDIO/VIDEO PCB - PS54)..........................................83
AVR85 (230V) SCHEMATIC DIAGRAM 3 of 8
AVR75 (230V) SCHEMATIC DIAGRAM 4 of 7 (AUDIO SELECTOR PCB - PS04,
(AC-3 CROSSOVER PCB - PC04, AUDIO/VIDEO PCB PS54) ............................................98
TONE CONTROL PCB - PF04,
VIDEO SELECTOR PCB - PL04, AVR85 (230V) SCHEMATIC DIAGRAM 4 of 8
S-VIDEO PCB - PL54)...................................................84 (AC-3 CROSSOVER PCB - PC04,
TONE CONTROL PCB - PF04,
AVR75 (230V) SCHEMATIC DIAGRAM 5 of 7 VIDEO SELECTOR PCB - PL04,
(CONNECT PCB PY04).................................................85 S-VIDEO PCB PL54) .....................................................99
AVR75 (230V) SCHEMATIC DIAGRAM 6 of 7 AVR85 (230V) SCHEMATIC DIAGRAM 5 of 8
(VOLTAGE AMP PCB - P714, (CONNECT PCB PY04)................................................100
MAIN PCB - P704,
SURROUND AMP PCB - PP04, AVR85 (230V) SCHEMATIC DIAGRAM 6 of 8
SPEAKER TERMINAL - P754, (VOLTAGE AMP PCB - P714,
HEADPHONE PCB - PW04, MAIN PCB - P704,
SPEAKER PROTECT PCB - PN54, SURROUND AMP PCB - PP04,
STANDBY PCB - PB04, SPEAKER TERMINAL - P754,
POWER SWITCH PCB - PU94) ...................................86 HEADPHONE PCB - PW04,
SPEAKER PROTECT PCB - PN54,
AVR75 (230V) SCHEMATIC DIAGRAM 7 of 7 STANDBY PCB - PB04,
ELECTRONIC VOLUME CONTROL PCB, PE04........87 POWER SWITCH PCB - PU94)...................................101
AVR85 (120V) SCHEMATIC DIAGRAM 1 of 8 AVR85 (230V) SCHEMATIC DIAGRAM 7 of 8
(FRONT PCB - PU04, (ELECTRONIC VOLUME PCB PE04) ........................102
MASTER VOLUME PCB - PU54,
AUX IN - PL94) ..............................................................88
AVR85 (120V) SCHEMATIC DIAGRAM 2 of 8
(TUNER PCB - P104) ....................................................89
AVR85 (120V) SCHEMATIC DIAGRAM 3 of 8
(AUDIO SELECTOR PCB - PS04,
AUDIO/VIDEO PCB - PS54)..........................................90
AVR85 (120V) SCHEMATIC DIAGRAM 4 of 8
(AC-3 CROSSOVER PCB - PC04,
3
Harman Kardon AVR75/85
Dolby Digital Audio/Video Receiver
ELECTROSTATICALLY SENSITIVE (ES) DEVICES
Some semiconductor (solid state) devices can be damaged easily by 4. Use only a anti-static solder removal device. Some solder removal
static electricity. Such components commonly are called Electrostatically devices not classified as "anti-static" can generate electrical charges
Sensitive (ES) Devices. Examples of typical ES devices are integrated sufficient to damage ES devices.
circuits and some field effect transistors and semiconductor "chip"
components. The following techniques should be used to help reduce 5. Do not use freon-propelled chemicals. These can generate electrical
the incidence of component damage caused by static electricity. change sufficient to damage ES devices.
1. Immediately before handing and semiconductor component or 6. Do not remove a replacement ES device from its protective package
semiconductor-equipped assembly, drain off any electrostatic charge on until immediately before you are ready to install it. (Most replacement ES
your body by touching a known earth ground. Alternatively, obtain and devices are packaged with leads electrically shorted together by
wear a commercially available discharging wrist strap device, which conductive foam, aluminum foil or comparable conductive material.)
should be removed for potential shock reasons prior to applying power to
7. Immediately before removing the protective material from the leads of
the unit under test.
a replacement ES device, touch the protective material to the chassis or
2. After removing an electrical assembly equipped with ES devices, place circuit assembly into which the device will be installed.
the assembly on a conductive surface such as aluminum foil, to prevent
CAUTION: Be sure no power is applied to the chassis or circuit, and
electrostatic charge buildup or exposure of the assembly.
observe all other safety precautions.
3. Use only a grounded-tip soldering iron to solder or unsolder ES
8. Minimize bodily motions when handling unpackaged replacement ES
devices.
devices. (Otherwise harmless motion such as the brushing together or
your clothes fabric or the lifting of your foot from a carpeted floor can
generate static electricity sufficient to damage an ES device.)
LEAKAGE TEST (FOR SERVICE ENGINEERS IN THE U.S.A.)
Before returning the unit to the user, preform the following safety checks:
1. Inspect all lead dress to make certain that leads are not pinched or that hardware is not lodged between parts in the unit.
2. Be sure that any protective devices such as nonmetallic control knobs, insulating fishpapers, cabinet backs, adjustment and compartment covers or
shields, isolation resistor-capacity networks, mechanical insulators, etc. which were removed for servicing are properly reinstalled.
3. Be sure that no shock hazard exists; check for leakage
current using Simpson Model 229 Leakage Tester, standard
equipment item No. 21641, RCA Model WT540A or use
alternate method as follows: Plug the power cord directly into
a 120-volt AC receptacle (do not use an Isolation
Transformer for this test). Using two clip leads, connect a
1500 Ohm, 10-watt resistor parallel by a 0.15m F capacitor, in
series with all exposed metal cabinet parts and a known
earth ground, such as a water pipe or conduit. Use a VTVM
or VOM with 1000 Ohms per volt, or higher sensitivity to
measure the AC voltage drop across the resister. (See
Diagram.) Move the resistor connection to each exposed
metal part having a return path to the chassis (antenna,
metal, cabinet, screw heads, knobs and control shafts,
escutcheon, etc.) and measure the AC voltage drop across
the resistor. (This test should be performed with the power
switch in both the On and Off positions.)
A reading of 0.35 volt RMS or more is excessive and
indicates a potential shock hazard which must be corrected
before returning the unit to the owner.
4
Harman Kardon AVR75/85
Dolby Digital Audio/Video Receiver
AVR75 & AVR85 FRONT PANEL CONTROLS
28 27 26
harman/kardon AVR 75
Volume
VISUAL TV DVD V1 V2 V3 TEST MEMO AUTO TUNED STEREO
dB
kHz
AC-3 PCM MHz
DIGITAL PRO LOGIC 3 STEREO MOVIE RF OPT COAX NIGHT LFE ATT
STEREO HALL MATRIX SLEEP P-SCAN DISP
DOLBY
D I G I T A L AM/FM CD T-1/MON T-2 TV DVD V1 V2 V3 OSD ATT MEMO CLR MODE P-SET P-SCN TUNE MUTE
Power Digital Input Mode Bass Treble Balance
Phones Night RF OPT Coax VIDEO 3
Min Max Min Max L R Video L - Audio - R
2 4 6 8 10 12 14 16 18 20 22
1 3 5 7 9 11 13 15 17 19 21 23 24 25
28 27 26
harman/kardon AVR 85
Volume
VISUAL TV DVD V1 V2 V3 TEST MEMO AUTO TUNED STEREO
dB
kHz
AC-3 PCM MHz
DIGITAL PRO LOGIC 3 STEREO MOVIE RF OPT COAX MULTI NIGHT LFE ATT
STEREO HALL MATRIX SLEEP P-SCAN DISP
DOLBY
D I G I T A L AM/FM CD T-1/MON T-2 TV DVD V1 V2 V3 MULTI OSD ATT MEMO CLR MODE P-SET P-SCN TUNE MUTE
Power Digital Input Mode Bass Treble Balance
Phones Night RF OPT Coax VIDEO 3
Min Max Min Max L R Video L - Audio - R
2 4 6 8 10 12 29 14 16 18 20 22
1 3 5 7 9 11 13 15 17 19 21 23 24 25
1. Power: Press this button once to turn the unit on and off. 2. AM/FM Tuner Selector: Press this button once to select
Once the unit is turned on, it may be turned off and then on the tuner. Press it again to switch between AM and FM.
again from the remote, if desired.
3. Headphone Jack: Plug standard stereo headphones into
NOTE: When the remote is used to turn the unit off the LED this jack for private listening.
surrounding the Power Switch will turn amber, indicating
that the AVR75/85 is in a Standby mode. In this condition NOTE: When the headphones are in use the output to the
the unit is NOT disconnected from the AC main power speakers is muted and the surround mode is automatically
supply. switched to STEREO. When the headphones are removed
from the jack, sound to the speakers is restored and the unit
returns to the previous sound mode.
5
Harman Kardon AVR75/85
Dolby Digital Audio/Video Receiver
4. CD: Press this button to select the CD player. 20. P-Set: Press this button to manually scroll up or down
through the FM or AM stations programmed into the
5. Tape 1/Monitor: Press this button to select Tape One as receiver's preset memory.
the input source. A red LED above the button will illuminate
to indicate that the Tape Monitor has been selected. 21. Balance: This knob adjusts the balance between the
front left and right speakers.
6. Night Mode: Press this button to activate the "Night"
mode, preventing loud playback when the digital modes are 22. P-Scan: Press this button to automatically scan through
in use. the FM or AM stations preset into the receiver's memory.
Press the button again to stop the scan when the tuner is at
7. Tape 2: Press this button to select tape 2 input. the desired station.
8. TV Input: Press this button to select the source 23. Tune: Press this button to manually scan up or down
connected to the TV Input (38). through the FM or AM bands.
9. Digital input Selectors: Press one of these buttons to 24. Video 3 Input: Audio or Video sources connected to
select a digital input source. The digital audio source may these jacks may be selected by pressing the Video Source
be the same as, or different from, the analog audio of the button (11).
selected video source.
25. Mute: Press this button to cut the output to the
10. DVD Input: Press this button to select the source speakers. Press it again to return to the previous volume
connected to the DVD Input (37). Note that the DVD or LV level.
player's digital audio output is used, it must be selected
separately using the Digital Input Selectors (9). 26. Volume Control: Turn the knob clockwise to increase
volume, counterclockwise to decrease the volume. Note
11. Video Sources: Press any of these buttons to select a that approximately two revolutions of the knob are required
video input source. to go from no output to maximum volume.
12. Mode: Press these buttons to scroll up or down through 27. Information Display: This display delivers messages
the list of available surround modes. and status indications to help you operate the receiver.
Refer to the separate diagram for complete explanation of
13. OSD (On-Screen Display): Press this button to activate the FL display.
the Attenuation mode which cuts the analog input signal by
50% to compensate for high-level input sources. 28. Remote Sensor Window: The sensor behind this
window receives infrared signals from the remote control.
14. ATT Attenuation Mode Select: Press this button to Aim the remote at this area and do not block or cover it
activate the Attenuation Mode which cuts the analog input unless an external remote sensor is installed.
signal by 50% to compensate for high-level input sources.
29. Multiroom Control: NOTE: this feature differentiates
15. Memo: The memo button is used to enter stations to the the AVR85 from the AVR75. The AVR75 does not have
tuner's preset memory in either the manual or automatic this feature. Press this button to turn the remote room feed
modes. On or Off. The MULTI indicator (D) will light or flash when
the remote feed is On. Note that the remote feed will remain
16. Clear: The clear button is used to cancel tuning,
On after the main room power is turned Off until it is
memory input or when cleaning the unit's memories.
switched Off by pressing this button again.
17. FM Mode: Press this button to select the tuning mode
for FM stations.
18. Bass: This knob adjusts the tone of low-frequency
sounds. Turn it to the right to boost bass frequencies or to
the left to cut bass frequencies.
19. Treble: This knob adjusts the tone of high-frequency
sounds. Turn it to the right to boost high frequencies or to
the left to cut high frequencies.
6
Harman Kardon AVR75/85
Dolby Digital Audio/Video Receiver
AVR75 & AVR85 FRONT PANEL DISPLAY
AVR75 DISPLAY
S R Q P O N M L
VISUAL TV DVD V1 V2 V3 TEST MEMO AUTO TUNED STEREO
dB
AC-3 PCM
kHz
MHz
K
DIGITAL PRO LOGIC 3 STEREO MOVIE RF OPT COAX NIGHT LFE ATT
J
STEREO HALL MATRIX SLEEP P-SCAN DISP
A B C E F G H I
AVR85 DISPLAY
S R Q P O N M L
VISUAL TV DVD V1 V2 V3 TEST MEMO AUTO TUNED STEREO
dB
AC-3 PCM
kHz
MHz
K
DIGITAL PRO LOGIC 3 STEREO MOVIE RF OPT COAX MULTI NIGHT LFE ATT
J
STEREO HALL MATRIX SLEEP P-SCAN DISP
A B C D E F G H I
A. AC-3 Indicator: This indicator illuminates when the another location. When a remote command is being
AVR75 is decoding a Dolby Digital input source. received via the Multi IR connection (59), this indicator will
flash. NOTE: this feature differentiates the AVR85 from
B. Surround Mode Status: These indicators display the the AVR75. The AVR75 does not have this feature.
currently selected surround mode.
E. Sleep Indicator: This indicator lights when the
C. Digital Mode Indicators: These indicators show which AVR75/85 is in the Sleep mode.
digital input is in use.
F. Night Indicator: This indicator lights when the
D. Multi: This indicator signifies that the AVR85 is sending AVR75/85 is in Night mode, which prevents the AVR75/85
a program source to a remote room location. Note that it from loud playback when digital sources are in use.
may be illuminated even when the unit is "off" in the main
listening room, signifying that operation continues at
7
Harman Kardon AVR75/85
Dolby Digital Audio/Video Receiver
G. P-Scan: This indicator flashes when the stations N. Auto: This indicator signifies that the Automatic Tuning
programmed into the tuner memory are being automatically mode is in use for FM broadcasts.
reviewed.
O. Memo: This indicator flashes when the Memo button is
H. LFE Indicator: This indicator will illuminate when the pressed when entering presets and other information into
Low-Frequency Effects (LFE) option has been turned on the tuner's memory.
through the controls in SETUP MENU 3.
P. Test: This indicator flashes when the output levels are
I. DISP: This indicator lights when the FL display has been being set using the built-in test signal generator.
turned off using the Display button (16) to remind you that
the unit is still turned on. Q. "Visual" Indicator: These indicators display which input
source is being fed to the video monitor output.
J. ATT Indicator: This indicator lights when the Attenuation
function has been engaged to cut the input from analog R. PCM Indicator: This indicator illuminates to show that a
sources by approximately 50%. standard PCM (S/P-DIF) digital audio signal is being
decoded by the digital-to-analog converter.
K. Main Information Display: This ten-digit display shows
messages relating to the status, input source, surround S. Signal Level Indication: This is a visual indication of the
mode, tuner, volume level or other aspects of unit's the strength of a radio station signal. The more bars visible,
operation. the stronger the station.
L. Stereo: This indicator lights when an FM station is
broadcasting in stereo.
M. Tuned: This indicator lights when an AM or FM station is
properly tuned and locked.
8
Harman Kardon AVR75/85
Dolby Digital Audio/Video Receiver
AVR75 & AVR85 REMOTE CONTROL
28 27 28 27
Sending Learning Sending Learning
1 1
Use Learn Use Learn
2 ON OFF ON OFF SLEEP
2 ON OFF ON OFF SLEEP
3 Main Power Source Power
26 3 Main Power Source Power
26
AC-3 P/L 3 ST MOVIE AC-3 P/L 3 ST MOVIE
4 TV STEREO MATRIX HALL 25 4 TV STEREO MATRIX HALL 25
5 DVD NIGHT 1 2 3 5 DVD NIGHT 1 2 3
6 VID 1 DELAY
ABC
4
DEF
5
GHI
6
6 VID 1 DELAY
ABC
4
DEF
5
GHI
6
JKL MNO PQR
24 JKL MNO PQR
24
VID 2 RF 7 8 9 VID 2 RF 7 8 9
7 VID 3 OPT
STU
*
VWX
0
YZ
# 7 VID 3 OPT
STU
*
VWX
0
YZ
#
23 23
AM/FM COAX
MEMO
+
CLEAR
SKIP
P-SCAN
22 AM/FM COAX
MEMO
+
CLEAR
SKIP
P-SCAN
22
21 21
CD
PRESET
DISC
TUNE/
SEARCH 20 8 CD MULTI
PRESET
DISC
TUNE/
SEARCH 20
_ 19 _ 19
TAPE 1 / TAPE 1 /
FM MODE PTY AF
18 FM MODE PTY AF
18
TAPE 2 DISPLAY MUTE TAPE 2 DISPLAY MUTE
17 17
SELECT
RDS DISP.
TEST TONE
16 SELECT
RDS DISP.
TEST TONE
16
9 9
10 10
OSD CH SELECT OSD CH SELECT
11
VOLUME 15 11
VOLUME 15
12 SPEAKER
12 SPEAKER
13 13
AVR 75 AVR 85
14 14
1 Use/Learn 15 Main Volume
2 Source Power 16 Display
3 Main Power 17 Mute
4 Source Selection 18 Transport Controls
5 Night Mode 19 Tune/Search and Fast Forward
6 Delay 20 Preset/Disc
7 Digital Audio Input Selectors 21 Channel/Skip
8 Multiroom Control 22 Memo
9 Menu Controls 23 P-Scan
10 Select 24 Number Keys
11 OSD 25 Surround Mode Selection
12 Test Tone 26 Sleep
13 Channel Select 27 Learn LED
14 Speaker Level Adjust 28 Sending LED
9
Harman Kardon AVR75/85
Dolby Digital Audio/Video Receiver
AVR75 & AVR85 REMOTE CONTROL INFORMATION ...continued
1. Use/Learn: This switch selects the operation mode of the 12. Test Tone: Press this button to begin calibration of the
remote control. Slide it to the left for normal operation. Slide output level for each channel. A test signal will immediately
it to the right when the remote is being programmed. be heard from the left front speaker and the Test indicator
P will flash.
2. Source Power: When power on/off commands have
been programmed into the remote's memory, press these 13. Channel Select: Press this button to view a status
buttons to control power for the last source device selected. report of the output level for each channel. When the Test
Tone is audible and the system output levels are being set,
3. Main Power: Press these buttons to turn the unit on or pressing this button will advance the channel being adjusted
off (to Standby Mode). in a clockwise direction to the next channel.
4. Source Selection: Pressing one of these buttons selects 14. Speaker Level Adjust: When setting the system output
the input source that will be listened to through the receiver. levels, press these buttons to increase or decrease the
When a source is selected the remote's transport and output level.
numeric number buttons will also transmit the commands
needed to control that machine. 15. Main Volume: These buttons control the unit's volume.
Note that all channels are controlled simultaneously.
5. Night Mode: Press this button to activate the "Night"
mode, preventing loud playback when the digital modes are 16. Display: Press this button to turn off all displays and
in use without altering the dynamic range of the output indicators in the Information Display except for a small Disp
signal. indication in the lower right corner of the display I . Press
the button again to turn the display back on.
6. Delay: Press this button to change the delay for the
surround channels when the Surround Mode Menu is on the 17. Mute: Press this button to temporarily cut the audio
screen. output of the receiver. Press it again to return to the
previous volume level.
7. Digital Audio Input Selectors: Press one of these
buttons to select a digital input source. The digital audio 18. Transport Controls: These buttons may be
source may be the same as, or different analog audio of the programmed to control the tape or disc motion of the last
selected video source. playback source selected with the Source Selection
buttons 4 . Use them as you would the Play, Stop, Pause,
8. Multiroom Control: Press this button to turn the remote Record, Reverse Play and Forward Play buttons on any
room feed on or off. The Multi indicator D will light or flash VCR, CD, cassette, DVD or LD remote control. The
when the remote feed is on. Note that the remote zone feed Reverse Play button also operates the FM Mode
will remain on after the main room power is turned off until it function of the AVR75/85's tuner.
is switched off by pressing this button again.
NOTE: The , and buttons are also used
9. Menu Controls: These buttons control the action of the to control the PTY, AF and RDS Display functions of the
cursor or the selection of menu items when the receiver is tuner.
being configured using the setup menus.
10. Select: This button enters settings to the receiver's 19. Tune/Search & Fast Forward: These buttons may be
memory during system configuration. programmed to have multiple functions, which vary
according to the input device selected.
11. OSD: Press this button to activate the on-screen menu a. When the TUNER has been selected, these buttons
system.
are used to tune stations.
b. When CD, Tape, DVD, LD or VCR is the input source,
these buttons act as the Fast Scan Forward or
Fast Scan Reverse controls.
10
Harman Kardon AVR75/85
Dolby Digital Audio/Video Receiver
20. Preset/Disc: These buttons have multiple functions,
which may vary according to the input device codes NOTE: The 0 button has a dual function. It also serves
programmed. as the CLEAR button for use in programming the tuner
or clearing the system memory.
a. When the TUNER has been selected, these buttons
will scroll up or down through the stations 25. Surround Mode Selection: Press one of these buttons
that have been programmed in the preset memory. to select a surround mode for the current listening session.
b. When CD is selected and the unit is a CD changer, 26. Sleep (AVR75): Press this button when the Sleep timer
these buttons will change to the next disc or has previously been activated to view the time remaining
previous disc . before the unit turns off to the Standby Mode. To activate
the Sleep function, first put the unit in the Tuner Mode by
c. When Tape 1 or Tape 2 is the input source, and the pressing the AM/FM button 4 2 . Next, press the Sleep
tape machine is a compatible Harman Kardon dual button 26 and note that the Sleep and Memo indicators E
cassette deck, these buttons will switch between the O will blink. Within that blinking time press the Memo
"A" and "B" sides. button 22 15 and then press the Sleep button again to set
the sleep time in the following order:
21. Channel/Skip: These buttons have multiple functions,
10 20 30 40 50 60 90
which vary according to the input device selected and the min min min min min min min
OFF
codes programmed from another remote.
When the desired time is shown in the display, press the
a. When TV, Vid 1 or Vid 2 are selected, they may
Memo button 22 15 to enter the time. The unit will go into
function as the channel up or channel down
the Standby Mode when the time entered has elapsed.
tuning buttons when programmed with the codes from
another unit's remote.
26. Sleep (AVR85): Pressing this button when the Sleep
b. When CD is selected these buttons act as forward and timer has previously been activated allows you to view the
reverse "Skip" buttons to move to the next track or time remaining before the timer function turns the unit off.
chapter on the disc. When the remote is in the AM/FM mode 4 , the Sleep
function may also be changed or set by pressing this button
c. When a compatible Harman Kardon cassette player so that the Sleep and Memo indicators E O blink (timer not
has been selected as Tape 1 or Tape 2, these yet set) or Sleep time is indicated (timer set already). Within
buttons move the tape forward or backwards that time press the Memo button 22 15 so that both
to the next selection using the Music Scan feature. indicators blink slowly. Now press the Sleep button 26
again to set the desired sleep time in the following order:
22. Memo: The memo button is used to enter stations to
10 20 30 60 90
the tuner's preset memory in either the manual or automatic min min min min min
OFF
modes. It is also used in the process of clearing the
memory. This button also performs the functions of the " " When the desired time is shown in the display, press the
symbol on compatible equipment. Memo button 22 15 to enter the time. The unit will go into
the Standby Mode when the time entered has elapsed.
23. P-Scan: Press this button to automatically scan through
the stations preset into the tuner memory. Press the button 27. Learn LED: This indicator will illuminate when a button
again to end the scan when the tuner stops at the desired on the remote is being programmed with signals from
station. This button also performs the functions of the " " another remote during the "learning" mode. The light will go
symbol on compatible equipment. out when the signal is received and memorized.
24. Number Keys: These buttons serve as a ten button 28. Sending LED: This indicator should flash any time a
numeric keypad to enter tuner preset positions. They are button is pressed to confirm that a command is being sent to
also to be used to select channel numbers when TV has the receiver or another unit. If the light is dim or does not
been selected on the remote, or to select track numbers on illuminate when a button is pressed the batteries in the
a CD, DVD or LD player, depending on how the remote has remote should be replaced.
been programmed. The letters below the buttons are used
to enter information for tuner station names.
11
Harman Kardon AVR75/85
Dolby Digital Audio/Video Receiver
AVR75 & AVR85 REAR PANEL CONNECTIONS
30. AM Antenna: Connect the AM loop antenna supplied 33. Tape 2 In: Connect these jacks to the PLAY/OUT jacks
with the receiver to these terminals. If an external AM of a second audio recorder.
antenna is used, make connections to the AM and GND
terminals in accordance with the instructions supplied with 34. Tape 1 Out: Connect these jacks to the
the antenna. RECORD/INPUT jacks of an audio recorder.
31. FM Antenna: Connect an indoor or external FM 35. Tape 1 In: Connect these jacks to the PLAY/OUT jacks
antenna to this terminal. of an audio recorder.
32. Tape 2 Out: Connect these jacks to the 36. CD IN: Connect these jacks to the output of a compact
RECORD/INPUT jacks of a second audio recorder. disk player or CD changer.
12
Harman Kardon AVR75/85
Dolby Digital Audio/Video Receiver
37. DVD Inputs: Connect the analog audio outputs and 50. Remote IR In: If the AVR75/85's front panel IR sensor is
composite or S-Video output of a DVD or LV player to these blocked due to cabinet doors or other obstructions, an
jacks. external IR sensor may be used. Connect the output of the
sensor to this jack.
38. TV Inputs: Connect these jacks to the audio and video
outputs of a TV Tuner, Cable TV converter box, satellite 51. Remote IR Out: This connection permits the IR sensor
receiver, or any other audio/video source. in the receiver to serve other remote controlled devices.
Connect this jack to the "IR IN" jack on Harman Kardon or
39. Pre-Outs: If external power amplifiers are used for any other compatible equipment.
channels, connect them to these jacks.
52. VCR 1 Inputs: Connect these jacks to the audio, video
40. Subwoofer Pre-Out: Connect this jack to the line level and S-Video PLAY/OUT jacks of a VCR.
input of a powered subwoofer. If an external subwoofer
amplifier is used, connect this jack to the subwoofer 53. VCR 1 Outputs: Connect these jacks to the audio,
amplifier input. video and S-Video RECORD/IN jacks of a VCR.
41. Center: Connect these terminals to the center speaker. 54. TV Monitor S-Video Output: Connect this jack to the
S-Video input of the TV monitor or video projector to view
42. Surround: Connect these terminals to the surround S-Video sources selected by the receiver's video switcher.
speakers.
NOTE: Standard (composite) video and S-Video signals will
43. Front: Connect these terminals to the front speakers. appear only at their respective output. The AVR75/85 does
not convert one video format to anther.
44. Switched AC Outlet: This outlet may be used to power
any device that you any wish to ha◦ Jabse Service Manual Search 2026 ◦ Jabse Pravopis ◦ onTap.bg ◦ Other service manual resources online : Fixya ◦ eServiceinfo