Service Manuals, User Guides, Schematic Diagrams or docs for : IBM HDD IBM Travelstar 5GS
<< Back | HomeMost service manuals and schematics are PDF files, so You will need Adobre Acrobat Reader to view : Acrobat Download Some of the files are DjVu format. Readers and resources available here : DjVu Resources
For the compressed files, most common are zip and rar. Please, extract files with Your favorite compression software ( WinZip, WinRAR ... ) before viewing. If a document has multiple parts, You should download all, before extracting.
Good luck. Repair on Your own risk. Make sure You know what You are doing.
Image preview - the first page of the document
>> Download IBM Travelstar 5GS documenatation <<
Text preview - extract from the document
IBM storage products
Quick installation guide
Travelstar 5GS
AT/IDE
Models: DPLA-24480 & DPLA-25120
Handling precautions Quick installation procedure
1. Do not cover the breather hole! Covering the Note: It is advisable to backup all data before
breather hole may result in loss of data. proceeding with the installation.
If your system BIOS cannot handle large capacity
drives (over 540 MB), you may need to use a disk
overlay program such as Ontrack's Disk Manager.
The following procedure uses the Ontrack Disk
Manager software. Information on obtaining a copy of
2. Do not press on the drive! Do not apply any force
Ontrack's Disk Manager can be found on the Web at
to the drive during handling or installation.
www.ibm.com/harddrive.
Setting the jumpers
1. In a one drive system, configure your new drive as
Master (Device 0) with no jumpers installed.
2. In a two drive system, one drive must be desig-
3. Always handle the drive with care to prevent nated as the Master, the other as the Slave (Device 1).
damage from shock, vibration, or electrostatic 3. When installing the new drive as a Slave, check the
discharge (ESD). Master drive to determine if a jumper change is
4. Do not open the static-protective bag containing the required to indicate that a Slave drive is present.
drive until required. Static electricity can damage the 4. Consult your manual to see if your computer
drive. supports Cable Select before choosing this option.
5. Turn off and unplug your computer. Remove the
cover.
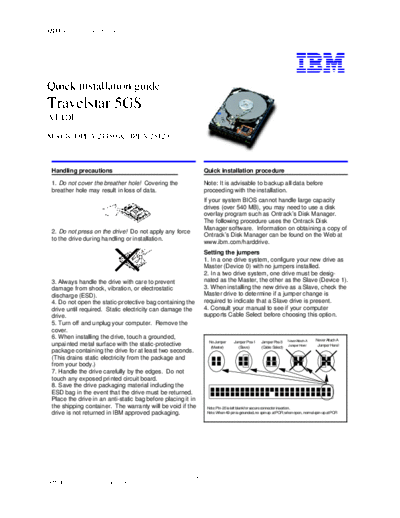
6. When installing the drive, touch a grounded, Never Attach A
No Jumper Jumper Pos-1 Jumper Pos-3 Never Attach A
unpainted metal surface with the static-protective (Master) (Slave) (Cable Select) Jumper Here! Jumper Here!
package containing the drive for at least two seconds.
(This drains static electricity from the package and
from your body.)
7. Handle the drive carefully by the edges. Do not
touch any exposed printed circuit board.
8. Save the drive packaging material including the
ESD bag in the event that the drive must be returned.
Place the drive in an anti-static bag before placing it in
the shipping container. The warranty will be void if the Note: Pin-20 is left blank for secure connector insertion.
drive is not returned in IBM approved packaging. Note: When 49-pin is grounded, no spin-up at POR; when open, normal spin-up at POR
Page 1
IBM Hard Disk Drive Technical Support Center version 3.0
IBM storage products
Attaching the drive
1. Turn off the computer, unplug the power cord, and
open the cover.
2. Match pin 1 of the 44 pin cable to pin 1 of the drive ◦ Jabse Service Manual Search 2026 ◦ Jabse Pravopis ◦ onTap.bg ◦ Other service manual resources online : Fixya ◦ eServiceinfo