Service Manuals, User Guides, Schematic Diagrams or docs for : Kyocera Copiers DC5090 SERVICE 36
<< Back | HomeMost service manuals and schematics are PDF files, so You will need Adobre Acrobat Reader to view : Acrobat Download Some of the files are DjVu format. Readers and resources available here : DjVu Resources
For the compressed files, most common are zip and rar. Please, extract files with Your favorite compression software ( WinZip, WinRAR ... ) before viewing. If a document has multiple parts, You should download all, before extracting.
Good luck. Repair on Your own risk. Make sure You know what You are doing.
Image preview - the first page of the document
>> Download 36 documenatation <<
Text preview - extract from the document
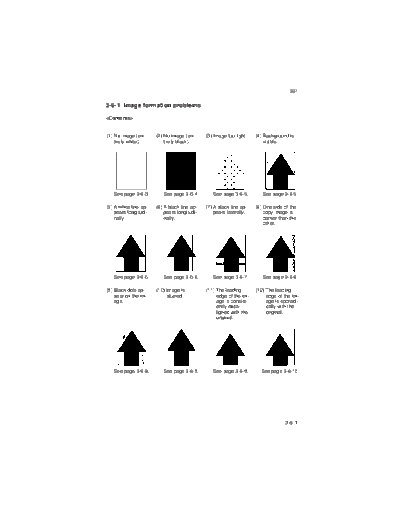
367 3-6-1 Image formation problems(1) No image (en- (2) No image (en- (3) Image too light. (4) Background is tirely white). tirely black). visible. See page 3-6-3. See page 3-6-4. See page 3-6-5. See page 3-6-5. (5) A white line ap- (6) A black line ap- (7) A black line ap- (8) One side of the pears longitudi- pears longitudi- pears laterally. copy image is nally. nally. darker than the other. See page 3-6-6. See page 3-6-6. See page 3-6-7. See page 3-6-8. (9) Black dots ap- (10) Image is (11) The leading (12) The leading pear on the im- blurred. edge of the im- edge of the im- age. age is consist- age is sporadi- ently misa- cally with the ligned with the original. original. See page 3-6-8. See page 3-6-9. See page 3-6-9. See page 3-6-10. 3-6-1 367 (13) Paper creases. (14) Offset occurs. (15) Black lines ap- (16) Image is party pear on both missing. sides of the image in re- duction copies. See page 3-6-10. See page 3-6-11. See page 3-6-12. See page 3-6-12. (17) Fixing is poor. (18) Image is out of (19) Image is not (20) Image is not focus. squarelongitu- square lateral- dinally. ly. See page 3-6-13. See page 3-6-13. See page 3-6-13. See page 3-6-14. (21) Lateral bands of the image are missing. See page 3-6-14. 3-6-2 367-1 367 (1) No image (en- Causes tirely white). 1. No original present. 2. No main charging. 3. No transfer charging. 4. All blank lamps on. 5. Developing section not driven. Causes Check procedures/corrective measures 1. No original present. Place an original in the correct position. 2. No main charging. A. Broken main charger wire. Replace the main charger wire. B. Leaking charger housing. Clean the main charger housing. C. The connector terminals of the Check for continuity across the terminals; If none, HVTPCB make poor contact. replace them. D. Defective MPCB. Run simulation 32. If CN10-16 on the MPCB fails to go low or the correct control voltage is not out- put at CN10-17, replace the MPCB. E. Defective HVTPCB. Run simulation 32. If main charging fails while the MPCB is okay, replace the HVTPCB. 3. No transfer charging. A. The connector terminals of the Check for continuity across the terminals; If none, TCBPCB make poor contact. replace them. B. Defective MPCB. If CN6-17B on the MPCB fails to go low or the correct control voltage is not output at CN6-16B during conveying paper, replace the MPCB. C. Defective TCBCB. Run simulation 31. If transfer charging fails while the MPCB is okay, replace the TCBPCB. 4. All blank lamps on. Run simulation 42 and if the check pattern copy is not obtained, replace the MPCB. 5. Developing section not driven. Check the gears driving the developing section and replace any broken gears. 3-6-3 367 367-1 (2) No image (en- Causes tirely black). 1. Broken halogen lamp filament. 2. Halogen lamp fails to light. Causes Check procedures/corrective measures 1. Broken halogen lamp filament. Take the halogen lamp of the unit and check for continuity across the terminals. If none, replace it. (see page 3-3-43) 2. Halogen lamp fails to light. Check for continuity. A. The optical thermostat trig- Check for continuity across the optical thermostat. gered. If none, after cleaning up the cause of the opera- tion, press the button and recheck for continuity. If there is still no continuity, replace the thermostat. B. The connector terminals of the Check for continuity across the terminals; If none, CPCB make poor contact replace them. C. Defective MPCB. Run simulation 20. If CN19-5 on the MPCB re- mains low, replace the MPCB. D. Defective CPCB. Run simulation 20. If the halogen lamp fails to light while the MPCB is okay, replace the CPCB. 3-6-4 367-1 367 (3) Image is too Causes light. 1. Insufficient toner. 2. Deteriorated developer. 3. Misadjusted developing section. 4. Dirty or deteriorated drum. 5. Lowered drum surface potential. Causes Check procedures/corrective measures 1. Insufficient toner. If the add toner message is on the display, re- place the toner cartridge. 2. Deteriorated developer. If the maintenance level is reached, replace the developer. 3. Misadjusted developing sec- Readjust the developing section (see page 3-3- tion. 88) 4. Dirty or deteriorated drum. Clean the drum or, if the maintenance level is reached. (see page 3-3-81) 5. Lowered drum surface poten- Readjust the drum surface potential if the poten- tial. tial sensor detects less than 1.5 V. (4) Background is Causes visible. 1. Dirty optical section. 2. Deteriorated developer. Causes Check procedures/corrective measures 1. Dirty optical section. Clean the exposure adjusters, mirrors and other parts in the optical section. 2. Deteriorated developer. If the maintenance level is reached, replace the developer. 3-6-5 367 (5) A white line ap- Causes pears longitudi- 1. Dirty or flawed main charger wire. nally. 2. Foreign matter in the developing section. 3. Flawed drum. Causes Check procedures/corrective measures 1. Dirty or flawed main charger Clean the main charger wire or, if it is flawed, re- wire. place. 2. Foreign matter in the develop- Check if the magnetic brash is formed uniformly. If ing section. not, replace the developer. 3. Flawed drum. Check the drum visually. If it is flawed, replace. (see page 3-3-81) (6) A black line ap- Causes pears longitudi- 1. Dirty optical section. nally. 2. Dirty or flawed drum. 3. Deformed or worn cleaning blade. 4. Dirty or flowed main charger grid. Causes Check procedures/corrective measures 1. Dirty optical section. Clean the mirrors, dust filter and other parts in the optical section. 2. Dirty or flawed drum. Clean the drum or, if it is flawed, replace. (see page 3-3-81) 3. Deformed or worn cleaning Check visually if the cleaning blade is deformed or blade. worn. If it is, replace. (see page 3-3-100) 4. Dirty or flowed main charger Replace the main charger grid. (see page 3-3-37) grid. 3-6-6 367 (7) A black line ap- Causes pears laterally. 1. Flawed drum. 2. Poor developing bias wire contact. 3. Dirty developing section. 4. No developing bias output. Causes Check procedures/corrective measures 1. Flawed drum. Check the drum visually. If it is flawed, replace. (see page 3-3-81) 2. Poor developing bias wire con- Check for poor developing bias wire contact. tact. 3. Dirty developing section. Check for part contaminated with toner or carrier in the developing section. 4. No developing bias output. A. The developing bias wire is Check the developing bias wire. If there is any shorted or makes poor con- problem, replace it. tact. B. Defective MPCB. Run simulation 02 and check if CN10-21 on the MPCB fails to go low, replace the MPCB. C. Defective HVTPCB. Run simulation 02. If the developing bias is not output while the MPCB is okay, replace the HVTPCB. 3-6-7 367 (8) One side of the Causes copy image is 1. Unevenly distributed halogen lamp light. darker than the 2. Dirty optical section. other. 3. Dirty main charger wire or grid. Causes Check procedures/corrective measures 1. Unevenly distributed halogen Adjust the positions of the light adjusters. (see lamp light. page 3-3-45) 2. Dirty optical section. Clean the mirrors, dust filter and any other dirty parts in the optical section. 3. Dirty main charger wire or grid. Check if the main charger wire or grid is dirty. It is, replace it. (9) Black dots ap- Causes pears on the im- 1. Dirty or flawed drum. age. 2. Dirty contact glass. 3. Deformed cleaning brush. Causes Check procedures/corrective measures 1. Dirty or flawed drum. Clean the drum or, if it is flawed, replace it. (see page 3-3-81) 2. Dirty contact glass. Clean the contact glass. 3. Deformed cleaning brush. Check visually if the cleaning brush is deformed. If it is, replace it. 3-6-8 367 (10) Image is Causes blurred. 1. Scanner moving erratically. 2. Foreign matter on the scanner rail. 3. Deformed press roller. 4. Drive system problem. Causes Check procedures/corrective measures 1. Scanner moving erratically. Adjust the tension of the scanner wire. (see page 3-3-52) 2. Foreign matter on the scanner Check visually and remove, it any. rail. 3. Deformed press roller. Check visually and replace. (see page 3-3-117) 4. Drive system problem. Check the gears and belts. Grease the gears or readjust the belt tension if necessary. (11) The leading Cause edge of the im- 1. Misadjusted leading edge registration. age is consist- ently misa- ligned with the original. Cause Check procedures/corrective measures 1. Misadjusted leading edge reg- Readjust the leading edge registration. (see page istration. 3-3-26) 3-6-9 367 (12) The leading Cause edge of the im- 1. Registration clutch installed or operating age is sporadi- incorrectly. cally misa- ligned with the original. Cause Check procedures/corrective measures 1. Registration clutch installed or Check the installation position and operation of operating incorrectly. the registration clutch. (13) Paper creases. Causes 1. Paper curled. 2. Paper damp. 3. Defective pressure springs. Causes Check procedures/corrective measures 1. Paper curled. Check the paper storage conditions. 2. Paper damp. Check the paper storage conditions. 3. Defective pressure springs. Replace the pressure springs. 3-6-10 367-1 367 (14) Offset occurs. Causes 1. Cleaning blade installed in the wrong position. 2. Defective cleaning blade. 3. Defective cleaning brush. 4. Cleaning lamp fails to light. 5. Abnormally high heat roller control temperature. Causes Check procedures/corrective measures 1. Cleaning blade installed in the Check the installation position of the cleaning wrong position. blade and correct it, if necessary. (see page 3-3- 100) 2. Defective cleaning blade. Replace the cleaning blade. 3. Defective cleaning brush. Clean or replace the cleaning brush. 4. Cleaning lamp fails to light. A. The connector terminals of the Check for continuity across the terminals. If none, cleaning lamp make poor con- replace them. tact. B. Defective cleaning lamp. Check for continuity across the lamp. If none, re- place the lamp. . C. Defective MPCB. Force CN5-6A on the MPCB to go low and check if the cleaning lamp lights. If it does, replace the MPCB. 5. Abnormally high heat roller Check if the fixing unit thermistor is installed cor- control temperature. rectly. 3-6-11 367-1 367 (15) Black lines ap- Causes pear on both 1. Dirty blank lamp. sides of the 2. Defective blank lamp. image in re- 3. Defective MPCB. duction copies. Causes Check procedures/corrective measures 1. Dirty blank lamp. Clean the blank lamp. 2. Defective blank lamp. Check for one-way continuity across the terminals of each blank lamp. If none, replace the blank lamp PCB. 3. Defective MPCB. Run simulation 42 and check if the level of CN12- 6B terminal on the MPCB is changed. If not, re- place the MPCB. (16) Image is partly Causes missing. 1. Paper damp. 2. Paper creased. 3. Drum condensation. 4. Flawed drum. Causes Check procedures/corrective measures 1. Paper damp. Check the paper storage conditions. 2. Paper creased. Change the paper. 3. Drum condensation. Clean the drum. (see page 3-3-81) 4. Flawed drum. Replace the drum. (see page 3-3-81) 3-6-12 367 (17) Fixing is poor. Causes 1. Wrong paper. 2. Defective pressure springs. 3. Flawed press roller. Causes Check procedures/corrective measures 1. Wrong paper. Check if the paper meets specifications. 2. Defective pressure springs. Replace the pressure springs. 3. Flawed press roller. Replace the roller. (see page 3-3-117) (18) Image is out of Cause focus. 1. Misadjusted focus (installation position of light source unit 1). Cause Check procedures/corrective measures 1. Misadjusted focus (installation Readjust the focus of the image (refitting of light position of light source unit 1). source unit 1). (see page 3-3-57) (19) Image is not Cause square longitu- 1. Light source unit 2 positioned incorrectly at the rear. dinally. Cause Check procedures/corrective measures 1. Light source unit 2 positioned Adjust the longitudinal squareness of the image. incorrectly at the rear. (see page 3-3-65) 3-6-13 367 (20) Image is not Cause square lateral- 1. The height of light source unit 2 is adjusted ly. incorrectly. Cause Check procedures/corrective measures 1. The height of light source unit Adjust the lateral squareness of the image. (see 2 is adjusted incorrectly. page 3-3-66) (21) Image is par- Causes tially missing 1. Registration clutch incorrectly installed or laterally. malfunctioning. 2. Feed clutch 1 or 2 incorrectly installed or malfunctioning. Causes Check procedures/corrective measures 1. Registration clutch incorrectly Check and correct the clutch installation position installed or malfunctioning. and its operation. 2. Feed clutch 1 or 2 incorrectly Check and correct the clutch installation align- installed or malfunctioning. ment and its operation. 3-6-14 367 3-6-2 Paper misfeeds
◦ Jabse Service Manual Search 2026 ◦ Jabse Pravopis ◦ onTap.bg ◦ Other service manual resources online : Fixya ◦ eServiceinfo