Service Manuals, User Guides, Schematic Diagrams or docs for : Keithley 2220 2220_2230_QuickStartGuideSBG

<< Back | Home

Most service manuals and schematics are PDF files, so You will need Adobre Acrobat Reader to view : Acrobat Download Some of the files are DjVu format. Readers and resources available here : DjVu Resources
For the compressed files, most common are zip and rar. Please, extract files with Your favorite compression software ( WinZip, WinRAR ... ) before viewing. If a document has multiple parts, You should download all, before extracting.
Good luck. Repair on Your own risk. Make sure You know what You are doing.


Image preview - the first page of the document
2220_2230_QuickStartGuideSBG


>> Download 2220_2230_QuickStartGuideSBG documenatation <<

Text preview - extract from the document
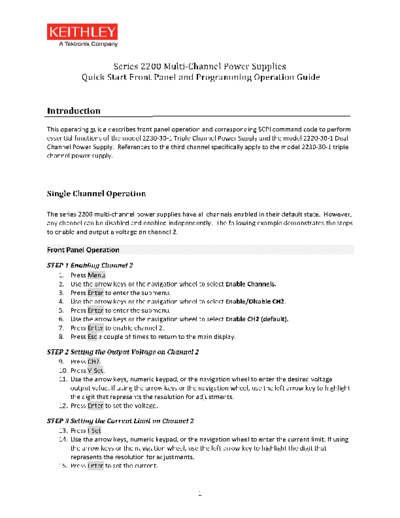


                            Series
  2200
  Multi-Channel
  Power
  Supplies
  
               
  Quick
  Start
  Front
  Panel
  and
  Programming
  Operation
  Guide


Introduction


This
  operating
  guide
  describes
  front
  panel
  operation
  and
  corresponding
  SCPI
  command
  code
  to
  perform
  
essential
  functions
  of
  the
  model
  2230-30-1
  Triple
  Channel
  Power
  Supply
  and
  the
  model
  2220-30-1
  Dual
  
Channel
  Power
  Supply.
  
  References
  to
  the
  third
  channel
  specifically
  apply
  to
  the
  model
  2230-30-1
  triple
  
channel
  power
  supply.


Single
  Channel
  Operation


The
  series
  2200
  multi-channel
  power
  supplies
  have
  all
  channels
  enabled
  in
  their
  default
  state.
  
  However,
  
any
  channel
  can
  be
  disabled
  and
  enabled
  independently.
  
  The
  following
  example
  demonstrates
  the
  steps
  
to
  enable
  and
  output
  a
  voltage
  on
  channel
  2.


Front
  Panel
  Operation
  
STEP
  1
  Enabling
  Channel
  2
  
   1. Press
  Menu.
  
   2. Use
  the
  arrow
  keys
  or
  the
  navigation
  wheel
  to
  select
  Enable
  Channels.
  
   3. Press
  Enter
  to
  enter
  the
  submenu.
  
   4. Use
  the
  arrow
  keys
  or
  the
  navigation
  wheel
  to
  select
  Enable/Disable
  CH2.
  
   5. Press
  Enter
  to
  enter
  the
  submenu.
  
   6. Use
  the
  arrow
  keys
  or
  the
  navigation
  wheel
  to
  select
  Enable
  CH2
  (default).
  
   7. Press
  Enter
  to
  enable
  channel
  2.
  
   8. Press
  Esc
  a
  couple
  of
  times
  to
  return
  to
  the
  main
  display.
  

STEP
  2
  Setting
  the
  Output
  Voltage
  on
  Channel
  2
  
   9. Press
  CH2.
  
   10. Press
  V-Set.
  
   11. Use
  the
  arrow
  keys,
  numeric
  keypad,
  or
  the
  navigation
  wheel
  to
  enter
  the
  desired
  voltage
  
           output
  value.
  If
  using
  the
  arrow
  keys
  or
  the
  navigation
  wheel,
  use
  the
  left
  arrow
  key
  to
  highlight
  
           the
  digit
  that
  represents
  the
  resolution
  for
  adjustments.
  
   12. Press
  Enter
  to
  set
  the
  voltage.
  

STEP
  3
  Setting
  the
  Current
  Limit
  on
  Channel
  2
  
   13. Press
  I-Set.
  
   14. Use
  the
  arrow
  keys,
  numeric
  keypad,
  or
  the
  navigation
  wheel
  to
  enter
  the
  current
  limit.
  If
  using
  
           the
  arrow
  keys
  or
  the
  navigation
  wheel,
  use
  the
  left
  arrow
  key
  to
  highlight
  the
  digit
  that
  
           represents
  the
  resolution
  for
  adjustments.
  
   15. Press
  Enter
  to
  set
  the
  current.


                                                                        1


STEP
  4
  Turning
  on
  the
  Output
  
    16. Press
  Output
  On/Off
  to
  turn
  on
  the
  output.


Remote
  Operation


The
  following
  SCPI
  command
  example
  enables
  channel
  2,
  sets
  the
  voltage
  output
  to
  2.22V,
  the
  current
  
limit
  to
  1.5A
  and
  turns
  the
  output
  on.


             INST:SEL
  CH2
  
             SOURCE:OUTP:ENAB
  ON
  
             SOURCE:VOLT
  2.22V
  
             SOURCE:CURR
  1.5A
  
             SOURCE:OUTP
  ON


Combining
  Channels
  1
  and
  2
  in
  Series
  to
  Output
  More
  than
  30V


The
  series
  2200
  multi-channel
  power
  supplies
  have
  all
  channels
  isolated
  in
  their
  default
  state.
  
  However,
  
channel
  1
  and
  channel
  2
  can
  be
  combined
  in
  series
  to
  output
  a
  higher
  total
  voltage.
  
  The
  following
  
example
  demonstrates
  the
  steps
  to
  enable
  and
  output
  a
  combined
  voltage
  from
  channel
  1
  and
  2.


Front
  Panel
  Operation
  
STEP
  1
  Configure
  the
  Instrument
  to
  Series
  Combination
  
   1. Press
  Menu.
  
   2. Use
  the
  arrow
  keys
  or
  the
  navigation
  wheel
  to
  select
  Combine
  CH1+CH2.
  
   3. Press
  Enter
  to
  enter
  the
  submenu.
  
   4. Use
  the
  arrow
  keys
  or
  the
  navigation
  wheel
  to
  select
  V1+V2
  Series.
  
   5. Press
  Enter
  to
  set
  to
  series
  combination.
  
  
  See
  an
  example
  of
  a
  series
  combination
  front
  panel
  
           display
  below.


STEP
  2
  Setting
  the
  Voltage
  Output
  and
  the
  Current
  Limit
  
   6. Press
  CH1.
  
  
   7. Press
  V-Set.
  
   8. Use
  the
  arrow
  keys,
  numeric
  keypad,
  or
  the
  navigation
  wheel
  to
  enter
  the
  voltage
  output.
  
   9. Press
  Enter
  to
  set
  the
  voltage
  of
  the
  combined
  channels.
  
   10. Press
  I-Set.
  
   11. Use
  the
  arrow
  keys,
  numeric
  keypad,
  or
  the
  navigation
  wheel
  to
  enter
  the
  current
  limit.
  
   12. Press
  Enter
  to
  set
  the
  current
  of
  the
  combined
  channel.
  

STEP
  3
  Turning
  on
  the
  Output
  
   13. Press
  Output
  On/Off
  to
  turn
  on
  the
  output.
  

                                                                      2


Remote
  Operation


The
  following
  SCPI
  command
  example
  configures
  the
  power
  supply
  for
  the
  series
  combination
  mode,
  
sets
  the
  voltage
  output
  to
  36V,
  the
  current
  limit
  to
  1.5A
  and
  turns
  the
  output
  on.


          *RST
  
          INST:COM:SER
  
          SOURCE:VOLT
  36V
  
          SOURCE:CURR
  1.5A
  
          SOURCE:OUTP
  ON


Wiring
  Channels
  1
  and
  2
  in
  Series
  to
  the
  DUT


Connect
  two
  wires
  from
  either
  the
  front
  panel
  binding
  posts
  or
  the
  rear
  panel
  terminals,
  as
  shown
  in
  
Figure
  1
  below,
  to
  your
  device
  under
  test
  (DUT).
  
  The
  SENSE
  lines
  are
  optional
  (rear
  panel
  only)
  and
  are
  
used
  in
  a
  remote
  sense
  connection.
  
                                                                                    CHANNEL 1                  CHANNEL 2                CHANNEL 3
                                                                                   S    S                      S                        S      S
                                                                                   e    e                      e   S                    e      e
                                                                               O   n    n   O              O   n   e   O           O    n      n    O
                                                                               u   s    s   u              u   s   n   u           u    s      s    u
                                                                               t   e    e   t              t   e   e   t           t    e      e    t
                                                 0-30V   0-30V   0-6V
                                                                               +    +   -       -          +   +   -       -       +    +      -    -
             IDUT

      +
                    H


      VDUT          DUT

                    L
      -                                                                                                                                     SOURCE HIGH
                                                                                                                                            SOURCE LOW
                                                                                                                                            SENSE HIGH
                                                                                                H          L                                SENSE LOW

                                                                                                    DUT


                                                                                            +       VDUT   -


                                          FRONT PANEL                                               IDUT                   REAR PANEL


             Figure
  1
  Connecting
  a
  Device
  in
  Series
  Combination
  on
  the
  Front
  Panel
  and
  the
  Rear
  Panel


Combining
  Channels
  1
  and
  2
  in
  Parallel
  to
  Output
  More
  than
  1.5A


The
  series
  2200
  multi-channel
  power
  supplies
  have
  all
  channels
  isolated
  in
  their
  default
  state.
  
  However,
  
channel
  1
  and
  channel
  2
  can
  be
  combined
  in
  parallel
  to
  output
  a
  higher
  total
  current.
  
  The
  following
  
example
  demonstrates
  the
  steps
  to
  enable
  and
  output
  a
  combined
  current
  from
  channel
  1
  and
  2.


Front
  Panel
  Operation
  
STEP
  1
  Configure
  the
  Instrument
  to
  Parallel
  Combination
  
   1. Press
  Menu.
  
   2. Use
  the
  arrow
  keys
  or
  the
  navigation
  wheel
  to
  select
  Combine
  CH1+CH2.
  
   3. Press
  Enter
  to
  enter
  the
  submenu.
  
   4. Use
  the
  arrow
  keys
  or
  the
  navigation
  wheel
  to
  select
  I1+I2
  Parallel.


                                                                        3


     5. Press
  Enter
  to
  set
  to
  parallel
  combination.
  
  
  See
  an
  example
  of
  a
  parallel
  combination
  front
  panel
  
        display
  below.


STEP
  2
  Setting
  the
  Voltage
  Output
  and
  the
  Current
  Limit
  
   6. Press
  CH1.
  
  
   7. Press
  V-Set.
  
   8. Use
  the
  arrow
  keys,
  numeric
  keypad,
  or
  the
  navigation
  wheel
  to
  enter
  the
  voltage
  output.
  
   9. Press
  Enter
  to
  set
  the
  voltage
  of
  the
  combined
  channel.
  
   10. Press
  I-Set.
  
   11. Use
  the
  arrow
  keys,
  numeric
  keypad,
  or
  the
  navigation
  wheel
  to
  enter
  the
  current
  limit.
  
   12. Press
  Enter
  to
  set
  the
  current
  of
  the
  combined
  channel.
  

STEP
  3
  Turning
  on
  the
  Output
  
    13. Press
  Output
  On/Off.


Remote
  Operation


The
  following
  SCPI
  command
  example
  configures
  the
  power
  supply
  for
  the
  parallel
  combination
  mode,
  
sets
  the
  voltage
  output
  to
  30V,
  the
  current
  limit
  to
  2.9A
  and
  turns
  the
  output
  on.


          *RST
  
          INST:COM:PARA
  
          SOURCE:VOLT
  30V
  
          SOURCE:CURR
  2.9A
  
          SOURCE:OUTP
  ON


Wiring
  Channels
  1
  and
  2
  in
  Parallel
  to
  the
  DUT


Connect
  two
  wires
  from
  either
  the
  front
  panel
  binding
  posts
  or
  the
  rear
  panel
  terminals,
  as
  shown
  in
  
Figure
  2
  below,
  to
  your
  DUT.
  
  The
  SENSE
  lines
  are
  optional
  (rear
  panel
  only)
  and
  are
  used
  in
  a
  remote
  
sense
  connection.


                                                                         4


                                                                                     CHANNEL 1                  CHANNEL 2                    CHANNEL 3

                                                                                     S   S                      S   S                        S   S
                                                                                     e   e                      e   e                        e   e
                                                                                 O   n   n   O              O   n   n   O              O     n   n   O
                                                                                 u   s   s   u              u   s   s   u              u     s   s   u
                                                                                 t   e   e   t              t   e   e   t              t     e   e   t
                                                                                 +   +   -       -          +   +   -       -           +    +   -       -
                                             0-30V    0-30V      0-6V

             IDUT

      +
                    H


      VDUT          DUT

                    L                                                                                                                        SOURCE HIGH
      -
                                                                                                                                             SOURCE LOW
                                                                                                                                             SENSE HIGH
                                                                                                 H          L                                SENSE LOW

                                                                                                     DUT


                                                                                             +       VDUT   -

                                   FRONT PANEL                                                       IDUT                       REAR PANEL
                                                                                                                                                             
  
              Figure
  2
  Connecting
  a
  Device
  in
  Parallel
  Combination
  on
  the
  Front
  Panel
  and
  the
  Rear
  Panel


Track
  Mode


◦ Jabse Service Manual Search 2024 ◦ Jabse PravopisonTap.bg ◦ Other service manual resources online : FixyaeServiceinfo