Service Manuals, User Guides, Schematic Diagrams or docs for : LG Car Audio tch-300 TCH-30~1

<< Back | Home

Most service manuals and schematics are PDF files, so You will need Adobre Acrobat Reader to view : Acrobat Download Some of the files are DjVu format. Readers and resources available here : DjVu Resources
For the compressed files, most common are zip and rar. Please, extract files with Your favorite compression software ( WinZip, WinRAR ... ) before viewing. If a document has multiple parts, You should download all, before extracting.
Good luck. Repair on Your own risk. Make sure You know what You are doing.


Image preview - the first page of the document
TCH-30~1


>> Download TCH-30~1 documenatation <<

Text preview - extract from the document
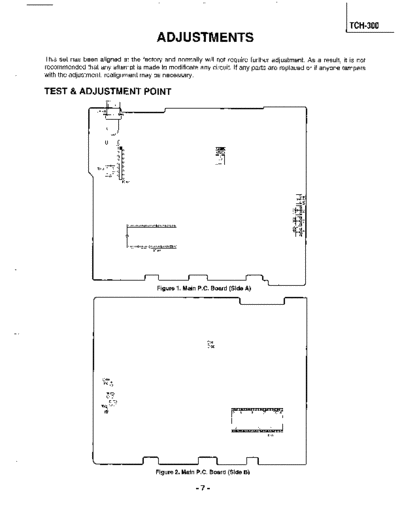
                                                                                                               TCH-300
                                                    ADJUSTMENTS
    This set has been aligned at the factory and normally will not require further adjustment. As a result, it is not
    recommended that any attempt is made to modificate any circuit. If any parts are replaced or if anyone tampers
-   with the adjustment, realignment may be necessary.


    TEST & ADJUSTMENT                             POINT
                L ,.
                 t
             I                                                                            /
                                                      I
                l_ J


                                                                             IFM]
                                                                              VR201

                                                                               6
                                                                             El

                       T201 O      ,"
                              0    0
                   \      0

                                          IC201


-


                                                    Figure 1. Main PC. Board (Side A)

                                                                                      1       r


                                                                      OS0
                                                                      OGND


                         ORE
                          TP601
                              5


                              FEIFE0
                              00
                                  TEI
                                    TEO
                         TPGM O"
                           0
                           REF


                                                    Figure 2. Main P.C. Board (Side B)
TCH-3001

   TUNER ADJUSTMENT

   1. FM ADJUSTMENT
                                                                                                                                                                                                                                                 -

                                                           Power Supply                                                          PRE OUT
                                                            -                01                                                                            11

          STEREO SG
                                                                                                                                                        -II
                                                                                                                                                                                              VTVM                       SCOPE

                                           FM SSG                                                                         I    II


          AUDIO OSC

                                                                                                1-n                                       /
                                                                                                            FM Dummy ANT.


                                                                   Figure 3. FM Adjustment                                Connection              Diagram


   (1) The impedance of FM antenna terminal is 7X&.
       Therefore, connect coaxial cable (3C-2V etc.) between FM SG and antenna terminal when wiring.
       \
                            FM SSG     Available Antenna
                          Attenuator     Power   Terminal
                           Indication     Ratio   Voltage

          Open indication                            OdB                    52dBf                6 dB/pV
          type                                      60dB                   652dBf                66dB/uV
          Load or close                              OdB                   11.2dBf               12dB/uV
          indication type                           54dB                   65.2dBf               66dB/uV
                                                                                                                      .
   (2) There are two kind in indication of FM SG output attenuator.
       1) Attenuator with marking of 75Q open...open indication type.
       2) Attenuator with marking of 75Q load or close . . . load or close indication                                                                                type.
   (3) FM SG output level in this FM adjustment are described as open indication type. The left table shows
       relations among FM SG attenuator indication (dB), available power ratio (dBf) and antenna terminal voltage
       (dB/uV) in each indication type.
   NOTE:       1.   BAND Switch .. .. . .. . .. .. . .. . .. .. .. . .. .. . .. .. .. . .. .. .. . .. . .. .. .. . .. . .. .. .. . .. .. . .. .. . .. .. . .. .. . .. . .. .. . .. . .. .. . .. .. . .. . .. .. . .. .. . .. .. .......... FM
               2.   BALANCE . . .. . .. .. . .. . .. .. . .. .. . .. .. . .. .. .. . .. .. .. . .. .. . .. .. . .. .. . .. .. . .. .. . .. .. .. . .. . .. .. .. . .. . .. .. . .. . .. . .. .. . .. . .. .. . .. .. . .. .. .......... Center
               3.   TREB/BASS .. . .. .. . .. . .. .. . .. .. . .. .. . .. .. .. .. . .. . .. .. .. . .. .. . .. .. . .. .. . .. .. . .. .. .. . .. . .. .. .. . .. . .. .. . .. . .. . .. .. . .. .. . .. . .. .. . .. .. . .....~.Center
               4.   Connect as shown in figure 3.
             - 5.   Refer to figure 1 & 2 for Adjustment Points.

                                                       FEED SIGNAL
   STEP      SUBJECT                                                                                        MEASURE              OUTPUT                  ADJUSTMENT                         ADJUST           FOR           REMARK
                                                  FROM                              TO
     1      Discriminator           98MHz 60dB                                ANTJack               Between IC2Ol Pin 0                            &            T201                    DC OV +lOmV
                                    No Dev.                                                         Pin 0, DC Volt Meter.
                                    FM SSG


     2      FM SEEK                 98MHz, 22dBpV                            ANT Jack               Between Point SD & point                                    VR201                   DC1.6V+O.O5V
            STOP                    225kHz Dev                                                      GND, DC Volt Meter


                                                                                                                -8-
                                                                                                                                             TCH-300

     CDP ADJUSTMENT

     1. METER AND JIG FOR ADJUSTMENT
--   l-l.   Oscilloscope                                     1-2. Test disc                                       1-3. Jitter meter
                                                                  (Sony type 4: YEDS-43)


     1-4. Low frequency       oscillator                     1-5. Digital frequency                counter         1-6. 10: 1 Oscilloscope   probe
-                                                                                                                        1: 1 Oscilloscope   probe


     1-7. Focus & tracking gain adjustment             jig


                                                                                                                 TP602
                                                   T                                    56K
                           A. F OSC        SWI-1   0          w                                                  TEI
                                  04                                                     1OOK
                                                                                                                 FEI
                                  0
                                  0                0
                                                   F


                                                   T                                          \
                                                                                       0.0047(M)
                           CH - 2          SWI-2   0          1                   II
                                                                                                   I


                                                                                                                 REF
                                  oe
                                                   0                                                         0   GND
                                  0
                                  0                F
                                                                                                   J
                                                   T                  22K              12K
                                                                                                                 TEO


                                                                                                         s
                           CH -   1
                                                                                                             0   FE0


                                                   F              22K                        10K


                   NOTE : This jig is not serviceable         part.


                                                                            -9-
                                                                        --                            _


TCH-300

  2.   Before adjusting,    preset adjustment   potentiometers     VR601, VR602, VR603 and VR604 center.


  3. E-F BALANCE ADJUSTMENT
       (1) Connect the oscilloscope to TP602 (TEO and REF).
       (2) Load test disc (YEDS-43).
       (3) Adjust VR602 so that amplitude above and below the zero DC line becomes equal (amplitude                    A=B).


                           Oscilloscope
                                                                                                               A


                                                                                                               OV DC Mode


                                                                                                               B

                                                    k    REF
                                                                                               A=B


  4. FOCUS OFFSET ADJUSTMENT

       (1) Connect the jitter meter to TP601 (HF, REF),        set the input selection   switch of jitter meter to "1 x " position.
       (2) Load test disc.
       (3) Put unit play mode.
       (4) Adjust VR601 so that the jitter meter reading       is minimum.


                    Jitter Meter

                                                                   NOTE: Jitter meter must have a "1 x "
                                                                         input selection switch.


                                                                 -IO-
                                                                                                                          TCH-300


        5. FOCUS GAIN ADJUSTMENT
          (1) Connect from gain adjustment jig to wire on the main P.C. Board pin to pin.
          (2) Connect audio frequency oscillator to A.F. OSC terminal and GND on the gain adjustment              jig.
-             Set the audio frequency oscillator output to 750Hz, ~VRMS.


                                        Low Frequency Oscillator (A.F. OSC)


                                                                   @@O                 A.F. OSC

                                                                                L      GND


          (3) Connect oscilloscope   to CHI, CH2 and GND on the main P.C. Board. (XV mode)


                                                    Oscilloscope
                                                                                             CHI : 20mV/div. AC MODE
                                                                                             CH2 : 2V/div. AC MODE


                                                                              I-O    GND


         (4) Insert test disc and put unit play mode on track.
         (5) Set switch SW1 on the gain adjustment jig to position "F".
         (6) Adjust VR603 so that the waveform on the oscilloscope looks            as shown below.


-----


              Good adjustment                               Bad adjustment                             Bad adjustment
            (Optimum focus gain)                           (Low focus gain)                           (High focus gain)


                                                                     -ll-
TCH-300(


   6. TRACKING      GAIN ADJUSTMENT
     (1) Connect  from gain adjustment jig to wire on the main P.C. Board pin to pin.
     (2) Connect  audio frequency oscillator to A.F. OSC terminal and GND on the gain adjustment             jig.
         Set the audio frequency oscillator output to 750Hz, ~VRMS.


                                         Low Frequency Oscillator (A.F. OSC)


        Connect oscil Ioscope to CHI, CH2 and GND on the main P.C. Board (XV mode)


                                                                               CHI : 20mV/div. AC MODE
                                                   Oscilloscope                CH2 : 2V/div. AC MODE


     (4) Insert test disc and put unit into play mode   on track.
     (5) Set switch SW1 on the gain adjustment jig      to position "T".
     (6) Adjust VI3604 so that the waveform on the      oscilloscope looks as shown below.


                                                                                                 Bad adjustment
      (Optimum tracking gain)                      (Low tracking gain)                         (High tracking gain)


                                                           -12-


◦ Jabse Service Manual Search 2024 ◦ Jabse PravopisonTap.bg ◦ Other service manual resources online : FixyaeServiceinfo