Service Manuals, User Guides, Schematic Diagrams or docs for : LG DVD DVD-2300N _DVD-2250N_2-1

<< Back | Home

Most service manuals and schematics are PDF files, so You will need Adobre Acrobat Reader to view : Acrobat Download Some of the files are DjVu format. Readers and resources available here : DjVu Resources
For the compressed files, most common are zip and rar. Please, extract files with Your favorite compression software ( WinZip, WinRAR ... ) before viewing. If a document has multiple parts, You should download all, before extracting.
Good luck. Repair on Your own risk. Make sure You know what You are doing.


Image preview - the first page of the document
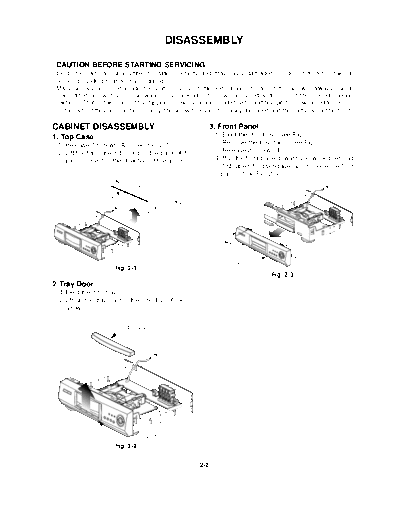
_DVD-2250N_2-1


>> Download _DVD-2250N_2-1 documenatation <<

Text preview - extract from the document
                                                         DISASSEMBLY

 CAUTION BEFORE STARTING SERVICING
 Electronic parts are susceptible to static electricity and may easily damaged, so do not forget to take a
 proper grounding treatment as required.
 Many screws are used inside the unit. To prevent missing, dropping, etc. of the screws, always use a
 magnetized screw driver in servicing. Several kinds of screws are used and some of them need special
 cautions. That is, take care of the tapping screws securing molded patrs and fine pitch screws used to secure
 metal parts. If they are used improperly, the screw holes will be easily damaged and the parts can not be fixed.

CABINET DISASSEMBLY                                                                    3. Front Panel
1. Top Case                                                                             1.   Eject the disc tray. (See Fig. 2-2)
 1. Release 7 screws (A). (See Fig. 2-1)                                                2.   Remove the tray door. (See Fig. 2-2)
 2. Lift the top case with holding the back of it,                                      3.   Release 2 screws (B).
   and remove it in the direction of the arrow                                          4.   Pull the front panel toward you while pressing
                                                                                             7 stoppers to disengage, and remove the front
            Top Case          (A)                  (A)                                       panel. (See Fig. 2-3)
                                                               (A)


                       (A)

                                                                           (A)


                                                                     (A)

                                                         (A)

                                                                                                               (B)


                                                                                                                         (B)
                                                                                       Stopper


                                                                                                                                Stopper
                                                                                                 Front Panel
                             Fig. 2-1
                                                                                                                     Fig. 2-3
2. Tray Door
  1.Eject the disc tray.
  2.Lift up the tray door in the direction of the
    arrow.


                                    Tray Door


                                            Disc Tray
                             Fig. 2-2


                                                                                 2-2
CIRCUIT BOARD DISASSEMBLY
Note:                                                                                  3. Digitron and Key Circuit Board
Before removing the main circuit board, be sure to                                     1. Remove the front panel.(See Fig. 2-3)
shortcircuit the laserdiode output land.                                               2. Release 8 screws(E), and remove the digitron
After replacing the main circuit board, open the land                                     circuit board.
after inserting the flexible connector.
(Refer to Mechanism Disassembly)

1. Main/A/V Circuit Board                                                                   Key
                                                                                            Circuit Board
1. Remove the top case.(See Fig.2-1)
                                                                                                (E)
2. Release 10 screws (C), and take out the main /                                                      (E)
   AV circuit board.(See Fig.2-4)
                                                                                                             (E)
3. Remove the flexible connectors and the
   connector from main circuit board.                                                                                     (E)
                                                                                                                                (E)
4. Then, remove the main A/V circuit board.
                                                                                                                                      (E)
                                    (C)
                                                            (C)
                                                                                                                                Digitron
               A/V Circuit Board            (C)                                                                                 Circuit Board
                              (C)
                                                      (C)
                                           (C)
                                                                                                                   Fig. 2-6
  Main Circuit Board                                              Flexible
                                                                  connector


         Flexible
         connector
                                                                    (C)
                                                                  (C)
                                                                          (C)
                                                                           (C)


                                           Fig. 2-4

2. Power Circuit Board
1. Relrase 4 screws(D). (See Fig. 2-5)

              Power Code
                                            (D)
                           (D)
                                                  (D)
                                     (D)

  Power
  Circuit
  Board


                                           Fig. 2-5


                                                                                 2-3


◦ Jabse Service Manual Search 2024 ◦ Jabse PravopisonTap.bg ◦ Other service manual resources online : FixyaeServiceinfo