Service Manuals, User Guides, Schematic Diagrams or docs for : Philips Monitor Monitor CD 2001[1].part02 Monitor CD 2001 E-MANUALS Philips crt 107p pdf p06_p12
<< Back | HomeMost service manuals and schematics are PDF files, so You will need Adobre Acrobat Reader to view : Acrobat Download Some of the files are DjVu format. Readers and resources available here : DjVu Resources
For the compressed files, most common are zip and rar. Please, extract files with Your favorite compression software ( WinZip, WinRAR ... ) before viewing. If a document has multiple parts, You should download all, before extracting.
Good luck. Repair on Your own risk. Make sure You know what You are doing.
Image preview - the first page of the document
>> Download p06_p12 documenatation <<
Text preview - extract from the document
6 107P CM25 GSIII OSD Adjustments
9 Go to cover page
The OSD Controls
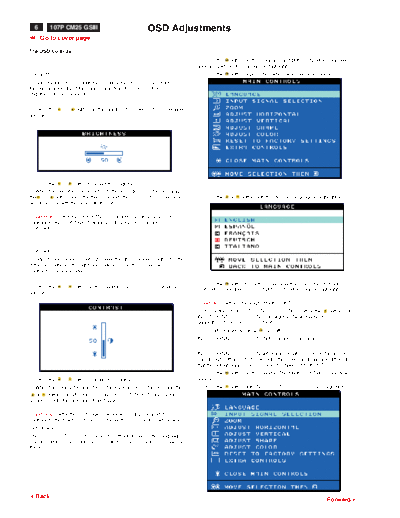
1) Press the button on the monitor. The MAIN CONTROLS window
appears. LANGUAGE should be highlighted.
BRIGHTNESS 2) Press the button again. The LANGUAGE window appears.
To adjust your screen's brightness, follow the steps below. Brightness is
the overall intensity of the light coming from the screen. A 50%
brightness is recommended.
1) Press the or button on the monitor. The BRIGHTNESS window
appears.
2) Press the or button to adjust the brightness.
3) When the brightness is adjusted to the level desired, stop pressing
the or button and after three seconds the BRIGHTNESS window 3) Press the or button until the desired language is highlighted.
will disappear with the new adjustment saved.
Smart Help After the BRIGHTNESS window has disappeared, to
continue to the CONTRAST window, follow the steps under
CONTRAST.
CONTRAST
To adjust your screen's contrast, follow the steps bellow. Contrast is the
difference between the light and dark areas on the screen. A 100%
contrast is recommended.
4) Press the button to confirm your selection and return to MAIN
1) Press the or button on the monitor. The CONTRAST window
CONTROLS window. CLOSE MAIN CONTROLS will be highlighted...
appears.
Smart Help After returning to MAIN CONTROLS . . .
. . . to continue to INPUT SIGNAL SELECTION, press the button until
INPUT SIGNAL SELECTION is highlighted. Next, follow steps 3 - 5
under INPUT SIGNAL SELECTION.
. . . to exit completely, press the button
INPUT SIGNAL SELECTION (Not available in all models)
INPUT SIGNAL SELECTION determines what you see on the screen.
The default setting is INPUT A, but if the video input signal is different
that the output signal, you may want to change it to INPUT B.?
1) Press the button on the monitor. The MAIN CONTROLS window
2) Press the or button to adjust the contrast. appears.
3) When the contrast is adjusted to the level desired, stop pressing the 2) Press the button until INPUT SIGNAL SELECTION is highlighted.
or button and after three seconds the CONTRAST window will
disappear with the new adjustment saved.
Smart Help After the CONTRAST window has disappeared, to
continue to the MAIN CONTROLS, follow the steps under LANGUAGE
LANGUAGE
The ON SCREEN DISPLAY shows its settings in one of five languages.
The default is English, but you can select French, Spanish, German, or
Italian.
3Back
Forward4
OSD Adjustments 107P CM25 GSIII 7
9 Go to cover page
3) Press the button. The INPUT SIGNAL SELECTION window
appears.
4) Press the or button to highlight INPUT B or INPUT A.
5) Press the button to confirm your selection and return to the MAIN
CONTROLS window. CLOSE MAIN CONTROLS will be highlighted.
Smart Help After returning to MAIN CONTROLS . . .
. . . to continue to ZOOM, press the button until ZOOM is highlighted.
Next, follow steps 3 - 5 under ZOOM. 3) Press the button. The ADJUST HORIZONTAL window appears.
ADJUST POSITION should be highlighted.
. . . to exit completely, press the button
ZOOM
ZOOM increases or decreases the size of the images on your screen.
To adjust the ZOOM follow the steps below.
1) Press the button on the monitor. The MAIN CONTROLS window
appears.
2) Press the --button until ZOOM is highlighted.
4) Press the or button to move the image to the left or right.
5) When the position is adjusted, press the button to return to MAIN
CONTROLS window, or press the to highlight ADJUST SIZE.
3) Press the button. The ZOOM window appears.
6) To adjust the horizontal size, press the or button.
4) Press the or button to adjust ZOOM.
7) When the size is adjusted, press the button to return to MAIN
5) Press the button to confirm your selection and return to the MAIN CONTROLS window. CLOSE MAIN CONTROLS will be highlighted.
CONTROLS window. CLOSE MAIN CONTROLS will be highlighted.
Smart Help After returning to MAIN CONTROLS . . .
Smart Help After returning to MAIN CONTROLS . . .
. . . to continue to ADJUST VERTICAL, press the button until ADJUST
. . . to continue to ADJUST HORIZONTAL, press the button until VERTICAL is highlighted. Next, start with step 3 under ADJUST
ADJUST HORIZONTAL is highlighted. Next, follow steps 3 - 7 under VERTICAL and follow the directions.
ADJUST HORIZONTAL.
. . . to exit completely, press the button
. . . to exit completely, press the button
ADJUST HORIZONTAL
ADJUST VERTICAL
ADJUST POSITION under ADJUST HORIZONTAL shifts the image on
your screen either to the left or right. Use this feature if your image ADJUST POSITION under ADJUST VERTICAL shifts the image on
does not appear centered. ADJUST SIZE under ADJUST your screen either up or down. Use this feature if your image does not
HORIZONTAL expands or controls the image on your screen, pushing it appear centered. ADJUST SIZE under ADJUST VERTICAL expands or
out toward the left and right sides or pulling it in toward the center. controls the image on your screen, pushing it out toward the top or
bottom or pulling it in toward the center.
1) Press the button on the monitor. The MAIN CONTROLS window
appears. 1) Press the button on the monitor. The MAIN CONTROLS window
appears.
2) Press the button until ADJUST HORIZONTAL is highlighted.
3Back Forward4
8 107P CM25 GSIII OSD Adjustments
9 Go to cover page
2) Press the button until ADJUST VERTICAL is highlighted. 2) Press the button until ADJUST SHAPE is highlighted.
3) Press the button. The ADJUST VERTICAL window appears. 3) Press the button. The ADJUST SHAPE window appears.
ADJUST POSITION should be highlighted. ADJUST SIDE CURVE should be highlighted.
4) Press the button. The SIDE CURVE window appears.
PINCUSHION should be highlighted.
4) Press the or button to move the image up or down.
5) When the position is adjusted, press the button to return to MAIN
CONTROLS window, or press the to highlight ADJUST SIZE.
5) To adjust the pincushion, press the or button.
6) To adjust the vertical size, press the or button. 6) When the pincushion is adjusted, press the button to highlight
BALANCED or press the button to return to the ADJUST SHAPE
7) When the size is adjusted, press the button to return to MAIN window.
CONTROLS window. CLOSE MAIN CONTROLS will be highlighted.
Smart Help After returning to MAIN CONTROLS . . .
. . . to continue to ADJUST SHAPE, press the button until ADJUST
SHAPE is highlighted. Next, start with step 3 under ADJUST SHAPE
and follow the directions.
. . . to exit completely, press the button
ADJUST SHAPE
ADJUST SIDE CURVE
ADJUST SIDE CURVE under ADJUST SHAPE allows you to adjust two
of the five preset options. These two options are PINCUSHION and
BALANCED pincushion. Note: use these features only when the picture
is not square. 7) To adjust the balanced pincushion, press the or button.
1) Press the button on the monitor. The MAIN CONTROLS window 8) When the balanced pincushion is adjusted, press the button to
appears. return to the ADJUST SHAPE window. BACK TO MAIN WINDOWS will
be highlighted.
9) Press the button to return to the MAIN CONTROLS window, or
3Back
Forward4
OSD Adjustments 107P CM25 GSIII 9
9 Go to cover page
Smart Help After returning to MAIN CONTROLS . . . 7) When the trapezoid is adjusted, press the button to highlight
...to continue to ADJUST SIDE ANGLES, start with step 5 under PARALLELOGRAM or press the button to return to the ADJUST
ADJUST SIDE ANGLES and follow the directions.
...to exit completely, press the button twice.
...to adjust only the BALANCED pincushion, follow steps 1 - 4 above,
then press the button, and follow steps 7 - 9.
...to adjust only the PARALLELOGRAM, follow steps 1 - 4 above, then
press the button, and follow steps 7 -9
ADJUST SIDE ANGLES
ADJUST SIDE ANGLES under ADJUST SHAPE allows you to adjust
two of the five preset options. These two options are TRAPEZOID and
PARALLELOGRAM. Note: use these features only when the picture is
not square.
1) Press the button on the monitor. The MAIN CONTROLS window
appears. 8) To adjust the parallelogram, press the or button.
2) Press the button until ADJUST SHAPE is highlighted. 9) When the parallelogram is adjusted, press the button to return to
the ADJUST SHAPE window. BACK TO MAIN WINDOWS will be
highlighted.
10) Press the button to return to the MAIN CONTROLS window, or
press the button until ROTATE IMAGE is highlighted.
Smart Help After returning to MAIN CONTROLS . . .
...to continue to ROTATE IMAGE, start with step 5 under ROTATE
IMAGE and follow the directions.
...to exit completely, press the button twice.
...to adjust only the PARALLELOGRAM, follow steps 1 - 4 above, then
press the button, and follow steps 7 -9
ROTATE IMAGE (Not available in all models)
ROTATE IMAGE under ADJUST SHAPE allows you to adjust one of
the five preset options. These two options are PINCUSHION and
BALANCED pincushion. Note: use this feature only when the picture is
not square.
1) Press the button on the monitor. The MAIN CONTROLS window
appears.
3) Press the button. The ADJUST SHAPE window appears. 2) Press the button until ADJUST SHAPE is highlighted.
ADJUST SIDE CURVE should be highlighted.
4) Press the button to highlight ADJUST SIDE ANGLES.
5) Press the button. The SIDE ANGLES window appears.
TRAPEZOID should be highlighted. 3) Press the button. The ADJUST SHAPE window appears.
ADJUST SIDE CURVE should be highlighted.
4) Press the arrow until ROTATE IMAGE is highlighted.
6) To adjust the trapezoid, press the or button.
SHAPE window.
3Back Forward4
10 107P CM25 GSIII OSD Adjustments (Continued)
9 Go to cover page
5) Press the button. The ROTATE IMAGE window appears. ROTATE 4) Press the or button to highlight 9300K for GENERAL USE,
should be highlighted. 6500K for GAMES, or USER PRESET.
5) Once you have highlighted GENERAL USE or GAMES, press the
button to confirm you selection and return to the MAIN CONTROLS
window. CLOSE MAIN CONTROLS will be highlighted.
6) To adjust the rotation, press the or button.
7) When the rotation is adjusted, press the button to return to the
ADJUST SHAPE window. BACK TO MAIN CONTROLS should be
highlighted.
8) Press the button to return to MAIN CONTROLS.
Smart Help After returning to MAIN CONTROLS . . .
. . . to continue to ADJUST COLOR, press the button until ADJUST
COLOR is highlighted. Next, start with step 3 under ADJUST COLOR
and follow the directions. 6a) ?If USER PRESET is highlighted, press the button to highlight
...to exit completely, press the button twice. RED. Next, press the LEFT CURSOR or RIGHT CURSOR button to
adjust the color red.
6b) ?When finished with RED, press the button to highlight GREEN.
ADJUST COLOR Next, press the or button to adjust the color green.
Your monitor has two preset options you can choose from. The first 6c) ?When finished GREEN, press the button to highlight BLUE. Next,
option is for GENERAL USE, which is fine for most applications. The press the or button to adjust the color blue.
second option is for GAMES, which is for playing computer games.
When you select one of these options, the monitor automatically adjusts 6d) ?When all adjustments are complete, press the button to confirm
itself to that option. There is also a third option, USER PRESET, which your adjustments and return to the MAIN CONTROLS window. CLOSE
allows you to adjust the colors on your screen to a setting you desire. MAIN CONTROLS will be highlighted.
1) Press the button on the monitor. The MAIN CONTROLS window Smart Help After returning to MAIN CONTROLS. . .
appears. . . . to continue to RESET TO FACTORY SETTINGS, press the button
2) Press the button until ADJUST COLOR is highlighted. until RESET TO FACTORY SETTINGS is highlighted. Next, start with
step 3 under RESET TO FACTORY SETTINGS.
. . . to exit completely, press the button.
RESET TO FACTORY SETTINGS
RESET TO FACTORY SETTINGS returns everything in all the windows
to factory presets.
1) Press the button on the monitor. The MAIN CONTROLS window
appears.
2) Press the button until RESET TO FACTORY SETTINGS is
highlighted.
3) Press the button. The ADJUST COLOR window appears.
3) Press the button. The RESET TO FACTORY SETTINGS window
appears.
3Back
Forward4
OSD Adjustments (Continued) 107P CM25 GSIII 11
9 Go to cover page
4) Press the or button to select YES or NO. NO is the default. YES ADJUST MOIRE (Not available in all models)
returns all settings to their original factory adjustments.
EXTRA CONTROLS is a set of three features, including ADJUST
MOIRE. Moire is a fringe pattern arising from the interference between
two superimposed line patterns. To adjust your moire, follow the steps
below. Note: Use only if necessary. By activating ADJUST MOIRE,
sharpness can be affected.
1) Press the button on the monitor. The MAIN CONTROLS window
appears.
5) Press the button to confirm your selection and return to the MAIN
CONTROLS window. CLOSE MAIN CONTROLS will be highlighted. 2) Press the DOWN CURSOR button until EXTRA CONTROLS is
highlighted.
Smart Help After returning to MAIN CONTROLS . . .
. . . to continue to EXTRA CONTROLS, press the button until EXTRA
CONTROLS is highlighted. Next, start with step 3 under EXTRA
CONTROLS.
. . . to exit completely, press the button.
EXTRA CONTROLS
DEGAUSS
EXTRA CONTROLS is a set of three features, including DEGAUSS.
Degaussing removes electromagnetic build up that may distort the color
on your screen.
1) Press the button on the monitor. The MAIN CONTROLS window
appears.
2) Press the button until EXTRA CONTROLS is highlighted.
3) Press the button. The EXTRA CONTROLS window appears.
DEGAUSS will be highlighted.
4) Press the button until ADJUST MOIRE is highlighted.
3) Press the button. The EXTRA CONTROLS window appears.
DEGAUSS will be highlighted.
5) Press the button. The ADJUST MOIRE window appears.
HORIZONTAL will be highlighted.
4) To degauss your screen, press the button. Your screen will be
degaussed, then the MAIN CONTROLS window will reappear. CLOSE
MAIN CONTROLS will be highlighted.
Smart Help After returning to MAIN CONTROLS . . .
6) To adjust the horizontal moire, press the or button.
. . . to continue to ADJUST MOIRE, press the button until EXTRA
CONTROLS is highlighted. Next, start with step 3 under EXTRA
CONTROLS, ADJUST MOIRE.
. . . to exit completely, press the button.
3Back Forward4
12 107P CM25 GSIII OSD Adjustments (Continued)
9 Go to cover page
7) When the horizontal moire is adjusted, press the button to highlight
VERTICAL.
8) To adjust the vertical moire, press the or button.
9) When the vertical moire is adjusted, press the button to return to
the EXTRA CONTROLS window. BACK TO MAIN CONTROLS will be
highlighted.
Smart Help After returning to MAIN CONTROLS . . .
. . . to exit completely, press the button.
CLOSE MAIN CONTROLS
3Back Forward4
◦ Jabse Service Manual Search 2026 ◦ Jabse Pravopis ◦ onTap.bg ◦ Other service manual resources online : Fixya ◦ eServiceinfo