Service Manuals, User Guides, Schematic Diagrams or docs for : Samsung Monitor Monitor 400P 400PN_SB-SI_1207654737
<< Back | HomeMost service manuals and schematics are PDF files, so You will need Adobre Acrobat Reader to view : Acrobat Download Some of the files are DjVu format. Readers and resources available here : DjVu Resources
For the compressed files, most common are zip and rar. Please, extract files with Your favorite compression software ( WinZip, WinRAR ... ) before viewing. If a document has multiple parts, You should download all, before extracting.
Good luck. Repair on Your own risk. Make sure You know what You are doing.
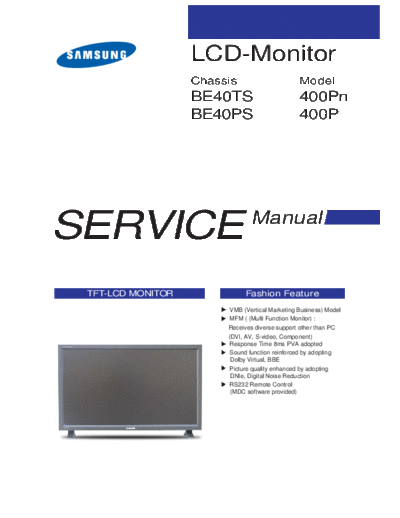
Image preview - the first page of the document
>> Download 400PN_SB-SI_1207654737 documenatation <<
Text preview - extract from the document
                   LCD-Monitor
                   Chassis                       Model
                   BE40TS                        400Pn
                   BE40PS                        400P


SERVICE                        Manual


 TFT-LCD MONITOR              Fashion Feature
                         VMB (Vertical Marketing Business) Model
                         MFM ( (Multi Function Monitor) :
                        Receives diverse support other than PC
                        (DVI, AV, S-video, Component)
                         Response Time 8ms PVA adopted
                         Sound function reinforced by adopting
                         Dolby Virtual, BBE
                         Picture quality enhanced by adopting
                         DNIe, Digital Noise Reduction
                         RS232 Remote Control
                         (MDC software provided)
This Service Manual is a property of      Samsung Electronics Co.,Ltd.
Samsung Electronics Co., Ltd.             416, Maetan-3Dong, Yeongtong-Gu, Suwon City, Gyeonggi-Do,
                                          Korea, 443-742
Any unauthorized use of Manual can be
                                          Printed in Korea
punished under applicable International   P/N : BN82-
and/or domestic law.                      URL : http://itself.sec.samsung.co.kr/
                                                                             3 Operating Installations and Installation


3 Operating Installations and Installation


3-1 Front


1. MENU                                                      6. PIP
2. Navigate button (Up-Down button)                          7. Power button
3. Adjust button (Left-Right button)/Volume button           8. Power indicator
4. ENTER                                                     9. Remote Control Sensor
5. SOURCE


1. MENU
-Use this button to open the on-screen menu and exit from the menu screen or close screen adjustment
menu.

2. Navigate button (Up-Down button)
-Moves from one menu item to another vertically or adjusts selected menu values. In TV mode, selects TV channels.

3. Adjust button (Left-Right button)/Volume button
-Moves from one menu item to another horizontally or adjusts selected menu values. Adjusts the audio volume.

4. ENTER
-Activates a highlighted menu item.

5. SOURCE
-Switches from PC mode to Video mode.
Changing the source is allowed only in external devices that are connected to the monitor at the time.
To switch Screen modes:
[PC]    [BNC]   [DVI]     [AV] [S-Video]     [Component]       [MagicNet]


                                                                                                                   3-1
3 Operating Installations and Installation


6. PIP
-Push the PIP button to turn PIP screen On/Off.
More than one PIP couldn't be overlapped on screen as BNC and the component use the same terminal.
  PC / DVI
  : AV / S-Video / Component Mode
  BNC
  : AV / S-Video Mode
  AV / S-Video
  : PC / BNC / DVI Mode
  Component
  : PC / DVI Mode

7. Power button
-Use this button to turn the monitor on and off.

8. Power indicator
-Power Indicator shows PowerSaver mode by green blinking.

9. Remote Control Sensor
-Aim the remote control towards this spot on the Monitor.


3-1-1 Rear
The monitor's rear configuration may vary slightly depending on the monitor model.


                                               1. POWER S/W
                                               2. POWER IN


3-2
                                                                    3 Operating Installations and Installation


3. RS232C OUT/IN(RS232C Serial Port): MDC(Multiple Device Control) Program Port
4. DVI IN(HDCP) (PC Video Connection Terminal) : Using DVI Cable (DVI-D to DVI-D), DVI mode(Digital PC)
5. PC IN(RGB) (PC Video Connection Terminal) : Using D-Sub Cable (15 pin D-Sub), PC mode(Analog PC)
6. PC/DVI/BNC AUDIO IN (PC/DVI/BNC Audio Connection Terminal (Input))


                                                                                                          3-3
      7. COMPONENT AUDIO IN [L-AUDIO-R]
        (Component Audio Connection Terminal (Input))
      8. BNC/COMPONENT OUT
        (BNC/Component Connection Terminal (Output))
        - BNC (Analog PC) Connection : connecting R, G, B,
        H, V port
        - Component Connection : connecting PR, Y,
        Pb port
      9. BNC/Component IN
        (BNC/Component Connection Terminal (Input))


3-4
                   3 Operating Installations and Installation


10. AV AUDIO IN [L-AUDIO-R]
     (Monitor Audio Connection Terminal (Input))
11. AV OUT [VIDEO](VIDEO Connection Terminal) :
     AV mode (Output)
12. AV IN [VIDEO](VIDEO Connection Terminal)
     (Input)
13. AV OUT [S-Video](S-Video Connection Terminal):
     S-Video mode (Output)
14. AV IN [S-Video](S-Video Connection Terminal)
     (Input)
15. EXT SPEAKER(8       ) (EXT Speaker Connection
     Terminal)
16. MONITOR [L-AUDIO-R] (Monitor Audio Connection
     Terminal (Output))
     - MONITOR OUT is the terminal for sound output of
     PC, DVI or BNC.


                                                         3-5
3 Operating Installations and Installation


                                             17. LAN (LAN Connection Terminal)
                                                 (MS Internet Explorer)
                                             18. USB (USB Connection Terminal)
                                                 (Keyboard / Mouse, Mass Storage Device Compatible.)
                                             19. DIGITAL AUDIO OUT (Digital Audio Connection Terminal)


                                                OPTICAL PORT:


                                             Supports incoming or outgoing digital audio data in SPDIF.
                                             Uses light instead of flexible current for transferring data.
                                             The red light is not a laser light and is not harmful to the human body.
                                             However, note that you should not touch the cable ends as dirt or foreign
                                             substances from your fingers could interfere with the optical connections.


3-6
                                          3 Operating Installations and Installation


3-1-2 Remote Control
                       1. ON / OFF
                          Use this button for turn the monitor on and off.
                       2. MAGICNET
                          MagicNet Quick Launch Button.
                       3. MDC
                         MDC Quick Launch Button.
                       4. LOCK
                          Sets the Lock Function.
                       5. MagicNet buttons
                          - Used for MagicNet.


                            Alphanumeric: Used to enter the Internet address.
                            DEL : Functions as the backspace.
                            SYMBOL : Used to enter the symbols. (.O_-:/)
                            ENTER : Used to enter values.
                       6. +100
                          Press to select channels over 100.
                          For example, to select channel 121, press "+100",
                          then press "2" and "1".
                          - This fuctions does not work for this monitor.
                       7. VOL
                          Also adjusts the audio volume.
                       8. MUTE
                          Pauses (mutes) the audio output temporarily.
                          Displayed on the lower left corner of the screen.
                          The audio resumes if MUTE or - VOL + is pressed
                          in the Mute mode.
                       9. AUTO
                          Adjusts the screen display automatically.
                          If you change resolution in the control panel, Auto
                          function will be executed.
                       10. MENU
                          Use this button to open the on-screen menu and
                          exit from the menu screen or close screen
                          adjustment menu.
                       11. ENTER
                          Activate a highlighted menu item.
                       12. PRE-CH
                          This button is used to return to the immediately
                          previous channel.
                          - This fuctions does not work for this monitor.
                       13. CH/PAGE
                          Selects channels or page.
                          - This fuctions does not work for this monitor.


                                                                                3-7
14. SOURCE                                             21. MTS
   Push the button, selects the Video source hanges.      You can select the MTS (Multichannel Television
15. INFO                                                 Stereo) mode.
   Current picture information displays on the
   upper left corner of the screen.
16. EXIT                                               22. PIP
   Exits from the menu screen.                           Every time you push the button, activate a PIP
17. Up-Down Left-Right buttons                           screen.
   Moves from one menu item to another                 23. SOURCE
   horizontally, vertically or adjusts selected menu      The PIP window's signal source changes.
   values.                                             24. SIZE
18. P.MODE (M/B)                                          You can switch the Picture Size.
   When you press this button, current picture         25. SWAP
   mode is displayed on the lower center of the          Swapping the contents of the PIP and main
   screen.                                               image.
                                                         The image in the PIP window will appear on the
   AV / S-Video / Component : P.MODE                     main screen, and the main screen image will
   The Monitor has four automatic picture settings       appear in the PIP window.
   that are preset at the factory.                     26.
   Then push button again to circle through avail         Rewind
   able preconfigured modes.                           27.
   ( Dynamic     Standard   Movie       Custom )          Stop
                                                       28.
   PC / DVI Mode : M/B ( MagicBright      )               Play/Pause
   MagicBright
◦ Jabse Service Manual Search 2026 ◦ Jabse Pravopis ◦ onTap.bg ◦ Other service manual resources online : Fixya ◦ eServiceinfo