Service Manuals, User Guides, Schematic Diagrams or docs for : Samsung TV plc-su20_257
<< Back | HomeMost service manuals and schematics are PDF files, so You will need Adobre Acrobat Reader to view : Acrobat Download Some of the files are DjVu format. Readers and resources available here : DjVu Resources
For the compressed files, most common are zip and rar. Please, extract files with Your favorite compression software ( WinZip, WinRAR ... ) before viewing. If a document has multiple parts, You should download all, before extracting.
Good luck. Repair on Your own risk. Make sure You know what You are doing.
Image preview - the first page of the document
>> Download plc-su20_257 documenatation <<
Text preview - extract from the document
FILE NO.
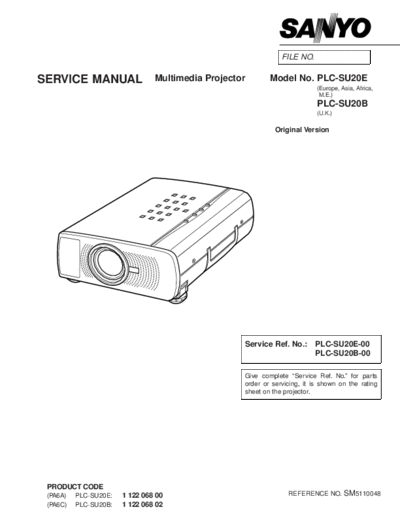
SERVICE MANUAL Multimedia Projector Model No. PLC-SU20E
(Europe, Asia, Africa,
M.E.)
PLC-SU20B
(U.K.)
Original Version
Service Ref. No.: PLC-SU20E-00
PLC-SU20B-00
Give complete "Service Ref. No." for parts
order or servicing, it is shown on the rating
sheet on the projector.
PRODUCT CODE
(PA6A) PLC-SU20E: 1 122 068 00 REFERENCE NO. SM5110048
(PA6C) PLC-SU20B: 1 122 068 02
s Mechanical Disassemblies
Mechanical disassemble should be made following procedures in numerical order.
Following steps show the basic procedures, therefore unnecessary step may be ignored.
Caution:
The parts and screws should be placed exactly the same position as the original otherwise it may cause loss of
performance and product safety.
1. CABINET TOP REMOVAL
Remove 4 screws and pull cabinet top upward.
Fig.1
2. AV SUB, MAIN-B/C BOARD REMOVAL
1) Remove 3 screws (A) and take the AV SUB Board off upward.
2) Remove a screw (B) and a fixer, then disconnect the FPC cables.
3) Remove 4 screws (C) and pull the Main-B/C Boards off upward.
C
C
C
A
A
A
Main-B/C Board
Fixer
B
Fig.2
AV SUB Board
-8-
Mechanical Disassemblies
3. FRONT CABINET, VIEWER LED BOARD* REMOVAL A
1) Remove 4 screws (A) and remove the front cabinet forward.
2) Remove a screw (B) and remove the Viewer LED Board.
* Model without the PC Card slot does not provide the Vierwer Board.
B
Viewer LED
Board *
Fig.3
4. VIEWER*, MAIN-A/D BOARD REMOVAL * Model without the PC Card slot does not
provide the Vierwer Board.
1) Remove 4 screws (A) and pull the Viewer and Main-A/D Board Ass'y
upward.
2) Remove 2 screws (B) and disconnect connector K1A, then take the
A
Viewer Board Ass'y off from the Main-A/D Board Ass'y.
3) Remove 4 screws (C) and take the Viewer Unit off from the Viewer
Mounting Holder.
4) Remove 2 screws (D) and remove the Main-D Board.
5) Remove 4 screws (E) and take the Main-A Board off from the Main-A
Board Holder.
Viewer Board * Viewer Board Holder Main-D Board
C D
C C D
Viewer, Main-
A/D Ass'y
C B
B
K1A
E
E
E
E
Main-A Board
Holder Fig.4
Main-A Board Fig.5
-9-
Mechanical Disassemblies
5. AV BOARD, REAR CABINET, FAN (FN904, FN905) REMOVAL
1) Pull the Rear Cabinet Ass'y upward. Spacer
2) Remove a screw (A) and take the B
spacer off. Thermal Switch B
3) Remove 2 screws (B) and remove the (SW902) d A
Thermal Switch (SW902).
4) Remove a screw (C) and remove the c E D
Fan E
grounding lead. (FN904, FN905)
5) Remove 4 screws (D) and remove the
AV Board. E
b
6) Remove 4 screws (E) and remove the
fans (FN904, FN905).
AV Board
a
Rear Cabinet
c d
C
ba
6. POWER COVER, FAN (FN901), FILTER
BOARD REMOVAL Fig.6
1) Remove 4 screws (A) and remove the Power Cover.
2) Remove 2 screws (B) and remove the Fan (FN901).
3) Remove 4 screws (C) and remove the Speaker. Speaker
4) Remove a screw (D) and remove R/C Board. (SP901)
5) Remove 2 screws (E) and remove the grounding
leads. A C
A A
6) Remove 2 screws (F) and pull the Filter & Interlock A C
Switch Ass'y. Fan(FN901)
7) Remove 2 screws (G) and then remove the Filter C
Filter Board
Board and the Interlock Switch Ass'y.
D
Note: G
B
* When fixing the grounding lead of the Filter Board, G
disconnect the lamp socket (refer to Fig.8) first, and
R/C Board
fix the grounding lead then connect the lamp socket. F F
f
* Dress the grounding lead (e), (f) as show in Fig.7-2. e Power Cover
* Make sure of wires color as shown in Fig.7-2 when B
connecting the sockets.
Interlock Switch
(SW904)
e, f Brown
Filter Board
E
E
f
e
Blue Fig.7-2 Fig.7-1
-10-
Mechanical Disassemblies
7. LAMP BALLAST UNIT REMOVAL
1) Remove 2 screws (A) and disconnect the lamp socket.
2) Remove 2 screws (B) and pull the Lamp Ballast Ass'y upward.
3) Remove 2 screws (C) and remove the Lamp Ballast Unit from
the Lamp Ballast Holder. B Lamp Ballast Holder
B
C
C
C
A Lamp Ballast Unit
Lamp Socket C
A
Fig.8
8. LENS, OPTICAL UNIT REMOVAL
1) Remove 5 screws and pull the Optical Unit upward.
Lens
Optical Unit
Fig.9
-11-
Mechanical Disassemblies
9. POWER, P.F. BOARD REMOVAL
1) Remove screws (A) and pull the Power Board Ass'y upward.
2) Remove 3 screws (B) and take the Power Board off from the Power Board
Holder.
3) Remove the P.F. Board from the Power Board.
B
B
B
Power Board
P.F. Board
A
A
A
P.F. Board Holder
Fig.10
10. FAN (FN902, FN903) REMOVAL
1) Remove each 2 screws and take the Fans (FN902, FN903) off.
Fan (FN903)
Fan (FN902)
Fig.11
-12-
Mechanical Disassemblies
11. SERVICE POSITION
For servicing the AV, AV Sub, Main-A and Main-D Board, it is advisable to set
up the service position for the checking and testing easily following to below
steps
1) Remove the AV, AV Sub and Main-A/D Board following to steps 1~5 of
"Mechanical Disassemblies".
* Should be remove the Main-A Board Holder and Viewer Holder.
2) Mount the AV, AV Sub, and Main-A/D Board to the Main-B Board.
* Not necessary to connect the Viewer Board.
Note:
In the mounting, make sure of the mounting direction of connectors.
Main-B Board
Main-D Board
Main-A Board
AV Sub Board
AV Board
Fig.12
12. LEAD WIRE DRESSING
Make sure to dress the lead wires as follows when assembling the chassis
and cabinets
Make sure that the
wires around here
are dressed not to
Do not loosen
touch to the fans.
these wires
Use a fixer for dress-
ing these wires.
AV Sub Board
Fig.13
Fix wires firmly after
dressing.
-13-
s Optical Parts Disassemblies
Remove the Cabinet Top , AV Sub, Main-B/C Board following to the "Mechanical Disassemblies", before proceed-
ing these disassemblies.
1. PROJECTION LENS REMOVAL
1) Remove the Optical Unit/Projection Lens following to the step 8 of
"Mechanical Disassemblies".
2) Remove 4 screws and remove the Projection Lens.
Fig.1
2. INTEGRATOR LENS-IN ASS'Y REMOVAL
Remove 2 screws (A) and pull the Integrator Lens-IN Ass'y upward.
A
A
Integrator Lens-IN
Ass'y
Fig.2
Fig.3
-14-
Optical Pats Disassemblies
3. INTEGRATOR LENS-IN ASS'Y DISASSEMBLY
Remove 2 screws (A) and take the Integrator Lens-IN off from the lens
holder.
Lens Surface
Lens Holder
A
A
Integrator Lens-IN
Fig.4
4. OPTICAL UNIT TOP REMOVAL
1) Remove each screw (A) and remove the Polarized Glass Holders.
2) Remove 4 screws (B) and take the Optical Unit Top off.
A
A
Polarized Glass Holder Polarized Glass Holder
A
B
B B
B
Fig.5
-15-
Optical Parts Disassemblies
5. INTEGRATOR LENS-OUT ASS'Y REMOVAL
Remove 2 screws (A) and pull the Integrator Lens-OUT Ass'y downward.
A
A
Fig.6
Integrator Lens-OUT
Ass'y
Lens Surface
Fig.7
6. INTEGRATOR LENS-OUT ASS'Y DISASSEMBLY
Remove the Lens Holder and disassembly the Integrator Lens-OUT Ass'y.
Lens Holder
Prism Assy
(Beam Splitter)
Lens Surface
Surface attached the
phase sheet comes to
the lens holder.
Integrator Lens-OUT Fig.8
-16-
Optical Parts Disassemblies
Parts Name and Locations
When the optical parts mounting or assembling, the parts must be mounted
in the specified location and direction. Please refer to the figure below and
"Mounting direction of optical parts" on next page.
No. Part name No. Part name
1 Prism ass'y 10 Mirror (B)
2 Relay lens (IN) 11 Optical Filter (UV cut)
3 Relay lens (OUT) 12 Polarized glass (R-filter)
4 Condenser lens (IN) 13 Polarized glass (IN/G)
5 Condenser lens (OUT) 14 Polarized glass (IN/B)
6 Condenser lens 15 Dichroic mirror (R)
7 Condenser lens (B) 16 Dichroic mirror (G)
8 Mirror (W)
9 Mirror (R)
1
10
9
14 12
7 13 6 15
3
11
6 Printed marker
comes this side
16 5
10 2
Mount lens to be the same direc- Printed marker
tion of the arrow marker on both of comes this side
the lens and optical base bottom.
4
8
Fig.9
-17-
Optical Parts Disassemblies
Mounting direction of optical parts
The optical parts must be mounted in specified direction otherwise the picture image will not reproduce correctly.
q Mounting direction of Lens (Key No. 2, 3, 4, 5, 6, 7)
Lens (Key No. 2) is mounted as shown in Fig.9.
Lens (Key No. 3, 7) have no specified mounting direction.
Lens (Key No. 4, 5, 6,) are mounted as shown in Fig.9.
q Mounting direction of Mirrors (Key No. 8, 9, 10)
Mount the mirrors as the coating surface comes inside.
q Mounting direction of optical filter (Key No. 11)
The optical filter has no specified mounting direction.
q Mounting direction of polarized glasses (Key No. 2, 13, 14)
Mount each polarized glass as the face that the polarized film is attached comes the prism ass'y.
q Mounting direction of dichroic mirror (Key No. 15,16)
dichroic mirrors are mounted as shown in Fig.9.
-18-
s LCD Panel Replacement
IMPORTANT NOTICE on LCD Panel Replacement
There are 2 types (Type A, Type B listed on next page) of LCD panels which they have a different characteristics
used for this model. As the only Type B LCD panels are supplied for the service spare parts, take care the follow-
ing notice when the LCD panel replacement.
1. When replacing the LCD panel, confirm the indication of the LCD panel, then replace the correct LCD panel.
Select either combination (1) or (2) listed on next page when in combine the R, G and B LCD panel, please
see the explanation "COMBINATION OF LCD PANELS".
2. After replacing LCD panel, the specified adjustment [Video Adjustment] should be performed for obtaining bet-
ter performance, please see the explanation "REPLACED LCD PANEL ADJUSTMENT". And also required to
adjustment the convergence and common center adjustments, and white uniformity adjustment if required.
(Refer to the Optical and Electrical adjustments.)
q LCD PANEL REMOVAL
1. Remove the cabinet top following to "Mechanical Disassemblies".
2. Remove 3 screws (A) by using 2.0mm hex driver, and then pull the prism/panel ass'y out from the optical base.
3. Remove 4 screws (B) to take off the LCD panel from the prism/panel ass'y.
Caution: Do not remove 3 panels (R,G,B) at the same time as it is necessary the standard panel for adjustment.
Do not fasten the screws with excessive force when mounting the LCD panel, otherwise focus adjust-
ment may be shifted.
A Prism Ass'y
B-LCD Panel Prism Ass'y
R-LCD
Panel
B
B
G-LCD
Panel
A
PART NO. SEAL
P09SG210
1-A-1234A9
LOT NO.
-19-
q COMBINATION OF LCD PANELS
When replacing the LCD panel, confirm the indication of the LCD panel, then replace the correct LCD panel.
Select either combination (1) or (2) when in combine the R, G and B LCD panel.
There is no combination to be used except them.
As the only Type B LCD panels are supplied for the service spare parts, the service parts for the Type A LCD pan-
els are not available. Please order the Type B LCD panels for replacement.
For example, if you intend to replace the R-LCD panel which is indicated part no. "P09SG220" with red seal, the
combination of LCD panels for this projector is employed COMBINATION-(1). So the service parts for R-LCD panel
should be PART NO. "P09SG220B" / SERVICE PART NO. "645 041 3995".
PART NO. SEAL
P09SG210
1-A-1234A9
TYPE NO. LOT NO.
A : Type A
B : Type B
COMBINATION-(1)
Type A * Type B
SEAL PART NO. PART NO. SERVICE PART NO.
R-LCD PANEL RED SEAL P09SG220 P09SG220B 645 041 3995
G-LCD PANEL NO SEAL P09SG210 P09SG210B 645 041 3988
B-LCD PANEL BLUE SEAL P09SG220 P09SG220B 645 041 4008
COMBINATION-(2)
Type A * Type B
SEAL PART NO. PART NO. SERVICE PART NO.
R-LCD PANEL RED SEAL P09SG210 P09SG210B 645 041 3964
G-LCD PANEL NO SEAL P09SG220 P09SG220B 645 041 3957
B-LCD PANEL BLUE SEAL P09SG210 P09SG210B 645 041 3971
* These are not supplied as a service parts.
-20-
q REPLACED LCD PANEL ADJUSTMENTS
After replacing LCD panels, [Video Adjustment] should be carried out for obtaining better performance. This only
required when replacing the LCD panel from "Type A" to "Type B".
VIDEO ADJUSTMENT
Please change the data value of service data for referring to the following adjustment. This should be performed
when replacing the LCD panel.
(To enter the service mode, refer to "Service Adjustment Menu Operation" on page 26.)
q In case of Green LCD panel replaced q In case of Blue and Green LCD panels replaced
1. Enter to the service mode and select COMPUTER 1. Enter to the service mode and select COMPUTER
mode. mode.
2. Select item no. "13" and decrease the data value 6 2. Select item no. "13" and decrease the data value 6
steps from the current value. steps from the current value.
3. Select item no. "14" and decrease the data value 6 3. Select VIDEO mode and perform the above same
steps from the current value. adjustment.
4. Select VIDEO mode and perform the above same
adjustment.
q In case of Red LCD panel replaced After performing the adjustment, please confirm the
1. Enter to the service mode and select COMPUTER white balance in COMPUTER, VIDEO and MCI mode.
mode. If required the readjustment, please follow the [WHITE
2. Select item no. "13" and increase the data value 6 BALANCE ADJUSTMENT] on page 31.
steps from the current value.
3. Select VIDEO mode and perform the above same
adjustment.
q In case of Blue LCD panel replaced
1. Enter to the service mode and select COMPUTER
mode.
2. Select item no. "14" and increase the data value 6
steps from the current value.
3. Select VIDEO mode and perform the above same
adjustment.
q In case of Red and Blue LCD panels replaced
1. Enter to the service mode and select COMPUTER
mode.
2. Select item no. "13" and increase the data value 6
steps from the current value.
3. Select item no. "14" and increase the data value 6
steps from the current value.
4. Select VIDEO mode and perform the above same
adjustment.
q In case of Red and Green LCD panels replaced
1. Enter to the service mode and select COMPUTER
mode.
2. Select item no. "14" and decrease the data value 6
steps from the current value.
3. Select VIDEO mode and perform the above same
adjustment.
-21-
s Lamp Replacement
WARNING: Service Parts No.: 610 280 6939
- For continued safety, replace with a lamp assembly of the same type. Description: Lamp Assy (POA-LMP21J)
- Allow the projector to cool for at least 45 minutes before you open the lamp cover. The inside of the projector can
become very hot.
- Do not drop the lamp module or touch the glass bulb! The glass can shat-
ter and cause injury.
Procedure
1. Turn off the projector and disconnect the AC cord,. Allow the projector to
cool for at lease 45 minutes.
2. Remove a screw with a screwdriver and remove the lamp cover.
3. Remove 2 screws and pull out the lamp assembly by grasping the han-
dle. Lamp cover
4. Replace the lamp assembly securely and tighten 2 screws.
5. Place the lamp cover and tighten a screw.
6. Connect the AC cord to the projector and turn on. Handle
7. Reset the lamp replacement monitor timer, see below explanation.
Note:
- Do not reset the LAMP REPLACEMENT MONITOR TIMER, except after
the lamp is replaced.
- The projector can not be turned-on with the lamp cover removed,
because when the lamp cover is removed, the interlock switch is also Lamp Assembly
released to switch off the mains power for safety.
How to reset the lamp replacement moni- Recommendation
tor timer Should the air filter become clogged with dust particles,
1. Turn the projector on. Press the MENU button on the it will reduce the cooling fan's effectiveness and may
projector and the On-Screen menu will appear. Select result in internal heat build up and short lamp life. We
setting menu and select "Lamp age" on the setting recommend cleaning the air filter after the projection
menu of menu bar. lamp is replaced.
2. "Lamp replace monitor Reset?" is displayed for confir- Refer to "Air Filter Cleaning".
mation.Select "Yes" to reset the lamp replace timer.
Please refer to the owners manual for further informa-
tion.
How to check the lamp replace monitor played, the accumulated illumination time of the
time lamp is 123 hours. This will disappear in 5 seconds.
The LAMP REPLACEMENT indicator will illuminate
when the accumulated illumination time of the lamp Accumulated illumi-
reaches 1000 hours. This is to indicate that lamp nation time of lamp
replacement is necessary.
Service Mode
You can check the accumulated illumination time of
the lamp by following procedure. Video
1. Press and hold the pointer v on the projector for Item Data
more than 20 seconds.
2. The projector enters to the service mode and the 36 123
accumulated time is displayed in the Data column
with hours unit. For example, when "123" is dis-
-22-
s Optical Adjustments
CONVERGENCE ADJUSTMENT
For convergence adjustment, use Green as the reference standard. Align Red and Blue with Green by adjusting
the position and angle of the Red and Blue LCD panels. Screws "A", "B", "C" (Fig.1) are for convergence adjust-
ment.
[Before adjustment]
- Make sure each Red, Green and Blue LCD panel unit has been correctly installed.
- Input a grid pattern signal.
- Adjustment requires a 2.0mm hex wrench. Remove cabinet top following to the "Mechanical Disassemblies".
RED/BLUE PANEL CONVERGENCE [Image Movement and Screw Turning]
1. Insert paper etc. in Red or Blue panel to block the red 1. Adjustment screw "A" turns the image (Fig.1-a).
or blue light so that either green and red or green and 2. Adjustment screw "B" moves the image right and left
blue lights are projected. (For example, when adjust (Fig.1-b).
Red panel convergence, project green and red lights, 3. Adjustment screw "C" moves the image up and down
and when adjust Blue panel, project green and blue (Fig.1-b).
lights.)
2. Loosen 2 screws "D" (Fig.1) using the 2.0mm hex
wrench.
A
3. Turning the screw "A", align so that the Red (or Blue) Red or Blue
horizontal lines are parallel to the Green horizontal
Green
lines (Fig.1-a).
4. Turning screw "B", align the Red (or Blue) vertical
lines onto the Green vertical lines (Fig.1-b).
5. Turning screw "C", align the Red (or Blue) horizontal Fig.1-a
lines onto the Green horizontal lines (Fig.1-b).
6. By repeating steps 3 to 5, align the Red (or Blue) grid
lines onto the green lines. B
7. Tighten the 2 screws "D" to fix the Red (or Blue) panel
unit. C
Green
Red or Blue
Fig.1-b
C: up/down
A: angle
Blue LCD panel Red LCD panel
B: right/left
D: Fixing
Fig.1 Fig.2
-23-
Optical Adjustments
CONTRAST ADJUSTMENT
[Before Adjustment]
- Adjustment requires a 2.0mm hex wrench and a slot screwdriver.
- Remove cabinet cover following to step1 of "Mechanical Disassemblies".
- Input a 100% of black raster signal.
[R/G/B-CONTRAST ADJUSTMENT]
1. Insert paper etc. in front of the LCD panels to block unnecessary
lights.
When adjusting the R-Contrast, project red light only.
When adjusting the G-Contrast, project green light only.
When adjusting the B-Contrast, project blue light only.
A
2. Loosen a screw "A" (Fig.3/4) on the polarized glass mounting base
which you intend to adjust.
3. Turn the polarized glass mounting base by using a slot driver as
shown in Fig.3 to obtain the darkest brightness on the screen. Polarized
4. Tighten the screw "A" to fix the polarized glass mounting base. glass
Repeat steps 1 to 4 for remaining polarized glasses.
Fig.3
B-Polarized R-Polarized
glass glass
A
A
G-Polarized A
glass
Fig.4
-24-
Optical Adjustments
INTEGRATOR LENS ADJUSTMENT
[Before Adjustment]
- Adjustment requires a 2.0mm hex driver and a slot screwdriver.
- Remove the cabinet top following to "Cabinet Disassemblies".
- Disconnect AV sub board and connectors FPC cable of LCD panels on the main unit.
[Adjustment] screws "A" (Fig.5-b) with hex driver and insert a
1. Turn on lamp by a state of without FPC cable of LCD slot screwdriver into slot "B" and turn it to make
panels. color uniformity in yellow.
2. Insert a light block sheet in front of the Blue panel to 2) If the un-uniform color appears on the left or right
block the blue light so that red and green light are pro- of the screen as shown in Fig.5-c, loosen 2 screws
jected. "C" (Fig.5-d) with the hex driver and insert a slot
3. Adjust the adjustment base of integrator lens-IN and screwdriver into slot "D" and turn it to make color
integrator lens-OUT to make color uniformity in yel- uniformity in yellow.
low. 6. Tighten the 2 screws "A" or "C" to fix the integrator
1) If the un-uniform color appears on the top or bot- lens-IN and OUT unit.
tom of the screen as shown in Fig.5-a, loosen 2
Fig.5-a Fig.5-c
Yellow Yellow
Fig.5-b A Slot B A Fig.5-d C
Slot D
C
Integrator Lens-OUT
Integrator Lens-IN
Fig.5
-25-
s Electrical Adjustments
q Service Adjustment Menu Operation
To enter the service mode
To enter the "Service Mode", press and hold the MENU and NORMAL button on the projector for more than 3 sec-
onds. The service mode display appears on the screen as follows.
To adjust service data
Select the adjustment item no. by pressing the pointer v or w button, and change the data value by pressing the
VOLUME + or VOLUME - button. Refer to the "Service Adjustment Data Table" for further descroption of adjust-
ment item no. and data value.
To exit the service mode
To exit the service mode, press any of the POWER ON-OFF, MENU, MODE, FOCUS or ZOOM buttons on the pro-
jector or remote control unit.
Normal mode Service mode
Service Mode
Video
Item Data
10 15
Version : 1.0
Item Data
10 15
Adjustment Adjustment
Item No. Data Value
q Memory IC Replacement
IC302 on the main board-A stores the data for the ser- data, it should be required to perform the re-adjust-
vice adjustments, and should not be replaced except ments following to the "Electrical Adjustments".
for the case of defective device. Please note that the lamp replacement monitor timer is
If replaced, it should be performed the re-adjustments reset.
following to the "Electrical Adjustments".
The lamp replacement monitor timer is stored in the
IC302, and it can be confirmed at the item no. 36 of q Caution of Main Board replacement (in the case
service mode. IC302 is not defective)
Please note that the lamp replacement monitor timer is When the main board-A is replaced, IC302 should be
reset when the memory IC (IC302) is replaced. replaced with the one on previous main board. After
(Lamp replacement monitor time can not be set to the replacement, it should be required to perform the re-
previous value.) adjustments following to the "Electrical Adjustments".
In this case, the lamp replacement monitor timer and
q Caution to memory IC replacement the white uniformity compensation data can be kept the
When IC302 is replaced with new one, the CPU writes value as before.
down the default data of the service adjustments to the
replaced IC, refer to the service adjustment table. As
these data are not the same data as factory shipped
-26-
Electrical Adjustments
q Circuit Adjustments
CAUTION: The each circuit has been made by the fine adjustment at factory. Do not attempt to adjust the follow-
ing adjustments except requiring the readjustments in servicing otherwise it may cause loss of perfor-
mance and product safety.
[Adjustment Condition]
q Input signal
Video signal ..................1.0Vp-p/75 terminated, 16 steps gray scale or color bar pattern
Computer signal ............0.7Vp-p/75 terminated, 16 steps gray scale pattern
MCI signal * ..................16 steps gray scale pattern from PC Card
q Picture control mode ---------- "NORMAL" mode unless otherwise noted.
Note:
* Please refer to "Service Adjustment Menu Operation" for entering to the service mode and adjusting the service
data.
* It is not available the MCI mode for model which does not provide the PC Card slot.
OUTPUT VOLTAGE ADJUSTMENT PEDESTAL ADJUSTMENT
After replacing the Power Board, PF.C. Board, readjust Presetting
the Output voltage adjustment as follows. 1. Receive the 16-step grey scale video signal.
2. Set to VIDEO mode.
1. Connect a digital voltmeter to pins 1 (+) and 3 (-) of
K6C. [R-PEDESTAL ADJUSTMENT]
2. Adjust the voltage by using VR01 as following. 3. Connect an oscilloscope to test point "TP221R" (+)
and chassis ground (-).
AC Input Reading 4. Enter to the service mode, select item no. "27" and
230V 370V ◦ Jabse Service Manual Search 2026 ◦ Jabse Pravopis ◦ onTap.bg ◦ Other service manual resources online : Fixya ◦ eServiceinfo