Service Manuals, User Guides, Schematic Diagrams or docs for : Sharp MICROWAVEs R-350A
<< Back | HomeMost service manuals and schematics are PDF files, so You will need Adobre Acrobat Reader to view : Acrobat Download Some of the files are DjVu format. Readers and resources available here : DjVu Resources
For the compressed files, most common are zip and rar. Please, extract files with Your favorite compression software ( WinZip, WinRAR ... ) before viewing. If a document has multiple parts, You should download all, before extracting.
Good luck. Repair on Your own risk. Make sure You know what You are doing.
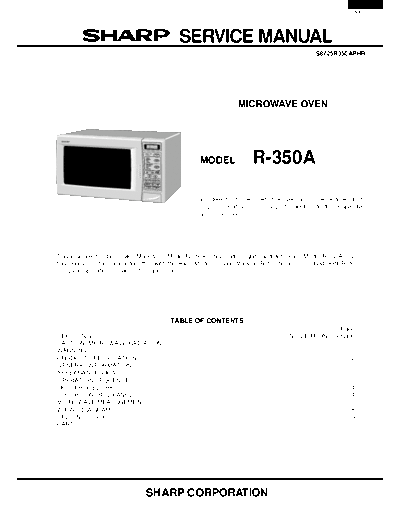
Image preview - the first page of the document
>> Download R-350A documenatation <<
Text preview - extract from the document
R-350A
SERVICE MANUAL
S8725R350APHR
MICROWAVE OVEN
COOK KG DEF HELP
R-350A
INTERACTIVE
DISPLAY HELP
MODEL
1.
BEVERAGE
2.
PIE/PIZZA
3. REHEAT
PORRIDGE
4.
CASSEROLES
1.
STEAK/CHOPS
2.
ROAST MEAT
3. DEFROST
POULTRY
4.
CHICKEN PIECES
MEAT VEGETABLES SLOW COOK
1 2 3 4 5
6 7 8 9 O
POWER LEVELS
CLOCK
TIMER
STOP/CLEAR
INSTANT COOK/START
In interests of user-safety the oven should be restored to its
original condition and only parts identical to those specified
should be used.
This is supplemental Service Manual for Model R-350A. This model is quite similar to Base Model R-340A. Use
this supplemental manual together with the Base Model Service Manual (Refer No. is S7717R340APHR) for
complete operation, service information, etc..
TABLE OF CONTENTS
Page
SERVICING ................................................................................................................. INSIDE FRONT COVER
CAUTION, MICROWAVE RADIATION ............................................................................................................ 1
WARNING ..........................................................................................................................................................1
PRODUCT SPECIFICATIONS ......................................................................................................................... 2
GENERAL INFORMATION ............................................................................................................................... 2
APPEARANCE VIEW ....................................................................................................................................... 3
OPERATION SEQUENCE ............................................................................................................................... 3
TEST PROCEDURE ........................................................................................................................................ 4
TOUCH CONTROL PANEL .............................................................................................................................. 4
MICROWAVE MEASUREMENT ...................................................................................................................... 7
WIRING DIAGRAM .......................................................................................................................................... 8
CPU UNIT CIRCUIT .......................................................................................................................................... 9
PARTS LIST .................................................................................................................................................... 10
SHARP CORPORATION
R-350A
SERVICING
WARNING TO SERVICE PERSONNEL
Microwave ovens contain circuitry capable of producing very high voltage and current, contact with following parts
of the high voltage circuit will result in electrocution. High voltage capacitor, Power transformer, Magnetron, High
voltage rectifier assembly, High voltage harness.
REMEMBER TO CHECK 3D REMEMBER TO CHECK 4R
1) Disconnect the supply. 1) Reconnect all leads removed from components
2) Door opened, and wedged open. during testing.
3) Discharge high voltage capacitor. 2) Replace the outer case (cabinet).
3) Reconnect the supply.
WARNING: AGAINST THE CHARGE OF THE 4) Run the oven. Check all functions.
HIGH-VOLTAGE CAPACITOR
Microwave ovens should not be run empty. To test for
The high-voltage capacitor remains charged about the presence of microwave energy within a cavity,
60 seconds after the oven has been switched off. place a cup of cold water on the oven turntable, close
Wait for 60 seconds and then short-circuit the the door and set the microwave timer for two (2)
connection of the high-voltage capacitor (that is, of minutes. Set the power level to HIGH and push the
the connecting lead of the high-voltage rectifier) START button. When the two minutes has elapsed
against the chassis with the use of an insulated (timer at zero) carefully check that the water is now hot.
screwdriver. If the water remains cold carry out 3D checks and re-
examine the connections to the component being
Sharp recommend that wherever possible fault-finding tested.
is carried out with the supply disconnected. It may in,
some cases, be necessary to connect the supply after
the outer case has been removed, in this event carry
out 3D checks and then disconnect the leads to the
primary of the power transformer. Ensure that these
leads remain isolated from other components and the
oven chassis. (Use insulation tape if necessary.) When
the testing is completed carry out 3D checks and
reconnect the leads to the primary of the power trans-
former.
When all service work is completed and the oven is fully assembled, the microwave power output should be
checked and microwave leakage test should be carried out.
R-350A
SERVICE MANUAL
PRODUCT SPECIFICATIONS
MICROWAVE OVEN
R-350A APPEARANCE VIEW
GENERAL IMPORTANT INFORMATION
This Manual has been prepared to provide Sharp Corp. Service OPERATING SEQUENCE
engineers with Operation and Service Information.
It is recommended that service engineers carefully study the
entire text of this manual, so they will be qualified to render
satisfactory customer service. TEST PROCEDURE
CAUTION
MICROWAVE RADIATION
TOUCH CONTROL PANEL
DO NOT BECOME EXPOSED TO RADIATION FROM
ASSEMBLY
THE MICROWAVE GENERATOR OR OTHER PARTS
CONDUCTING MICROWAVE ENERGY.
Service engineers should not be exposed to the microwave
energy which may radiate from the magnetron or other MICROWAVE MEASUREMENT
microwave generating devices if it is improperly used or
connected. All input and output microwave connections,
waveguides, flanges and gaskets must be secured. Never
operate the device without a microwave energy absorbing WIRING DIAGRAM
load attached. Never look into an open waveguide or
antenna while the device is energized.
PARTS LIST
WARNING
Never operate the oven until the following points are ensured.
(A) The door is tightly closed.
(B) The door brackets and hinges are not defective.
(C) The door packing is not damaged.
(D) The door is not deformed or warped.
(E) There is not any other visible damage with the oven.
Servicing and repair work must be carried out only by trained
service engineers.
All the parts marked "*" on parts list are used at voltages more
than 250V.
Removal of the outer wrap gives access to potentials above
250V.
All the parts marked "" on parts list may cause undue micro-
wave exposure, by themselves, or when they are damaged,
loosened or removed.
SHARP CORPORATION
OSAKA, JAPAN
1
R-350A
PRODUCT SPECIFICATIONS
ITEM DESCRIPTION
Power Requirements 220 Volts
50 Hertz
Single phase, 3 wire earthed
Power Consumption 1.5kW
Power Output 1000 watts nominal of RF microwave energy (IEC 705)
Operating fequency 2450 MHz
Case Dimensions Width 520 mm
Height 302 mm including foot
Depth 403 mm
Cooking Cavity Dimensions Width 348 mm
Height 212 mm
Depth 379 mm
Turntable diameter 335mm
Control Complement Touch Control System
Clock ( 1:00 - 12:59)
Timer (0 - 99 minutes 99 seconds)
Microwave Power for Variable Cooking
Repetition Rate;
HIGH ............................................... Full power throughout the cooking time
MEDIUM HIGH .................................................. approx. 70% of Full Power
MEDIUM ............................................................. approx. 50% of Full Power
MEDIUM LOW .................................................... approx. 30% of Full Power
LOW ................................................................... approx. 10% of Full Power
HELP pad
REHEAT pad
DEFROST pad
SLOW COOK pad
INFORMATION COOK pads
MORE / LESS pads
NUMBER pads
POWER LEVEL pad
CLOCK pad
TIMER pad
STOP/CLEAR pad
INSTANT COOK/START pad
Set Weight Approx. 17 kg
GENERAL INFORMATION
WARNING
THIS APPLIANCE MUST BE EARTHED
IMPOTANT
THE WIRES IN THIS MAINS LEAD ARE COLOURED IN ACCORDANCE WITH THE FOLLOWING CODE:
GREEN-AND-YELLOW : EARTH
BLUE : NEUTRAL
BROWN : LIVE
2
R-350A
APPEARANCE VIEW
TOUCH CONTROL PANEL
COOK KG DEF HELP Indicator
INTERACTIVE HELP PAD
DISPLAY HELP Press to select information guide
INFORMATION COOK PADS on/off, child lock, demonstration
Press to select information Cook mode. 1. or language modes.
BEVERAGE
2. Press to get cooking information.
PIE/PIZZA
3. REHEAT
PORRIDGE
4. SLOW COOK PAD
CASSEROLES
Press to cook slowly and for a
1. longer time.
STEAK/CHOPS
2.
ROAST MEAT
3. DEFROST MORE ( ), LESS ( ) PADS
POULTRY
4. Press to increase/decrease the
NUMBER PADS CHICKEN PIECES time in one minute increments
Press to enter cooking times, clock during cooking or to alter the do-
time or weight or quantity of food. neness for the Information Cook
MEAT VEGETABLES SLOW COOK
mode.
POWER LEVEL PAD
Press to select microwave power CLOCK PAD
setting. If not pressed, HIGH is au-
tomatically selected.
1 2 3 4 5 Press to set Clock.
6 7 8 9 O TIMER PAD
Press to set timer.
POWER LEVEL CLOCK TIMER INSTANT COOK/START PAD
STOP/CLEAR PAD Press once to cook for 1 minute
Press to clear during programming. at HIGH or increase by 1 minute
STOP/CLEAR
Press once to stop operation of oven INSTANT COOK/START multiples each time this pad is
during cooking; press twice to can- pressed during cooking.
cel cooking programme. Press to start oven after setting
programmes.
OPERATION SEQUENCE
OFF CONDITION
Closing the door activates all door interlock switches (1st. latch switch and 2nd. interlock relay control switch).
IMPORTANT
When the oven door is closed, the monitor switch contacts (COM-NC) must be open.
When the microwave oven is plugged in a wall outlet, rated voltage is supplied to the control unit.
Figure O-1 on page 13
1. The display will show , , and .
2. To set any programmes or set the clock, you must first touch the STOP/CLEAR pad.
3. " : " appears in the display.
NOTE: When the oven door is opened, the oven lamp comes on at this time.
3
R-350A
TEST PROCEDURES
PROCEDURE
LETTER COMPONENT TEST
M KEY UNIT TEST
If the display fails to clear when the STOP/CLEAR pad is depressed, first verify the flat ribbon cable
is making good contact, verify that the door sensing switch (stop switch) operates properly; that is the
contacts are closed when the door is closed and open when the door is open.
If the door sensing switch (stop switch) is good, disconnect the flat ribbon cable that connects the key
unit to the control unit and make sure the door sensing switch is closed (either close the door or short
the door sensing switch connector). Use the key unit matrix indicated on the control panel schematic
and place a jumper wire between the pins that correspond to the STOP/CLEAR pad making
momentary contact. If the control unit responds by clearing with a beep the key unit is faulty and must
be replaced. If the control unit does not respond, it is faulty and must be replaced.
If a specific pad does not respond, the above method may be used (after clearing the control unit) to
determine if the control unit or key pad is at fault.
CARRY OUT 3D CHECKS.
G8 G7 G6 G5 G4 G3 G2 G1
G9 5 4 3 2 1 HELP
POWER
G10 0 9 8 7 6 LEVEL
SLOW STOP
G11 TIMER
COOK VEGETABLES REHEAT
CLEAR
INSTANT
G12 COOK CLOCK DEFROST MEAT
START
DESCRIPTION OF LSI
LSI(IZA814DR):
The I/O signal of the LSI(IZA814DR) is detailed in the following table.
Pin No. Signal I/O Description
1-2 VL2-VL1 IN Power source voltage input terminal.
Standard voltage for LCD.
3-6 AN7-AN4 IN Terminal to change cooking input according to the Model.
By using the A/D converter contained in the LSI, DC voltage in accordance with the
Model in operation is applied to set up its cooking constant.
7 AN3 OUT Key strobe signal.
Signal applied to touch-key section. A pulse signal is input to P44 - P47 terminal
while one of G1 line keys on key matrix is touched.
8 AN2 IN To input signal which communicates the door open/close information to LSI.
Door closed "H" level signal (0V). Door opened "L" level signal (-5V)
9-10 P61-P60 OUT Terminal not used.
11 P57 OUT Terminal not used.
12 P56 OUT Oven lamp, fan motor and turntable motor driving signal.
20.0 msec.
To turn on and off shut off relay (RY1). The
H : GND
square waveform voltage is delivered to
the RY1 driving circuit and RY2 control
circuit. During cooking
L : -5V
13 P55 OUT Terminal not used.
4
R-350A
Pin No. Signal I/O Description
0.12 sec.
14 P54 OUT Signal to sound buzzer (2.0 kHz). H : GND
A
A: key touch sound. 2.4 sec.
L : -5V
H : GND
B: Completion sound. B
L : -5V
15 P53 OUT Magnetron high-voltage circuit driving signal.
To turn on and off the cook relay OFF
H : GND
(RY2). The signals holds "L" level
during microwave cooking and "H" P-HI ON
L : -5V
level while not cooking. In other cook- OFF OFF
ing modes (variable cooking) the sig- H : GND
24 sec.
nal turns to "H" level and "L" level in P-70
ON 8 sec.
repetition according to the power level. L : -5V
(ON and OFF times for other power level.)
16-18 P52-P50 OUT Terminal not used.
19 P47 IN Signal coming from touch key.
When either G12 line on key matrix is touched, a corresponding signal out of AN3
and P20 - P26 will be input into P47. When no key is touched, the signal is held at
"H" level.
20 P46 IN Signal similar to P47.
When either G11 line on key matrix is touched, a corresponding signal will be input
into P46.
21 P45 IN Signal similar to P47.
When either G10 line on key matrix is touched, a corresponding signal will be input
into P45.
22 P44 IN Signal similar to P47.
When either G9 line on key matrix is touched, a corresponding signal will be input
into P44.
23 P43 OUT Terminal not used.
24 INT0 IN Signal synchronized with commercial power source frequency.
This is the basic timing for time processing H : GND
of LSI.
L : -5V
20.0 msec.
25 P41 OUT Terminal not used.
26 P40 IN Connected to VC.
27 RESET IN Auto clear terminal.
Signal is input to reset the LSI to the initial state when power is applied. Temporarily
set to "L" level the moment power is applied, at this time the LSI is reset. Thereafter
set at "H" level.
28-29 P71-P70 OUT Terminal not used.
30 XIN OUT Internal clock oscillation frequency input setting.
The internal clock frequency is set by inserting the ceramic filter oscillation circuit
with respect to XIN terminal.
31 XOUT OUT Internal clock oscillation frequency control output.
Output to control oscillation input of XOUT.
32 VSS IN Power source voltage: -5.0V.
VC voltage of power source circuit input.
33 P27 OUT Terminal not used.
34 P26 OUT Key strobe signal.
Signal applied to touch-key section. A pulse signal is input to P44 - P47 terminal
while one of G8 line keys on key matrix is touched.
35 P25 OUT Key strobe signal.
Signal applied to touch-key section. A pulse signal is input to P44 - P47 terminal
while one of G7 line keys on key matrix is touched.
5
R-350A
Pin No. Signal I/O Description
36 P24 OUT Key strobe signal.
Signal applied to touch-key section. A pulse signal is input to P44 - P47 terminal
while one of G6 line keys on key matrix is touched.
37 P23 OUT Key strobe signal.
Signal applied to touch-key section. A pulse signal is input to P44 - P47 terminal
while one of G5 line keys on key matrix is touched.
38 P22 OUT Key strobe signal.
Signal applied to touch-key section. A pulse signal is input to P44 - P47 terminal
while one of G4 line keys on key matrix is touched.
39 P21 OUT Key strobe signal.
Signal applied to touch-key section. A pulse signal is input to P44 - P47 terminal
while one of G3 line keys on key matrix is touched.
40 P20 OUT Key strobe signal.
Signal applied to touch-key section. A pulse signal is input to P44 - P47 terminal
while one of G2 line keys on key matrix is touched.
41-44 P17-P14 OUT Terminal not used.
45-47 P13-P11 OUT Segment data signal.
Connected to LCD.
The relation between signals are as follows:
LSI signal (Pin No.) LCD (Pin No.) LSI signal (Pin No.) LCD (Pin No.)
P13 (45) ......................... S16 (25) SEG 13 (59) .................... S20 (12)
P12 (46) ......................... S15 (24) SEG 11 (61) .................... S21 (11)
P11 (47) ......................... S14 (23) SEG 10 (62) .................... S22 (10)
SEG 24 (48) ................... S13 (22) SEG 9 (63) ....................... S23 ( 9)
SEG 23 (49) ................... S12 (21) SEG 8 (64) ....................... S24 ( 8)
SEG 22 (50) ................... S11 (20) SEG 7 (65) ....................... S25 ( 7)
SEG 21 (51) ................... S10 (19) SEG 6 (66) ....................... S26 ( 6)
SEG 19 (53) ..................... S9 (18) SEG 5 (67) ........................ S 4 ( 5)
SEG 18 (54) ..................... S8 (17) SEG 3 (69) ........................ S 3 ( 4)
SEG 17 (55) ..................... S7 (16) SEG 2 (70) ........................ S 2 ( 3)
SEG 16 (56) ..................... S6 (15) SEG 1 (71) ........................ S 1 ( 2)
SEG 15 (57) ..................... S5 (14) SEG 0 (72) ........................ S 0 ( 1)
SEG 14 (58) ................... S19 (13)
48-51 SEG24-SEG21 OUT Segment data signal.
Signal similar to P13.
52 SEG20 OUT Terminal not used.
53-59 SEG19-SEG13 OUT Segment data signal.
Signal similar to P13.
60 SEG12 OUT Terminal not used.
61-67 SEG11-SEG5 OUT Segment data signal.
Signal similar to P13.
68 SEG4 OUT Terminal not used.
69-72 SEG3-SEG0 OUT Segment data signal.
Signal similar to P13.
73/74 VCC/VREF IN Connected to GND.
75 AVSS IN Connected to VC.
76 COM3 OUT Common data signal: COM3.
Connected to LCD signal C3 (Pin No. 29)
77 COM2 OUT Common data signal: COM2.
Connected to LCD signal C2 (Pin No. 28)
78 COM1 OUT Common data signal: COM1.
Connected to LCD signal C1 (Pin No. 27)
79 COM0 OUT Common data signal: COM0.
Connected to LCD signal C0 (Pin No. 26)
80 VL3 IN Power source voltage input terminal.
Standard voltage for LCD.
6
R-350A
MICROWAVE MEASUREMENT
After adjustment of door latch switches, monitor switch Recommended instruments are:
and door are completed individually or collectively, the NARDA 8100
following leakage test must be performed with a survey NARDA 8200
instrument and it must be confirmed that the result meets HOLADAY HI 1500
the requirements of the performance standard for micro- SIMPSON 380M
wave oven. 2. Place the oven tray into the oven cavity.
3. Place the load of 275 ◦ Jabse Service Manual Search 2026 ◦ Jabse Pravopis ◦ onTap.bg ◦ Other service manual resources online : Fixya ◦ eServiceinfo