Service Manuals, User Guides, Schematic Diagrams or docs for : TOSHIBA LCD 40UL975G Installation_Instruction
<< Back | HomeMost service manuals and schematics are PDF files, so You will need Adobre Acrobat Reader to view : Acrobat Download Some of the files are DjVu format. Readers and resources available here : DjVu Resources
For the compressed files, most common are zip and rar. Please, extract files with Your favorite compression software ( WinZip, WinRAR ... ) before viewing. If a document has multiple parts, You should download all, before extracting.
Good luck. Repair on Your own risk. Make sure You know what You are doing.
Image preview - the first page of the document

>> Download Installation_Instruction documenatation <<
Text preview - extract from the document
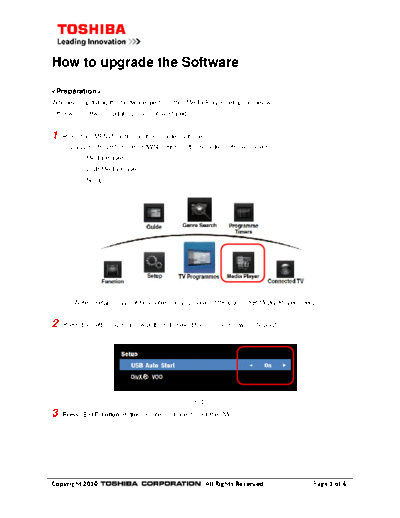
How to upgrade the SoftwareWhenever updating the Software, perform the "Media Player setup" as below. Otherwise software updating may not be stared. 1 Press the "MENU" button on the remote controller. Via LEFT/RIGHT or UP/DOWN button on the remote controller, select "Media Player" "USB Media Player" "Setup" Note; "Setup" may not be visible until you select it through "USB Media Player" menu. 2 Press the "left or right" arrow buttons to select the "On" as shown in figure2. Figure2 3 Press "EXIT" button on the remote controller to exit the "Menu". Copyright 2010 All Rights Reserved Page 1 of 4 4 Connect the AC power and turn "ON" the TV receiver. 5 The USB reader is located on the left or right of the cabinet near the side control/jack assembly as shown in Figure1. Figure3 6 Insert the "USB Drive" into the USB slot as shown in Figure2. Figure4 Copyright 2010 All Rights Reserved Page 2 of 4 7 After insertion of USB Drive into reader slot a firmware upgrade information window will appear as shown in Figure5. Figure5 8 If the window is no present, remove the USB Drive and try reinserting the USB Drive again. 9 Press the "left or right arrow" buttons on the remote controller to select the "Yes". Press the "OK" button on the remote controller. Following message will appear in sequence of figure 6 and 7. Figure6 Figure7 10 Press the "left or right arrow" buttons on the remote controller to select the "Yes". 11 Press the "OK" button on the remote controller to start the Software updating. Copyright 2010 All Rights Reserved Page 3 of 4 12 Following message will appease as shown in figure 8 and then disappear. Figure8 While the TV is upgrading no indication will appear on the TV screen but the upgrade is in process. This will take approx.3 minutes. DO NOT unplug the AC power to the TV or press any buttons on the remote controller or the TV keypad during this process. 13 Upon completion of the software upgrade, The TV will reboot automatically. 14 Following massage will appear again after 20 seconds as shown in figure 9. Figure9 15 Press the "left or right arrow" buttons on the remote controller to select the "Yes". Following massage will appear as shown in figure 9 and then disappear. 16 Remove the "USB Drive" from the slot. Momentarily remove (10 seconds) AC power from set by unplugging the AC power cord. Plug the TV back into the AC power. The TV should turn back on. Now select Menu
◦ Jabse Service Manual Search 2024 ◦ Jabse Pravopis ◦ onTap.bg ◦ Other service manual resources online : Fixya ◦ eServiceinfo