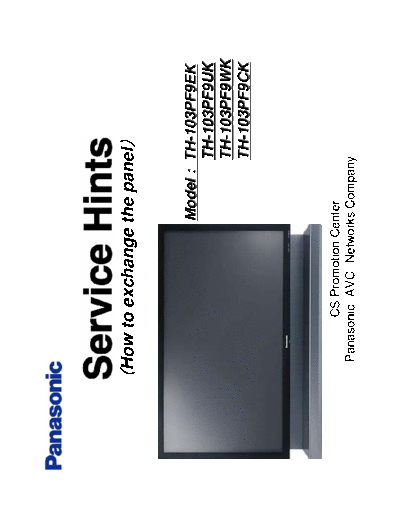
Service Manuals, User Guides, Schematic Diagrams or docs for : panasonic PDP National Training TH-103PF9EK TH-103PF9UK TH-103PF9WK TH-103PF9CK Panel Replacement
<< Back | HomeMost service manuals and schematics are PDF files, so You will need Adobre Acrobat Reader to view : Acrobat Download Some of the files are DjVu format. Readers and resources available here : DjVu Resources
For the compressed files, most common are zip and rar. Please, extract files with Your favorite compression software ( WinZip, WinRAR ... ) before viewing. If a document has multiple parts, You should download all, before extracting.
Good luck. Repair on Your own risk. Make sure You know what You are doing.
Image preview - the first page of the document
>> Download TH-103PF9EK TH-103PF9UK TH-103PF9WK TH-103PF9CK Panel Replacement documenatation <<
Text preview - extract from the document
How to exchange the panel
Model : TH-103PF9EK
TH-103PF9UK
TH-103PF9WK
TH-103PF9CK
CS Promotion Center
Panasonic AVC Networks Company
Introduction (1)
The procedure for exchange the panel is as follows.
Step 1
Step 1 Preparation for exchange the panel
It's necessary to prepare the replacement panel, lift or crane and stand
before exchange the panel.
Step 2
Step 2 Move the panel to the stand
You have to set the panel on the stand.
Step 3
Step 3 Replace the escutcheon
Replacement panel has dummy escutcheon.
You have to exchange the original escutcheon of defective panel to that of
replacement panel.
Next page
Introduction (2)
From provirus page
Step 4
Step 4 Replacement of the PCB
Only panel drive PCBs are on the replacement panel.
You have to replace PCBs of defective panel to replacement panel.
Step 5
Step 5 Adjustment of the voltage and waveform
Drive voltage of the panel is varied according to the panel itself.
You have to adjust the voltage and correct the waveform.
Step 1
Step 1
Preparation for exchange the panel
1-1-1. Replacement panel
The replacement panel is shipped in carton box with wooden frame to keep
transportation quality.
Weight total : 440kg approx.
(Panel and carton box : 313kg)
(Wooden frame : 132kg)
How to disassemble wooden frame is as follows.
2694mm
92
mm
5
mm
1-1-2. Replacement panel
How to unpack carton box is as follows.
1. Remove the band 2. Remove the joint and carton
Top
Carton
Band x 5
Joint
x4
3. Remove L-shape paper tube 4. Remove protection material 5. Unwrap protection bag
Protection R Protection C
L-shape paper tube Protection L
Total x6
1-1-3. Replacement panel
The replacement panel is included the following parts.
Please confirm below parts list and figure.
Eyebolt
Reinforcement Angle
C1 to CZ Board
Parts List Dummy
Escutcheon
1. Dummy Escutcheon SU Board SS2 Board
2. 3 eye bolts SM Board Hook Reinforcement Angle
SC Board
3. 12 pcs of C boards SS Board
4. SU,SM,SD,SC board
5. SS2,SS,SS3 board
SD Board SS3 Board
6. Reinforcement angle
7. Rear cover angle
8. Rear cover Hook
9. Hook Rear Cover Angle
Rear Cover (L), (R)
(Back view)
1-2-1. Preparation of the stand
When exchange the panel, you need 2pcs of stand. One for defective panel, the other
for replacement panel.
(Merchandise stand) (Service stand)
There are 2 kind of stands which are
merchandise stand and service stand.
The basic structure of both stands
are the same.
(After setting the panel to the stand)
You can buy the service stand by
service part's route.
The part number is as follows.
TZSC09028T
More detail of service stand,
please refer to the QSM/ Service Hint
on TSN. (Order No. ITD0610075BE)
1-2-2. Preparation of the lift, crane and jack
When move the panel, you should use the lift or crane.
The maximum lifting load of lift or crane needs twice of panel
weight (The panel weight is about 200kg). Please
prepare the lift or crane that the ability is Over 500kg.
When remove and set the escutcheon, you should use the jack for your safety and
preventing from panel damage. Please prepare the jack like the following photo.
The maximum loading weight of jack needs Over 50kg. (The weight of escutcheon is
about 50kg.)
(Jack)
DOWN UP
Step 2
Step 2
Move the panel to the stand
2-1. Movement of the panel
When you exchange the panel, you should put the panel on the stand.
Necessary quantity of service stand is different for each installation condition.
The preparation for moving the panel is as follows.
Customer use merchandise stand
(Defective panel) (Replacement panel) (Service stand x1) (Lift or Crane)
w/ merchandise stand
Customer mount wall hanging
(Defective panel) (Replacement panel) (Service stand x2) (Lift or Crane)
2-2-1. How to move the panel
In case of merchandise stand
1. Move the defective panel from merchandise stand to service stand.
Defective
plasma Panel
Defective Defective
plasma panel plasma panel
w/ Merchandise stand Merchandise stand Service stand Service stand
2. Set the replacement panel to customer's stand.
Replacement
plasma panel
Replacement
Replacement plasma panel
plasma panel
Merchandise stand Merchandise stand
2-2-2. How to move the panel
In the case of wall hanging
1. Move and set the defected panel to service stand 1.
Defective Defective
plasma panel plasma Panel
(Wall hanging)
Defective
plasma Panel
Defected Defective
plasma panel plasma panel
(After picking up) Service stand 1 Service stand 1
2. Set the replacement panel to service stand 2.
Replacement
plasma panel Replacement
Replacement
plasma panel
plasma panel
Service stand 2 Service stand 2
2-2-3. How to move the panel
After moving the panel, each panel are completed to set to the stand.
The initial and final condition in Step 2 are as follows.
In the case of merchandise stand In the case of wall hanging
(Initial condition) (Initial condition)
Defective Replacement Replacement
panel Defective
panel panel
panel
Merchandise stand On wall
(Final condition) (Final condition)
Defective Replacement Defective Replacement
panel panel panel panel
Service stand Merchandise stand Service stand 1 Service stand 2
2-3-1. Procedure in detail for moving the panel
From this page, these are explanation in detail for moving the panel.
Please check the following points and method one by one before moving the panel.
Confirmation of eye bolt
When move the panel by lift or crane, the wire string to
eye bolt. So please confirm the condition of eye bolt
and then fix it before lifting up.
Eye bolt
Confirmation of hook position
In the case of wall hanging, the hook is set at
1
mark 1 and 3. Please replace the hook position
at mark 2 and 4, when set the panel to the stand. Rear view
2
(Hook)
3
4
2-3-2. Procedure in detail for moving the panel
1. Remove the cover of stand.
2. Remove the 6 kinds of rear cover.
2 3
1 6
4 5
3. Remove the 4 screws.
2-3-3. Procedure in detail for moving the panel
4. String the wire between lift and eye bolt.
(Structure of notch and hole)
Lift
Upper notch
Panel
Hook Lower hole
Notch
Hole
Stand
5. Lift up the panel by lift to vertical direction and confirm upper hook to remove from upper notch.
(Confirmation point)
Before lifting up After lifting up
2-3-4. Procedure in detail for moving the panel
6. After lifting up the panel, move the upper of panel to front side direction. After that, remove the
panel from stand.
7. Finish
2-3-5. Procedure in detail for moving the panel
The procedure is reverse to remove the panel from stand.
Regarding the detail procedure, please refer to previous pages.
The simple procedure is as follows.
1. Approach the panel 2. After setting the lower 3. After standing the 4. Finish
to the stand and set hook to the lower hole, panel to vertically,
the lower hook to stand up the panel to set the panel to
lower hole of stand. vertically. stand slowly.
(Insert the upper
hook to upper
notch.)
Panel
Hole
2-3-6. Procedure in detail for moving the panel
When lift up the panel by lift or crane, you should support it to keep the panel position
for your safety and prevent from panel damage as the following figure.
(Bad Cases)
Spin Unbalance
Step 3
Step 3
Replace the escutcheon
3-1. Replacement of the escutcheon
Replacement panel has dummy escutcheon.
You have to exchange the original escutcheon of defective panel to that of
replacement panel..
The preparation for replacement the escutcheon is as follows.
(Defective panel) (Replacement panel) (Jack x2)
w/ Stand w/ Stand
3-2-1. How to replace the escutcheon
1. As mentioned in Step 2, The defective panel and replacement panel were set on the stand.
And there are 2 kinds of escutcheon on the each panel as the following figure.
Original Dummy
(Defective panel) escutcheon (Replacement panel) escutcheon
w/ Stand w/ Stand
2. Remove the dummy escutcheon from replacement panel by jack and put it on the flat space.
Dummy
Dummy escutcheon Dummy
escutcheon escutcheon
Replacement panel
Jack Jack Temporary space
(w/ Stand)
3. Replace the original escutcheon from defective panel to replacement panel by jack.
Original
Original escutcheon Original
escutcheon escutcheon
Defected panel Replacement panel
(w/ Stand ) Jack Jack
(w/ Stand )
3-2-2. How to replace the escutcheon
4. Set the dummy escutcheon from temporary space to defective panel by jack.
Dummy
Dummy Dummy
escutcheon escutcheon
escutcheon
Defective panel
Temporary space Jack Jack (w/ Stand )
After replacing the escutcheon, the initial and final condition of Step 3 is as follows.
(Initial Condition) (Final Condition)
Defective panel Defective panel
(w/ Original escutcheon) (w/ Dummy escutcheon)
Replacement panel Replacement panel
(w/ Dummy escutcheon) (w/ Original escutcheon)
3-3-1. Procedure in detail for replacing the escutcheon
From this page, these are explanation in detail for replacing the escutcheon.
Please check the following points and method one by one before replacing
the escutcheon.
1. Install the jacks at right and left side under the escutcheon.
(Left side) (Right side)
Install the jack
Install the jack
3-3-2. Procedure in detail for replacing the escutcheon
2. Remove the screw at 24 points (red arrow) and disconnect DS15 and SC34 connector. (Fig 1)
3. After disconnecting the DS15 and SC34 connector, the condition of both connectors are
as follows. (Fig 2) The both connectors are connected to the escutcheon.
DS15
The condition of DS15 and SC34 connector
SC34
(Fig 1) (Fig 2)
3-3-3. Procedure in detail for replacing the escutcheon
4. Move up the escutcheon about 2- 3mm from panel by jacks.
(Confirmation point)
When move up the escutcheon by jack, please
confirm the movement of escutcheon and the
space between escutcheon and plate.
Before lifting up
Escutcheon
No space
Lift up the both jacks at same time Plate
After lifting up
2- 3mm
3-3-4. Procedure in detail for replacing the escutcheon
5. After moving up the escutcheon completely, (Confirmation point)
You can confirm the rattled upper escutcheon.
Rattled upper escutcheon
6. After confirming the rattled upper escutcheon, move the jacks to front direction with escutcheon.
3-3-5. Procedure in detail for replacing the escutcheon
7. After moving the escutcheon to front direction, separate the escutcheon and put it on
the temporary flat space.
8. Finish
3-3-6. Procedure in detail for replacing the escutcheon
The procedure is reverse to remove the escutcheon from panel.
Regarding the detail procedure, please refer to previous pages.
The simple procedure is as follows.
1. Put the escutcheon on jacks from temporary flat space and set it in vertical direction.
And then, adjust the height of escutcheon and jacks.
2. Install the escutcheon to the panel with jacks.
3-3-7. Procedure in detail for replacing the escutcheon
3. Down the escutcheon by jacks and set it to the panel.
(Condition of escutcheon)
Before setting After setting
2- 3mm
Escutcheon
No space
Plate
4. Screw at 24 points and connect the DS15 and SC34 connector.
DS15
SC34
5. Finish
3-3-8. Procedure in detail for replacing the escutcheon
Confirmation of flexible cable from panel
When replace the escutcheon, please be careful not to damage the all of flexible
cable from panel (SC side and SS side) by inside metal plate of escutcheon.
(Confirmation point)
Flexible cable Metal plate
Move the escutcheon
Move the jacks
3-3-9. Procedure in detail for replacing the escutcheon
Confirmation of connector
After disconnecting DS15 and SC34 connector, please handle the cable for each
connector carefully. Because both cable are connected to the PCB on the escutcheon.
That's why, when replace the escutcheon, both cable moves with the escutcheon.
(Confirmation point)
Before moving escutcheon After moving escutcheon
Escutcheon Panel
Cable for DS15 and SC34 connector
Cable for DS15 and
SC34 connector
Step 4
Step 4
Replace the PCB
4-1. Replacement of the PCB
Only panel drive PCBs are on the replacement panel.
You have to replace other PCBs of defective panel to replacement panel.
The PCBs with replacement panel are as follows.
(Replacement panel)
C1 C2 C3 C4 C5 C6
SU
(List of included the PCB)
SS2
Board name Remarks
SC Board
SM SC SS
SU/ SM/ SD Board
SD SS3
SS Board
SS2/ SS3 Board
CZ CY CX C9 C8 C7 C1- CZ Board 12pcs
4-2. How to replace the PCB
Replace the PCB from defective (Replacement of the PCB)
panel to replacement panel one Defected panel Replacement panel
by one as shown in Fig.
Regarding the information in detail
Replace the PCB
for replacing the PCB, please refer
to the Service Manual.
Before removing the PCB from defected panel, please confirm to discharge the
voltage on defective panel. And please wait at least 10 minutes for discharging
the voltage after AC plug out.
Step 5
Step 5
Adjustment of the voltage and waveform
5-1. Adjustment of the voltage and waveform
After replacement PCBs of defective panel to replacement panel, it's necessary to
adjust the voltage and waveform. Because drive voltage of the panel is varied
according to the panel itself.
The preparation for adjustment of the voltage and waveform are as follows.
(Oscilloscope) (Digital multi meter) (Adjusting driver)
5-2-1. How to adjust the voltage
1. Set Aging pattern 0 (Vset adjustment pattern) by IIC mode.
(Panel label)
2. Set the picture adjustment items as follows.
(1) Picture menu : Standard
(2) Color temperature : Normal
(3) Picture : 25
(4) Aspect : Full
3. Check and adjust the following voltages with digital multi meter.
Before adjusting the Vsus and Ve voltage, please refer to the
panel data on the panel label.
Name Test Point Voltage Volume Remarks
Vsus TPVSUS (SC) Vsus (+ - 0.5V) VR251 (P_SC) Refer to the number of VSUS on panel label
Vsus TPVSUS (SS) Vsus (+ - 0.5V) VR251 (P_SS) Refer to the number of VSUS on panel label
Ve TPVE (SS) Ve (+ - 1V) VR6000 (SS) Refer to the number of Ve on panel label
Vad TPVAD (SC2) -85V (+ - 1V) VR6600 (SC2)
Vscn TPVSCN (SC2) Vad + 140V (+ - 4V) VR6605 (SC2)
Vset TPVSET (SC2) 240V (+ - 1V) VR6604 (SC2)
Vset2 TPVSET2 (SC) Vad + 8V (+1V, -0V) VR6603 (SC)
Vbk TPVBK (SC2) 150V (+ - 1V) VR6351 (SC2)
Vc TPVC (DR1) 45V (+ - 0.5V) VR600 (DR1_SC)
Vc TPVC (DR2) 45V (+ - 0.5V) VR650 (DR2_SC)
Vc TPVC (DR1) 34.5V (+ - 0.5V) VR600 (DR1_SS) Confirm the inserted DR6 connector
Vc TPVC (DR2) 34.5V (+ - 0.5V) VR650 (DR2_SS) Confirm the inserted DR6 connector
5-2-2. How to adjust the voltage
(DR1)
TPVC
(Back view)
VR600
(SC)
TPVDA
TPVSUS
(P (SC side))
VR6351
VR251
(DR2 and SC2) (SC2)
TPVbk
TPVDA TPVSET
VR650 TPVbk VR6604 TPVSCN
TPVC VR6605 VR6600
5-2-3. How to adjust the voltage
(DR2) (DR6 Connector)
(Back view)
TPVC
VR650
TPVDA
(SS)
TPVe2
TPVe2
TPVe
(P (SS side))
VR6000
VR251
(DR1) (DR6 Connector)
TPVDA
VR600
TPVC
5-3. How to adjust the waveform
1. Set Aging pattern 0 (Vset adjustment pattern) by IIC mode.
2. Set the picture adjustment items as follows. (Fig 1) (Fig 2)
(1) Picture menu : Standard
(2) Color temperature : Normal
(3) Picture : 25 T2
(4) Aspect : Full
3. Connect Oscilloscope to "TPSC1" and confirm the 190 + -7V
initialization pulse.
4. Voltage and waveform adjustments are as follows.
Confirmation Point Volume Level Remarks 80uS
Start up of initialization pulse VR6601 (SC) 190V (+ -7V) Fig 1
T2 period VR6602 (SC) 165 (+ -10)uSec Fig 2
(SC Board)
TPSC1
VR6602
VR6601
Note
◦ Jabse Service Manual Search 2026 ◦ Jabse Pravopis ◦ onTap.bg ◦ Other service manual resources online : Fixya ◦ eServiceinfo