Service Manuals, User Guides, Schematic Diagrams or docs for : panasonic TV TX-G10 chassis AC1 AG10
<< Back | HomeMost service manuals and schematics are PDF files, so You will need Adobre Acrobat Reader to view : Acrobat Download Some of the files are DjVu format. Readers and resources available here : DjVu Resources
For the compressed files, most common are zip and rar. Please, extract files with Your favorite compression software ( WinZip, WinRAR ... ) before viewing. If a document has multiple parts, You should download all, before extracting.
Good luck. Repair on Your own risk. Make sure You know what You are doing.
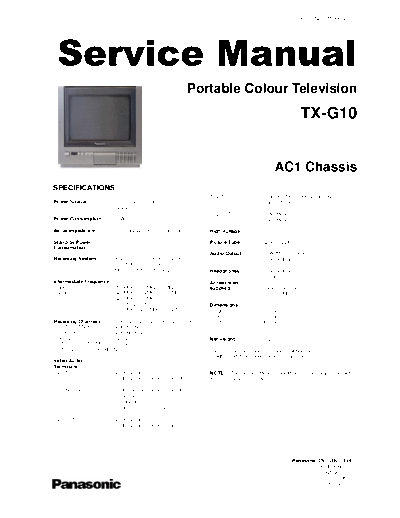
Image preview - the first page of the document
>> Download AG10 documenatation <<
Text preview - extract from the document
                                                                                                   ORDER No. SM-98042


                                                        Portable Colour Television
                                                                                                     TX-G10


                                                                                         AC1 Chassis
SPECIFICATIONS
                                                           AV2 IN                  Audio (RCAx1) 500mV rms10k
Power Source:          220-240V a.c., 50Hz                                         Video (BNCx1) 1V p-p 75
                       12-24V d.c.
                                                           AV2 OUT                 Audio Monitor Out
Power Consumption:     39W                                                         Video Monitor Out

Aerial Impedance:      75 unbalanced, Coaxial Type         High Voltage:           20kV +0,7kV/-1kV

Stand-by Power                                             Picture Tube:           A23KQU22X01
Consumption:           1W
                                                           Audio Output:           3,5W (Music Power)
Receiving System:      PAL-I, B/G, H, D/K, PAL-525/60                              8 Impedance
                       SECAM L/L' B/G, D/K
                       M.NTSC, NTSC (AV only)              Headphones:             8 Impedance
                                                                                   3,5 mm
Intermediate Frequency:                                    Accessories
Video                   39,5MHz, 38,9MHz, 34MHz            supplied :              Remote Control
Sound                   32,9MHz, 33,4MHz, 33,16MHz                                 2 x R6 (UM3) Batteries
                        32,4MHz, 40,4MHz
Colour                  34,47MHz (PAL)                     Dimensions:
                        34,5MHz, 34,65MHz (SECAM)          Height:                 272 mm
                                                           Width:                  283 mm
Receiving Channels:  VHF E2-E12 VHF H1-H2 (ITALY)          Depth:                  309 mm
VHF A-H (ITALY)      VHF R1-R2
VHF R3-R5            VHF R6-R12
UHF E21-E69          CATV (S01-S05)                        Net weight:             7kg
CATV S1-S10 (M1-M10) CATV S11-S20 (U1-U10)
CATV S21-S41 (HYPERBAND)                                   Specifications are subject to change without notice.
                                                           Weights and dimensions shown are approximate.
Video/Audio
Terminals:
AV1 IN                 Video (21 pin) 1V p-p 75            NOTE: This Service Manual should be used in conjunction with
                       Audio (21 pin) 500mV rms 10k        the AC1 Technical Guide.

AV1 IN (Front)         Audio (RCAx1)   500mV rms10k
                       Video (RCAx1)   1V p-p 75
                       S-Video IN      Y: 1V p-p 75
                       (4 pin)         C: 0.3V p-p 75

AV1 OUT                Video (21 pin) 1V p-p 75
                       Audio (21 pin) 500mV rms 1k


                                                                                                 Panasonic CS ( U.K. ) Ltd.
                                                                                                     WILLOUGHBY ROAD,
                                                                                                            BRACKNELL,
                                                                                                                 BERKS.,
                                                                                                               RG12 8FT.
 CONTENTS
 SAFETY PRECAUTIONS..........................................................................................................................................................2
 SERVICE HINTS .......................................................................................................................................................................3
 SERVICE POSITION.................................................................................................................................................................4
 ADJUSTMENT PROCEDURE...................................................................................................................................................5
 WAVEFORM PATTERN TABLE ...............................................................................................................................................6
 ALIGNMENT SETTINGS...........................................................................................................................................................7
 BLOCK DIAGRAMS ..................................................................................................................................................................8
 PARTS LOCATION .................................................................................................................................................................12
 REPLACEMENT PARTS LIST ................................................................................................................................................13
 SCHEMATIC DIAGRAMS .......................................................................................................................................................22
 CONDUCTOR VIEWS.............................................................................................................................................................25


 SAFETY PRECAUTIONS
 GENERAL GUIDE LINES
1.   It is advisable to insert an isolation transformer in the                                  6.     The potential at any point should not exceed
     a.c. supply before servicing a hot chassis.                                                       1,4 Vrms. In case a measurement is outside the limits
2.   When servicing, observe the original lead dress in the                                            specified, there is a possibility of a shock hazard, and
     high voltage circuits. If a short circuit is found, replace                                       the receiver should be repaired and rechecked before
     all parts that have been overheated or damaged by                                                 it is returned to the customer.
     the short circuit.
3.   After servicing, see that all the protective devices                                                 HOT CHECK CIRCUIT
     such as insulation barriers, insulation papers, shields
     and isolation R-C combinations are correctly
     installed.                                                                                                          A.C. VOLTMETER
4.   When the receiver is not being used for a long period
     of time, unplug the power cord from the a.c. outlet.
5.   Potentials as high as 20,7kV are present when this
     receiver is in operation. Operation of the receiver
     without the rear cover involves the danger of a shock
     hazard from the receiver power supply. Servicing
     should not be attempted by anyone who is not                                                                        2k 10 Watts                             WATER PIPE
                                                                                                                                                                  (EARTH)
     familiar with the precautions necessary when working
     on high voltage equipment. Always discharge the                                                 TO INSTRUMENT'S EXPOSED
     anode of the tube.                                                                              METALLIC PARTS
                                                                                                                                        Fig. 1.
6.   After servicing make the following leakage current
     checks to prevent the customer from being exposed
     to shock hazard.
LEAKAGE CURRENT COLD CHECK                                                                      X-RADIATION WARNING
1.   Unplug the a.c. cord and connect a jumper between                                          1.     The potential sources of X-Radiation in TV sets are
     the two prongs of the plug.                                                                       the high voltage section and the picture tube.
2.   Turn on the receiver's power switch.                                                       2.     When using a picture tube test jig for service, ensure
3.   Measure the resistance value with an ohmmeter,                                                    that the jig is capable of handling 20,7kV without
     between the jumpered a.c. plug and each exposed                                                   causing X-Radiation.
     metallic cabinet part on the receiver, such as screw
     heads, aerials, connectors, control shafts etc. When                                       NOTE: It is important to use an accurate periodically
     the exposed metallic part has a return path to the                                         calibrated high voltage meter.
     chassis, the reading should be between 4M ohm and                                          1. Set the brightness to minimum.
     20M ohm. When the exposed metal does not have a                                            2. Measure the high voltage. The meter should
     return path to the chassis, the reading must be                                                 indicate :- 20kV +0,7kV/-1kV If the meter indication is
     infinite.                                                                                       out of tolerance, immediate service and correction is
LEAKAGE CURRENT HOT CHECK                                                                            required to prevent the possibility of premature
1.   Plug the a.c. cord directly into the a.c. outlet. Do not                                        component failure.
     use an isolation transformer for this check.                                               3. To prevent any X-Radiation possibility, it is essential
2.   Connect a 2k 10W resistor in series with an                                                     to use the specified tube.
     exposed metallic part on the receiver and an earth,
     such as a water pipe.
3.   Use an a.c. voltmeter with high impedance to
     measure the potential across the resistor.
4.   Check each exposed metallic part and check the
     voltage at each point.
5.   Reverse the a.c. plug at the outlet and repeat each of
     the above measurements.


                                                                                     2
SERVICE HINTS
How to remove the rear cover
1. Remove the 7 screws as shown in Fig.2.
2. Push clips (A) and elevate lid.
3. Remove the 2 screws as shown in Fig.3.


                     Clips
                      (A)


                   SCREWS                                              SCREWS
                    Fig.2.                                              Fig.3.

LOCATION OF CONTROLS


               Y - Board


                                                                              Focus

                                                                              Screen

               Q - Board
                                                          S 451
                                              E - Board   Vertical Position

                                            Fig.4.


                                               3
HOW TO MOVE THE CHASSIS INTO SERVICE POSITION
1. Remove the backcover screws and clips as shown in Fig.2 and Fig.3 (page3.).
2. Release chassis from right-hand chassis rail and partially withdraw.
3. Rotate, clockwise, the whole T.V. vertically through 90
◦ Jabse Service Manual Search 2026 ◦ Jabse Pravopis ◦ onTap.bg ◦ Other service manual resources online : Fixya ◦ eServiceinfo