Service Manuals, User Guides, Schematic Diagrams or docs for : . Car Manuals Jeep Cherokee XJ 1988-1989.1993-1995 Approved 1995 XJ Jeep Cherokee 95XJ_11
<< Back | HomeMost service manuals and schematics are PDF files, so You will need Adobre Acrobat Reader to view : Acrobat Download Some of the files are DjVu format. Readers and resources available here : DjVu Resources
For the compressed files, most common are zip and rar. Please, extract files with Your favorite compression software ( WinZip, WinRAR ... ) before viewing. If a document has multiple parts, You should download all, before extracting.
Good luck. Repair on Your own risk. Make sure You know what You are doing.
Image preview - the first page of the document
>> Download 95XJ_11 documenatation <<
Text preview - extract from the document
J EXHAUST SYSTEM AND INTAKE MANIFOLD 11 - 1
EXHAUST SYSTEM AND INTAKE MANIFOLD
CONTENTS
page page
EXHAUST SYSTEM . . . . . . . . . . . . . . . . . . . . . . . 1 SERVICE PROCEDURES . . . . . . . . . . . . . . . . . . . 3
EXHAUST SYSTEM DIAGNOSIS . . . . . . . . . . . . . 2 TORQUE SPECIFICATIONS . . . . . . . . . . . . . . . . 10
EXHAUST SYSTEM
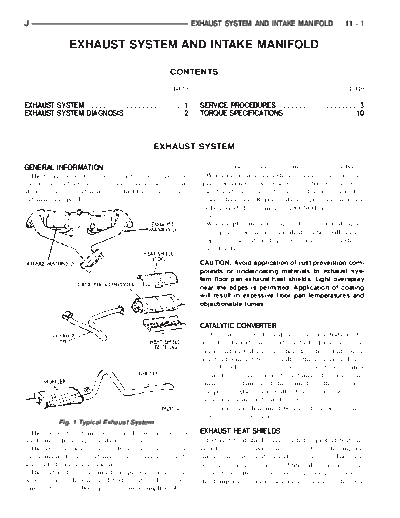
GENERAL INFORMATION tionable noises originating from the engine or body.
The basic exhaust system consists of an engine ex- When inspecting an exhaust system, critically in-
haust manifold, exhaust pipe with oxygen sensor, cat- spect for cracked or loose joints, stripped screw or
alytic converter, exhaust heat shield(s), muffler and bolt threads, corrosion damage and worn, cracked or
exhaust tailpipe (Fig. 1). broken hangers. Replace all components that are
badly corroded or damaged. DO NOT attempt to re-
pair.
When replacement is required, use original equip-
ment parts (or their equivalent). This will assure
proper alignment and provide acceptable exhaust
noise levels.
CAUTION: Avoid application of rust prevention com-
pounds or undercoating materials to exhaust sys-
tem floor pan exhaust heat shields. Light overspray
near the edges is permitted. Application of coating
will result in excessive floor pan temperatures and
objectionable fumes.
CATALYTIC CONVERTER
The stainless steel catalytic converter body is de-
signed to last the life of the vehicle. Excessive heat
can result in bulging or other distortion, but exces-
sive heat will not be the fault of the converter. If un-
burned fuel enters the converter, overheating may
occur. If a converter is heat-damaged, correct the
cause of the damage at the same time the converter
is replaced. Also, inspect all other components of the
exhaust system for heat damage.
Unleaded gasoline must be used to avoid contami-
nating the catalyst core.
Fig. 1 Typical Exhaust System
The exhaust system uses a single muffler with a EXHAUST HEAT SHIELDS
single monolithic-type catalytic converter. Exhaust heat shields are needed to protect both the
The 4.0L engines use a seal between the engine ex- vehicle and the environment from the high tempera-
haust manifold and exhaust pipe to assure a tight tures developed by the catalytic converter. The cata-
seal and strain free connections. lytic converter releases additional heat into the
The exhaust system must be properly aligned to exhaust system. Under severe operating conditions,
prevent stress, leakage and body contact. If the sys- the temperature increases in the area of the con-
tem contacts any body panel, it may amplify objec-
11 - 2 EXHAUST SYSTEM AND INTAKE MANIFOLD J
verter. Such conditions can exist when the engine DO NOT allow the engine to operate at fast idle for
misfires or otherwise does not operate at peak effi- extended periods (over 5 minutes). This condition
ciency. may result in excessive temperatures in the exhaust
DO NOT remove spark plug wires from plugs or by system and on the floor pan.
any other means short out cylinders. Failure of the
catalytic converter can occur due to a temperature
increase caused by unburned fuel passing through
the converter.
EXHAUST SYSTEM DIAGNOSIS
J EXHAUST SYSTEM AND INTAKE MANIFOLD 11 - 3
SERVICE PROCEDURES
INDEX
page page
Catalytic Converter . . . . . . . . . . . . . . . . . . . . . . . . . 4 Intake Manifold--2.5L Engine . . . . . . . . . . . . . . . . . 7
Engine Exhaust Manifold--2.5L Engine . . . . . . . . . . 7 Intake Manifold--4.0L Engine . . . . . . . . . . . . . . . . . 8
Engine Exhaust Manifold--4.0L Engine . . . . . . . . . . 7 Muffler and Exhaust Tailpipe--XJ Vehicles . . . . . . . . 5
Exhaust Pipe--XJ Vehicles . . . . . . . . . . . . . . . . . . . 3 Muffler and Exhaust Tailpipe--YJ Vehicles . . . . . . . . 6
Exhaust Pipe--YJ Vehicles . . . . . . . . . . . . . . . . . . . 4
EXHAUST PIPE--XJ VEHICLES
WARNING: IF TORCHES ARE USED WHEN WORK-
ING ON THE EXHAUST SYSTEM, DO NOT ALLOW
THE FLAME NEAR THE FUEL LINES.
REMOVAL
(1) Raise and support the vehicle.
(2) Saturate the bolts and nuts with heat valve lu-
bricant (Fig. 1). Allow 5 minutes for penetration.
Fig. 2 Oxygen Sensor
(5) Support the transmission and remove the rear
crossmember.
(6) Remove the clamp nuts and clamp (Fig. 3). To
remove the exhaust pipe from the catalytic converter,
apply heat until the metal becomes cherry red. Dis-
connect the exhaust pipe from the catalytic converter
(Fig. 3). Remove the exhaust pipe.
Fig. 1 Exhaust Pipe-to-Engine Exhaust Manifold
Nuts
(3) Remove the oxygen sensor from the exhaust
pipe (Fig. 2).
(4) Disconnect the exhaust pipe from the engine
exhaust manifold. Discard the seal (4.0L engine,
only).
Fig. 3 Exhaust Pipe-to-Catalytic Converter
Connection
11 - 4 EXHAUST SYSTEM AND INTAKE MANIFOLD J
INSTALLATION (3) Remove the oxygen sensor from the exhaust
(1) Assemble exhaust pipe to manifold and cata- pipe (Fig. 2).
lytic converter loosely to permit proper alignment of (4) Disconnect the exhaust pipe from the engine
all parts. exhaust manifold.
(2) Use a new clamp and tighten the nuts to 61 (5) Disconnect the exhaust pipe from the catalytic
N m (45 ft. lbs.) torque. converter and slide the pipe out of the transmission
(3) Connect the exhaust pipe to the engine exhaust torque arm insulator (Fig. 5). Remove the exhaust
manifold. Install a new seal between the exhaust pipe.
manifold and the exhaust pipe (4.0L engine, only).
Tighten the nuts to 31 N m (23 ft. lbs.) torque (Fig.
1).
(3) Install the rear crossmember. Tighten the
crossmember-to-sill bolts to 41 N m (30 ft. lbs.)
torque. Remove the support from the transmission.
(4) Coat the oxygen sensor with anti-seize com-
pound. Install the sensor and tighten the nut to 48
N m (35 ft. lbs.) torque.
(5) Lower the vehicle.
(6) Start the engine and inspect for exhaust leaks
and exhaust system contact with the body panels.
Adjust the alignment, if needed.
EXHAUST PIPE--YJ VEHICLES
WARNING: IF TORCHES ARE USED WHEN WORK- Fig. 5 Exhaust Pipe-to-Catalytic Converter
ING ON THE EXHAUST SYSTEM, DO NOT ALLOW Connection--YJ Vehicles
THE FLAME NEAR THE FUEL LINES. INSTALLATION
(1) Slide the exhaust pipe into the transmission
REMOVAL torque arm insulator and onto the catalytic converter
(1) Raise and support the vehicle. (Fig. 5).
(2) Saturate the bolts and nuts with heat valve lu- (2) Clean the mating surface of the engine exhaust
bricant (Fig. 4). Allow 5 minutes for penetration. manifold flange.
(3) Connect the exhaust pipe to the engine exhaust
manifold using new nuts. DO NOT tighten the nuts.
(4) Align the exhaust pipe.
(5) Use a new clamp at the exhaust pipe to cata-
lytic converter connection and tighten the nuts to 61
N m (45 ft. lbs.) torque.
(6) Tighten the exhaust pipe-to-engine exhaust
manifold nuts to 31 N m (23 ft. lbs.) torque.
(7) Coat the oxygen sensor with anti-seize com-
pound. Install the sensor and tighten the nut to 48
N m (35 ft. lbs.) torque.
(8) Lower the vehicle.
(9) Start the engine and inspect for exhaust leaks
and exhaust system contact with the body panels.
Adjust the alignment, if needed.
CATALYTIC CONVERTER
WARNING: IF TORCHES ARE USED WHEN WORK-
ING ON THE EXHAUST SYSTEM, DO NOT ALLOW
THE FLAME NEAR THE FUEL LINES.
Fig. 4 Exhaust Pipe-to-Engine Exhaust Manifold REMOVAL
Bolts and Nuts (1) Raise and support the vehicle.
J EXHAUST SYSTEM AND INTAKE MANIFOLD 11 - 5
(2) Remove the clamp from the catalytic converter REMOVAL
and muffler connection (Fig. 6). (1) Raise and support the vehicle.
(2) Remove the front muffler clamp from the cata-
lytic converter and muffler connection (Fig. 6).
(3) Remove the rear exhaust tailpipe hanger clamp
(Fig. 7) and remove the exhaust tailpipe from the
front exhaust tailpipe hanger (Fig. 8).
Fig. 6 Catalytic Converter-to-Muffler Connection
(3) Heat the catalytic converter and muffler con-
nection with an oxyacetylene torch until the metal
becomes cherry red.
(4) While the metal is still cherry red, twist the
muffler assembly back and forth to separate it from Fig. 7 Rear Exhaust Tailpipe Hanger Clamp
the catalytic converter.
(5) Disconnect the exhaust pipe from the catalytic
converter (Figs. 3 and 5). If needed, heat up the pipes
to separate.
INSTALLATION
(1) Connect the catalytic converter to the exhaust
pipe (Figs. 3 and 5). Use a new clamp and tighten
the nuts to 61 N m (45 ft. lbs.) torque.
(2) Install the muffler onto the catalytic converter
until the alignment tab is inserted into the align-
ment slot.
(3) Install a new clamp at the muffler and catalytic
converter connection (Fig. 6). Tighten the clamp nuts
to 61 N m (45 ft. lbs.) torque.
(4) Lower the vehicle.
(5) Start the engine and inspect for exhaust leaks
and exhaust system contact with the body panels.
Adjust the alignment, if needed.
MUFFLER AND EXHAUST TAILPIPE--XJ VEHICLES
All original equipment exhaust systems are manu- Fig. 8 Front Exhaust Tailpipe Hanger
factured with the exhaust tailpipe welded to the muf-
fler. Service replacement mufflers and exhaust (4) Heat the catalytic converter-to-muffler connec-
tailpipes are either clamped together or welded to- tion with an oxyacetylene torch until the metal be-
gether. comes cherry red.
(5) While the metal is still cherry red, remove the
WARNING: IF TORCHES ARE USED WHEN WORK- exhaust tailpipe/muffler assembly from the catalytic
ING ON THE EXHAUST SYSTEM, DO NOT ALLOW converter.
THE FLAME NEAR THE FUEL LINES. (6) Remove the exhaust tailpipe from the muffler:
11 - 6 EXHAUST SYSTEM AND INTAKE MANIFOLD J
◦ Jabse Service Manual Search 2026 ◦ Jabse Pravopis ◦ onTap.bg ◦ Other service manual resources online : Fixya ◦ eServiceinfo