Service Manuals, User Guides, Schematic Diagrams or docs for : . Car Manuals Jeep Cherokee XJ 1997.1999-2001 Approved 1999 XJ Jeep Cherokee EXJ_8LA
<< Back | HomeMost service manuals and schematics are PDF files, so You will need Adobre Acrobat Reader to view : Acrobat Download Some of the files are DjVu format. Readers and resources available here : DjVu Resources
For the compressed files, most common are zip and rar. Please, extract files with Your favorite compression software ( WinZip, WinRAR ... ) before viewing. If a document has multiple parts, You should download all, before extracting.
Good luck. Repair on Your own risk. Make sure You know what You are doing.
Image preview - the first page of the document
>> Download EXJ_8LA documenatation <<
Text preview - extract from the document
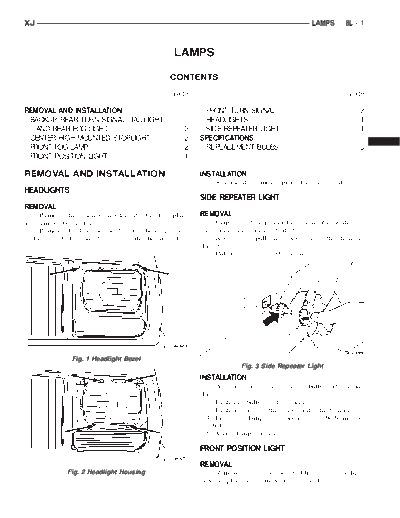
XJ                                                                                                                LAMPS         8L - 1


                                                          LAMPS
                                                        CONTENTS

                                                          page                                                                    page

REMOVAL AND INSTALLATION                                             FRONT TURN SIGNAL . . . . . . . . . . . . . . . . . . . .          2
 BACKUP, REAR TURN SIGNAL, TAILLIGHT                                 HEADLIGHTS . . . . . . . . . . . . . . . . . . . . . . . . . . .   1
   AND REAR FOG LIGHT . . . . . . . . . . . . . . . . . .       2    SIDE REPEATER LIGHT . . . . . . . . . . . . . . . . . . .          1
 CENTER HIGH MOUNTED STOPLIGHT . . . . . . .                    2   SPECIFICATIONS
 FRONT FOG LAMP . . . . . . . . . . . . . . . . . . . . . . .   2    REPLACEMENT BULBS . . . . . . . . . . . . . . . . . . .            3
 FRONT POSITION LIGHT . . . . . . . . . . . . . . . . . .       1

REMOVAL AND INSTALLATION                                            INSTALLATION
                                                                      1. Reverse the removal procedures to install.
HEADLIGHTS
                                                                    SIDE REPEATER LIGHT
REMOVAL
  1. Remove the 2 screws holding the bezel in place                 REMOVAL
and remove bezel (Fig. 1).                                            1. Grip the side repeater lamp assembly with your
  2. Remove the 4 screws holding the headlight and                  hand and pull from the body to remove.
replace the bulb from the front of the housing (Fig.                  2. Rotate and pull the socket from the housing
2).                                                                 (Fig. 3).
                                                                      3. Pull the bulb from the socket.


                  Fig. 1 Headlight Bezel
                                                                                     Fig. 3 Side Repeater Light
                                                                    INSTALLATION
                                                                      1. Align the side repeater lamp bulb to the socket
                                                                    (Fig. 3).
                                                                      2. Push the bulb into the socket.
                                                                      3. Push and rotate the socket into the housing.
                                                                      4. Press the lamp assembly into the body mount-
                                                                    ing hole.
                                                                      5. Verify lamp operation.

                                                                    FRONT POSITION LIGHT
                                                                    REMOVAL
                Fig. 2 Headlight Housing                              1. Remove the 2 screws holding the headlight
                                                                    bezel in place and remove the bezel (Fig. 1).
8L - 2    LAMPS                                                                                            XJ
REMOVAL AND INSTALLATION (Continued)
  2. Remove the 4 screws holding the headlight
housing (Fig. 2).
  3. Pull the front position light socket from the rub-
ber grommet and replace the bulb (Fig. 4).


                                                                     Fig. 6 Front Turn Signal Lamp


             Fig. 4 Front Position Light
INSTALLATION
  1. Reverse the removal procedure for installation.

FRONT TURN SIGNAL
REMOVAL
  1. Remove the 2 screws holding the bezel in place
and remove the bezel (Fig. 5).
  2. Remove the screws holding the turn signal                       Fig. 7 Front Turn Signal Bulb
housing in place (Fig. 6).
  3. Remove the turn signal housing.                        3. Remove the lamp element from the housing.
  4. Twist the socket from the back of the turn sig-
nal housing and then pull from the housing (Fig. 7).      INSTALLATION
                                                            1. Install the new lamp element in the housing
                                                          and reinstall the lower housing.

                                                          BACKUP, REAR TURN SIGNAL, TAILLIGHT AND
                                                          REAR FOG LIGHT
                                                          REMOVAL
                                                             1. There are 3 mounting bolts attaching the tail-
                                                          light assembly. When removing, unfasten the 3 bolts
                                                          located on the top and side. Lift up and out to
                                                          remove the assembly.
                                                             2. Turn the socket assembly 1/3 turn and pull the
                                                          socket from the housing to replace the bulb (Fig. 8).
                Fig. 5 Headlight Bezel
                                                          INSTALLATION
INSTALLATION                                                1. Reverse the removal procedure to install.
  1. Reverse the removal procedure to install.
                                                          CENTER HIGH MOUNTED STOPLIGHT
FRONT FOG LAMP
                                                          REMOVAL
REMOVAL                                                     1. Remove the 2 screws (Fig. 9).
  1. Remove the 2 screws from the bottom cover of           2. Remove the Center High Mount Stoplight
the lamp body.                                            Assembly.
  2. Disconnect the 2 wires from the lamp element.
XJ                                                                                                      LAMPS         8L - 3
REMOVAL AND INSTALLATION (Continued)

                                                       SPECIFICATIONS
                                                       REPLACEMENT BULBS
                                                       Exterior Lamps                                             Bulb Type
                                                       Headlamp . . . . . . . . . . . . . . . . . . . . . . . . . . . . . . H4
                                                       Front Position . . . . . . . . . . . . . . . . . . . . . . . . . T4W
                                                       Front Turn Signal . . . . . . . . . . . . . . . . . . . . P27/7W
                                                       Side Turn Signal . . . . . . . . . . . . . . . . . . . . . . . W3W
                                                       License Lamp . . . . . . . . . . . . . . . . . . . . . . . . . W5W
                                                       Rear Position and Stop . . . . . . . . . . . . . . . . P27/7W
                                                       Rear Turn Signal . . . . . . . . . . . . . . . . . . . . . P27/7W
          Fig. 8 Rear Lamp Replacement                 Reversing . . . . . . . . . . . . . . . . . . . . . . . . . . . P27/7W
                                                       Rear Fog . . . . . . . . . . . . . . . . . . . . . . . . . . . P27/7W
  3. Twist and pull the socket from the back of the    Underhood Lamp . . . . . . . . . . . . . . . . . . . . . . . W5W
housing.                                               Underhood Retractable Lamp . . . . . . . . . . . . . . 105
                                                       Front Fog . . . . . . . . . . . . . . . . . . . . . . . . . . . . . . H3
                                                       CHMSL . . . . . . . . . . . . . . . . . . . . . . . . . . . . . W16W
                                                       Interior Lamps                                         Bulb Type
                                                       Ashtray Lamp . . . . . . . . . . . . . . . . . . . . . . . . . 1891
                                                       Cigarette Lighter Lamp . . . . . . . . . . . . . . . . . . . . 53
                                                       Auto. Trans. Floor Shift Lamp . . . . . . . . . . . . . . 658
                                                       Cargo Lamp . . . . . . . . . . . . . . . . . . . . . . . . . . . . 561
                                                       Climate Control Lamp (2) . . . . . . . . . . . . . . . . . . 74
                                                       Dome Lamp . . . . . . . . . . . . . . . . . . . . . . . . . . . . 561
                                                       Dome/Reading Lamp . . . . . . . . . (1) 561 and (2) 906
                                                       Glove Box Lamp . . . . . . . . . . . . . . . . . . . . . . . . . 194
                                                       Lighted Vanity Mirror (2) . . . . . . . . . . . . . . . . . . . 74
       Fig. 9 Center High Mounted Stoplight            Map Reading Light in Overhead Console (4) . . . 912
                                                       Rocker Switch . . . . . . . . . . . . . . . . . . . . . . . . . . . 37
INSTALLATION
                                                       Transfer Case Lamp . . . . . . . . . . . . . . . . . . . . . . 658
  1. Reverse the removal procedure for installation.
                                                       Underpanel Courtesy lamps (2) . . . . . . . . . . . . . 168
                                                       NOTE: Numbers refer to commercial bulb types
                                                       that can be purchased from your local Jeep dealer.
◦ Jabse Service Manual Search 2026 ◦ Jabse Pravopis ◦ onTap.bg ◦ Other service manual resources online : Fixya ◦ eServiceinfo