Service Manuals, User Guides, Schematic Diagrams or docs for : . Car Manuals Jeep Cherokee XJ 1997.1999-2001 Approved 1999 XJ Jeep Cherokee EXJ_9A
<< Back | HomeMost service manuals and schematics are PDF files, so You will need Adobre Acrobat Reader to view : Acrobat Download Some of the files are DjVu format. Readers and resources available here : DjVu Resources
For the compressed files, most common are zip and rar. Please, extract files with Your favorite compression software ( WinZip, WinRAR ... ) before viewing. If a document has multiple parts, You should download all, before extracting.
Good luck. Repair on Your own risk. Make sure You know what You are doing.
Image preview - the first page of the document
>> Download EXJ_9A documenatation <<
Text preview - extract from the document
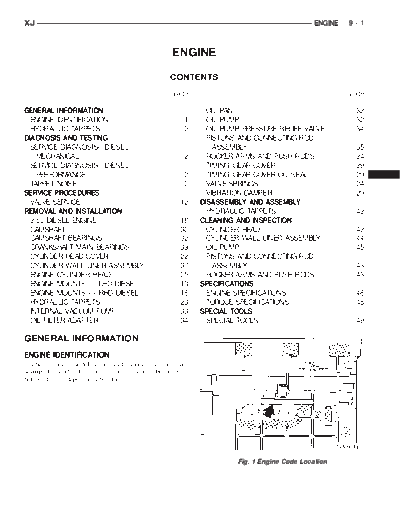
XJ ENGINE 9-1
ENGINE
CONTENTS
page page
GENERAL INFORMATION OIL PAN . . . . . . . . . . . . . . . . . . . . . . . . . . . . . . 32
ENGINE IDENTIFICATION . . . . . . . . . . . . . . . . . . 1 OIL PUMP . . . . . . . . . . . . . . . . . . . . . . . . . . . . . 32
HYDRAULIC TAPPETS . . . . . . . . . . . . . . . . . . . . 2 OIL PUMP PRESSURE RELIEF VALVE . . . . . . . 34
DIAGNOSIS AND TESTING PISTONS AND CONNECTING ROD
SERVICE DIAGNOSIS--DIESEL-- ASSEMBLY . . . . . . . . . . . . . . . . . . . . . . . . . . . 35
MECHANICAL . . . . . . . . . . . . . . . . . . . . . . . . . 2 ROCKER ARMS AND PUSH RODS . . . . . . . . . 24
SERVICE DIAGNOSIS--DIESEL-- TIMING GEAR COVER . . . . . . . . . . . . . . . . . . . 29
PERFORMANCE . . . . . . . . . . . . . . . . . . . . . . . 2 TIMING GEAR COVER OIL SEAL . . . . . . . . . . . 29
TAPPET NOISE . . . . . . . . . . . . . . . . . . . . . . . . . . 2 VALVE SPRINGS . . . . . . . . . . . . . . . . . . . . . . . . 24
SERVICE PROCEDURES VIBRATION DAMPER . . . . . . . . . . . . . . . . . . . . 29
VALVE SERVICE . . . . . . . . . . . . . . . . . . . . . . . . 12 DISASSEMBLY AND ASSEMBLY
REMOVAL AND INSTALLATION HYDRAULIC TAPPETS . . . . . . . . . . . . . . . . . . . 42
2.5L DIESEL ENGINE . . . . . . . . . . . . . . . . . . . . 18 CLEANING AND INSPECTION
CAMSHAFT . . . . . . . . . . . . . . . . . . . . . . . . . . . . 30 CYLINDER HEAD . . . . . . . . . . . . . . . . . . . . . . . 42
CAMSHAFT BEARINGS . . . . . . . . . . . . . . . . . . . 32 CYLINDER WALL LINER ASSEMBLY . . . . . . . . 44
CRANKSHAFT MAIN BEARINGS . . . . . . . . . . . . 39 OIL PUMP . . . . . . . . . . . . . . . . . . . . . . . . . . . . . 45
CYLINDER HEAD COVER . . . . . . . . . . . . . . . . . 22 PISTONS AND CONNECTING ROD
CYLINDER WALL LINER ASSEMBLY . . . . . . . . 37 ASSEMBLY . . . . . . . . . . . . . . . . . . . . . . . . . . . 43
ENGINE CYLINDER HEAD . . . . . . . . . . . . . . . . 25 ROCKER ARMS AND PUSH RODS . . . . . . . . . 43
ENGINE MOUNTS -- LHD DIESEL . . . . . . . . . 13 SPECIFICATIONS
ENGINE MOUNTS -- RHD DIESEL . . . . . . . . . 16 ENGINE SPECIFICATIONS . . . . . . . . . . . . . . . . . 46
HYDRAULIC TAPPETS . . . . . . . . . . . . . . . . . . . 23 TORQUE SPECIFICATIONS . . . . . . . . . . . . . . . . 48
INTERNAL VACUUM PUMP . . . . . . . . . . . . . . . 33 SPECIAL TOOLS
OIL FILTER ADAPTER . . . . . . . . . . . . . . . . . . . . 34 SPECIAL TOOLS . . . . . . . . . . . . . . . . . . . . . . . . 49
GENERAL INFORMATION
ENGINE IDENTIFICATION
The engine model code and serial number are
stamped on the left side of the engine block, just
below the oil dipstick tube (Fig. 1).
Fig. 1 Engine Code Location
9-2 ENGINE XJ
GENERAL INFORMATION (Continued)
ate the same tappet action. Check the lubrication
system from the intake strainer to the pump cover,
including the relief valve retainer cap. When tappet
noise is due to aeration, it may be intermittent or
constant, and usually more than 1 tappet will be
noisy. When oil level and leaks have been corrected,
operate the engine at fast idle. Run engine for a suf-
ficient time to allow all of the air inside the tappets
to be bled out.
DIAGNOSIS AND TESTING
SERVICE DIAGNOSIS--DIESEL--
PERFORMANCE
SERVICE DIAGNOSIS--DIESEL--MECHANICAL
TAPPET NOISE
(1) To determine source of tappet noise, operate
engine at idle with cylinder head covers removed.
(2) Feel each valve spring or rocker arm to detect
noisy tappet. The noisy tappet will cause the affected
spring and/or rocker arm to vibrate or feel rough in
operation.
NOTE: Worn valve guides or cocked springs are
sometimes mistaken for noisy tappets. If such is
Engine Description
the case, noise may be dampened by applying side
HYDRAULIC TAPPETS thrust on the valve spring. If noise is not apprecia-
Before disassembling any part of the engine to cor- bly reduced, it can be assumed the noise is in the
rect tappet noise, check the oil pressure. If vehicle tappet. Inspect the rocker arm push rod sockets
has no oil pressure gauge, install a reliable gauge at and push rod ends for wear.
the pressure sending unit. The pressure should be
between 4 bars (50 psi) at 3000 RPM. (3) Valve tappet noise ranges from light noise to a
Check the oil level after the engine reaches normal heavy click. A light noise is usually caused by exces-
operating temperature. Allow 5 minutes to stabilize sive leak down around the unit plunger or by the
oil level, check dipstick. The oil level in the pan plunger partially sticking in the tappet body cylinder.
should never be above the FULL mark or below the The tappet should be replaced. A heavy click is
ADD OIL mark on dipstick. Either of these 2 condi- caused by a tappet check valve not seating or by for-
tions could be responsible for noisy tappets: eign particles becoming wedged between the plunger
OIL LEVEL HIGH and the tappet body. This will cause the plunger to
If oil level is above the FULL mark, it is possible stick in the down position. This heavy click will be
for the connecting rods to dip into the oil. With the accompanied by excessive clearance between the
engine running, this condition could create foam in valve stem and rocker arm as valve closes. In either
the oil pan. Foam in oil pan would be fed to the case, tappet assembly should be removed for inspec-
hydraulic tappets by the oil pump causing them to tion and cleaning.
lose length and allow valves to seat noisily. The valve train generates a noise very much like a
OIL LEVEL LOW light tappet noise during normal operation. Care
Low oil level may allow oil pump to take in air. must be taken to ensure that tappets are making the
When air is fed to the tappets, they lose length which noise. In general, if more than one tappet seems to
allows valves to seat noisily. Any leaks on intake side be noisy, its probably not the tappets.
of oil pump through which air can be drawn will cre-
XJ ENGINE 9-3
DIAGNOSIS AND TESTING (Continued)
9-4 ENGINE XJ
DIAGNOSIS AND TESTING (Continued)
XJ ENGINE 9-5
DIAGNOSIS AND TESTING (Continued)
9-6 ENGINE XJ
DIAGNOSIS AND TESTING (Continued)
XJ ENGINE 9-7
DIAGNOSIS AND TESTING (Continued)
9-8 ENGINE XJ
DIAGNOSIS AND TESTING (Continued)
XJ ENGINE 9-9
DIAGNOSIS AND TESTING (Continued)
9 - 10 ENGINE XJ
DIAGNOSIS AND TESTING (Continued)
XJ ENGINE 9 - 11
DIAGNOSIS AND TESTING (Continued)
9 - 12 ENGINE XJ
SERVICE PROCEDURES
VALVE SERVICE
This procedure is done with the engine cylinder
head removed from the block.
DISASSEMBLY
(1) Remove the engine cylinder head from the cyl-
inder block. Refer to cylinder head removal and
installation in this section.
(2) Use Valve Spring Compressor Tool and com-
press each valve spring.
(3) Remove the valve locks, retainers, and springs.
(4) Use an Arkansas smooth stone or a jewelers
file to remove any burrs on the top of the valve stem,
especially around the groove for the locks.
(5) Remove the valves, and place them in a rack in
the same order as removed.
VALVE CLEANING
(1) Clean all carbon deposits from the combustion
chambers, valve ports, valve stems, valve stem
Fig. 2 Valve Spring Chart
guides and head.
(2) Clean all grime and gasket material from the VALVE STAND DOWN
engine cylinder head machined gasket surface. Valve stand down is to maintain the adequate com-
pression ratio.
INSPECTION (1) Invert cylinder head.
(1) Inspect for cracks in the combustion chambers (2) Fit each valve to its respective valve guide.
and valve ports. (3) Using a straight edge and feeler gauge (Fig. 4),
(2) Inspect for cracks on the exhaust seat. check valve head stand down: Inlet valve head stand
(3) Inspect for cracks in the gasket surface at each down .80 to 1.2 mm (.031 to .047 in.) and exhaust
coolant passage. valve stand down .79 to 1.19 mm (.031 to .047 in).
(4) Inspect valves for burned, cracked or warped (4) If valve head stand down is not in accordance
heads. with above, discard original valves, check stand down
(5) Inspect for scuffed or bent valve stems. with new valves and recut valve seat inserts to
(6) Replace valves displaying any damage. obtain correct stand down.
(7) Check valve spring height (Fig. 2).
VALVE GUIDES
VALVE REFACING (1) Valve Guides height requirement.
(1) Use a valve refacing machine to reface the (2) Measurement A (Fig. 5): 13.50 - 14.00 mm.
intake and exhaust valves to the specified angle.
(2) After refacing, a margin of at least 4.52-4.49 VALVE STEM-TO-GUIDE CLEARANCE
mm (.178-.177 inch) must remain (Fig. 3). If the mar- MEASUREMENT
gin is less than 4.49 mm (.177 inch), the valve must (1) Measure and record internal diameter of valve
be replaced. guides. Valve guide internal diameter is 8.0 to 8.015
mm (.3149 to .3155 ins.).
VALVE SEAT REFACING (2) Measure valve stems and record diameters.
(1) Install a pilot of the correct size in the valve Intake valve stem diameter 7.94 to 7.96 mm (.3125 to
guide bore. Reface the valve seat to the specified .3133 in). Exhaust valve stem diameter 7.92 to 7.94
angle with a good dressing stone. Remove only mm (.3118 to .31215 in).
enough metal to provide a smooth finish. (3) Subtract diameter of valve stem from internal
(2) Use tapered stones to obtain the specified seat diameter of its respective valve guide to obtain valve
width when required. stem clearance in valve guide. Clearance of inlet
valve stem in valve guide is .040 to .075 mm (.0015
to .0029 in). Clearance of exhaust valve stem in valve
guide is .060 to .095 mm (.0023 to .0037 in).
XJ ENGINE 9 - 13
SERVICE PROCEDURES (Continued)
Fig. 4 Checking Valve Stand Down
Fig. 5 Valve Guide Height
(4) If valve stem clearance in valve guide exceeds
tolerances, new valve guides must be installed.
REMOVAL AND INSTALLATION
ENGINE MOUNTS -- LHD DIESEL
The engine mounts support the engine at each
side. These supports are made of resilient rubber.
REMOVAL--RIGHT SIDE
(1) Disconnect the negative battery cable.
(2) Remove the innercooler inlet hose from the tur-
bocharger and position it out of the way (Fig. 6).
(3) Remove the right engine mount upper sill plate
nuts.
(4) Raise the vehicle on a hoist.
(5) Remove the oil filter and adaptor from the
engine.
(6) Remove the engine mount throughbolt nut only.
Do not remove the bolt at this time.
(7) Position a jack stand and raise the weight off
the right engine mount.
(8) Remove the (2) engine mount lower sill plate
bolts.
(9) Remove the (4) engine mount bracket bolts
Fig. 3 Valve Specification from the engine block.
9 - 14 ENGINE XJ
REMOVAL AND INSTALLATION (Continued)
Fig. 6 Engine Compartment View -- Diesel Fig. 7 Engine Compartment View -- Diesel
(10) Remove the engine mount throughbolt. (3) Disconnect the A/C compressor electrical con-
(11) Remove the right engine mount from the vehi- nector.
cle. (4) Remove the (2) engine mount upper sill plate
nuts (Fig. 8).
INSTALLATION--RIGHT SIDE
(1) Position the engine mount and bracket and
install the engine mount throughbolt and nut, leav-
ing them loose at this time.
(2) Install, but do not torque the engine mount
lower sill plate bolts.
(3) Install the (4) engine mount bracket to engine
block retaining bolts and torque to 61 N◦ Jabse Service Manual Search 2026 ◦ Jabse Pravopis ◦ onTap.bg ◦ Other service manual resources online : Fixya ◦ eServiceinfo