Service Manuals, User Guides, Schematic Diagrams or docs for : . Car Manuals Nissan 300ZX 1984-1985,1988,1990,1994-1996 Approved 1988 Engine

<< Back | Home

Most service manuals and schematics are PDF files, so You will need Adobre Acrobat Reader to view : Acrobat Download Some of the files are DjVu format. Readers and resources available here : DjVu Resources
For the compressed files, most common are zip and rar. Please, extract files with Your favorite compression software ( WinZip, WinRAR ... ) before viewing. If a document has multiple parts, You should download all, before extracting.
Good luck. Repair on Your own risk. Make sure You know what You are doing.


Image preview - the first page of the document
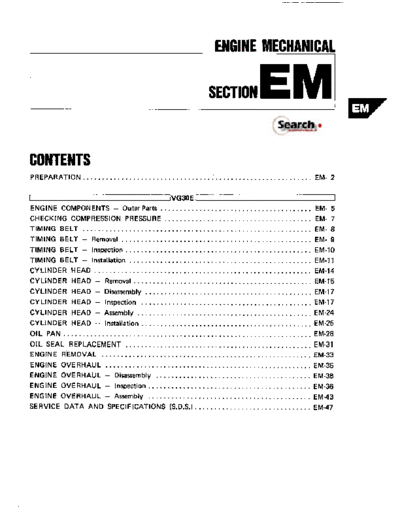
Engine


>> Download Engine documenatation <<

Text preview - extract from the document
I
                                                    ENGINE MECHANICAL

                                                  SECTION        EM V
CONTENTS
PREPARATION ............................................................        EM- 2


r                                      IVG30E 1                                        I
ENGINE COMPONENTS .Outer Parts       .......................................    EM- 5
CHECKING COMPRESSION PRESSURE          ......................................   EM- 7
TIMING BELT    ...........................................................      EM- 8
TIMING BELT    . Removal .................................................      EM- 9
TIMING BELT    . Inspection ................................................    EM-10
TIMING BELT .Installation   ...............................................     EM-11
CYLINDER HEAD     ........................................................      EM-14
CYLINDER HEAD .Removal ..............................................           EM-15
CYLINDER HEAD .Disassembly       ...........................................    EM-17
CYLINDER HEAD .    Inspection ............................................      EM-17
CYLINDER HEAD .    Assembly .............................................       EM-24
CYLINDER HEAD .    Installation ............................................    EM-25
OIL PAN ................................................................        EM-28
OIL SEAL REPLACEMENT       ................................................     EM-31
ENGINE REMOVAL ......................................................           EM-33
ENGINE OVERHAUL      .....................................................      EM-35
ENGINE OVERHAUL      . Disassembly ........................................     EM-36
ENGINE OVERHAUL .Inspection ..........................................          EM-%
    ENGINE OVERHAUL .Assembly   ..........................................      EM43
SERVICE DATA AND      SPECIFICATIONS (S.D.S.) ..............................    EM47
                                                  PREPARATION

                                                  SPECIAL SERVICE TOOLS

    Tool number
    (Kent-Moore No.)                Description
    Tool name
    ST0501SOOO                                                            Disassembling and assembling
    (           -           1
    Engine stand
    assembly
@ ST05011000
        (           -           )
  Engine stand
@ST05012000
        (           -           1
        Base
KV10106500
(           -           1
Engine stand shaft


KV10110001
(           -           1
Engine sub-
attachment

ST 10120000                                                               Loosening and tightening
(52423901)                                                                cylinder head bolt
Cylinder head bolt
wrench

KVlO110600                                                                Disassembling and assembling
(J339861                                                                  valve components
Valve spring
compressor


KV10107501
(           -           1
Valve oil seal drift


                                                      EM-2
                                                 PREPARATION


Tool number
(Kent-Moore No.)                Description
Tool name

KVlOllO300                                                     Disassembling and assembling
(       -           1                                          piston with connecting rod
Piston pin press stand
assembly
@KV10110310
    (           -       )
    QP
@ KV10110330
    I           -           )
    Spacer
@ ST1 3030020
    (           -       )
    Press stand
@ ST13030030
    (           -       )
    Spring
@ KVlOllO340
    (           -       )
    Drift
@ KV10110320
    (           -       )
    Center shaft

EM03470000                                                     Installing piston assembly into
(580371                                                        cylinder bore
Piston ring compressor


ST 16610001                                                    Removing crankshaft
(523907)                                                       pilot bushing
Pilot bushing puller


KV 101 1 1 100                                                 Removing oil pan
(       -           1
Seal cutter


WS39930000                                                     Pressing the tube of liquid
(           -       )                                          gasket
Tube presrer


Spark plug wrench                                              Removing and
                                                               installing spark plug

                                               l6mm
                                              (063 ml


                                                        EM-3
                                                    PREPARATION


Tool name                Description


Pulley holder                                                            Holding camshaft

                                                     .      -.     brJ   pulley while tightening
                                                                         or loosening camshaft
                                                                         bolt


Valve seat cutter set                                                    Finishing valve seat
                                                                         dimensions


Piston ring expander                                                     Removing and
                                                                         installing piston ring


Valve guide drift       Intake & Exhaust:                                Removing and
                          A = 10.5 m m                                   installing valve guide
                              (0.413 id din.
                          B = 6.6 m m
                              10.260 in1 dia.


Valve guide reamer      Intake:                                          Reaming valve guide
                            D, = 7.0 mm 10.276 in1 dia.
                            D. = 11.2 mrn (0.441 in1 dis.
                                                                         (0) for
                                                                          or hole

                              -
                        Exhain:
                          D, 8.0 m m 10.315 in1 dia.
                          D, = 12.2 m m 10.480 in1 dia.
                                                                         oversize valve guide
                                                                         (0)


                                                            0%


                                                            EM-4
ENGINE COMPONENTS   - Outer   Parts


                                           ..
                                           c


                                      SEM8050


           EM-5
ENGINE COMPONENTS - Outer Parts


                                  SEMESOB


            EM-6
                        CHECKING COMPRESSION PRESSURE


                Wrench with a rnagnst
                                            Measurement of Compression Pressure
                to hold spark plug          1.   Warm up engine.
                                            2.   Turn ignition switch off.
                                            3.   Removal all spark plugs.
                                            4.   Disconnect distributor center cable.
    10.63 in1                               5.   Release fuel pressure.
                                                 Refer to "Release Fuel Pressure" in section EF & EC


                            SEM294d

                                            6. Attach a compression tester to No. 1 cylinder.
I                                       I   7. Depress accelerator pedal fully to keep throttle valve wide
                                                open.
                                            8. Crank the engine and read the highest gauge indication.
                                            a Always use a fully-charged battery to obtain specified
                                                engine revolution.
                                                     Compression pressure:
                                                         kPa (kglcm', psi)/rpm
                                                             Standard
                                                                 Non-turbo
                                                                    1,196 (12.2, 173)/300
                                                                 Turbo
                                                                    1,167 (11.9, 169)/300
                                                             Minimum
                                                                 Non-turbo
                                                                    883 (9.0, 128)/300
                                                                 Turbo
                                                                    863 (8.8, 125)/300
                                                     Difference limit between cylinders:
                                                         98 (1.0. 14)/300
                                            9. Repeat the measurement on each cylinder as shown above.
                                             10. If cylinder compression in one or more cylinders is low, pour
                                                 a small amount of engine oil into cylinders through the spark
                                                 plug holes and retest compression.
                                             a If adding oil helps the compression, piston rings may be
                                                 worn or damaged. If so, replace the piston rings after
                                                 checking piston.
                                             a If pressure stays low, a valve may be sticking or seating
                                                 improperly. Inspect and repair valve and valve seat. (Refer
                                                 to S.D.S.). If the valve or valve seat is damaged exces-
                                                 sively, replace them.
                                             a If compression in any two adjacent cylinders is low and if
                                                 adding oil does not help the compression, there i s leak-
                                                 age past the gasket surface. If so, replace cylinder head
                                                 gasket.


                                                    EM-7
TIMING BELT


              E
              t
              E


                  E
                  i


                      SEM238A


   EM-8
                                                  TIMING BELT

                                                 Removal
                                                 1. Remove engine under cover.
                                                 2. Drain engine coolant from radiator.
                                                 Be careful not to spill coolant on drive belts.
                                                 3. Remove radiator shroud and fan.
                                                 4. Remove the following belts.
                                                 0 Power steering drive belt
                                                 0 Compressor drive belt
                                                    Alternator drive belt
                                                 5. Remove suction pipe bracket of coolant and lower hose
                                                    from suction pipe.
                                                 6. Remove all spark plugs.
                     Timina indicator        I   7. Set No. 1 cylinder at T.D.C. on its compression stroke.
                                                 8. Remove idler bracket of the compressor drive belt and
                                                    crankshaft pulley.
                                                 9. Remove front upper and lower belt covers.


               Crankshaft pulley

           I   timing mark                   I
No. 1 cylinder a t T.O.C.                    I


    Distributor rotor position
                                   SEM530A

                                                 10. Loosen timing belt tensioner nut, turn tensioner, and then
                                                     remove timing belt.


                                   SEMZ40A


                                                       EM-9
                                                  TIMING BELT

                                                Inspection
                                               Visually check the condition of the timing belt.
                                               Replace if any abnormality is found.


     Item to check                          Problem                                                Cause

Tooth is broken/                                                                     Camshaft iamming
tooth root is                                                                        Distributor jamming
cracked.
                                                                                 a Damaged camshaftlcrankshaft oil seal


                                                                 SEM3941

Back surface is                                                                  a Tensioner jamming
crackedhorn.                                                                     a Overheated engine
                                                                                 a Interference with belt cover


                                                                 SEM395

Side surface i s worn.                                                           a Improper installation of belt
                                                                                 a Malfunctioning crankshaft pulley p l a t e l
                                                                                   timing belt plate


                          a Belt corners are worn and round.
                          a Wicks are frayed and coming out.     ~   ~   ~   3   9   6

Teeth are worn.                                                                  a Poor belt cover sealing
                                                                                 a Coolant leakage at water pump
                                                                                 a Camshaft not functioning properly
                                                                                 a Distributor not functioning properly
                                                                                 a Excessive belt tension
                                  c                     c
                                       Rotating direction


                          a Canvas on tooth face is worn down.
                          a Canvas on tooth is fluffy, rubber layer is
                            worn down and faded white, or weft is
                            worn down and invisible.             SEM397

OilICoolant or water is                                                          a Poor oil sealing of each oil seal
stuck to belt.                                                                   a Coolant leakage a t water pump
                                                                                 a Poor belt cover sealing


                                                       EM-1 0
                                                     TIMING BELT
                                                   Inspection (Cont'd)
                                                   BELT TENSIONER AND TENSIONER SPRING
                                                   1. Check belt tensioner for smooth turning.
                                                   2. Check condition of tensioner spring.


                                                   Installation
                                                   1. Confirm that No. 1 cylinder is set at T.D.C. on its compres-
                                                      sion stroke.


 Crankshah timi       Pump     in compre%ioi


                                                   2. Install tensioner and tensioner spring.
                      Hook mntionar rpri           If stud is once removed, apply locking sealant to threads of
                                                   stud before installing.


              L"=+I          Arrow A
                                    SEM243P

                                                   3. Swing tensioner fully clockwise with hexagon wrench, and
                                                       temporarily tighten lock nut.


   Aligning                     Aliening      1


                                                   Number of timing belt teeth                                  133
                                                   Number of         Between L.H. and R.H. camshaft sprockets   40
Crankshah timinp                                   teeth between     Between L.H. camshaft sprocket and
sorocket           No. 1 cylinder at T.D.C.                                                                     43
SEM242A            in compraion Wok0           I   timina marks      crankshaft timing surocket


                                                         EM-I 1
                                                                 TIMING BELT
                                                               Installation (Cont'd)
                                                               5. Loosen tensioner lock nut, keeping tensioner steady with a
                                                                  hexagon wrench.


                                                               6. Turn tensioner 70 to 80 degrees clockwise with hexagon
                                                                  wrench, and temporarily tighten lock nut.
                                                               7. Turn crankshaft clockwise 2 or 3 times, then slowly set No.
                                                                  1 cylinder at T.D.C. on its compression stroke.


                                                               8. Push middle of timing belt between R.H. camshaft sprocket
                                                                  and tensioner pulley with a force of 98 N (10 kg, 22 Ib).
                                                               9. Loosen tensioner lock nut, keeping tensioner steady with a
                                                                  hexagon wrench.


       Cranbhaftl
       sprocket                               s ~ ~ e e n
                                                               10. Set thickness gauge as shown in the ..jure which is 0.35
                                                                   mm (0.0138 in) thick and 12.7 mm (0.500 in) wide.


                                             Timing balt
~nrionsr
                                Width: 12.7 mm
                                             ~ o . ~ i n l I
N.G.              N.G.                       OK.               11, Turn crankshaft clockwise, and set thickness gauge as
                                Thickness,                         shown in the figure.
                                                               0 Timing belt will move about 2.5 teeth.
                                                               12. Tighten tensioner lock nut, keeping tensioner steady with a
                                                                   hexagon wrench.

           Tenaionar pulley

                         bslt
                                 Crankshaft
                                 sprocket
                                             /
                                                       I
                                              smeem

                                                                     EM-I2
                            TIMING BELT
                          Installation (Cont'd)
                          13. Turn crankshaft clockwise or counterclockwise, and remove
                              thickness gauge.
                          14. Turn crankshaft clockwise 2 or 3 times, then slowly Set NO.
                              1 cylinder at T.D.C. on its compression stroke.


                          15. Install lower and upper belt covers.

Belt mver front luppsr)


                                                  ,   ,BokA17ps.l


                                E M - I3
                                         CYLINDER HEAD


4
    -                      Exhaust


    R.H. cylinder L.H. cylinder
    head front    head front


                         raw
                                     (ol 1 3 10.1 - 0 3 0.7. 2.21-
                                                     ..


                           Intake


: N m Ikgm,ft-lbl


                                                                     SEMSlZB


                                               EM-I4
                            CYLINDER HEAD

                            CAUTION:
                            0 When installing sliding parts such as rocker arms, cam-
                              shafl and oll seal, be sure to apply new engine oil on their
                              sliding surfaces.
                            0 When tightening cylinder head bolts and rocker shaft bolts,
                              apply new engine oil to the thread portions and seat
                              surfaces of bolts.


I.          O.K.            0 If  a hydraulic valve lifter is kept on Its side, there is a risk
                              of air entering It. After removal, always set hydraulic valve
                              lifter straight up, or when laying It on its side, have it soak
                              in new engine oil.
                            0 Do not disassemble hydraulic valve lifter.
                            0 Attach tags to valve lifters so as not to mix them up.
     N.G.


                   EM8701

                            Removal
                            1. Remove timing belt.
                            Refer to "Removal" of TIMING BELT.
                            2. Drain coolant by removing drain plug on left side of cylinder
                               block.


                            3. Remove collector cover and collector.
                            Before removing collector, be sure to drain coolant removing
                            drain plug in cylinder block.


                            4. Remove intake manifold with fuel tube assembly.
                            0 Loosen intake manifold bolts in numerical order.


                                   EM-I5
                                                  CYLINDER HEAD
                                                  Removal (Cont'd)
                                                  5. Remove power steering pump bracket.


                                                  6. Remove exhaust collector bracket


                                     SEM297A

                                                  7. Disconnect exhaust manifold balance tube.
                                                  8. Disconnect exhaust tube from exhaust manifold.
                                                  9. Remove camshaft sprockets and rear timing belt cover.


                                     SEM298A

                                                  1   Remove compressor and its bracket.


                                     SEM435B

rFar L.H. cylinder head   For R.H. cylindey hem   11. Remove rocker covers.
                                                  12. Remove cylinder head with exhaust manifold.
                                                  0 Head warpage or cracking could result from removing In
                                                      incorrect order.
                                                  0 Cylinder head bolts should be loosened in two or three
                                                      steps.


                     ~ o o r s n numerical orde
                               in
                                     SEM926I


                                                        EM-1 6
                                  CYLINDER HEAD

R.H. exhaust manifold             Disassembly
          No.5     No.3   No. 1
                                  1. Remove exhaust manifolds from cylinder head


                                  2. Remove rocker shafts with rocker arms.
                                  Bolts should be loosened in two or three steps.
                                  3. Remove hydraulic valve lifters and lifter guide.
                                  0 Hold hydraulic valve lifters with wire so that they will not
                                     drop from lifter guide.


                                  4. Remove oil seal and camshaft.
                                  5. Remove valve components with Tool.
                                     Tool: KV10110600 (J33986)
                                  6. Remove valve oil seals.


iEM259A

                                  Inspection
                                  CYLINDER HEAD DISTORTION
                                         Head surface flatness:
                                             Less than 0.1 mm (0.004 in)
                                  If beyond the specified limit, replace it o resurface it.
                                                                             r
                                  Resurfacing limit:
                                  The resurfacing limit of cylinder head is determlned by the
                                  cylinder block resurfacing in an engine.
                                  Amount of cylinder head resurfacing is " A '
                                  Amount of cylinder block resurfacing is "B"
                                         The maximum limlt is as follows:
                                             A +   B = 0.2 mm (0.008 In)
                                  After resurfacing the cylinder head, check that camshaft rotates
                                  freely by hand. If resistance is felt, the cylinder head must be
                                  replaced.
                                          Nominal cylinder head height:
                                                   -                 -
                                             106.8 107.2 mm (4.205 4.220 in)


                                        EM-I 7
                                          CYLINDER HEAD
                                          Inspection (Cont'd)
                                          VALVE GUIDE CLEARANCE
                                          1. Measure valve deflection in a parallel direction with rocker
                                             arm. (Valve and valve guide mostly wear in this direction.)
                                                Valve deflection limit (Dial gauge reading):
                                                    0.20 mm (0.0079 in)


                                          2. If it exceeds the limit, check valve to valve guide clearance.
                                          (1) Measure valve stem diameter "d" and valve guide inner
                                              diameter.
                                          (2) Check that clearance is within the specification.
                                                   Valve to valve guide clearance limit:
                                                      0.10 mm (0.0039 in)
                                          (3) If it exceeds the limit, replace valve or valve guide.


                            SEMBOO


      1
    Valve guide
                  Valve
                            I,.
                          Center


                            SEM751

                                          VALVE GUIDE REPLACEMENT
                                          1. To remove valve guide, heat cylinder head to 150 to 16OOC
                                             (302 to 32OOF).


L                           SEM008A

r                                     I   2. Drive out valve guide with a press [under a 20 kN (2 1 2.2
                                                                                                   ,
                                             US ton, 2.0 Imp ton) pressure] or hammer and suitable tool.


                            SEM264A


                                               EM-I8
                      CYLINDER HEAD
                      Inspection (Cont`d)
                      3. Ream cylinder head valve guide hole.
                            Valve guide hole diameter
                            (for service parts):
                                Intake:
                                              -
                                    11.175 11.196 mm (0.4400     - 0.4408 in)
                                Exhaust:
                                              -
                                    12.175 12.196 mm (0.4793     - 0.4802 In)

                      4   Heat cylinder head to 150 to 160


◦ Jabse Service Manual Search 2026 ◦ Jabse PravopisonTap.bg ◦ Other service manual resources online : FixyaeServiceinfo