Service Manuals, User Guides, Schematic Diagrams or docs for : . Car Manuals Nissan Micra 2003-2006 Approved sma GW-001
<< Back | HomeMost service manuals and schematics are PDF files, so You will need Adobre Acrobat Reader to view : Acrobat Download Some of the files are DjVu format. Readers and resources available here : DjVu Resources
For the compressed files, most common are zip and rar. Please, extract files with Your favorite compression software ( WinZip, WinRAR ... ) before viewing. If a document has multiple parts, You should download all, before extracting.
Good luck. Repair on Your own risk. Make sure You know what You are doing.
Image preview - the first page of the document
>> Download GW-001 documenatation <<
Text preview - extract from the document
                                         SIDE WINDOW GLASS
SIDE WINDOW GLASS
Removal and Installation                     To ESM


                                                                                                  MIIB0904E

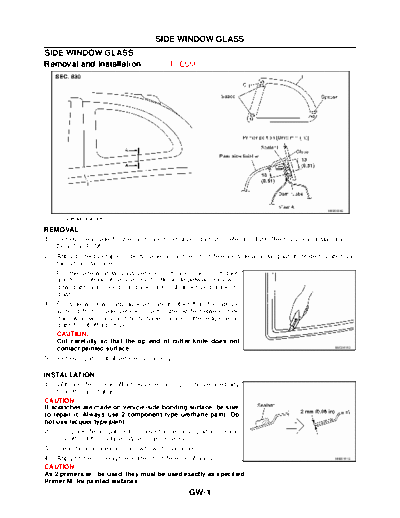
     1.   Side window glass

REMOVAL
1.    Remove rear side finisher and lock pillar upper garnish. Refer to EI-20, "Removal and Installation (3-
      Door)" on ESM.
2.    Apply protective tape on body panel along the circumference side window glass to protect coated sur-
      faces from damage.
3.    For the side window glass vehicle front side, open front door,
      and from outside of vehicle insert cutter knife between side win-
      dow glass and lock pillar panel and cut adhesive parallel to
      glass.
4.    For side window glass adhesion areas other than the above,
      working from inside vehicle, insert cutter knife between side
      door window glass and body panel. Guide cutter edge along
      glass to cut off adhesive.
      CAUTION:
      Cut carefully so that the tip end of cutter knife does not
      contact painted surface.                                                                       BEC2418D


5.    Remove glass out of vehicle, unclipping.

INSTALLATION
1.   With a knife, scrape off adhesive remaining on the vehicle body
     to as thin and flat as 2 mm.
CAUTION:
If scratches are made on vehicle-side bonding surface, be sure
to repair it. Always use 2-component type urethane paint. Do
not use lacquer type paint.
2.    Using a knife or spatula to remove the remaining adhesive and
      smooth out the surface. (When glass is reused)
3.    Clean bonded area on glass with white gasoline.
4. Apply primer G along the entire circumference of glass.                                           MIIB0181E


CAUTION:
As 2 primers will be used, they must be used exactly as specified.
Primer M: for painted surfaces
                                                     GW-1
                                           SIDE WINDOW GLASS
Primer G: for glass
NOTE:
The essential function of primers is to strengthen adhesion between the glass and painted surface primer.
5. Apply primer M on areas where adhesive contacts on the side of vehicle body.
CAUTION:
If primer M adheres to a painted surface other than bonding area, or if it overflows, quickly remove it
with white gasoline.
6.   After applying primers, apply the adhesive along the entire cir-
     cumference of the glass as shown in the figure, and within the
     time specified in the instructions for the adhesive.
q    Open adhesive by cutting off the nozzle tip and set it in a sealant
     gun.


                                                                                                         MIIB0185E


7.   After setting rubber suction cups (SST) to glass, align mating
     marks on body and glass. Install glass to the body.
8.   Press entire surface of glass lightly to fit it completely.
9.   Remove protective tape.
10. Using a spatula, go over areas with excessive or insufficient
    adhesive and neatly smooth the surface.
    CAUTION:
    After installing glass, keep door windows open and avoid
    driving vehicle until adhesive has completely cured.
                                                                                                         BEC2420D
11. Check for water leaks.
12. Install rear side finisher and lock pillar upper garnish. Refer to EI-20, "Removal and Installation (3 Door)"
    on ESM.


                                                        GW-2
◦ Jabse Service Manual Search 2026 ◦ Jabse Pravopis ◦ onTap.bg ◦ Other service manual resources online : Fixya ◦ eServiceinfo