Service Manuals, User Guides, Schematic Diagrams or docs for : . Car Manuals Nissan Frontier 1998-2002 Approved Nissan Frontier 2000 KA24DE RA
<< Back | HomeMost service manuals and schematics are PDF files, so You will need Adobre Acrobat Reader to view : Acrobat Download Some of the files are DjVu format. Readers and resources available here : DjVu Resources
For the compressed files, most common are zip and rar. Please, extract files with Your favorite compression software ( WinZip, WinRAR ... ) before viewing. If a document has multiple parts, You should download all, before extracting.
Good luck. Repair on Your own risk. Make sure You know what You are doing.
Image preview - the first page of the document
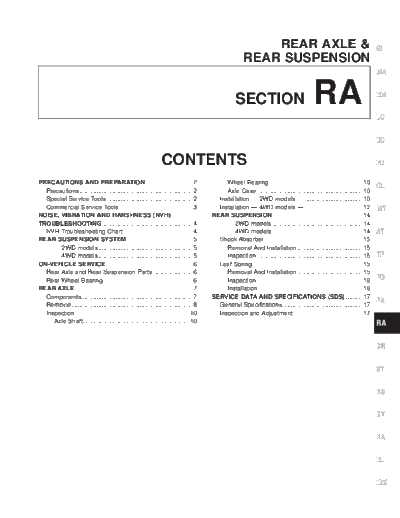
>> Download RA documenatation <<
Text preview - extract from the document
REAR AXLE & GI
REAR SUSPENSION
MA
SECTION RA EM
LC
EC
CONTENTS FE
PRECAUTIONS AND PREPARATION............................2 Wheel Bearing.......................................................10
CL
Precautions ..................................................................2 Axle Case..............................................................10
Special Service Tools ..................................................2 Installation -- 2WD models -- ..................................10
Commercial Service Tools ...........................................3 Installation -- 4WD models -- ..................................12 MT
NOISE, VIBRATION AND HARSHNESS (NVH) REAR SUSPENSION.....................................................14
TROUBLESHOOTING .....................................................4 2WD models .....................................................14
NVH Troubleshooting Chart.........................................4 4WD models .....................................................14 AT
REAR SUSPENSION SYSTEM.......................................5 Shock Absorber .........................................................15
2WD models .......................................................5 Removal And Installation ......................................15
4WD models .......................................................5 Inspection ..............................................................15 TF
ON-VEHICLE SERVICE ..................................................6 Leaf Spring ................................................................15
Rear Axle and Rear Suspension Parts .......................6 Removal And Installation ......................................15
Rear Wheel Bearing ....................................................6 Inspection ..............................................................16 PD
REAR AXLE.....................................................................7 Installation .............................................................16
Components.................................................................7 SERVICE DATA AND SPECIFICATIONS (SDS) ..........17
FA
Removal.......................................................................8 General Specifications...............................................17
Inspection...................................................................10 Inspection and Adjustment ........................................17
Axle Shaft..............................................................10 RA
BR
ST
RS
BT
HA
EL
IDX
PRECAUTIONS AND PREPARATION
Precautions
q When installing rubber parts, final tightening must be car-
ried out under unladen condition* with tires on ground.
*: Fuel, radiator coolant and engine oil full. Spare tire,
jack, hand tools and mats in designated positions.
q Use flare nut wrench when removing and installing brake
tubes.
q After installing removed suspension parts, check wheel
alignment and adjust if necessary.
q Always torque brake lines when installing.
SBR686C
Special Service Tools
The actual shapes of Kent-Moore tools may differ from those of special service tools illustrated here.
Tool number
Kent-Moore No. Description
Tool name
KV40101000 Removing rear axle shaft
(J25604-01)
Axle stand
NT159
ST36230000 Removing rear axle shaft
(J25840-A)
Sliding hammer
NT126
ST38020000 Removing wheel bearing lock nut
( -- )
Bearing lock nut wrench
NT160
KV40106500 Removing wheel bearing and ABS sensor rotor
(J25852-B)
Rear axle shaft bearing
puller
NT683
ST37840000 Installing rear axle shaft
( -- )
Rear axle shaft guide
NT162
RA-2
PRECAUTIONS AND PREPARATION
Commercial Service Tools GI
Tool name Description
1 Flare nut crowfoot Removing and installing each brake piping MA
2 Torque wrench
EM
NT360 a: 10 mm (0.39 in)
Bearing cage oil seal drift Installing oil seal LC
a: 74 mm (2.91 in) dia.
EC
NT115 b: 68 mm (2.68 in) dia.
Rear axle oil seal drift Installing oil seal
FE
CL
a: 54.5 mm (2.15 in.)
NT115 b: 34.5 mm (1.36 in.)
MT
AT
TF
PD
FA
RA
BR
ST
RS
BT
HA
EL
IDX
RA-3
Symptom
X : Applicable
Reference page
SION
Possible cause and
SUSPEN-
SUSPECTED PARTS
AND REAR
Noise
Shake
Judder
Shimmy
REAR AXLE Vibration
or handling
Poor quality ride
X
X
X
X
X
X
Improper installation, Looseness RA-5
X
X
X
X
X
X
Shock absorber deformation, damage or deflection RA-15
X
X
X
X
X
X
Bushing or mounting deterioration --
X
X
X
X
X
Parts interference --
RA-4
X
X
X
Spring fatigue --
X
X
Suspension looseness RA-14
X
Wheel bearing damage RA-6
X
X
X
PROPELLER SHAFT NVH in PD section
X
DIFFERENTIAL NVH in PD section
NVH Troubleshooting Chart
X
X
X
DRIVE SHAFT NVH in FA section
X
X
X
X
X
X
X FRONT AXLE AND FRONT SUSPENSION NVH in FA section
X
X
X
X
X
TIRES NVH in FA section
X
X
X
X
X
ROAD WHEEL NVH in FA section
NOISE, VIBRATION AND HARSHNESS (NVH) TROUBLESHOOTING
X
X
X
X
BRAKES NVH in BR section
X
X
X
X
X
STEERING NVH in ST section
Use the chart below to help you find the cause of the symptom. If necessary, repair or replace these parts.
REAR SUSPENSION SYSTEM
2WD models GI
MA
EM
LC
EC
FE
CL
MT
AT
TF
ARA108
4WD models PD
FA
RA
BR
ST
RS
BT
HA
EL
IDX
ARA109
RA-5
ON-VEHICLE SERVICE
Rear Axle and Rear Suspension Parts
Check rear axle and rear suspension parts for excessive play, wear
and damage.
q Shake each rear wheel to check for excessive play.
SMA525A
q Retighten all nuts and bolts to the specified torque.
: Refer to REAR SUSPENSION, RA-14.
SRA839
q Check shock absorber for oil leakage and other damage.
q Check shock absorber bushing for excessive wear and other
damage.
SRA734
Rear Wheel Bearing
q Check that wheel bearings operate smoothly.
q Check axial end play.
Axial end play:
Refer to SDS, RA-17.
SRA006-A
RA-6
REAR AXLE
Components GI
MA
EM
LC
EC
FE
CL
MT
AT
TF
PD
FA
ARA091
RA
BR
ST
RS
BT
HA
EL
ARA112
IDX
RA-7
REAR AXLE
Removal
q Before removing the rear axle, disconnect the ABS wheel
sensor from the assembly. Then move it away from the
axle. Failure to do so may result in damage to the sensor
wires and the sensor becoming inoperative.
q Wheel bearing does not require maintenance. -- 4WD
models --
q If growling noise is emitted from wheel bearing during
operation, replace wheel bearing assembly.
q If the wheel bearing assembly is removed, it must be replaced.
The old assembly must not be re-used.
1. Disconnect parking brake cable and brake tube.
2. Remove nuts securing wheel bearing cage with baffle plate.
SRA002
3. Draw out axle shaft with Tool.
When drawing out axle shaft, be careful not to damage oil seal.
4. Remove case shim and case seal.
-- 2WD --
5. Remove O-ring. -- 4WD models --
6. Remove oil seal.
Do not reuse oil seal once it is removed.
Always install new one.
ARA096
7. Remove ABS sensor rotor. -- 4WD models --
ARA097
8. Unbend lock washer with a screwdriver.
SRA104
RA-8
REAR AXLE
Removal (Cont'd)
9. Remove bearing lock nut with Tool. GI
MA
EM
LC
ARA095
10. Remove wheel bearing together with bearing cage and baffle EC
plate from axle shaft.
FE
CL
MT
ARA098
11. Remove grease seal in bearing cage with suitable bar. AT
12. Remove wheel bearing outer race with a brass drift.
-- 2WD models --
TF
PD
FA
SRA595C
13. Remove wheel bearing assembly. -- 4WD models -- RA
BR
ST
RS
ARA094
BT
HA
EL
IDX
RA-9
REAR AXLE
Inspection
AXLE SHAFT
q Check axle shaft for straightness, cracks, damage, wear and
distortion. Replace if necessary.
WHEEL BEARING
q Make sure wheel bearing rolls freely and is free from noise,
cracks, pitting and wear.
AXLE CASE
q Check axle case for yield, deformation and cracks. Replace if
necessary.
Installation -- 2WD models --
1. Install wheel bearing outer race with a brass drift.
2. Install a new grease seal in bearing cage.
After installing new grease seal, coat sealing lip with multi-
purpose grease.
SRA010
3. Install bearing spacer with chamfer side facing axle shaft
flange.
SRA510
4. Install wheel bearing inner race with a brass drift.
5. Coat each bearing cone with multi-purpose grease.
Specified amount of grease:
8 - 12 g (0.28 - 0.42 oz)
SRA011
RA-10
REAR AXLE
Installation -- 2WD models -- (Cont'd)
6. Install plain washer and a new wheel bearing lock washer. GI
7. Tighten wheel bearing lock nut.
Fit wheel bearing lock washer lip in wheel bearing lock nut
groove correctly by tightening lock nut. Be sure to bend it up. MA
EM
LC
SRA730
8. Install a new oil seal with suitable tool. EC
After installing new oil seal, coat sealing lip with multi-pur-
pose grease.
FE
CL
MT
SRA731
9. Apply recess of axle case end with multi-purpose grease. AT
10. Apply gear oil to the spline of axle shaft. Coat seal surface of
axle shaft with multi-purpose grease (as shown left).
TF
PD
FA
SRA652A
11. Adjust axial end play. RA
a. Select end shims.
Standard thickness including seal: 1.5 mm (0.059 in)
Axle case end shim: Refer to SDS, RA-17. BR
Do not insert end shims between case seal and bearing cage.
ST
RS
SRA653A
b. Insert axle shaft with Tool as a guide. BT
When inserting axle shaft, be careful not to damage oil seal.
c. Measure end play of axle shaft. HA
Axial end play:
Servicing only one side of axle shaft
0.02 - 0.15 mm (0.0008 - 0.0059 in) EL
Servicing both side axle shafts
On first axle shaft (right or left) adjust axial end
play
IDX
0.30 - 0.90 mm (0.0118 - 0.0354 in)
ARA088
After servicing second axle shaft, total end play
0.02 - 0.15 mm (0.0008 - 0.0059 in)
RA-11
REAR AXLE
Installation -- 2WD models -- (Cont'd)
d. If axial end play is not within the specified limit, reselect axle
case end shims.
While adjusting axial end play, be careful not to damage oil
seal.
SRA006-A
Installation -- 4WD models --
1. Press new wheel bearing until it bottoms end face of bearing
cage.
Maximum load P:
78 kN (8 ton, 8.8 US ton, 7.9 Imp ton)
Always press outer race of wheel bearing during installation.
SRA288A
2. Press new grease seal until it bottoms end face of bearing
cage.
After installing new grease seal, coat sealing lip with multi-
purpose grease.
SRA289A
3. Press axle shaft into inner race of wheel bearing.
Maximum load P:
47.1 kN (4.8 ton, 5.3 US ton, 4.72 Imp ton)
Be careful not to damage or deform grease seal.
SRA761A
4. Install plain washer and a new wheel bearing lock washer.
5. Tighten wheel bearing lock nut to specified torque.
: 147 - 196 N m (15 - 20 kg-m, 108 - 145 ft-lb)
Fit wheel bearing lock washer lip in wheel bearing lock nut
groove correctly by tightening lock nut. Be sure to bend it up.
SRA762A
RA-12
REAR AXLE
Installation -- 4WD models -- (Cont'd)
6. Check wheel bearing preload. GI
a. Turn bearing cage (with respect to axle shaft) two or three
times. It must turn smoothly.
b. Attach spring gauge to bearing cage bolt (as shown at left) and MA
pull it at a speed of 10 rpm to measure preload.
Spring gauge indication:
6.9 - 48.1 N (0.7 - 4.9 kg, 1.5 - 10.8 lb) EM
LC
SRA763A
7. Install new oil seal to rear axle housing using a suitable tool. EC
After installing new oil seal, coat sealing lip with multi-pur-
pose grease.
FE
8. Install new O-ring to rear axle housing.
CL
MT
SRA803A
9. Press ABS sensor rotor onto axle shaft until it contacts wheel AT
bearing lock nut.
TF
PD
FA
SRA802A
10. Position axle shafts in rear axle housing with Tool as a guide. RA
Be careful not to damage oil seal.
BR
ST
RS
ARA088
11. Check axial end play.
BT
a. Check that wheel bearings operate smoothly.
b. Check axial end play.
Axial end play: HA
0 mm (0 in)
EL
IDX
SRA006-A
RA-13
REAR SUSPENSION
2WD models
ARA092
4WD models
ARA111
RA-14
REAR SUSPENSION
Shock Absorber GI
REMOVAL AND INSTALLATION
q Remove shock absorber by disconnecting upper and lower MA
end.
EM
LC
EC
FE
CL
MT
SRA701
INSPECTION AT
q If oil leakage, cracks and deformation occurs, replace shock
absorber assembly. TF
q If rubber bushings are cracked and deformed, replace rubber
bushings.
PD
FA
RA
Leaf Spring
REMOVAL AND INSTALLATION
1. Disconnect shock absorber lower end, and remove U-bolts.
BR
ST
RS
SRA702
2. Disconnect spring shackle.
BT
HA
EL
IDX
SRA704
RA-15
REAR SUSPENSION
Leaf Spring (Cont'd)
3. Disconnect front pin.
SRA705
INSPECTION
q Check leaf spring for cracks. Replace if necessary.
q Check front bracket and pin, shackle, U-bolts and spring pad
for wear, cracks, straightness and damaged threads. Replace
if necessary.
q Check all bushings for deformation and cracks. Replace if nec-
essary.
(4WD models: Rear spring front bushing)
Make sure that front bushing is properly installed.
ARA089
INSTALLATION
1. Apply soapsuds to rubber bushing.
2. Install spring shackle and front pin, and finger tighten the nuts.
3. Install spring pad and nuts under leaf spring or axle case.
4. Tighten U-bolt mounting nuts diagonally.
Tighten U-bolts so that the lengths of all U-bolts under spring
pad are the same.
5. Install shock absorber, and finger tighten the nuts.
SRA727
6. Remove stands and bounce the vehicle to stabilize suspen-
sion. (Unladen)
SRA703
7. Tighten spring shackle nuts, front pin nuts and shock absorber
nuts.
When installing rubber parts, final tightening must be carried
out under unladen condition* with tires on the ground.
* Fuel, radiator coolant and engine oil full. Spare tire, jack,
hand tools and mats in designated positions.
SRA754
RA-16
SERVICE DATA AND SPECIFICATIONS (SDS)
General Specifications GI
Rigid axle with semi-elliptic leaf
Suspension type
spring MA
Shock absorber type Double-acting hydraulic
EM
Inspection and Adjustment
WHEEL BEARING WHEEL BEARING LC
-- 2WD models -- -- 4WD models --
Total end play mm (in) 0.02 - 0.15 (0.0008 - 0.0059) Total end play mm (in) 0 (0)
EC
Thickness Wheel bearing preload at bearing
Part number 6.9 - 48.1 (0.7 - 4.9, 1.5 - 10.8)
mm (in) cage bolt N (kg, lb)
0.05 (0.0020) 43086-P0110 FE
Available rear axle case end 0.07 (0.0028) 43087-P0110
shims 0.10 (0.0039) 43088-P0110
0.15 (0.0059) 43086-B9500
0.20 (0.0079) 43089-P0110 CL
0.50 (0.0197) 43090-P0110
1.00 (0.0394) 43036-01G00
MT
AT
TF
PD
FA
RA
BR
ST
RS
BT
HA
EL
IDX
RA-17
NOTES
RA-18
◦ Jabse Service Manual Search 2026 ◦ Jabse Pravopis ◦ onTap.bg ◦ Other service manual resources online : Fixya ◦ eServiceinfo