Service Manuals, User Guides, Schematic Diagrams or docs for : . Car Manuals Nissan Primera 2000.2005 Approved Nissan Primera 2000 ra
<< Back | HomeMost service manuals and schematics are PDF files, so You will need Adobre Acrobat Reader to view : Acrobat Download Some of the files are DjVu format. Readers and resources available here : DjVu Resources
For the compressed files, most common are zip and rar. Please, extract files with Your favorite compression software ( WinZip, WinRAR ... ) before viewing. If a document has multiple parts, You should download all, before extracting.
Good luck. Repair on Your own risk. Make sure You know what You are doing.
Image preview - the first page of the document
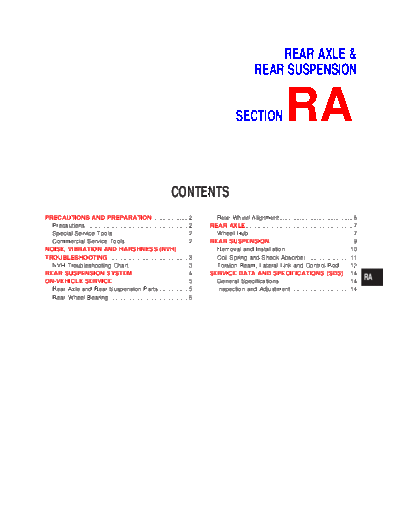
>> Download ra documenatation <<
Text preview - extract from the document
REAR AXLE &
REAR SUSPENSION
SECTION RA
CONTENTS
PRECAUTIONS AND PREPARATION ..................... 2 Rear Wheel Alignment........................................... 6
Precautions ............................................................ 2 REAR AXLE............................................................... 7
Special Service Tools ............................................ 2 Wheel Hub ............................................................. 7
Commercial Service Tools..................................... 2 REAR SUSPENSION................................................. 9
NOISE, VIBRATION AND HARSHNESS (NVH) Removal and Installation ..................................... 10
TROUBLESHOOTING ............................................... 3 Coil Spring and Shock Absorber ......................... 11
NVH Troubleshooting Chart................................... 3 Torsion Beam, Lateral Link and Control Rod...... 12
REAR SUSPENSION SYSTEM................................. 4 SERVICE DATA AND SPECIFICATIONS (SDS) ... 14
ON-VEHICLE SERVICE ............................................ 5 General Specifications ......................................... 14
RA
Rear Axle and Rear Suspension Parts ................. 5 Inspection and Adjustment .................................. 14
Rear Wheel Bearing .............................................. 5
PRECAUTIONS AND PREPARATION
Precautions
q When installing each rubber part, final tightening must
be carried out under unladen condition* with tires on
ground.
*: Fuel, radiator coolant and engine oil full. Spare tire,
jack, hand tools and mats in designated positions.
q Use flare nut wrench when removing or installing brake
GG94310000
tubes.
q After installing removed suspension parts, check wheel
SBR820B
alignment.
q Do not jack up at the trailing arm and lateral link.
q Always torque brake lines when installing.
Special Service Tools
Tool number
Description
Tool name
GG94310000 Removing and installing brake piping
Flare nut torque
wrench
NT406 a: 10 mm (0.39 in)
HT71780000 Removing and installing coil spring
Spring compressor
NT144
KV40106400
Piston rod lock nut a: 5 mm (0.20)
wrench b: 16.2 mm (0.64 in) DIA
c: 52 mm (2.05 in)
d: 14 mm (0.55 in)
e: 25.4 mm (1.00 in) DIA
NT369 f : 55 mm (2.17 in)
ST35652000 Fixing strut assembly
Shock absorber
attachment
NT145
Commercial Service Tools
Tool name Description
Equivalent to Removing and installing brake piping
GG94310000
V Flare nut crows foot
1
V Torque wrench
2
NT360 a: 10 mm (0.39 in)
RA-2
Symptom
X: Applicable
Reference page
Possible cause and
SUSPECTED PARTS
AND REAR
REAR AXLE
SUSPENSION
Noise
Shake
Judder
Shimmy
handling
Vibration
Poor quality ride or
X
X
X
X
X
X
Improper installation, looseness RA-9
X
X
X
X
X
X
Shock absorber deformation, damage or deflection RA-11
X
X
X
X
X
X
Bushing or mounting deterioration RA-11
RA-3
X
X
X
X
X
Parts interference --
X
X
X
Spring fatigue --
X
X
Suspension looseness RA-9
X
X
Incorrect wheel alignment RA-14
X
Wheel bearing damage RA-5
NVH Troubleshooting Chart
X
X
X
DRIVE SHAFT NVH in FA section
X
X
X
X
X
X
FRONT AXLE AND FRONT SUSPENSION NVH in FA section
X
X
X
X
X
X
TIRES NVH in FA section
X
X
X
X
X
ROAD WHEEL NVH in FA section
NOISE, VIBRATION AND HARSHNESS (NVH) TROUBLESHOOTING
X
X
X
X
BRAKES NVH in BR section
X
X
X
X
X
STEERING NVH in ST section
Use the chart below to help you to find the cause of the symptom. If necessary, repair or replace these parts.
REAR SUSPENSION SYSTEM
SEC. 431
When installing each rubber part, final tightening
must be carried out under unladen condition*
with tires on ground.
* Fuel, radiator coolant and engine oil full.
Spare tire, jack, hand tools and mats in
designated positions.
42 - 57
(4.3 - 5.8, 31 - 42)
98 - 118 (10 - 12, 73 - 87) V
1
V
2
V
4
V
5
V
3
Front
98 - 118 (10 - 12, 73 - 87)
: Do not re-use
: N◦ Jabse Service Manual Search 2026 ◦ Jabse Pravopis ◦ onTap.bg ◦ Other service manual resources online : Fixya ◦ eServiceinfo