Service Manuals, User Guides, Schematic Diagrams or docs for : . Car Manuals Nissan Primera 2000.2005 Approved Nissan Primera 2005 fsu
<< Back | HomeMost service manuals and schematics are PDF files, so You will need Adobre Acrobat Reader to view : Acrobat Download Some of the files are DjVu format. Readers and resources available here : DjVu Resources
For the compressed files, most common are zip and rar. Please, extract files with Your favorite compression software ( WinZip, WinRAR ... ) before viewing. If a document has multiple parts, You should download all, before extracting.
Good luck. Repair on Your own risk. Make sure You know what You are doing.
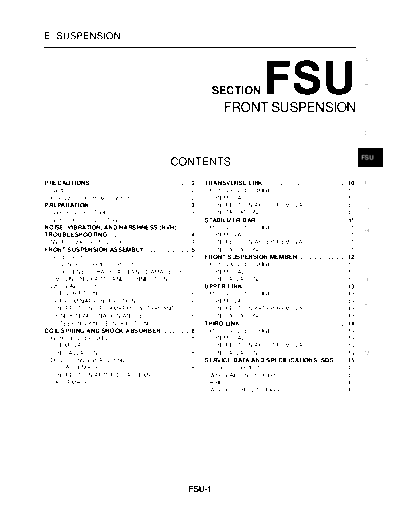
Image preview - the first page of the document

>> Download fsu documenatation <<
Text preview - extract from the document
FRONT SUSPENSION
E SUSPENSION
A
B
SECTION
FRONT SUSPENSION C
D
FSU
CONTENTS
PRECAUTIONS ......................................................... 2 . TRANSVERSE LINK ................................................ 10 . F
Caution .................................................................... 2
. Removal and Installation ....................................... 10 .
Precautions for Brake System ................................. 2 . REMOVAL .......................................................... 10 .
PREPARATION .......................................................... 3. INSPECTION AFTER REMOVAL ...................... 10 . G
Special Service Tools .............................................. 3 . INSTALLATION .................................................. 10 .
Commercial Service Tools ....................................... 3 . STABILIZER BAR .................................................... 11 .
NOISE, VIBRATION, AND HARSHNESS (NVH) Removal and Installation ....................................... 11 .
H
TROUBLESHOOTING ............................................... 4 . REMOVAL .......................................................... 11 .
NVH Troubleshooting Chart .................................... 4 . INSPECTION AFTER REMOVAL ...................... 11 .
FRONT SUSPENSION ASSEMBLY .......................... 5 . INSTALLATION .................................................. 11 .
Components ............................................................ 5
. FRONT SUSPENSION MEMBER ............................ 12 . I
On-Vehicle Inspection and Service ......................... 6 . Removal and Installation ....................................... 12 .
LOOSENESS, BACKLASH AND DAMAGE OF REMOVAL .......................................................... 12 .
MOUNTING PARTS AND CONNECTIONS ......... 6 . INSTALLATION .................................................. 12 . J
Wheel Alignment ..................................................... 6. UPPER LINK ............................................................ 13
.
DESCRIPTION ..................................................... 6 . Removal and Installation ....................................... 13 .
PRELIMINARY INSPECTION .............................. 6 . REMOVAL .......................................................... 13 .
K
INSPECTION OF CAMBER, CASTER, AND INSPECTION AFTER REMOVAL ...................... 13 .
KINGPIN INCLINATION ANGLES ....................... 6 . INSTALLATION .................................................. 13 .
STEERING ANGLE INSPECTION ....................... 7 . THIRD LINK ........................................................... .. 14
.
COIL SPRING AND SHOCK ABSORBER ................ 8 . Removal and Installation ....................................... 14 . L
Removal and Installation ......................................... 8 . REMOVAL .......................................................... 14 .
REMOVAL ............................................................ 8
. INSPECTION AFTER REMOVAL ...................... 14 .
INSTALLATION .................................................... 8 . INSTALLATION .................................................. 14 . M
Disassembly and Assembly .................................... 8 . SERVICE DATA AND SPECIFICATIONS (SDS) ..... 15 .
DISASSEMBLY .................................................... 8 . General Specification .......................................... .. 15 .
INSPECTION AFTER DISASSEMBLY ................ 8 . Wheel Alignment (Unladen) ................................. .. 15 .
ASSEMBLY .......................................................... 9. Ball Joint ................................................................ 15
.
Wheelarch Height (Unladen) ................................. 15 .
FSU-1
PRECAUTIONS
PRECAUTIONS PFP:00001
Caution EES000LP
q When installing rubber bushings, final tightening must be carried out under unladen conditions with tires
on flat, level ground. Oil will shorten the life of rubber bushings. Be sure to wipe off any spilled oil.
q "Unladen condition" means that fuel, coolant and lubricant are full and ready for drive. However, spare tire,
jack, and hand tools should be unloaded.
q After installing the removed suspension parts, always check wheel alignment and adjust if necessary.
q Replace the caulking nut with a new one. Install a new nut without wiping the oil off before tightening.
Precautions for Brake System EES000LQ
q When installing rubber parts, final tightening must be carried out
under unladen condition* with tires on ground.
*: Fuel, radiator coolant and engine oil full. Spare tire, jack,
hand tools and mats in designated positions.
q Use flare nut wrench when removing or installing brake tubes.
q After installing removed suspension parts, check wheel align-
ment and adjust if necessary.
q Always torque brake lines when installing.
SBR686C
FSU-2
PREPARATION
PREPARATION PFP:00002
A
Special Service Tools EES000LR
Tool name
Description
Tool number B
C
HT7252000 Removing tie-rod outer and lower ball
Ball joint remover joint
D
S-NT146
FSU
Preload gauge
Measuring ball joint sliding torque
ST3127S000
F
ZZA0806D
CCK gauge attachment G
KV991040S1
1 KV99104020 Adapter A
2 KV99104030 Adapter B
H
3 KV99104040 Adapter C
Measuring wheel alignment
4 KV99104050 Adapter D
5 KV99104060 Plate
6 KV99104070 Guide bolt I
7 KV99104080 Spring ZZA1167D
8 KV99104090 Center plate
J
Strut attachment
Disassembling and assembling strut
ST35652000 K
ZZA0807D
L
Commercial Service Tools EES000LS
Tool name Description
M
Attachment wheel alignment
a: screw M24 x 1.5 pitch
b: 35 mm (1.38 in) dia.
Measure wheel alignment
c: 65 mm (2.56 in) dia.
d: 56 mm (2.20 in) dia.
e: 12 mm (0.47 in) dia.
S-NT148
1. Flare nut crowfoot
2. Torque wrench Removing and installing brake piping
a: 10 mm (0.39 in)
S-NT360
FSU-3
Symptom
◦ Jabse Service Manual Search 2024 ◦ Jabse Pravopis ◦ onTap.bg ◦ Other service manual resources online : Fixya ◦ eServiceinfo